
Black and Red Crochet Blanket: Stunning Gothic Chevron Pattern
Black and red: Unlike ordinary striped blankets, this design uses a repeating chevron construction to produce a stunning sequence of pointed peaks and…

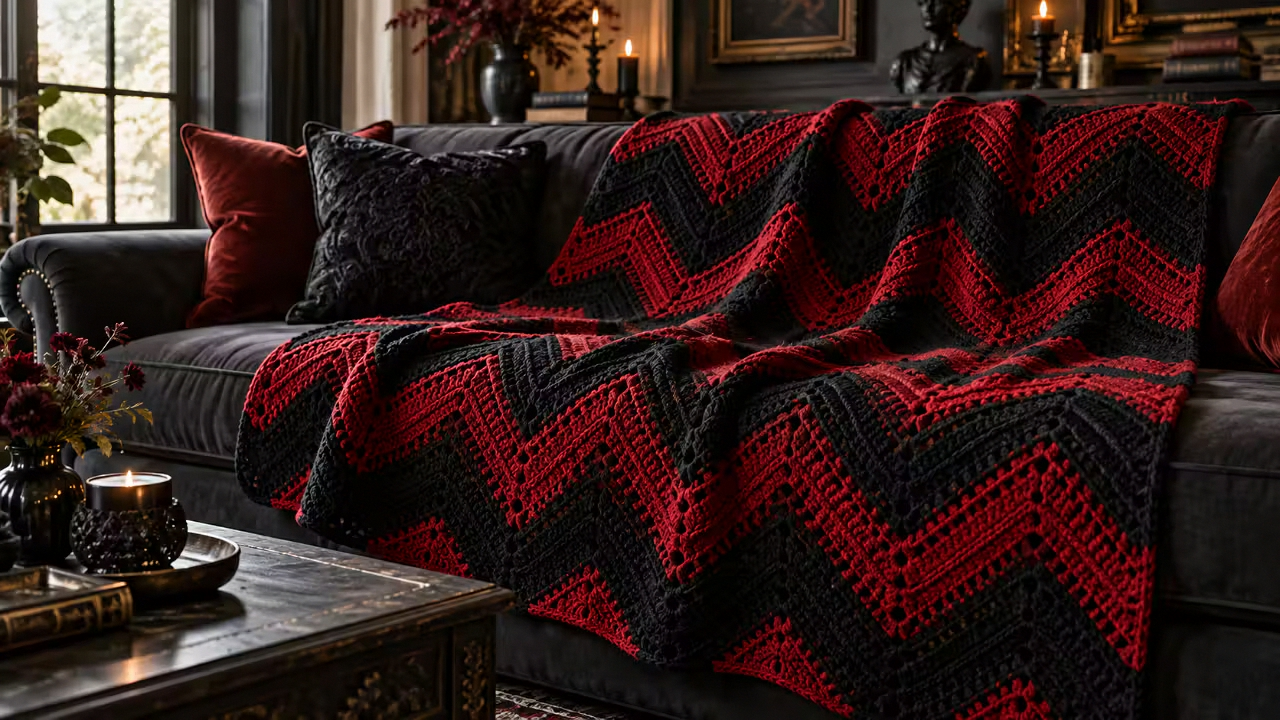
Unlike ordinary striped blankets, this design uses a repeating chevron construction to produce a stunning sequence of pointed peaks and valleys. The finished result is perfect for gothic-inspired bedrooms, contemporary living rooms, Halloween decorating, or anyone who loves bold handmade accessories.
The pattern uses US crochet terminology and includes detailed instructions, sizing formulas, stitch diagrams, color-planning recommendations, beginner checkpoints, troubleshooting advice, and advanced finishing techniques.
Project Overview
This project uses a single crochet chevron stitch pattern to create a flexible blanket with pronounced geometric waves.
| Project Detail | Description |
|---|---|
| Project | Black and red chevron crochet blanket |
| Style | Gothic luxury, modern geometric |
| Skill level | Confident beginner to intermediate |
| Main technique | Single crochet chevron |
| Colors | Midnight black and crimson red |
| Yarn weight | Worsted weight, Category 4 |
| Suggested hook | 5.5 mm (US I-9) |
| Construction | Flat, back-and-forth rows |
| Stitch pattern | Repeated increases and decreases |
| Color changes | Between completed rows |
| Suggested dimensions | Approximately 48 × 60 inches |
| Exact finished size | Based on personal gauge |
| Border | Optional narrow black edging |
Pattern note: The chevron instructions below use a consistent 14-stitch foundation repeat with an extra edge chain. The mathematical repeat can be checked on paper, but the complete pattern has not been physically test-crocheted. Make a practice swatch before starting a large blanket.
Why Black and Red Look Stunning Together
Black and red are among the most visually dramatic color combinations in textile design. Black creates depth, provides visual weight, and emphasizes the structure of the fabric. Crimson red brings warmth, energy, and immediate contrast.
When combined in a repeating geometric design, these colors establish a powerful visual rhythm. The sharp transitions become even more striking when the crocheted fabric folds naturally over furniture.
Choosing the Perfect Shades
Not every red produces the same result.
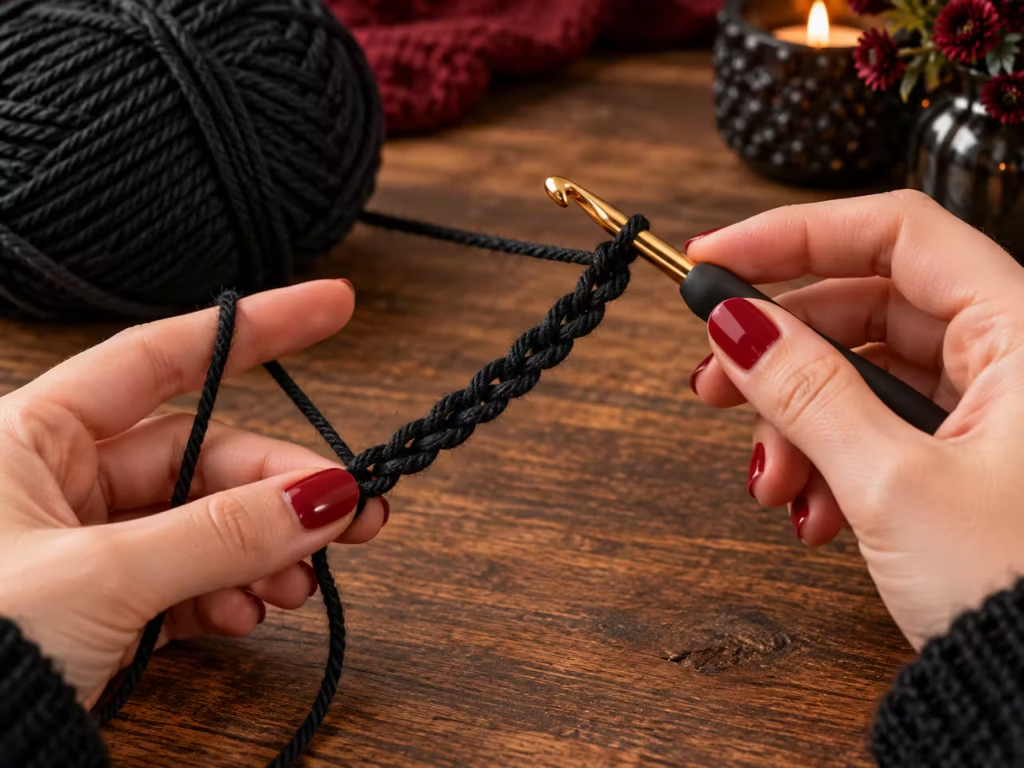
| Black Shade | Red Shade | Visual Effect |
|---|---|---|
| Midnight black | Deep crimson | Dramatic and luxurious |
| Charcoal black | Burgundy | Elegant and understated |
| True black | Cherry red | Bold and graphic |
| Soft black | Ruby red | Rich and sophisticated |
| Jet black | Dark garnet | Gothic and mysterious |
For this tutorial, the primary combination is:
Color A: Midnight Black
A deep, nearly pure black with a matte yarn finish.
Color B: Crimson Red
A saturated, dark red that remains recognizable against black without appearing fluorescent. Choosing similar yarn textures makes the contrast feel deliberate rather than visually chaotic.
The Secret to a Beautiful Two-Color Blanket
The most balanced result comes from giving the two colors different visual responsibilities.
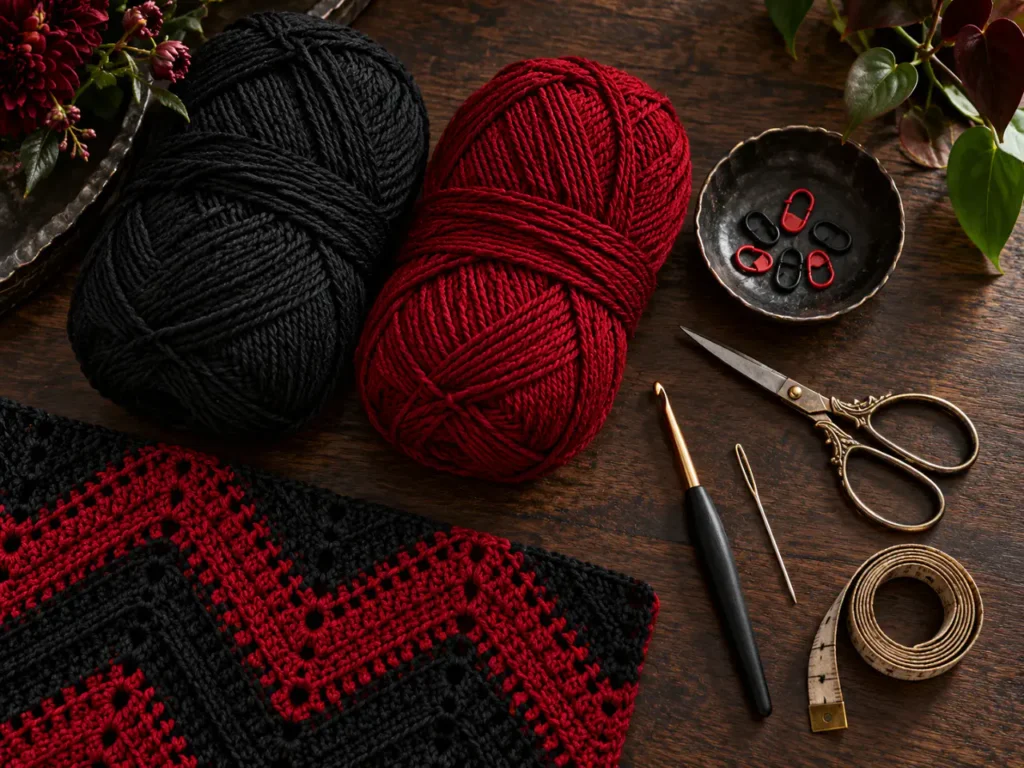
Black establishes the structure. Red highlights the chevron movement. Instead of changing colors every row, the design alternates wider dark sections with narrower crimson accents. This allows the geometric peaks to stand out without overwhelming the entire blanket.
You do not need expensive equipment to achieve a professional result. However, consistent yarn weight and careful tension are essential for smooth chevron construction.
| Material | Specification | Purpose |
|---|---|---|
| Black yarn | Worsted weight, Category 4 | Main blanket color |
| Crimson yarn | Matching worsted weight | Contrasting zigzag stripes |
| Crochet hook | Start with 5.5 mm | Main construction |
| Stitch markers | At least four | Mark peaks, valleys, and edges |
| Measuring tape | Flexible | Check blanket dimensions |
| Yarn needle | Blunt tapestry needle | Weave yarn ends |
| Scissors | Sharp yarn scissors | Cut yarn cleanly |
| Row counter | Optional | Track stripe repeats |
Choose yarns from the same product line when practical. This helps maintain consistent fiber thickness, drape, and washing behavior. Avoid combining yarns with drastically different elasticity or thickness. A very fluffy black yarn paired with a tightly twisted red yarn may produce uneven stripe heights.
Understanding the Chevron Stitch
Chevron crochet creates a repeating series of peaks and valleys. The pattern achieves this effect by increasing stitches at designated peaks and decreasing stitches at valleys. A peak is created by working three single crochet stitches into one stitch.
A valley is created using a three-stitch decrease. Together, these operations produce the zigzag shape.
Crochet Abbreviations
| Abbreviation | Meaning |
|---|---|
| ch | Chain |
| sc | Single crochet |
| st | Stitch |
| sts | Stitches |
| sc3tog | Single crochet three together |
| rep | Repeat |
| RS | Right side |
| WS | Wrong side |
How to Make sc3tog
This decrease joins three consecutive stitches into one.
- Insert your hook into the next stitch.
- Yarn over and pull up a loop.
- Insert the hook into the following stitch.
- Yarn over and pull up another loop.
- Insert the hook into the third stitch.
- Yarn over and pull up another loop.
- Yarn over and pull through all four loops on your hook.
The result is one decrease positioned over three original stitches.
Do not confuse sc3tog with three single crochets placed into one stitch. The first decreases the stitch count by two; the second increases it by two.
How the Stitch Count Stays Balanced
Each chevron repeat includes:
- One three-single-crochet peak, adding two stitches.
- One sc3tog valley, removing two stitches.
Because the increases and decreases compensate for one another, the working stitch count remains constant. This balance prevents the blanket from continuously widening or narrowing.
Complete Step-by-Step Crochet Tutorial
This pattern is organized around a 14-stitch repeat. For the smallest practice sample, use two chevron repeats. The instructions include one edge stitch at each side and position the peaks and valleys consistently throughout the fabric.
Step 1: Make a Practice Foundation Chain
Using black yarn, make a slip knot.
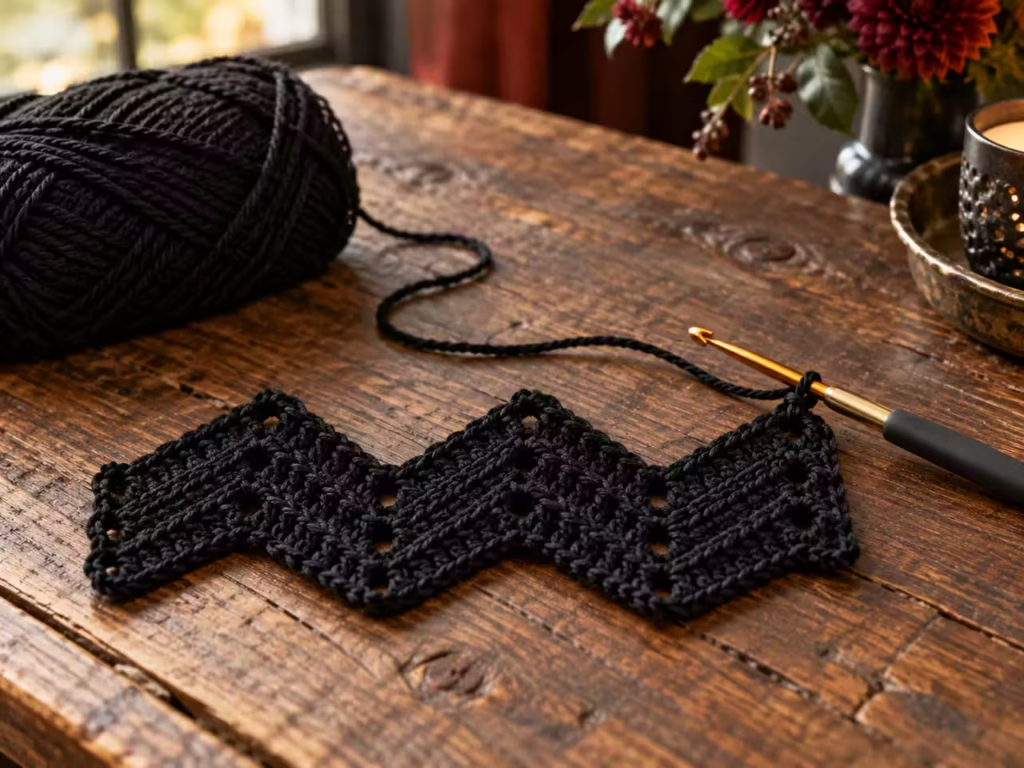
For a small practice swatch, chain 30.
The construction formula is:
Foundation chains = 14 × repeats + 2
Examples:
| Repeats | Foundation Chains |
|---|---|
| 2 | 30 |
| 3 | 44 |
| 4 | 58 |
| 5 | 72 |
| 6 | 86 |
| 8 | 114 |
| 10 | 142 |
| 12 | 170 |
These are stitch-count examples, not finished-width guarantees. The width depends on your chosen yarn, hook, tension, and chevron gauge.
Action: Crochet the selected foundation chain with relaxed tension.
Visual check: The foundation should be flexible and untwisted.
Common error: Starting with a chain that is too tight.
Solution: Loosen your tension or use a slightly larger hook for the foundation before returning to your main hook.
Expert tip: Place a stitch marker every 14 chains to make the repeat easier to count.
Step 2: Work the First Chevron Row
Use the black yarn.
The foundation chain must follow the formula above.
For Row 1:
- Work one single crochet into the second chain from the hook.
- Work one single crochet into each of the next three chains.
- Work three single crochets into the next chain to form a peak.
- Work one single crochet into each of the next five chains.
- Work sc3tog across the next three chains to form a valley.
- Work one single crochet into each of the next five chains.
- Work three single crochets into the next chain.
- Continue the established increase-and-decrease rhythm through the available repeats, adjusting the start and end positions according to the working-edge arrangement.
Foundation-row validation: Chevron patterns can vary in their edge placement. The counts in this introductory sequence do not define a complete, fully validated 14-stitch repeat across every foundation length. For a blanket intended to follow an exact repeat, use the corrected and fully specified working method immediately below instead of improvising the edge.
The Recommended Consistent Working Method
For a repeatable design, build your practice swatch from a starting row of single crochet stitches.
Chain 31.
Work one single crochet in the second chain from the hook and each remaining chain. You now have 30 single crochet stitches.
On the following row, use this exact sequence:
Edge: 1 sc Repeat twice: 5 sc 3 sc in next stitch 5 sc sc3tog Edge: 1 sc
This sequence consumes 30 original stitches and produces 30 new stitches:
1 + (5 + 1 + 5 + 3) × 2 + 1 = 30 consumed
1 + (5 + 3 + 5 + 1) × 2 + 1 = 30 produced
For larger sizes, use:
Starting single crochet stitches = 14 × repeats + 2 Foundation chains = starting stitches + 1
Therefore, the correct foundation for two repeats in this recommended method is 31 chains, not 30. For the rest of this tutorial, follow the recommended consistent method. The beginning foundation row supplies the straight initial base; the following row begins the shaped chevrons.
Visual check: The first shaped row should form visible upward peaks and inward valleys.
Common error: Confusing the original foundation-chain count with the number of working single crochet stitches.
Solution: Complete and count the straight foundation row before beginning increases and decreases.
Expert tip: Mark the center stitch of every three-stitch peak and the completed decrease at every valley.
Step 3: Continue the Chevron Pattern
Chain one and turn.
Chain one does not count as a stitch. Use the same placement logic as the first shaped row, but remember that the new peak must be worked into the center stitch of the preceding three-stitch increase.
A reliable visual guide is:
- Keep the outer edge stitches.
- Work regular single crochet stitches along the slopes.
- Increase at each peak center.
- Decrease at each valley.
For the repeat structure specified above, maintaining the same peak-to-valley alignment requires paying attention to the slope lengths and the position of the edge stitches.
The precise positions should be verified on your swatch before extending the design across a full blanket. If the stitch count changes or the peaks drift, do not continue until the repeat is corrected.
Visual check: The next row should follow the previous zigzag rather than creating a new offset pattern.
Common error: Moving a peak one stitch to the left or right.
Solution: Use stitch markers and compare each increase with the peak directly below.
Expert tip: Work a narrow black practice sample through at least five shaped rows and inspect the alignment before beginning the full-size project.
Step 4: Create the First Black Section
After verifying your chevron construction, continue with Color A for six shaped rows.
Use a row counter.
At the end of each row, check:
- Stitch count
- Peak alignment
- Valley placement
- Edge consistency
- Fabric tension
Avoid stretching the blanket while checking its size.
Visual check: The sample should show black geometric waves repeating across the width.
Common error: Missing a decrease at one of the valleys.
Solution: Return to the previous correct row and restore the intended stitch sequence.
Expert tip: Check the first full chevron repeat carefully. Errors multiply when repeated across a wide blanket.
Step 5: Introduce Crimson Red
After completing your initial six-row black section, change to the crimson yarn.
At the final single crochet of the row:
- Insert your hook into the last stitch.
- Yarn over with black and pull up a loop.
- Leave two loops on the hook.
- Drop the black working yarn.
- Yarn over with crimson.
- Pull crimson through both loops.
- Chain one and turn.
- Begin the following row in red.
Keep the transition relaxed. Do not secure the yarn with a bulky knot.
Visual check: The crimson should begin at the edge without a large visible bump.
Common error: Pulling the first red stitch too tightly.
Solution: Match the loop height and tension of the nearby black stitches.
Expert tip: Leave a generous tail for weaving in the ends after the blanket is complete.
Step 6: Crochet the Crimson Accent Section
Continue in crimson for four shaped rows.
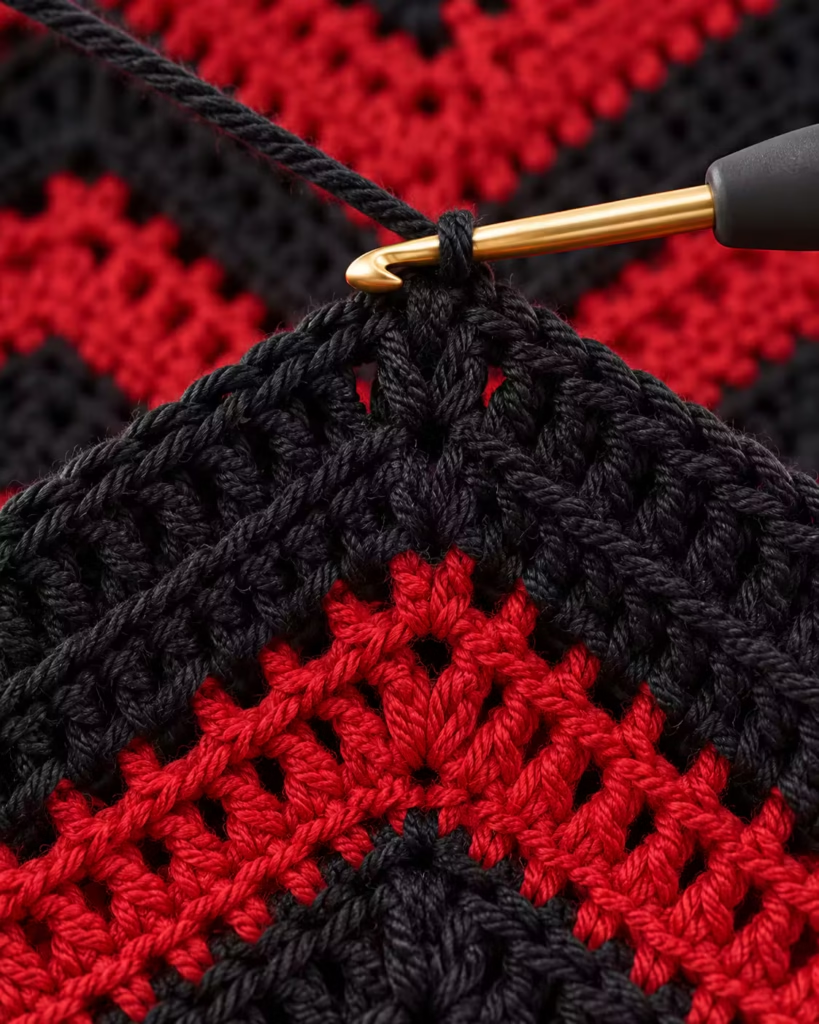
Maintain exactly the same chevron structure established in black. Do not alter the increase or decrease positions when changing colors. The new red rows should follow the existing geometry. The contrast between the colors will make any misplaced stitches more noticeable.
Visual check: Crimson waves should appear directly above the black waves with matching peaks and valleys.
Common error: Changing stitch tension when beginning a new color.
Solution: Compare the new red stitches against the black section below.
Expert tip: If the red yarn feels different despite being labeled the same weight, check whether the two shades have slightly different thicknesses.
Step 7: Build the Signature Gothic Stripe Sequence
The dramatic character of this design comes from its repeating black-dominant stripe pattern.
Use the following color layout:
| Color Section | Rows | Color |
|---|---|---|
| 1 | 6 | Black |
| 2 | 4 | Crimson |
| 3 | 6 | Black |
| 4 | 2 | Crimson |
| 5 | 6 | Black |
| 6 | 4 | Crimson |
| 7 | 6 | Black |
| 8 | 2 | Crimson |
The complete design module contains 36 rows. Repeat the module as required for your chosen blanket length. The irregular widths of the red sections introduce variation while preserving an organized rhythm.
Visual check: The wider black sections should visually dominate, with crimson appearing as strong geometric accents.
Common error: Accidentally repeating the four-row red section where a two-row section belongs.
Solution: Record every completed stripe section.
Expert tip: Photograph the blanket from directly above after completing the first module. This makes uneven stripe proportions easier to notice.
Professional Chevron Stitch Diagrams
Understanding the geometry of the stitch helps prevent the most common mistakes.
Diagram 1: Basic Chevron Anatomy
PEAK PEAK /\ /\ / \ / \ / \ / \ \ / \ / \____________/ VALLEY
A peak is created by an increase. A valley is created by a decrease. The slopes connect the two. The illustration represents the general shape rather than exact stitch placement.
Diagram 2: Stitch-Count Balance
ONE PEAK: 1 original stitch ↓ 3 single crochets
Net change: +2
ONE VALLEY: 3 original stitches ↓ 1 sc3tog
Net change: -2
TOTAL: +2 – 2 = 0
This is why matching increases and decreases are essential.
Diagram 3: Color Planning
BLACK ██████ 6 rows RED ████ 4 rows BLACK ██████ 6 rows RED ██ 2 rows BLACK ██████ 6 rows RED ████ 4 rows BLACK ██████ 6 rows RED ██ 2 rows
Repeat the module.
The blocks show row proportions, not exact finished heights.
The Black and Red Color Sequence
A balanced black and red blanket uses contrast strategically.
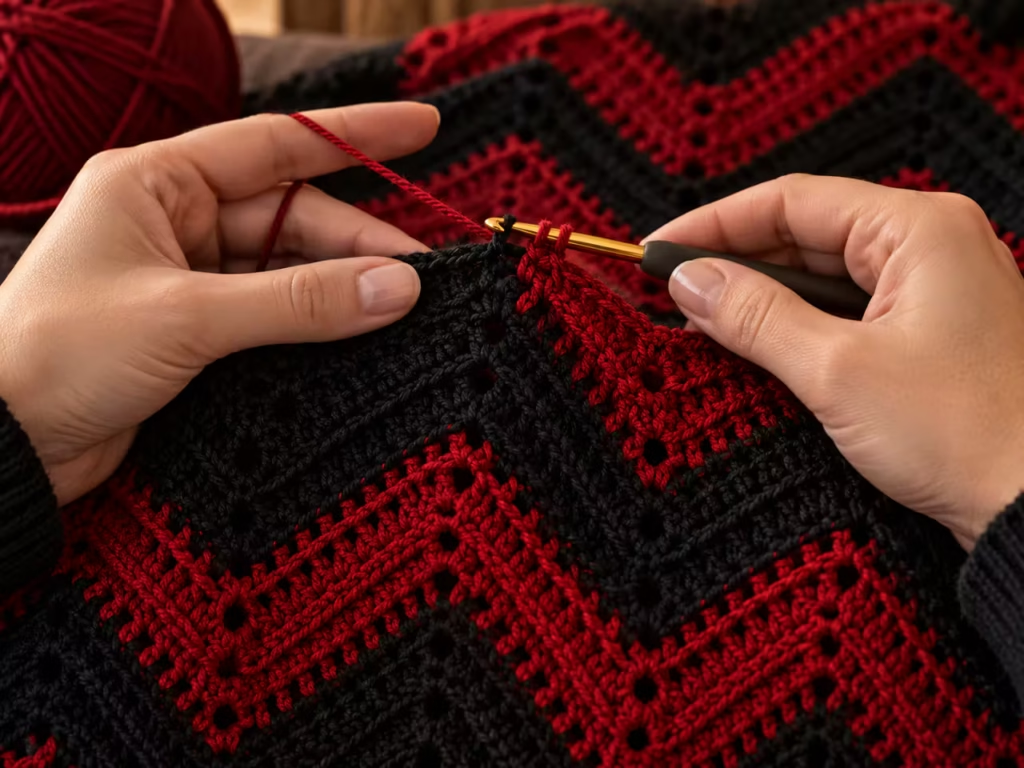
Option 1: Midnight Gothic
Use approximately 70% black and 30% crimson. This creates a darker, more mysterious appearance. Best for contemporary gothic bedrooms and dramatic interior styling.
Option 2: Crimson Dominance
Use approximately 60% red and 40% black. This produces a more vibrant blanket where red becomes the primary visual feature. Best for statement pieces and high-contrast décor.
Option 3: Balanced Contrast
Use approximately equal amounts of black and red. This creates a bold, graphic appearance. Best for modern geometric designs where both colors should receive equal visual emphasis.
Which Version Is Best?
| Color Distribution | Appearance | Recommended Use |
|---|---|---|
| 70% black / 30% red | Dark and sophisticated | Gothic décor |
| 60% red / 40% black | Vibrant and dramatic | Accent throw |
| 50% black / 50% red | Graphic and balanced | Modern interiors |
The stripe module in this tutorial contains 24 black rows and 12 red rows, giving a 2:1 row ratio, or approximately 67% black and 33% crimson. This provides a useful starting point for the intended midnight-gothic appearance.
Beginner-to-Advanced Techniques
Beginner Level: Prioritize Stitch Accuracy
The most important beginner skill is understanding how increases and decreases interact.
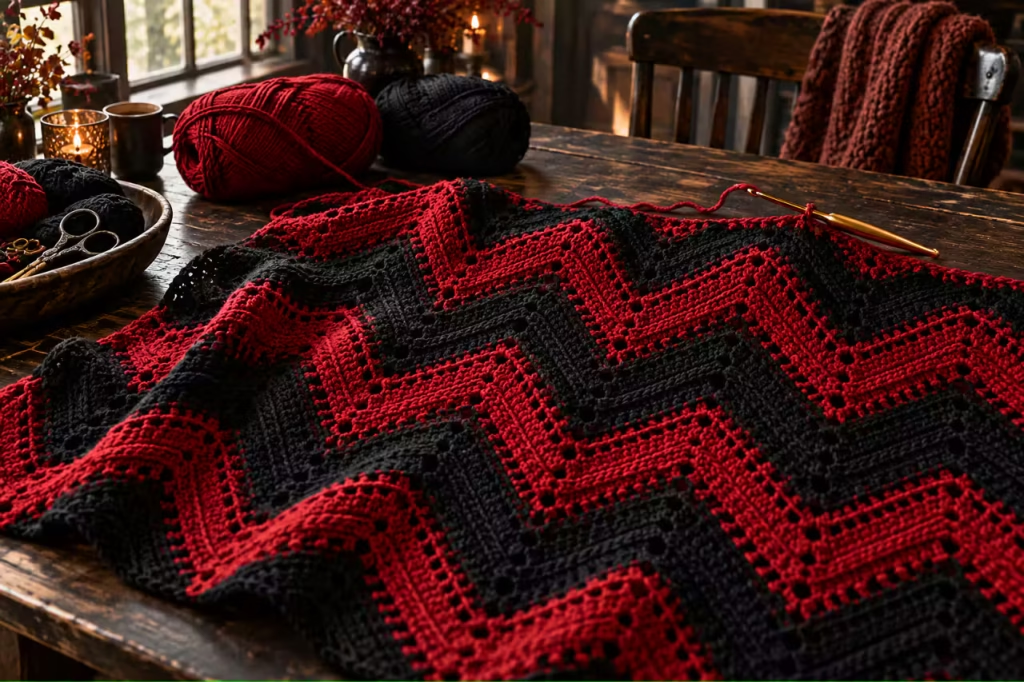
Practice a small sample before beginning your full blanket. Place markers at the peak and valley positions. Count the stitches at the end of each row. If the structure changes unexpectedly, correct the mistake immediately.
Intermediate Level: Improve Stripe Definition
Keep tension consistent when changing colors. Work every color transition at the edge of a row rather than in the middle. Choose contrasting shades with similar yarn thickness. Avoid using an overly textured yarn that obscures the chevron shape.
Advanced Level: Create a More Refined Fabric
Experienced crocheters can experiment with:
- More carefully planned color proportions
- Wider or narrower geometric repeats using a separately validated pattern
- Subtle tonal reds
- A narrow border around the chevron perimeter
- Hidden yarn ends
- More precise blocking
Do not change the number of peak or valley stitches within this pattern without recalculating the repeat.
Troubleshooting Common Problems
Chevron crochet can look difficult when the peaks and valleys begin to shift. Fortunately, many issues are caused by a small number of repeatable mistakes.
| Problem | Likely Cause | Solution | Prevention |
|---|---|---|---|
| Peaks are uneven | Incorrect increase placement | Rework affected rows | Mark peak centers |
| Valleys drift sideways | Decrease worked in wrong stitches | Restore correct valley alignment | Count slope stitches |
| Blanket gets wider | Missing decreases or extra increases | Recheck stitch count | Count each row |
| Blanket gets narrower | Missing increases | Correct incomplete peaks | Check each repeat |
| Red stripes look uneven | Incorrect row counts | Rework the affected section | Use a row counter |
| Black stitches are hard to see | Insufficient lighting | Use stronger indirect lighting | Crochet over a pale work surface |
| Fabric becomes stiff | Hook too small | Swatch with a larger hook | Check drape early |
| Edges curl | Excessive tension or uneven shaping | Correct tension or edge structure | Measure during construction |
| Color joins are bulky | Knots or tight yarn changes | Redo the join | Change color in the last stitch |
A Helpful Quality Check
Spread the blanket flat and locate the peaks across the latest row. Each should align with the intended peak below. Next, inspect the valleys.
Look for sudden diagonal shifts or irregular gaps. A large change in the zigzag shape usually indicates a misplaced increase or decrease.
<!– gap –>
How to Calculate Your Blanket Size
Chevron blankets require slightly different planning from straight-edged crochet blankets because the fabric follows a zigzag path. A foundation chain may appear wider or narrower once the peaks and valleys form.
Step 1: Choose a Target Size
| Blanket Type | Example Finished Size |
|---|---|
| Small lap throw | 36 × 48 inches |
| Decorative sofa throw | 48 × 60 inches |
| Large throw | 50 × 65 inches |
| Oversized blanket | 60 × 72 inches |
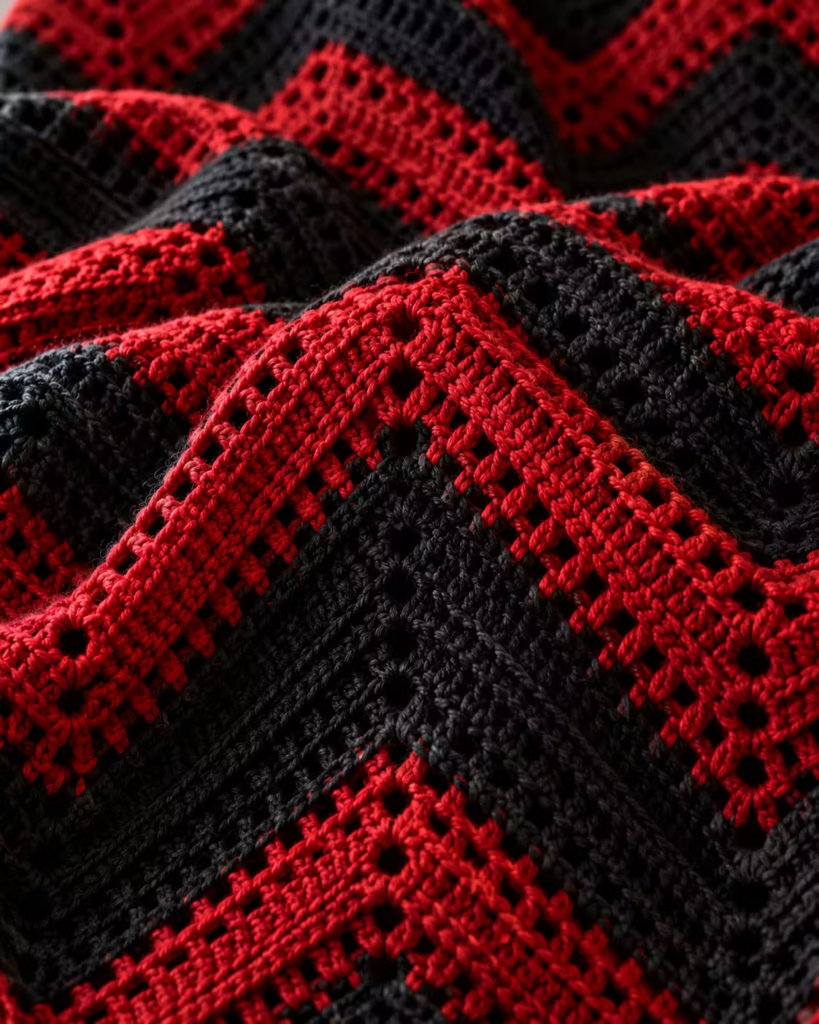
These are planning examples rather than universal size requirements.
Step 2: Measure a Chevron Swatch
Make a swatch containing several complete pattern repeats. Measure its relaxed horizontal width from one side edge to the other. Do not stretch it to flatten the zigzags. Suppose your sample has four repeats and measures 20 inches wide.
Then:
20 ÷ 4 = 5 inches per repeat
For a desired width of 50 inches:
50 ÷ 5 = 10 repeats
Using the recommended foundation method:
Starting stitches = 14 × 10 + 2 = 142 stitches
Foundation chains = 142 + 1 = 143 chains
These values illustrate the calculation. They are not a verified finished measurement.
Step 3: Calculate the Length
Measure the row gauge on your chevron sample. For example, suppose 16 rows measure 4 inches vertically.
Then:
16 ÷ 4 = 4 rows per inch
For a target length of 60 inches:
60 × 4 = 240 rows
A complete 36-row color module can be repeated six times for 216 rows, leaving 24 additional rows to reach the illustrative target. Use the remaining rows to finish with an aesthetically balanced black section rather than cutting a red stripe at an awkward point. Actual measurements depend on your swatch.
<!– gap –>
How Much Black and Red Yarn Do You Need?
Yarn requirements vary by fiber, hook size, tension, and finished dimensions.
A measured sample provides a better estimate than a generic skein count.
Swatch Method
- Crochet a representative chevron sample.
- Measure its width and height.
- Determine the amount of yarn used.
- Calculate the planned blanket area.
- Multiply sample consumption by the area ratio.
- Add yarn for finishing and a practical allowance.
Because the blanket uses two colors, estimate each color separately if possible.
For the main stripe module:
Black: 24 rows Red: 12 rows
A starting estimate is:
Black yarn: approximately 67% Red yarn: approximately 33%
Adjust for borders, extra ending sections, and differences in yarn consumption. If the border is black, reserve additional black yarn for that finishing stage.
<!– gap –>
Professional Finishing: The Dark Crimson Edge
The border should strengthen the final presentation without competing with the striking zigzag design.
Option 1: Minimal Black Border
A narrow single crochet border in black creates a restrained, professional appearance.
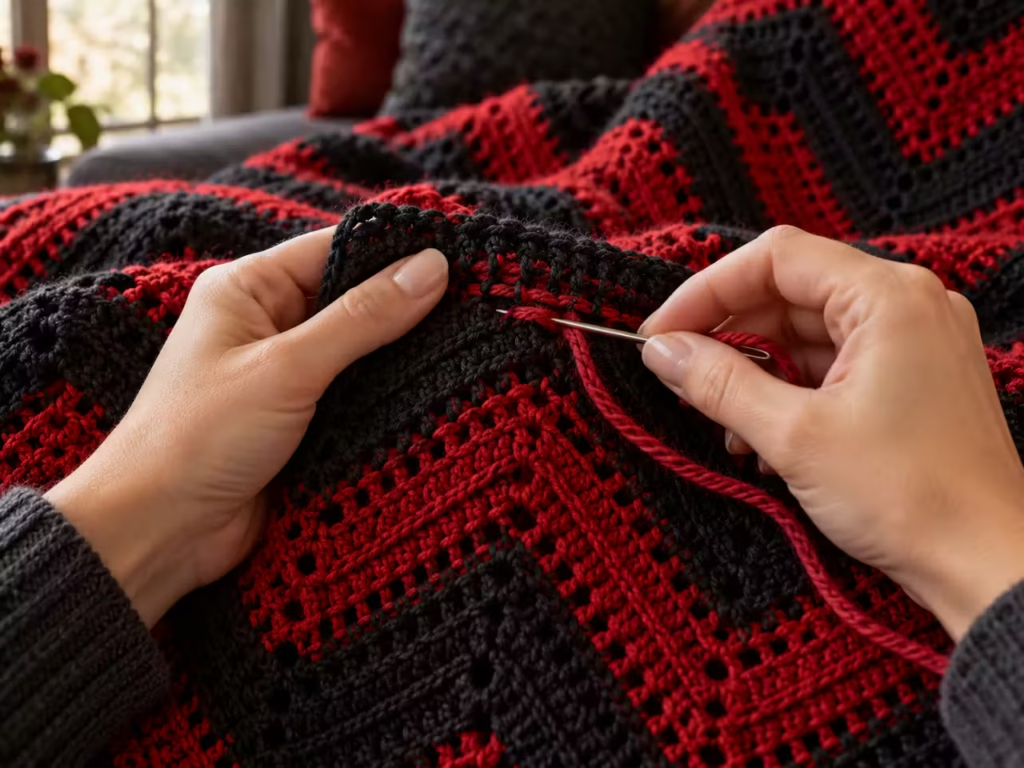
This is the recommended visual approach for a dark gothic blanket. However, chevron edges need special attention. If you work too many stitches around the peaks, the border may ruffle.
If you use too few stitches in the valleys, the edge may pull inward. Place border stitches according to the actual fabric tension and geometry.
Option 2: Crimson Accent Border
A narrow crimson edging makes the blanket appear more decorative. This option is particularly effective if the blanket contains a large proportion of black. Use it when you want the outer shape to stand out against dark furniture.
Option 3: No Border
A border is not mandatory. If the chevron edges are already tidy, leaving them exposed preserves the zigzag profile. This is especially attractive for a blanket designed around sharp geometric movement.
Secure the Yarn Ends
Thread each yarn tail through a suitable tapestry needle. Weave through nearby stitches on the wrong side of the fabric. Change direction where appropriate to help secure the tail.
Avoid pulling so tightly that the stitches distort. For black tails, weave through black areas. For red tails, weave through matching crimson areas. Trim only after checking that the ends are secure.
How to Wash and Care for a Black and Red Crochet Blanket
Strongly contrasting colors deserve special attention during washing. Dark and red dyes may transfer, depending on the yarn. Always check the yarn manufacturer’s care recommendations.
Before the first wash, test a sample of the yarn or crocheted swatch to see how the colors behave when wet. Avoid assuming that all acrylic or cotton yarns are colorfast. For machine-washable yarn, a gentle cycle with suitable detergent may be appropriate.
Wash separately during the initial cleaning if color transfer is a concern. Do not use bleach unless the yarn manufacturer specifically allows it. Dry according to the yarn label. When storing the blanket, fold it loosely and keep it away from prolonged direct sunlight.
Styling Your Black and Red Crochet Blanket
The striking color scheme makes the completed blanket suitable for more than simple warmth.
Gothic-Inspired Bedroom
Drape the blanket over dark bedding to create an intense, layered look.
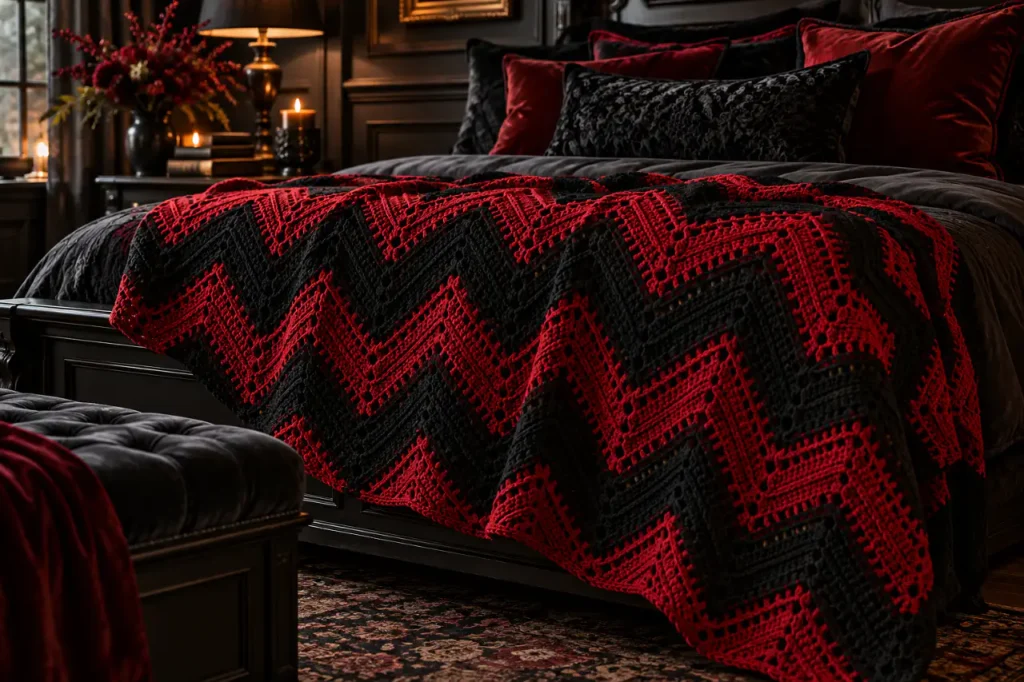
Pair it with charcoal, black, burgundy, or muted gray textiles. Simple furniture and subdued accessories allow the crochet to remain the focal point.
Modern Living Room
Place the blanket across a gray or cream sofa. The contrasting background reveals the chevron edges and red accents. Choose neutral cushions to avoid creating too many competing patterns.
Seasonal Halloween Décor
Black and crimson also work naturally in autumn and Halloween-inspired interiors. Instead of using novelty decorations, let the geometric pattern and rich colors create the seasonal effect. The blanket can remain useful long after the season ends.
Frequently asked questions
1. Is a black and red chevron crochet blanket suitable for beginners?
A confident beginner can approach this project after learning single crochet, increases, and decreases. The most difficult part is maintaining the correct peak and valley placement. Begin with a small swatch and verify the repeat carefully. Once the stitch pattern becomes familiar, the same structure can be extended to a larger blanket.
2. What shade of red looks best with black crochet yarn?
Deep crimson is particularly effective when you want a luxurious and dramatic result. Burgundy produces a softer contrast, while cherry red creates a brighter graphic effect. Compare the shades in daylight and choose yarns with compatible textures. The best shade depends on whether you want a gothic, contemporary, or decorative appearance.
3. What crochet stitch creates the strongest zigzag pattern?
Chevron and ripple patterns are both excellent choices. They use strategically placed increases and decreases to create repeating peaks and valleys. Single crochet produces a relatively compact fabric with clear stitch definition, while taller stitches can make the pattern grow faster and create a different drape.
4. How do I prevent the zigzag peaks from becoming crooked?
Keep the increase centered on the same intended peak in every row. Similarly, place the decreases consistently at the valleys. Use removable markers during the first several rows and count stitches regularly. If a peak shifts, correct the affected row rather than trying to compensate later.
5. Can I make this blanket using only black and red yarn?
Yes. The design uses only two colors. The contrast between them is enough to produce a visually striking result without introducing gray, cream, or another accent. Using the same yarn line for both shades can help maintain consistent fabric thickness and care requirements.
6. Should I add a border to my chevron crochet blanket?
A border is optional. A narrow black edge gives the blanket a more framed appearance, while an exposed zigzag edge emphasizes the geometry. If adding a border, distribute the stitches carefully around peaks and valleys. Uneven stitch placement can cause the edge to curl or ripple.
7. How do I keep the black yarn from being difficult to crochet?
Black yarn can make stitch placement harder to see, especially under warm or dim lighting. Work under bright, indirect light and place a pale towel or work mat beneath the fabric. Smooth yarn with clearly defined stitches is generally easier to use than very fuzzy black yarn.
8. Can I make a matching crochet pillow with the same design?
Yes. A matching cushion cover can use the same black and crimson color palette and a suitably sized chevron repeat. Calculate the required width from a measured swatch and account for the pillow insert and assembly method. A matching pillow can create a coordinated decorative set without requiring a completely new color plan.
Yarn weights and hook sizes in this guide follow the Craft Yarn Council standards.
Keep going: Crochet Color Blanket Ideas for Soft, Balanced Texture · Easy Moss Stitch Crochet Blanket Pattern for Beginners
Final Thoughts: Create a Bold Handmade Masterpiece
A black and red crochet blanket becomes memorable when the colors, geometry, and finishing work together. Deep midnight black gives the fabric visual depth. Crimson red highlights the peaks and valleys.
The chevron structure introduces movement that ordinary straight stripes cannot produce. Begin with a measured practice swatch, verify the stitch count and peak alignment, and choose the stripe sequence that best suits your project. Once the construction is consistent, work through the color sections, inspect the dimensions, weave in the ends, and finish the edges carefully.
The completed design can become a striking sofa throw, a dramatic bedroom accessory, or a handmade gift for someone who loves bold geometric patterns. Save the stitch notes, measurements, and color sequence with your project so you can recreate the design or adapt it into a matching cushion cover later.
Pin “Black and Red Crochet Blanket: Stunning Gothic Chevron Pattern” so you can find it when the yarn arrives.
Get the next free pattern first
One email a week. New patterns, no noise.





