
Handmade Crocheted Bag: Make Your Own Custom Everyday Tote
Crocheted bag: A beautiful crocheted handbag starts with yarn that can handle everyday use. For this design, choose firm, medium-weight cotton rather than…

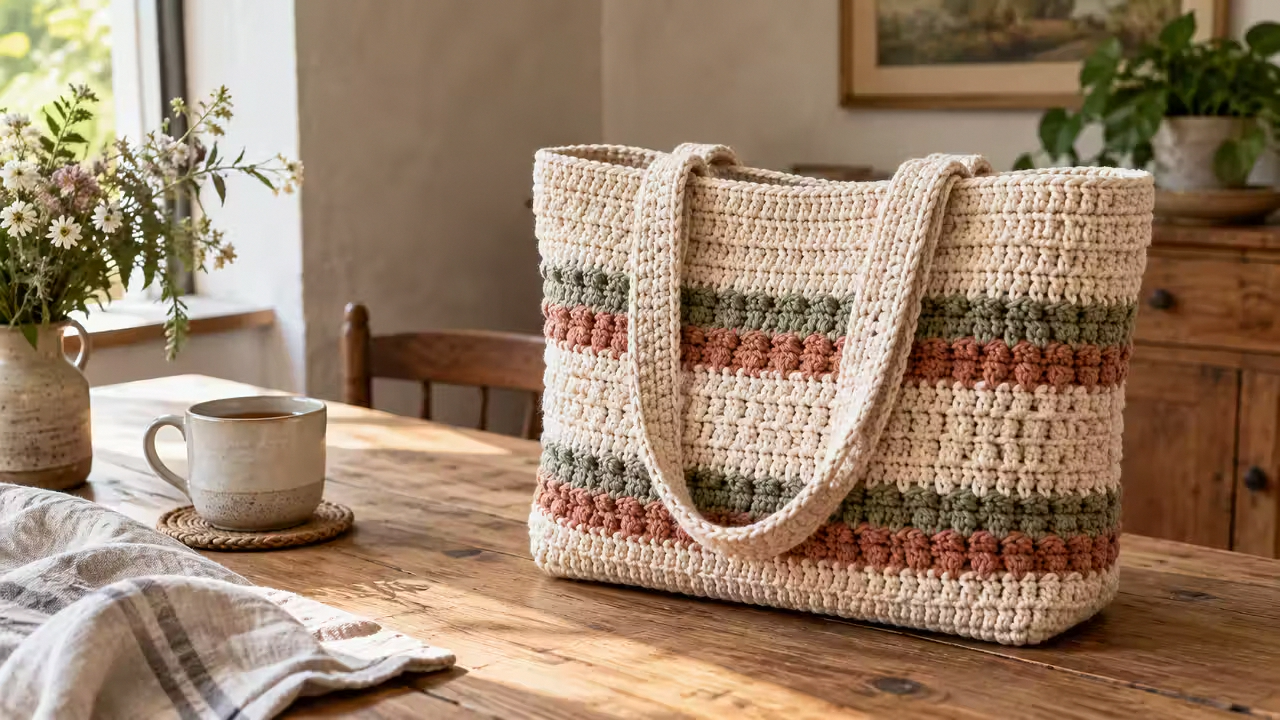
A beautiful crocheted handbag starts with yarn that can handle everyday use. For this design, choose firm, medium-weight cotton rather than fluffy yarn that hides the stitch definition.
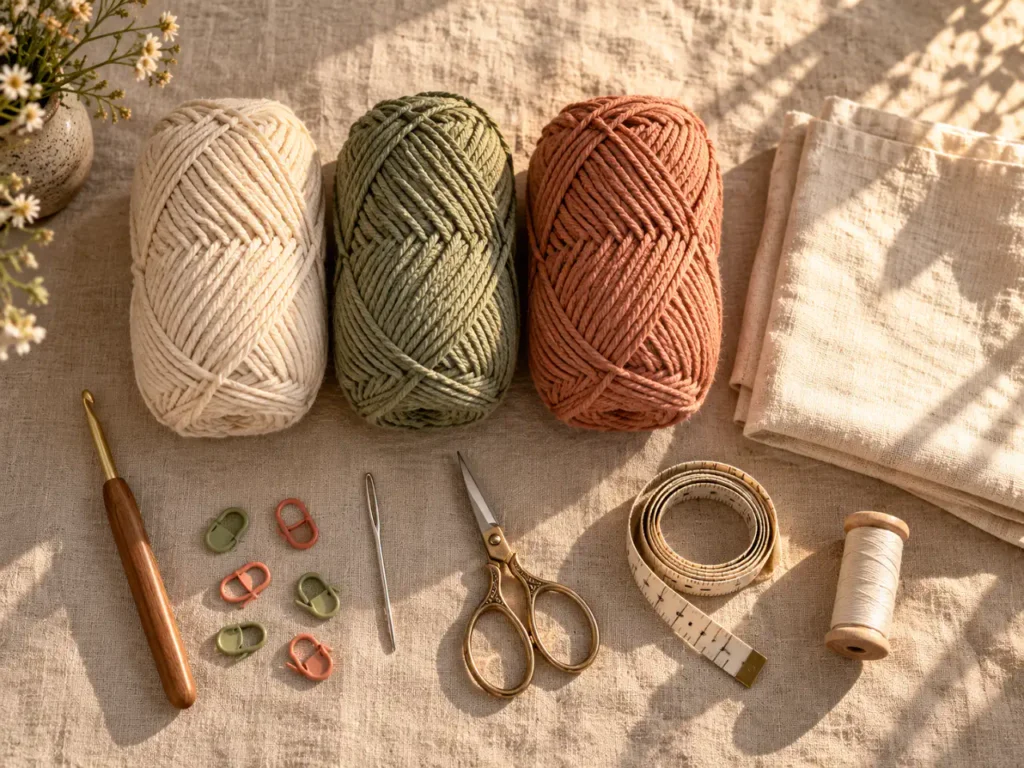
| Item | Quantity | Why this one | Cheaper swap |
|---|---|---|---|
| Worsted-weight cotton yarn | Approximately 400 yards | Firm fabric and defined stitches | Leftover cotton in matching weights |
| Crochet hook | 4.0 mm | Creates a relatively dense fabric | Existing hook that meets gauge |
| Stitch markers | 4 | Mark handle positions | Contrasting yarn scraps |
| Tapestry needle | 1 | Joins panels and hides ends | Blunt yarn needle |
| Scissors | 1 pair | Cuts yarn cleanly | Household scissors |
| Cotton lining fabric | Enough for bag interior | Prevents small items slipping through | Reclaimed cotton pillowcase |
| Sewing needle and thread | 1 set | Attaches lining | Hand-sewing supplies you own |
| Measuring tape | 1 | Checks dimensions | Ruler |
Pattern information
These measurements are design targets, not results from a completed physical sample.
Handmade Crocheted Bag Design: Before You Start
Unlike a decorative crochet swatch, a handbag must support weight without losing its shape.
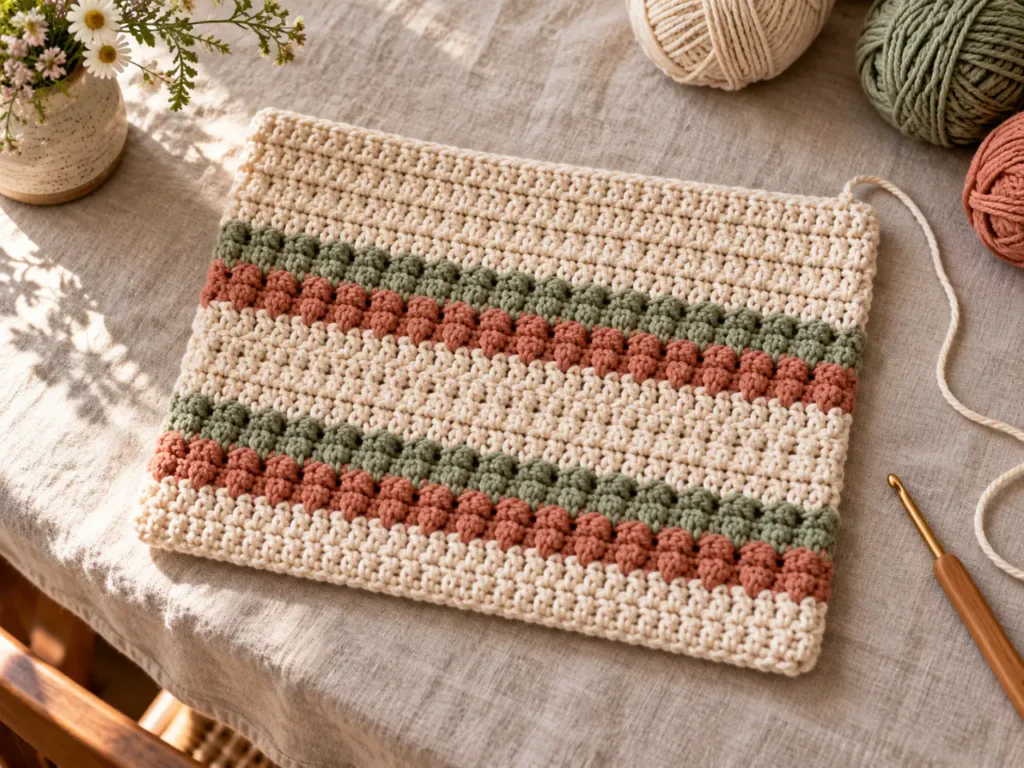
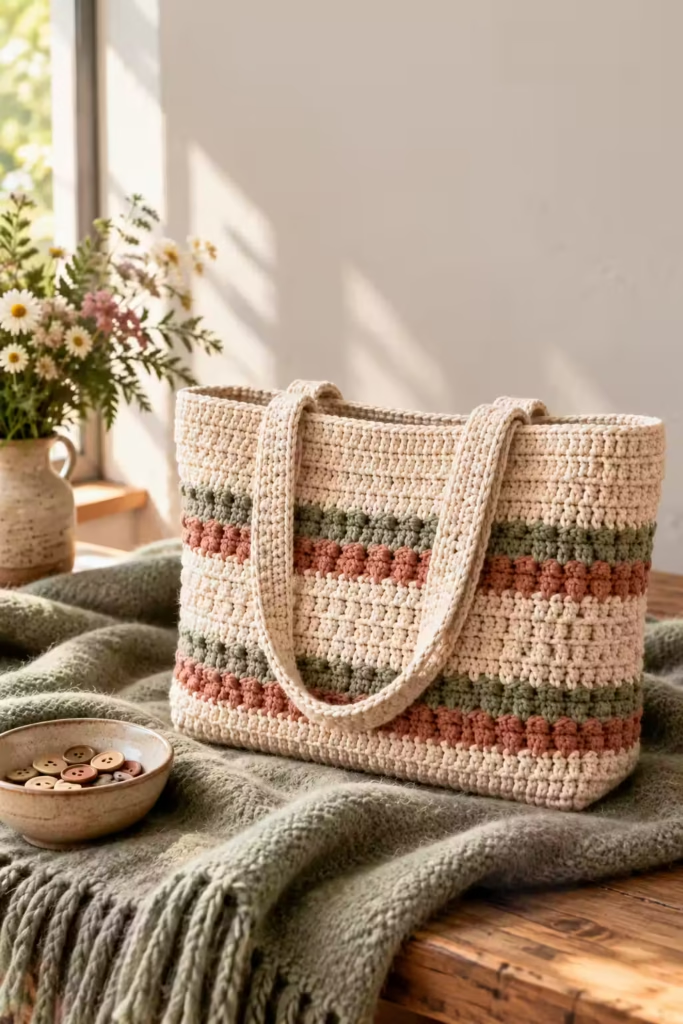
This pattern uses tightly worked single crochet stitches for the body. You make two matching panels, join their edges, and attach reinforced handles. The rectangular construction also makes it easier to customize the finished bag.
Learn the basic stitches
You only need these abbreviations:
- ch: Chain
- sc: Single crochet
- sl st: Slip stitch
- st(s): Stitch or stitches
- RS: Right side
- WS: Wrong side
To make a single crochet, insert your hook into the next stitch, yarn over, and pull up a loop. Yarn over again and pull through both loops on your hook. Keep your tension steady rather than pulling each stitch excessively tight.
Make a gauge swatch
Chain 21 and work 20 single crochet stitches across.
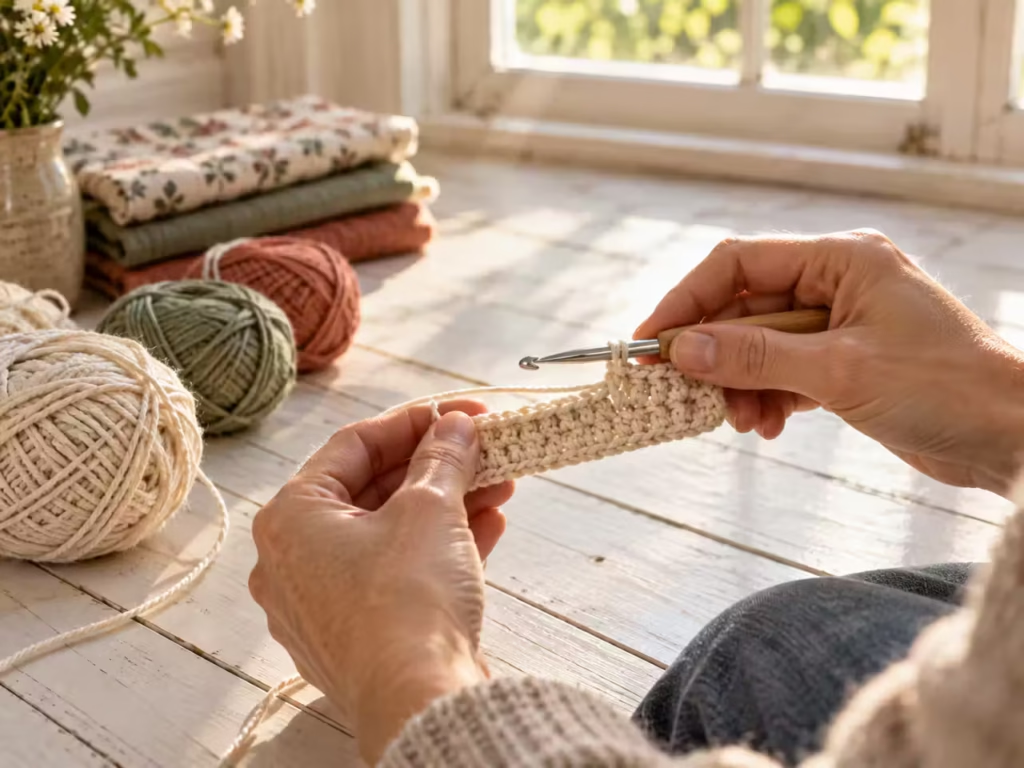
Continue until you have a square large enough to measure an interior 4-inch section without including the edges. Count both stitches and rows.
If your stitches are too wide, try a smaller hook. If the fabric feels extremely rigid, increase the hook size slightly and measure again. A small difference in gauge can noticeably change the finished bag.
How to Crochet Your Bag Step by Step
This original rectangular tote pattern avoids complicated increases, circular bases, and confusing stitch repeats. Follow each stage in order.
Step 1: Crochet the first panel
Make a foundation chain of 41 stitches.
Row 1: Single crochet in the second chain from the hook and in every remaining chain. You should have 40 stitches.
Row 2: Chain 1, turn, and single crochet across all 40 stitches.
Repeat Row 2 until you complete 44 rows in total, counting the foundation row of single crochet as Row 1. Fasten off, leaving a yarn tail for weaving in.
What it should look like: A flat rectangle with parallel rows and consistent edges.
Common problem: Accidentally working into the turning chain creates extra stitches. Count 40 actual single crochets per row.
Step 2: Make the matching panel
Repeat the previous instructions exactly. Place your completed rectangles beside each other, with the starting edges aligned. Both panels should have identical stitch counts and row counts. If one measures noticeably larger, compare your tension before joining.
What it should look like: Two matching rectangles that lie flat without pulling at the corners.
Common problem: Your second panel may grow wider as your hands relax. Adjust your tension before continuing rather than stretching the smaller piece.
Step 3: Join the sides and bottom
Place the panels together with the right sides facing inward. Align the top corners. Use stitch markers to hold the side edges together.
Starting at a top corner, attach your yarn. Single crochet through both layers down the first side, across the bottom, and up the opposite side. Along row-end edges, aim for approximately one single crochet per row end, adjusting only enough to keep the seam flat. Across the bottom, work through matching stitch positions.
Leave the top open.
Fasten off and turn the bag right side out.
What it should look like: A tidy pouch with a continuous seam around its sides and bottom.
Common problem: A puckered seam means you inserted too many joining stitches or pulled them too tightly.
Step 4: Finish the top edge
Join yarn at either side seam along the opening.
Work one single crochet into each stitch around the top, adding stitches only where necessary to keep the edge smooth. Join to the first stitch with a slip stitch. Repeat for another round if you want a firmer rim. Avoid tightening the opening.
What it should look like: A clean, level upper edge that maintains the bag’s rectangular silhouette.
Common problem: An opening that draws inward usually means you skipped stitches or crocheted the edging too tightly.
Step 5: Crochet two sturdy handles
Make two identical straps.
For each handle:
- Chain 7.
- Single crochet into the second chain and across, making 6 stitches.
- Chain 1 and turn.
- Work 6 single crochet stitches across.
- Repeat until the strap measures approximately 21 inches long, or your preferred length.
- Fasten off with a long sewing tail.
For greater stability, make each strap twice the intended finished width, fold it lengthwise, and sew the long edges together. Alternatively, sew narrow cotton tape along the underside.
Position the handle ends near the top of the bag, approximately 2 inches inward from each side. Place one handle on the front and the other on the back. Each end should overlap the inside of its panel by about 2 inches. Sew a reinforced rectangle through the strap and bag fabric, adding diagonal stitches across the attachment area.
What it should look like: Even handles that lie flat and attach symmetrically.
Common problem: Narrow handles attached with only a few stitches can pull loose under weight.
Step 6: Add the optional lining
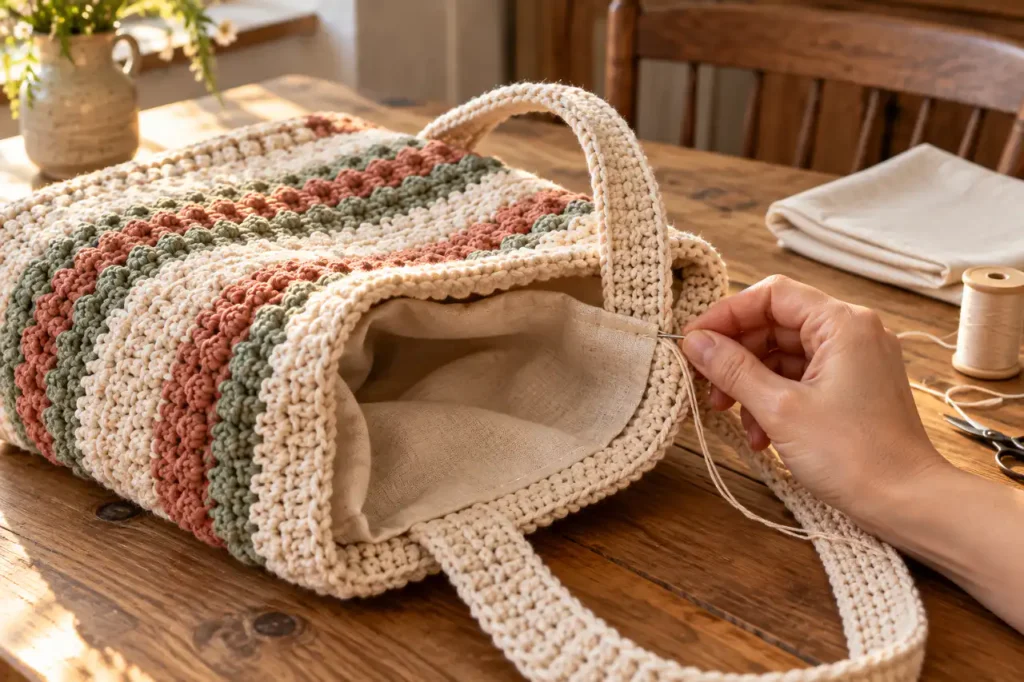
Turn the bag inside out and measure its actual interior. Cut two pieces of cotton fabric to fit, allowing seam allowances along the sides and bottom and enough fabric to fold a neat upper hem. Place the fabric pieces right sides together.
Sew the sides and bottom, leaving the top open. Fold and press the lining’s upper edge. Insert the lining into the bag with its seams hidden against the crocheted interior.
Hand-sew the folded upper edge just below the crocheted rim using small stitches. Keep the fabric smooth without pulling the bag out of shape.
What it should look like: A lining that sits comfortably inside the bag without sagging.
Common problem: Cutting fabric before measuring the finished crochet body can produce a lining that is too small.
Step 7: Finish and inspect
Weave each yarn end through several neighboring stitches, change direction, and weave through additional stitches before trimming. Inspect the bottom seam and handle attachment points. Place a lightweight everyday item inside the bag and observe how the fabric behaves. Increase the load gradually if you intend to carry heavier belongings.
What it should look like: An evenly shaped tote with stable handles and no exposed yarn tails.
Common problem: Trimming ends too close to the final stitch allows them to work loose during use.
Custom Crochet Bag Design Ideas
The most appealing handmade crocheted accessories often combine a simple base pattern with a distinctive finishing detail. You do not need to master elaborate stitch combinations to produce a personalized bag.
Minimalist neutral tote
Use ivory, oatmeal, charcoal, or muted taupe cotton.
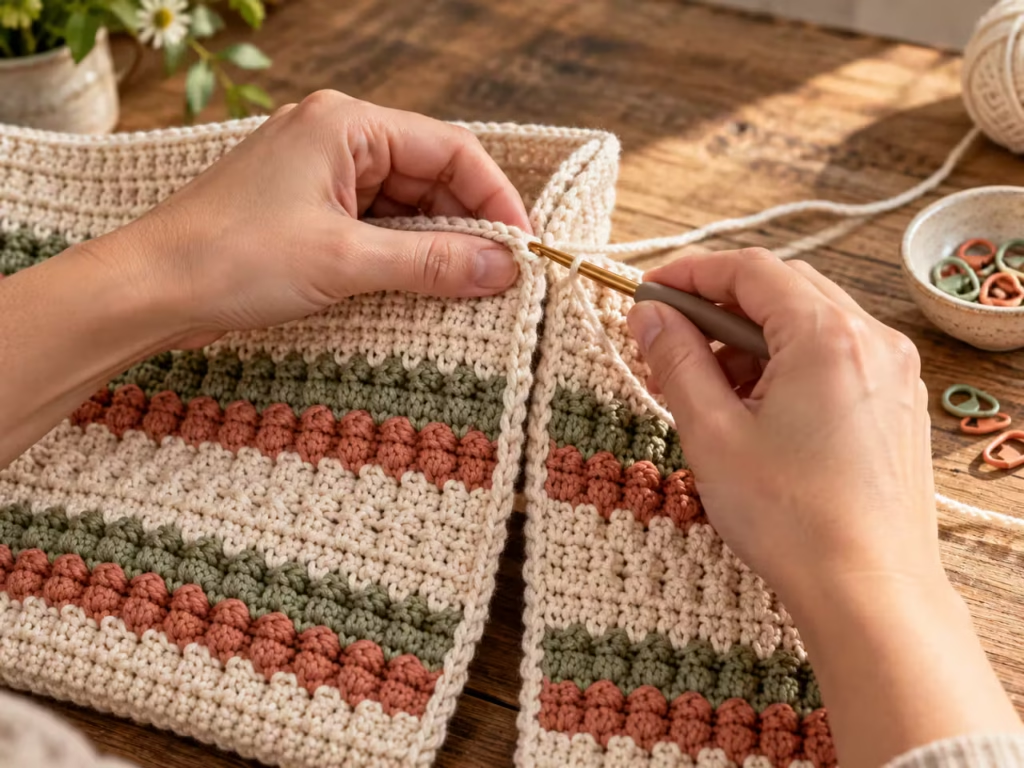
Keep the handles the same color as the body and skip decorative embellishments. This creates a clean silhouette suitable for everyday outfits.
Two-tone color-block bag
Make the front panel in one shade and the back in another. For a more subtle effect, work the final section of both panels in a contrasting color. Change colors at the end of a row so the transition stays straight. Weave ends thoroughly before assembling.
Floral crochet accessories
Add a detachable crochet flower to the handle attachment area or top corner. Use a small removable charm or secure appliqué rather than placing a bulky decoration directly underneath the strap. For children’s accessories, avoid detachable beads or other small pieces that could become choking hazards.
Autumn-inspired color combinations
October is a natural time to explore richer yarn shades. Try a rust-colored body with cream handles, an olive bag with matching edging, or warm brown cotton with a floral accent. The basic construction remains unchanged.
<!– gap –>
How to Make Your Crocheted Bag Stronger
An attractive handbag can still become frustrating if its handles stretch or the bottom sags.
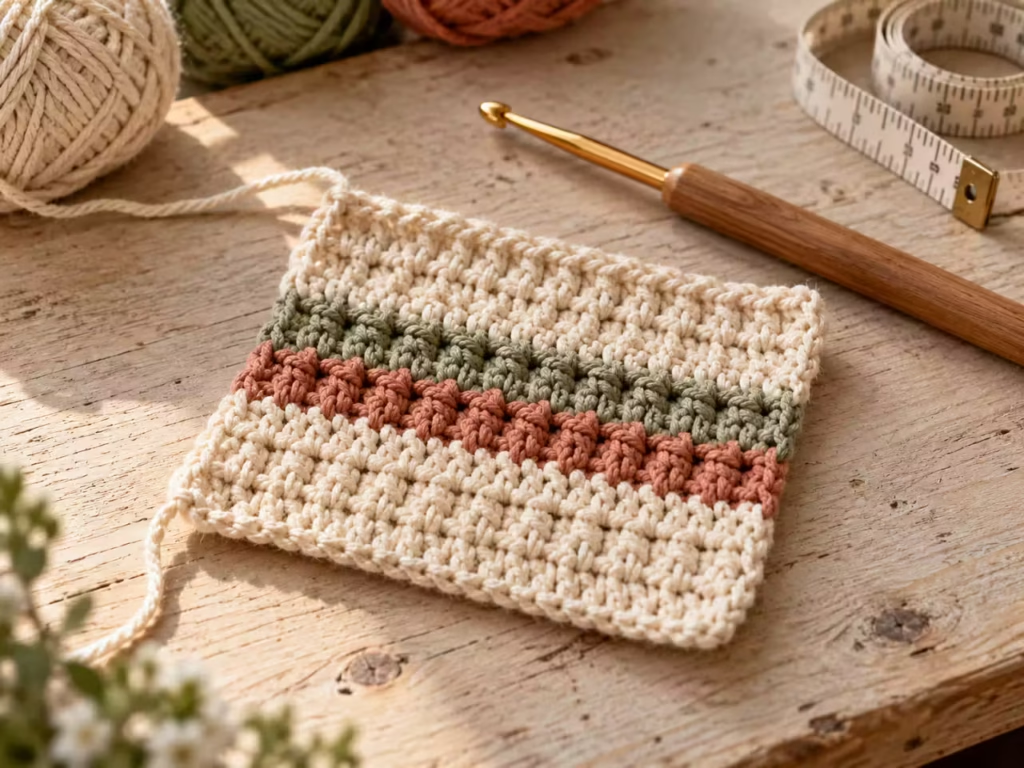
Before adding more decoration, improve the parts that carry the weight.
Step 1 — Reinforce the base
Cut a removable piece of firm bag-bottom material or washable plastic canvas to fit the interior bottom.
Round any sharp corners and cover the insert with fabric so it cannot snag the yarn.
Slide it underneath the lining or into a simple fabric sleeve. This helps the base retain its shape, especially when you carry objects with flat bottoms.
Step 2 — Prevent handle stretching
Crochet stitches can lengthen when they carry weight repeatedly.
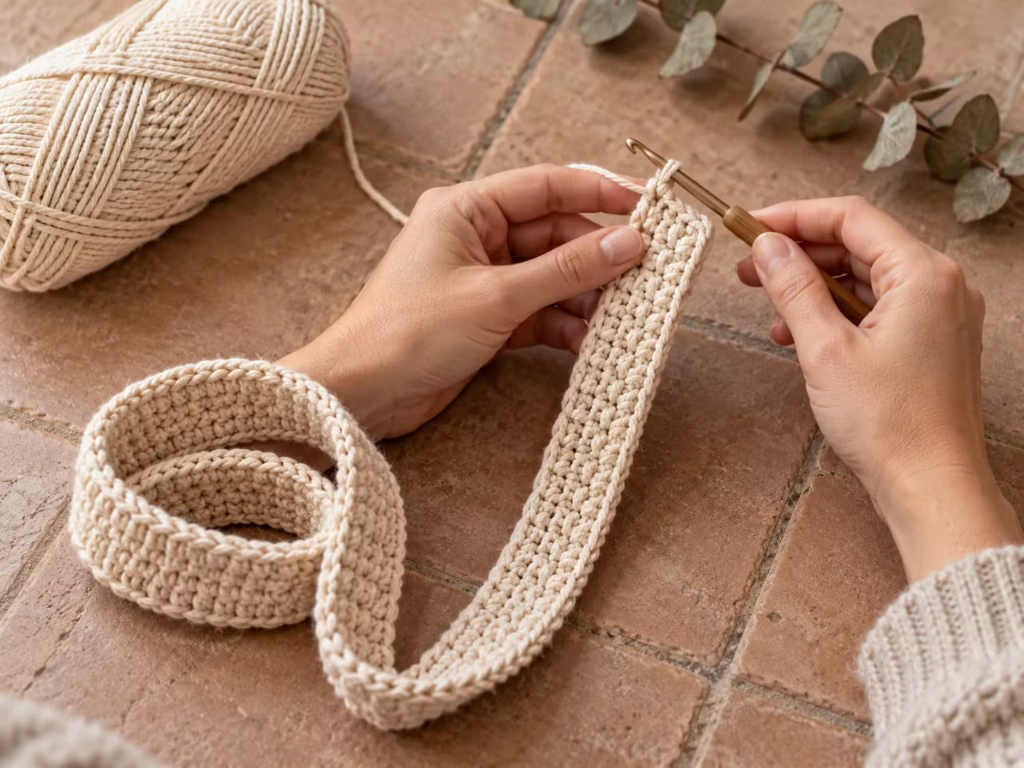
You can reduce that movement by using dense stitches, doubling the handle fabric, or adding cotton webbing beneath the crocheted strap. A sturdy handle also needs a secure attachment. Spread the attachment stitches over a wider area instead of joining everything at one point.
<!– gap –>
Choosing the Right Bag Size
Before changing the stitch count, decide what your bag needs to hold. A small handbag requires different proportions from a market tote.
| Bag style | Suggested finished dimensions | Best use |
|---|---|---|
| Mini handbag | 7 × 8 inches | Phone, keys, small wallet |
| Everyday tote | 10 × 10 inches | Daily essentials |
| Shoulder tote | 12 × 13 inches | Notebook and personal items |
| Large market tote | 15 × 15 inches | Lightweight shopping |
These are suggested design dimensions rather than tested capacities.
To change the size, use your stitch gauge:
Required stitches = desired width in inches × stitches per inch.
Required rows = desired height in inches × rows per inch.
For example, at 4 stitches per inch, a 12-inch-wide panel needs 48 single crochet stitches, so begin with 49 chains. Keep the panel dimensions consistent and remeasure before cutting lining fabric.
<!– gap –>
How to Check the Fit Before Finishing
A bag can look balanced on the table but feel awkward when carried. Testing the fit before permanently attaching the handles saves unnecessary unraveling.
Step 3 — Test the handle drop
Pin or loosely baste the handles into position. Place the bag over your shoulder or hold it at your side. Check where the opening sits relative to your arm.
Remember that straps may stretch with use. Shorten them before final attachment if the empty bag already hangs too low.
Step 4 — Test the opening
Place your intended everyday items inside. Check whether the opening is wide enough for comfortable access. For extra security, consider adding a zipper to the fabric lining or a button-and-loop closure. Make sure the closure does not pull the upper edge inward.
Common Crochet Bag Mistakes
Five problems appear frequently when crocheting structured bags.
| Symptom | Cause | Fix |
|---|---|---|
| Bag sides flare outward | Accidental stitch increases | Count stitches at the end of every row |
| Bottom corners look uneven | Panel edges were misaligned | Pin corners together before joining |
| Handles stretch excessively | Loose stitches or unsupported straps | Reinforce with folded crochet fabric or cotton tape |
| Bag feels floppy | Loose gauge or unsuitable yarn | Use tighter stitches and consider lining |
| Fabric puckers around seams | Joining stitches are too tight | Loosen seam tension and distribute stitches evenly |
If a mistake changes the bag’s dimensions, correct it before assembly. A crooked panel becomes much harder to repair after adding the handles and lining. The right material depends on how you plan to use the bag.
| Option | Main advantage | Limitation | Recommendation |
|---|---|---|---|
| Worsted cotton | Good stitch definition | Can feel heavy | Best starting choice |
| Cotton-acrylic blend | Softer hand feel | May stretch more | Casual lightweight bags |
| Acrylic yarn | Accessible and soft | Less shape stability | Decorative handbags |
| Raffia yarn | Firm, summery appearance | Can feel stiff to work | Structured seasonal styles |
| T-shirt yarn | Thick fabric and fast stitch growth | Finished bag can be heavy | Small statement bags |
| Single crochet | Dense, controlled fabric | Requires more stitching | Best for this pattern |
| Granny-square assembly | Colorful modular designs | More joining and possible gaps | Decorative custom bags |
| Cotton webbing handles | Strong, consistent support | Different appearance from crochet | Heavy-use accessories |
For your first structured tote, use cotton yarn with single crochet panels. Once the construction feels comfortable, experiment with different yarns and decorative methods.
Care and Storage
Handmade crocheted bags need gentler care than many manufactured handbags. Check the yarn label before washing. If your bag contains a removable base insert, take it out first.
For a bag made entirely from washable cotton, gently hand-wash in cool water with mild detergent. Support the fabric while rinsing and avoid twisting the handles. Press excess moisture into a towel.
Reshape the bag and dry it flat, away from strong heat. Store it without heavy objects hanging from the handles.
<!– gap –>
Your Next Custom Crochet Project
Once your first tote is complete, photograph the finished shape, handle attachment, lining, and your favorite decorative detail. Save the pattern along with your actual yarn usage, gauge, final measurements, and notes about anything you changed.
For your next project, experiment with one new feature, such as a zipper, color-blocked panels, or a removable flower charm. Pin the finished bag and save this tutorial to your crochet projects board so you can return to the measurements when planning another handmade accessory.
Frequently asked questions
What is the best yarn for a handmade crochet bag?
Worsted-weight cotton is a practical starting point because it produces defined stitches and can form a relatively firm fabric. Raffia and t-shirt yarn also work for particular designs. Consider the bag’s intended use before choosing. Heavy yarn may create an uncomfortable finished accessory, while highly stretchy yarn can make structured bags lose their shape.
Can beginners make a crocheted handbag?
Yes. A rectangular bag constructed from single crochet panels is an accessible project once you understand chains, turning rows, and stitch counting. Begin with the panels rather than a complicated circular base. Work slowly around the seams and reinforce the handles carefully. Those finishing details make a noticeable difference to the completed accessory.
How do you stop a crochet bag from stretching?
Use firm stitches and select a yarn suited to structured accessories. Reinforce handles with a second layer of crochet or cotton webbing, and spread attachment stitches across a wider area. A fitted fabric lining helps support the body. Avoid carrying heavy objects until you have checked that the seams and handles remain secure.
Do handmade crochet bags need a lining?
Not every bag needs one. A decorative tote carrying larger items may work without additional fabric. However, lining helps protect small belongings from slipping through stitch gaps and can improve shape retention. Choose a closely woven cotton fabric and cut it according to the completed bag’s measurements rather than relying entirely on the original pattern dimensions.
How much yarn do I need to crochet a tote bag?
Yarn consumption depends on bag dimensions, stitch density, handle length, and fiber thickness. This pattern uses approximately 400 yards as a planning allowance, but your actual requirement may differ. Weigh your gauge swatch or record the yarn used on the first panel. Matching that quantity for the second panel makes estimating the remaining yarn easier.
How do you customize a crochet bag design?
Start by changing one feature: color, dimensions, handle style, or surface decoration. For a modern handbag, use contrasting panels with plain handles. For a playful accessory, add a detachable crocheted flower or colorful edging. Keep the structural construction consistent when experimenting, especially if the bag will carry everyday essentials.
Can you sell bags made from this crochet pattern?
You can make finished bags from this original tutorial for personal use, gifts, or sale. Before selling, test your finished product for durability and record actual material costs and making time. Price the finished item to account for supplies, labor, packaging, selling fees, and profit. Use your own product photographs and descriptions rather than copying another maker’s branding. — SLUG: handmade-crocheted-bag-custom-everyday-tote META: Learn how to make a handmade crocheted bag with sturdy handles, simple stitches, a custom design, optional lining, and step-by-step instructions.
SCHEMA: { “@context”: “[https://schema.org](https://schema.org/)”, “@graph”: [ { “@type”: “Article”, “headline”: “Handmade Crocheted Bag: Make Your Own Custom Everyday Tote”, “description”: “A beginner-friendly tutorial for making a structured handmade crochet tote with matching panels, reinforced handles, optional fabric lining, and customizable design details.”, “inLanguage”: “en-US”, “articleSection”: [ “Materials and Tools”, “Handmade Crocheted Bag Design: Before You Start”, “How to Crochet Your Bag Step by Step”, “Custom Crochet Bag Design Ideas”, “How to Make Your Crocheted Bag Stronger”, “Choosing the Right Bag Size”, “How to Check the Fit Before Finishing”, “Common Crochet Bag Mistakes”, “Crochet Bag Materials Compared”, “Care and Storage”, “Frequently Asked Questions” ], “keywords”: [ “handmade crocheted bag”, “crochet bag pattern”, “custom crochet tote”, “crocheted accessories”, “beginner crochet handbag” ] }, { “@type”: “HowTo”, “name”: “How to Make a Handmade Crocheted Tote Bag”, “description”: “Crochet a rectangular tote using two single crochet panels, joined seams, reinforced handles, and an optional lining.”, “inLanguage”: “en-US”, “supply”: [ { “@type”: “HowToSupply”, “name”: “Approximately 400 yards of worsted-weight cotton yarn” }, { “@type”: “HowToSupply”, “name”: “Optional cotton lining fabric” }, { “@type”: “HowToSupply”, “name”: “Sewing thread” } ], “tool”: [ { “@type”: “HowToTool”, “name”: “4.0 mm crochet hook” }, { “@type”: “HowToTool”, “name”: “Tapestry needle” }, { “@type”: “HowToTool”, “name”: “Scissors” }, { “@type”: “HowToTool”, “name”: “Stitch markers” }, { “@type”: “HowToTool”, “name”: “Measuring tape” } ], “step”: [ { “@type”: “HowToStep”, “position”: 1, “name”: “Crochet the first panel”, “text”: “Chain 41.
Single crochet in the second chain and across for 40 stitches. Work 44 total rows of single crochet, maintaining 40 stitches per row.” }, { “@type”: “HowToStep”, “position”: 2, “name”: “Make the second panel”, “text”: “Repeat the first panel instructions and confirm that both rectangles match in size.” }, { “@type”: “HowToStep”, “position”: 3, “name”: “Join the panels”, “text”: “Place panels with right sides facing.
Single crochet through both layers along the sides and bottom, keeping the top open.” }, { “@type”: “HowToStep”, “position”: 4, “name”: “Finish the top edge”, “text”: “Work a neat round of single crochet around the bag opening, maintaining an even edge.” }, { “@type”: “HowToStep”, “position”: 5, “name”: “Create and attach handles”, “text”: “Crochet two matching handles using six single crochet stitches per row.
Reinforce each strap and sew the ends securely to the bag.” }, { “@type”: “HowToStep”, “position”: 6, “name”: “Add an optional lining”, “text”: “Measure the finished interior, cut and sew matching cotton fabric, and hand-stitch the lining beneath the upper rim.” }, { “@type”: “HowToStep”, “position”: 7, “name”: “Finish and inspect”, “text”: “Secure loose ends, inspect the seams and straps, and test the bag gradually with lightweight belongings.” } ] }, { “@type”: “FAQPage”, “mainEntity”: [ { “@type”: “Question”, “name”: “What is the best yarn for a handmade crochet bag?”, “acceptedAnswer”: { “@type”: “Answer”, “text”: “Worsted-weight cotton is a practical starting choice for defined stitches and firm fabric.
Raffia and t-shirt yarn are alternatives for different designs.” } }, { “@type”: “Question”, “name”: “Can beginners make a crocheted handbag?”, “acceptedAnswer”: { “@type”: “Answer”, “text”: “Yes. A rectangular bag made from single crochet panels is suitable for confident beginners familiar with chains, turning rows, and stitch counting.” } }, { “@type”: “Question”, “name”: “How do you stop a crochet bag from stretching?”, “acceptedAnswer”: { “@type”: “Answer”, “text”: “Use firm stitches, reinforce handles, distribute attachment stitches across a wider area, and consider a fitted fabric lining.” } }, { “@type”: “Question”, “name”: “Do handmade crochet bags need a lining?”, “acceptedAnswer”: { “@type”: “Answer”, “text”: “Lining is optional but useful for supporting the bag and keeping smaller belongings from slipping through stitch gaps.” } }, { “@type”: “Question”, “name”: “How much yarn do I need to crochet a tote bag?”, “acceptedAnswer”: { “@type”: “Answer”, “text”: “This design uses approximately 400 yards as a planning allowance.
Actual consumption depends on yarn, gauge, dimensions, and handle construction.” } }, { “@type”: “Question”, “name”: “How do you customize a crochet bag design?”, “acceptedAnswer”: { “@type”: “Answer”, “text”: “Customize a bag by changing the colors, dimensions, handle style, edging, or decorative details while maintaining secure structural seams.” } }, { “@type”: “Question”, “name”: “Can you sell bags made from this crochet pattern?”, “acceptedAnswer”: { “@type”: “Answer”, “text”: “Finished bags made from this original tutorial may be sold.
Test their durability and calculate material, labor, packaging, selling fees, and profit before pricing.” } } ] } ] } PINS: **PIN 1 — Result:** Title: Handmade Crochet Bag That Looks Boutique-Made / Overlay: MAKE YOUR OWN CROCHET TOTE / Description: Create a beautiful cotton crochet bag with a structured shape and matching handles. Learn the steps for making an everyday handmade accessory with personalized details.
Keywords: handmade crochet bag, crochet tote, DIY handbag. / Image: 1 **PIN 2 — How-To:** Title: How to Crochet a Bag for Beginners Step by Step / Overlay: CROCHET A BAG STEP BY STEP / Description: Learn how to turn simple crochet rectangles into a practical handmade tote. Follow the instructions for joining panels, attaching handles, and adding a lining. Keywords: beginner crochet bag, crochet bag tutorial, easy crochet pattern. / Image: 5 **PIN 3 — List:** Title: 3 Crochet Tote Bag Styles You Can Make From One Pattern / Overlay: ONE PATTERN THREE BAG STYLES / Description: Turn a simple tote pattern into three distinctive handmade accessories using different colors and finishing details.
Explore minimalist, two-tone, and earthy crochet bag inspiration. Keywords: crochet bag ideas, custom crochet bag, crochet accessories. / Image: 8 **PIN 4 — Mistake:** Title: Crochet Bag Handles Stretching? Here’s How to Reinforce Them / Overlay: STOP STRETCHY BAG HANDLES / Description: A beautiful crochet tote needs handles that stay secure during regular use.
Learn how reinforcement, attachment placement, and firm stitching help prevent sagging. Keywords: crochet bag handles, crochet bag mistakes, sturdy crochet straps. / Image: 6 **PIN 5 — Seasonal:** Title: Cozy Fall Crochet Bag Idea in Beautiful Neutral Cotton / Overlay: YOUR NEXT FALL CROCHET PROJECT / Description: Make a handmade tote that pairs beautifully with October outfits and autumn colors. Follow a beginner-friendly cotton bag pattern and customize the finish to suit your style.
Keywords: fall crochet projects, autumn crochet bag, handmade fall accessories. / Image: 7 The main inconsistency is that the pattern describes a 10 × 10-inch finished tote, while the stated gauge and stitch counts produce panels measuring approximately 10 × 9¾ inches before seaming. The handle instructions also need clearer measurements. Use these corrected sections to replace the corresponding parts of the article.
Corrected Pattern Measurements
| Measurement | Corrected specification |
|---|---|
| Crochet gauge | 16 single crochet stitches × 18 rows = 4 × 4 inches |
| Foundation chain | 41 chains |
| Stitches per row | 40 single crochet stitches |
| Total rows per panel | 45 rows |
| Panel width before assembly | 10 inches |
| Panel height before assembly | 10 inches |
| Finished bag dimensions | Approximately 9½ × 9¾ inches, depending on seams |
| Handle width | 6 single crochet stitches = 1½ inches before folding |
| Handle length | 21 inches before attachment |
| Handle overlap | 2 inches at each attachment end |
| Exposed handle length | Approximately 17 inches |
| Approximate handle rows | 95 rows per handle |
Step 1: Crochet the First Panel
Chain 41.
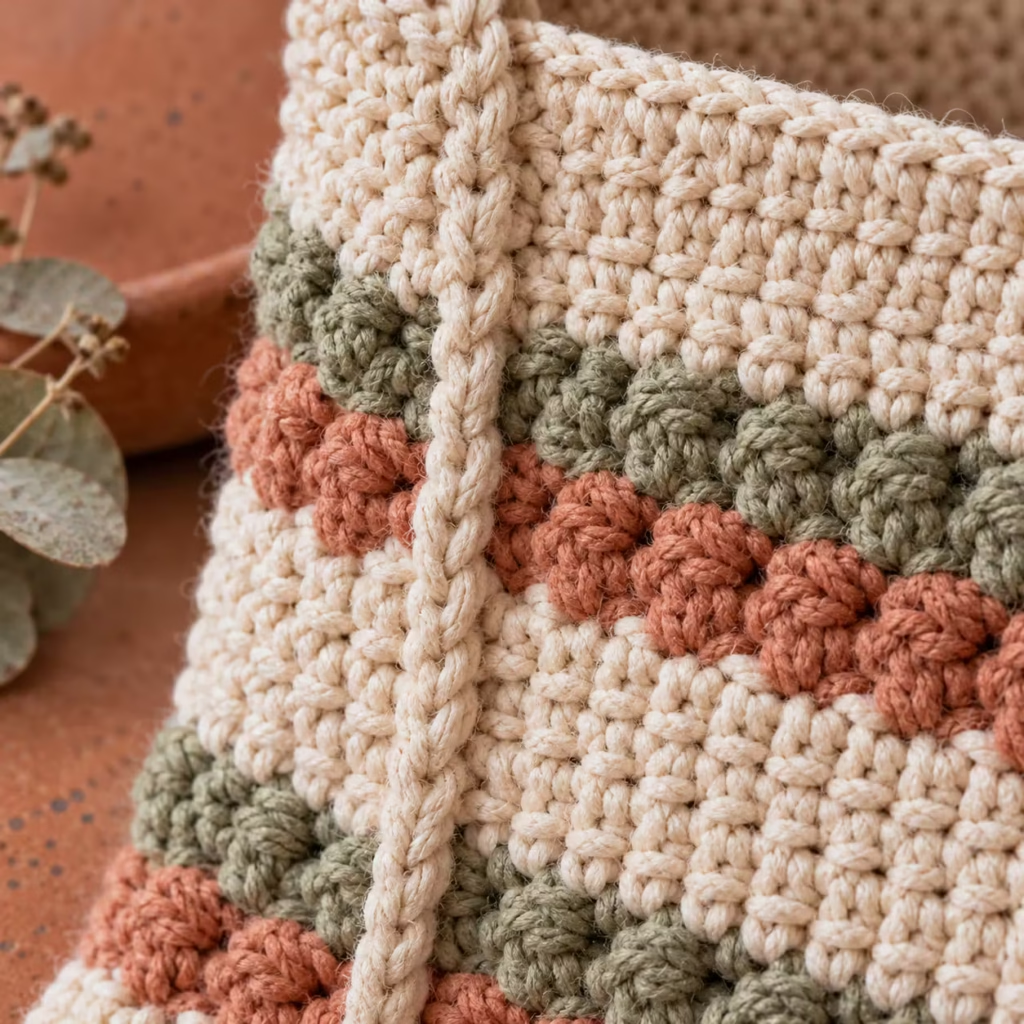
Row 1: Single crochet in the second chain from the hook and in each remaining chain. You should have 40 single crochet stitches.
Rows 2–45: Chain 1, turn, and single crochet in each stitch across. Maintain exactly 40 stitches per row.
At the target gauge of 16 stitches and 18 rows per 4 inches:
- Width: 40 ÷ 4 = 10 inches.
- Height: 45 ÷ 4.5 = 10 inches.
Your completed panel should measure approximately 10 × 10 inches before assembly. Make a second identical panel.
Both panels should have 40 stitches across and 45 completed rows. Measure them without stretching.
Step 3: Join the Panels
Place the panels with their right sides facing each other. Align the top corners and secure the layers with stitch markers. Single crochet through both layers along the first side, across the bottom, and up the second side.
Work approximately one joining stitch per row end along each side, keeping the seam flat. Across the bottom, match the 40 foundation-edge stitch positions. Turn the bag right side out. Because the seams occupy some fabric, the usable finished dimensions will be slightly smaller than the original panels.
Expected finished size: Approximately 9½ inches wide and 9¾ inches high, depending on seam tension and the edging.
Step 5: Crochet the Handles
Make two identical handles.
Row 1: Chain 7. Single crochet in the second chain from the hook and across. You should have 6 stitches.
Rows 2–95: Chain 1, turn, and single crochet across all 6 stitches.
At the target row gauge, 95 rows produce a strap approximately 21.1 inches long. Each strap measures approximately 1½ inches wide before folding. For a firmer handle, fold the strip lengthwise and sew its long edges together, producing a handle approximately ¾ inch wide.
Attach each handle to its corresponding bag panel, positioning the attachment points approximately 2 inches inward from the side edges. Overlap each handle end with the inside of the bag by approximately 2 inches.
This leaves approximately 17 inches of exposed strap between attachment points. The actual vertical handle drop depends on the curvature of the strap and the distance between attachments; check the fit before sewing permanently.
Reinforce every attachment with secure rectangular stitching and diagonal cross-stitches.
Corrected Size Customization Table
The dimensions below describe individual panels before assembly, using the same gauge.
| Bag style | Panel width | Panel height | Stitches per row | Total rows | Starting chains |
|---|---|---|---|---|---|
| Mini handbag | 7 in | 8 in | 28 | 36 | 29 |
| Everyday tote | 10 in | 10 in | 40 | 45 | 41 |
| Shoulder tote | 12 in | 13⅓ in | 48 | 60 | 49 |
| Large market tote | 15 in | 15⅛ in | 60 | 68 | 61 |
The shoulder tote and market tote row counts give the nearest practical dimensions at the stated row gauge. Finished bags become slightly smaller after joining.
Corrected resizing formula
At the specified gauge:
Stitches per row = desired panel width × 4
Rows = desired panel height × 4.5, rounded to the nearest whole row.
Starting chains = stitches per row + 1
For example, to make a 12-inch-wide panel:
12 × 4 = 48 stitches. Start with 49 chains.
For a panel approximately 13⅓ inches tall:
13⅓ × 4.5 = 60 rows.
Additional Corrections
Gauge swatch: Chain 25 and make 24 single crochet stitches across for a 6-inch-wide swatch at the target gauge. Continue for approximately 27 rows, then measure a central 4-inch area. This provides a more reliable measurement than a swatch exactly 4 inches wide.
Yarn quantity: Keep 400 yards as a provisional shopping estimate rather than a verified requirement. Actual consumption depends on the completed panel weight, yarn specifications, seams, and handles.
Lining: Measure the assembled bag’s interior rather than cutting fabric from the original 10-inch panel dimensions. Include appropriate seam and hem allowances.
Pattern terminology: Clearly distinguish panel dimensions before seaming from finished exterior bag dimensions throughout the article.
With these corrections, the stitch counts, row counts, starting chains, panel dimensions, and handle measurements are mathematically consistent with the stated gauge. The finished dimensions remain estimates until a physical sample is measured.
Pin “Handmade Crocheted Bag: Make Your Own Custom Everyday Tote” so you can find it when the yarn arrives.
Get the next free pattern first
One email a week. New patterns, no noise.
Yarn weights and hook sizes in this guide follow the Craft Yarn Council standards.
Keep going: Cute Crochet Baby Booties: Easy Free Pattern for Beginners · Crochet Moss Stitch: Easy Free Tutorial for Beginners · Crochet Fingerless Gloves: Easy Free Pattern for Beginners
Gauge & sizing
Sizes: Approximately 10 inches wide by 10 inches high at the suggested gauge, before





