
15 Cozy Autumn Crochet Coin Purse Ideas: Pumpkin, Acorn & Mushroom Pouches
Coin purse: You'll learn how to crochet a small drawstring pouch from the bottom up, shape it into a pumpkin, acorn, or mushroom, and finish it securely…

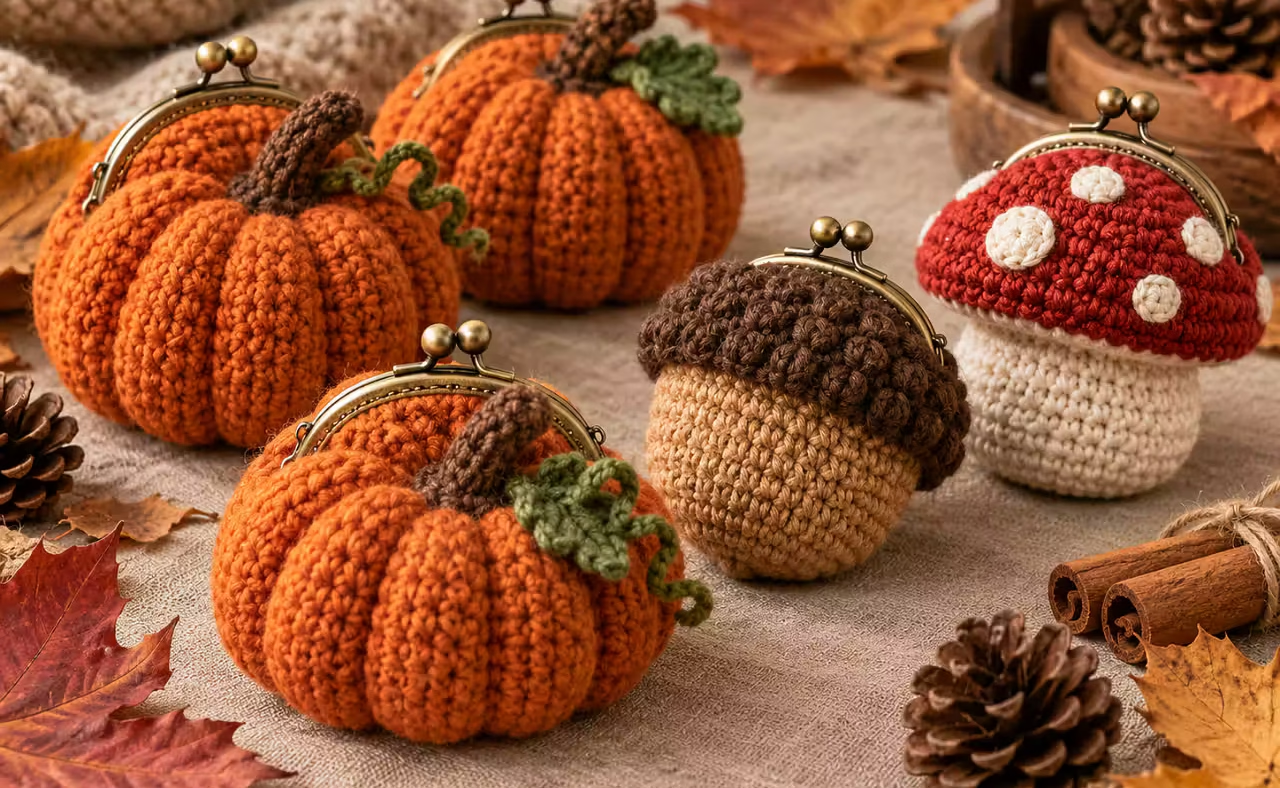
You’ll learn how to crochet a small drawstring pouch from the bottom up, shape it into a pumpkin, acorn, or mushroom, and finish it securely enough for coins, folded bills, and other small essentials. Start with the complete pumpkin pattern, then use the customization guide to create your own woodland collection.
Project Overview
These small autumn crochet pouches use a seamless spiral base, simple cylindrical sides, and a drawstring closure. The design is suitable for confident beginners who can make single crochet stitches and work in the round.
| Project detail | What to expect |
|---|---|
| Skill level | Beginner to intermediate |
| Main technique | Single crochet in continuous rounds |
| Yarn | Worsted-weight cotton or cotton blend |
| Hook | 3.5 mm suggested starting point |
| Main pouch stitch count | 48 stitches per round |
| Base construction | Six increase rounds followed by a transition round |
| Finished size | Depends on gauge, yarn, and chosen height |
| Closure | Crocheted drawstring |
| Decorative options | Pumpkin ribs, acorn cap, mushroom spots, leaves |
| Best use | Coins, folded cash, small lightweight accessories |
The stitch counts below have been checked for internal consistency, but the project has not been physically tested to establish an exact finished size or completion time. Make a small gauge sample and measure your first finished pouch before producing several matching pieces.
Materials and Tools
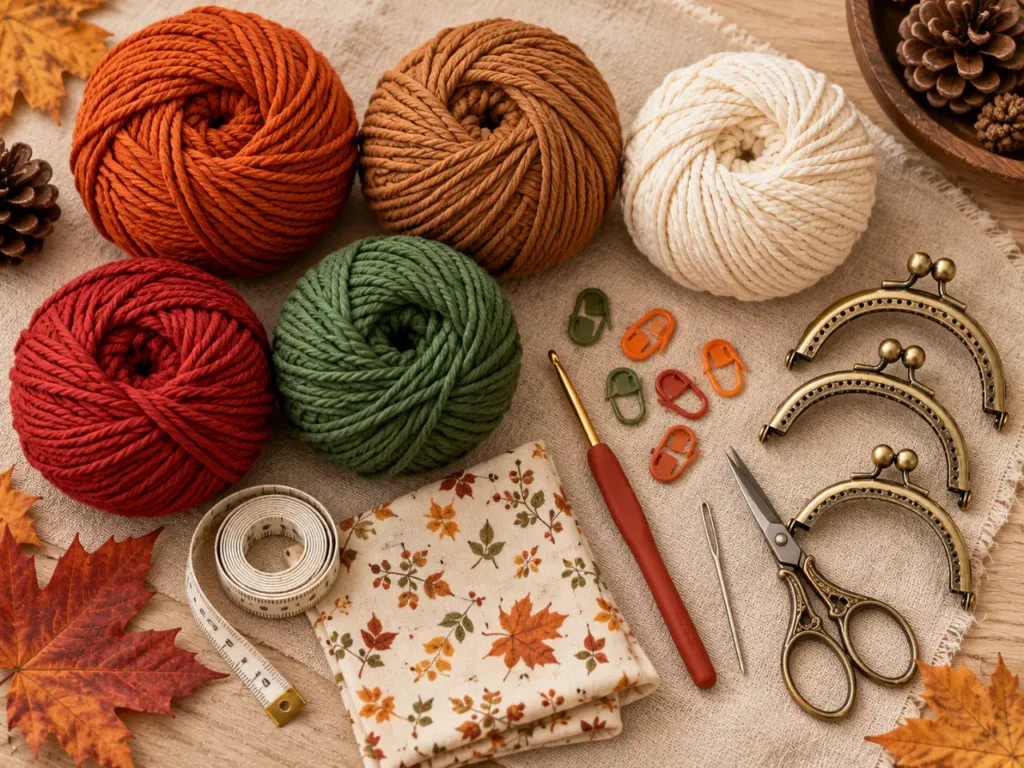
You can make the basic crochet coin purse using only one yarn color, but a few contrasting scraps make the autumn details much more recognizable.
| Item | Quantity or specification | Purpose | Alternative |
|---|---|---|---|
| Main yarn | Small amount of worsted-weight cotton | Body of purse | Cotton-acrylic blend |
| Accent yarn | Scraps in coordinating colors | Stems, caps, dots, leaves | Embroidery cotton |
| Crochet hook | 3.5 mm to begin | Creates a firm fabric | Adjust to achieve tighter stitches |
| Stitch marker | 1 removable marker | Marks beginning of rounds | Contrasting scrap yarn |
| Yarn needle | 1 blunt tapestry needle | Weaving and shaping | Smaller suitable tapestry needle |
| Scissors | 1 pair | Cutting yarn | Thread snips |
| Measuring tape | 1 | Sizing checks | Ruler |
| Optional lining | Small piece of woven cotton | Helps contain small coins | Lightweight sewn pouch insert |
| Optional zipper | Sized to finished opening | More secure closure | Drawstring with cord lock |
Choose a hook based on the fabric, not just the yarn label. Coin purses benefit from tighter stitches than many garments because an open, stretchy fabric can allow small contents to escape. For a warm woodland palette, combine burnt orange, pumpkin spice, caramel, chocolate brown, cream, moss green, burgundy, and deep forest green.
Crochet Basics Before You Begin
This article uses US crochet terminology.
- MR: Magic ring, an adjustable loop used to begin circular projects.
- SC: Single crochet.
- INC: Two single crochet stitches worked into one stitch.
- SL ST: Slip stitch.
- CH: Chain.
- BLO: Back loop only.
- ST: Stitch.
- FO: Fasten off.
An instruction such as (4 SC, INC) × 6 means work four single crochets, then an increase, and repeat that group six times. The number in brackets at the end of a round tells you exactly how many stitches should be present.
Practice Exercise: Make a Flat Circle
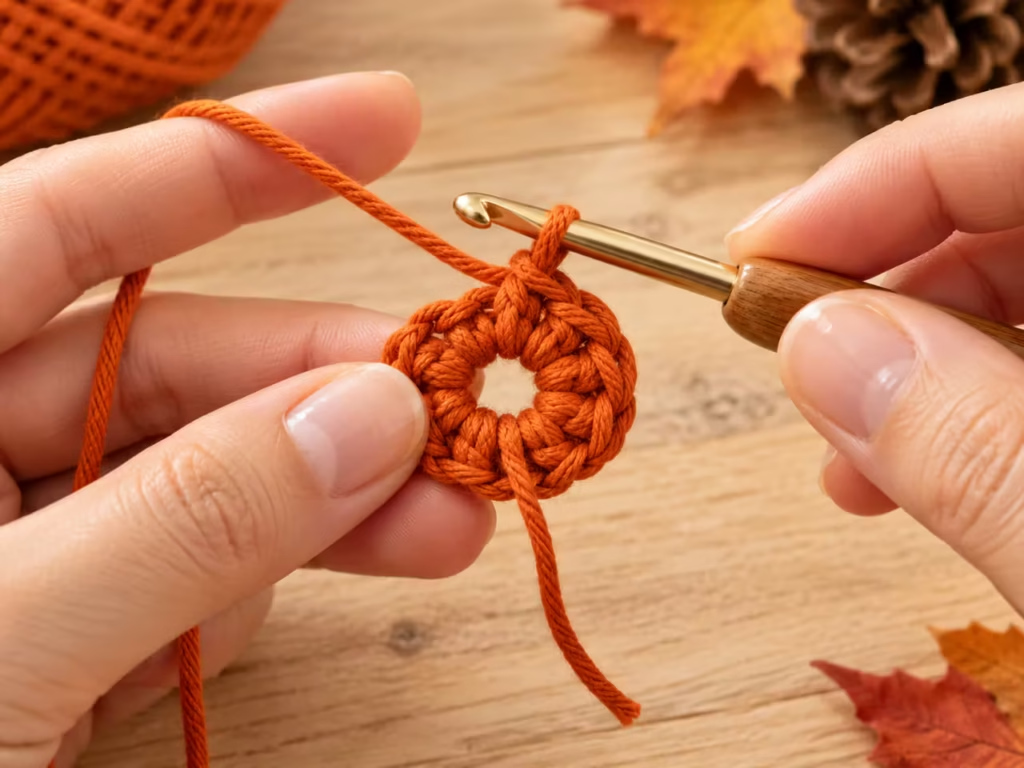
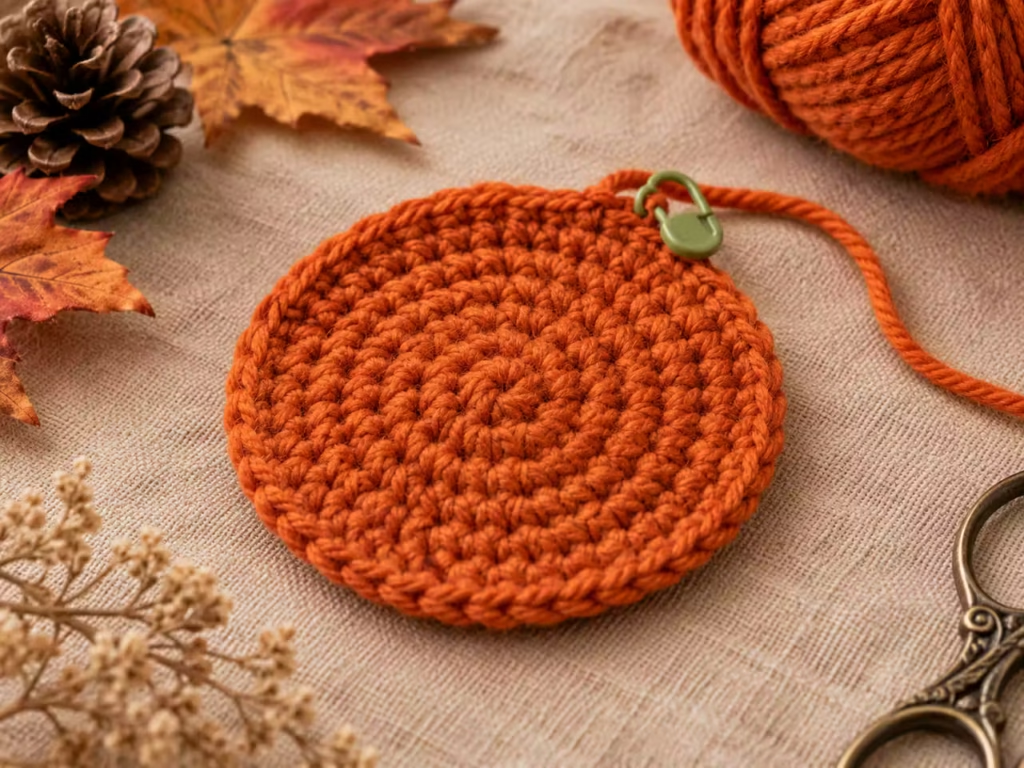
Before beginning your coin purse, practice forming a small single-crochet circle.
Make six single crochets into a magic ring and tighten the loop. Work two stitches into each stitch on the following round. Continue increasing evenly until the circle lies flat.
If the edge curves upward too early, you may have missed an increase. If it becomes noticeably wavy, check that you haven’t added extra stitches. A flat circle is the foundation of a tidy pumpkin or mushroom pouch.
15 Cozy Autumn Crochet Coin Purse Ideas
The following designs are creative variations on the same small-pouch concept. Each uses a different combination of shape, color, texture, or decoration.
Not every idea requires a completely different pattern. That’s the advantage: once you understand the base, you can reuse it throughout the season.
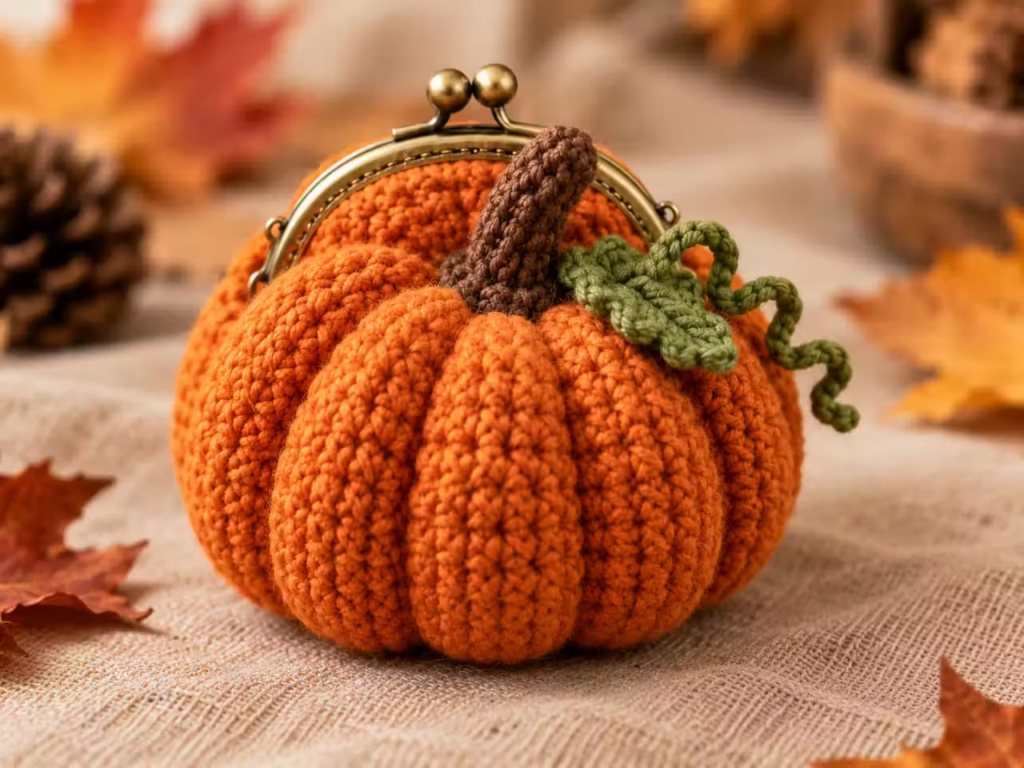
1. Classic Burnt Orange Pumpkin Purse
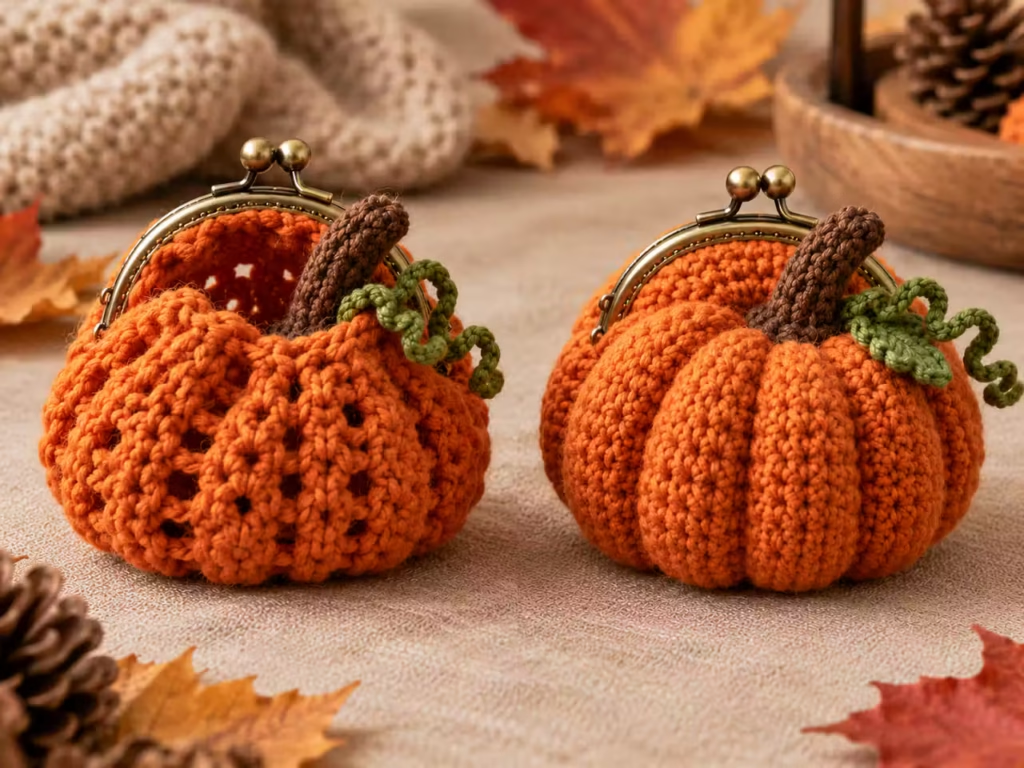
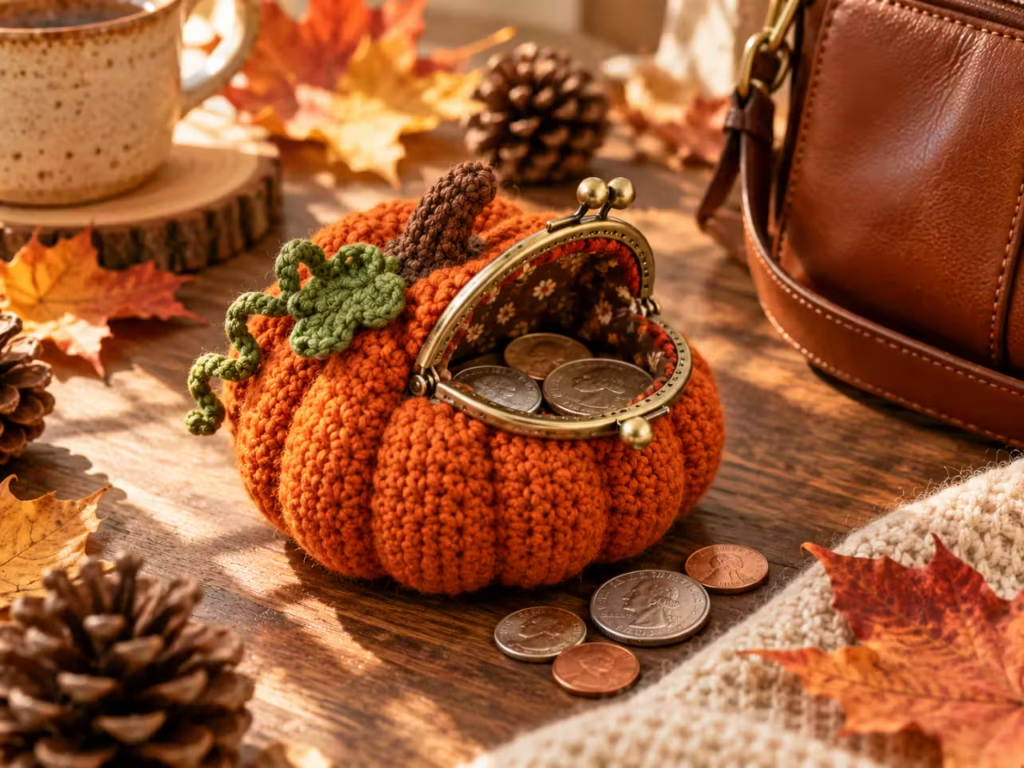
A round burnt orange pouch with stitched vertical ribs and a small brown stem captures the familiar harvest pumpkin shape. Use slightly firm cotton yarn to keep the body structured. Add four or six rib lines with matching yarn, using controlled tension so the pouch develops soft grooves rather than severe indentations. A dark green drawstring provides contrast without hiding the pumpkin shape.
2. Mini White Pumpkin Coin Purse
Replace traditional orange with warm ivory or oatmeal.
Add a taupe stem and muted sage-green leaves for a neutral autumn look. This version works especially well with farmhouse-inspired bags and cream-colored winter accessories. Use a washable liner if you expect frequent handling because light yarn can show dirt quickly.
3. Cinnamon Spice Ribbed Pumpkin
Create extra surface texture by crocheting the body with alternating front-loop and back-loop effects or by adding raised decorative ribbing after construction. For beginners, surface slip stitches are easier to control than changing the structural stitch pattern. Keep the drawstring channel smooth so the textured embellishments don’t interfere with opening and closing.
4. Woodland Brown Acorn Pouch
Use caramel yarn for the acorn body and chocolate brown for the cap. A contrasting textured band around the upper portion creates the recognizable acorn silhouette without requiring complex shaping. Finish with a short decorative stem and a functional drawstring.
5. Golden Honey Acorn Coin Holder
A honey-gold body paired with a dark espresso cap produces a cozy autumn palette. Try a narrow ridge of reverse single crochet along the cap edge if you already know that finishing method. For a beginner version, a standard round of single crochet creates a cleaner, flatter edge.
6. Rustic Acorn With Textured Cap
Make the cap visually deeper using small embroidered crosses or surface slip-stitch rows. Keep the decorations shallow and secure so the pouch doesn’t snag on keys or rough objects. A deep brown drawstring concealed beneath the cap gives the exterior a more natural acorn appearance.
7. Red Toadstool Mushroom Pouch
A scarlet upper section, cream body, and scattered white embroidered spots make this purse instantly recognizable. Use secure embroidery rather than loose knots for the spots, especially if the purse will be carried frequently. The upper red band can suggest a mushroom cap while preserving an uncomplicated cylindrical construction.
8. Soft Blush Mushroom Coin Purse
Swap bright red for dusty rose, and combine it with ivory and warm beige.
Use small cream circles or embroidered French knots for delicate mushroom markings. This version makes a charming pastel woodland accessory without losing the autumn theme.
9. Chocolate Mushroom With Cream Spots
A deep cocoa mushroom cap over an oatmeal stem-inspired body feels especially seasonal. The contrast is strong enough to make the design visible in photographs even without highly saturated yarn colors. For the cleanest effect, distribute embroidered spots unevenly but leave the drawstring channel unobstructed.
10. Forest Green Moss Pouch
Use moss-green cotton and decorate the outside with small crocheted leaves.
A beige or dark olive drawstring adds a subtle accent. The pouch resembles a little forest treasure bag and works as an everyday coin holder beyond autumn.
11. Maple Leaf Autumn Purse
Crochet a simple rust-colored pouch and attach one small maple-inspired leaf motif.
Place the leaf below the drawstring channel, not directly over it. A flat stitched motif is easier to manage than a heavily layered applique.
12. Burgundy Woodland Berry Pouch
Deep cranberry yarn creates a rich autumn accessory. Add several small embroidered berry shapes and tiny green leaves along one side. Avoid beads for children’s accessories; embroidered details are generally the more practical option.
13. Harvest Striped Coin Purse
Use alternating bands of pumpkin orange, oatmeal, and cocoa brown.
Change yarn colors at the beginning of a round and secure the ends carefully. Stripes are particularly useful for beginners because they help make the construction progress visible.
14. Patchwork Autumn Scrap-Yarn Pouch
Combine leftover yarn in coordinating autumn shades. Keep the yarn weight and fiber composition reasonably consistent to avoid uneven tension or unexpected washing behavior. Use one darker color for the drawstring channel to tie the different sections together.
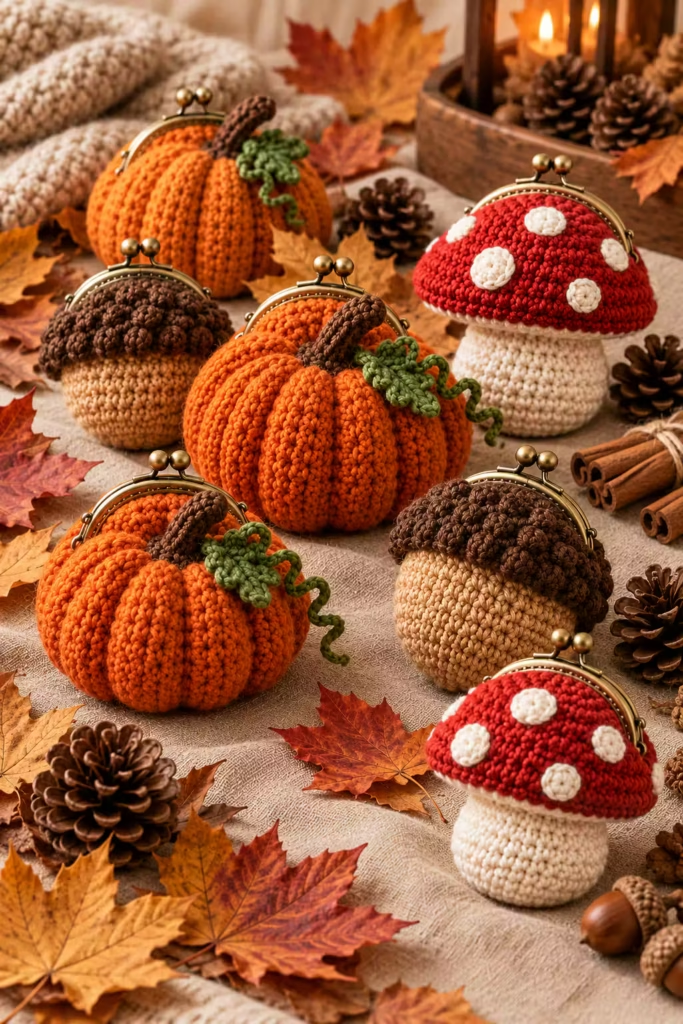
15. Enchanted Woodland Trio
Create three matching pouches: a pumpkin, an acorn, and a mushroom.
Use the same 48-stitch body structure for all three, then customize the color placement and exterior details. Matching proportions make the group visually cohesive, even when the decorations differ.
Complete Beginner Pumpkin Coin Purse Tutorial
This pattern is the foundation for the autumn collection.
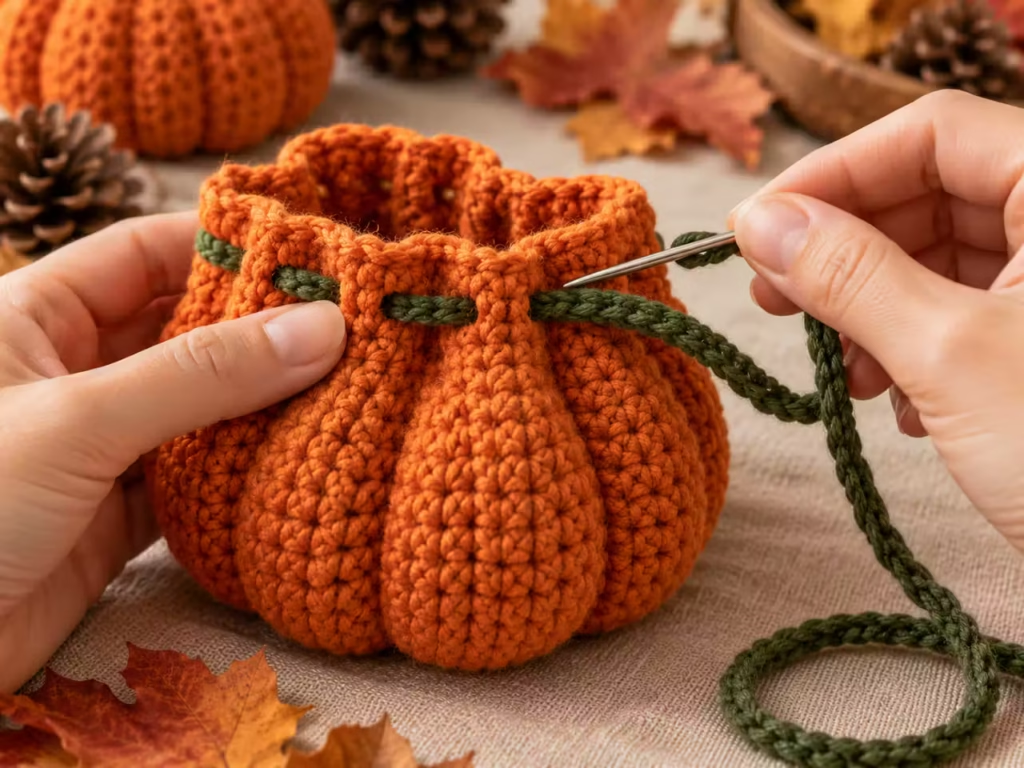
It builds a flat circular bottom, straight sides, a simple drawstring channel, and decorative pumpkin ribs. The pouch is designed to be practical first and ornamental second.
Step 1: Crochet the Circular Base
Use orange worsted-weight yarn and a 3.5 mm hook. Work in continuous rounds. Place a stitch marker into the first stitch of each round and move it upward as you progress.
| Round | Instructions | Stitch count |
|---|---|---|
| 1 | 6 SC into a magic ring | 6 |
| 2 | INC in each stitch | 12 |
| 3 | (1 SC, INC) × 6 | 18 |
| 4 | (2 SC, INC) × 6 | 24 |
| 5 | (3 SC, INC) × 6 | 30 |
| 6 | (4 SC, INC) × 6 | 36 |
| 7 | (5 SC, INC) × 6 | 42 |
| 8 | (6 SC, INC) × 6 | 48 |
Tighten the magic ring, but leave enough yarn to weave the starting tail securely.
Visual check: The circle should remain reasonably flat with eight rounds and 48 stitches.
Common error: Missing one increase leaves the stitch count short.
Solution: Count after every round rather than trying to correct several rounds later.
Expert tip: Staggering the increase locations in future designs can make the base look rounder and less hexagonal.
Step 2: Turn the Base Into a Pouch
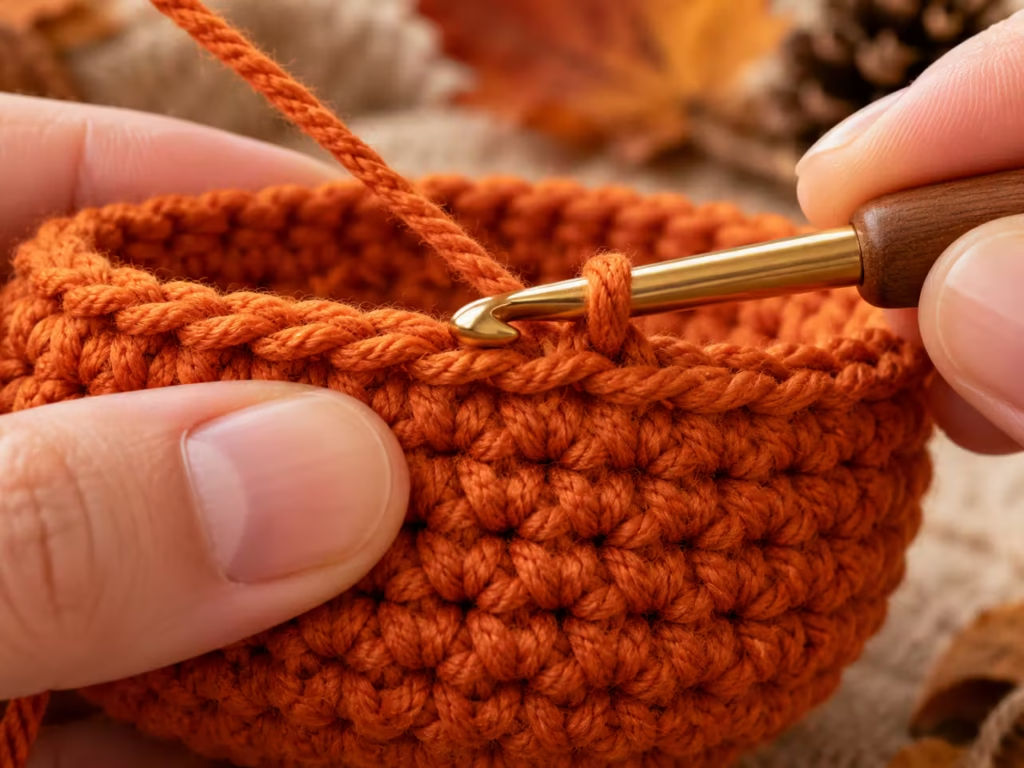
Round 9: Work 1 SC in the back loop of every stitch. [48]
This creates a subtle ridge at the base and encourages the fabric to turn upward.
Rounds 10–23: Work 1 SC in every stitch. [48 each round]
Do not increase during these rounds. The result should resemble a small open cylindrical cup.
Visual check: The base remains flat or gently rounded while the sides rise evenly.
Common error: Accidentally adding a stitch at the beginning of a spiral round makes the body wider.
Solution: Keep the stitch marker in the true first stitch and count periodically.
Expert tip: A hook smaller than the yarn’s usual recommendation may help produce a denser pouch, provided the stitches remain comfortable to work.
Step 3: Create the Drawstring Eyelets
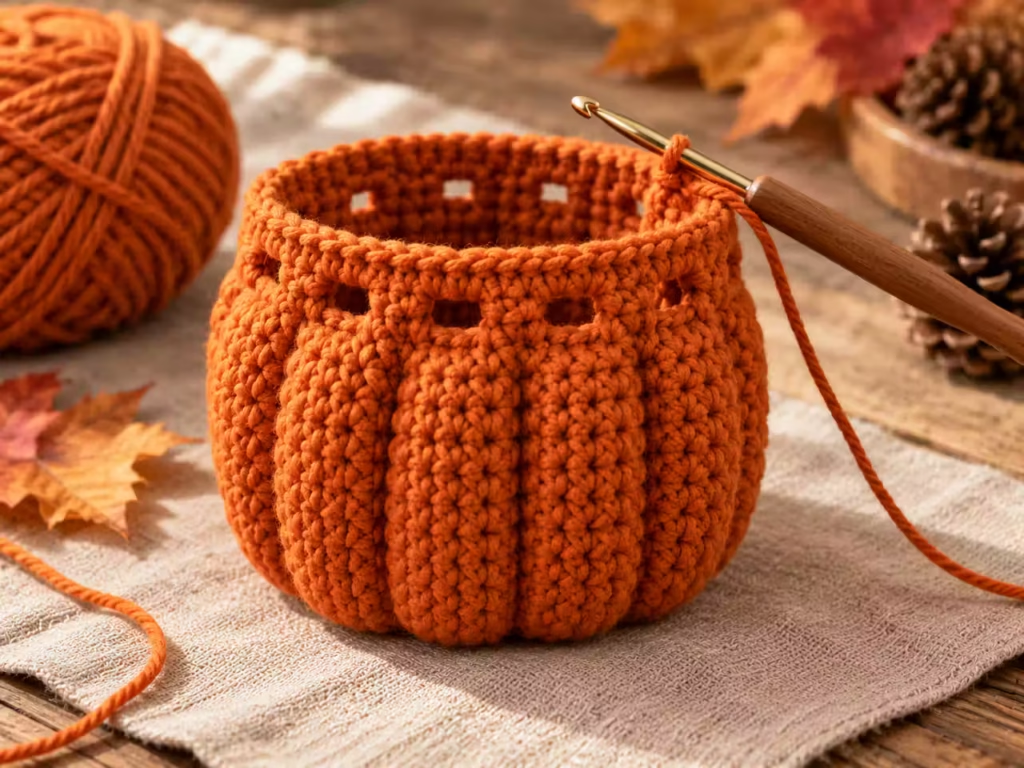
The drawstring needs evenly spaced openings around the upper edge.
Round 24:
Repeat (2 SC, CH 1, skip 1 stitch) sixteen times.
This consumes all 48 stitches from the previous round and creates 16 evenly distributed eyelets. Each repeat produces two single crochets and one chain space.
Round 25:
Work 1 SC into each single crochet and 1 SC into each chain-1 space from Round 24. [48]
Round 26:
Work 1 SC into each stitch. [48]
Fasten off and weave in the finishing tail.
Visual check: Sixteen small openings should sit evenly around the upper section.
Common error: Working into a skipped stitch rather than the chain space changes the stitch count.
Solution: Identify the two single crochets and the chain space in every repeat before proceeding.
Expert tip: Test the drawstring through several eyelets before securing any decorative elements.
Step 4: Crochet and Thread the Drawstring
Use dark green or chocolate brown yarn. Make a chain long enough to pass around the entire opening and leave two tails that can be tied comfortably. Because the required length depends on your stitch size, measure the finished opening before deciding how many chains to make.
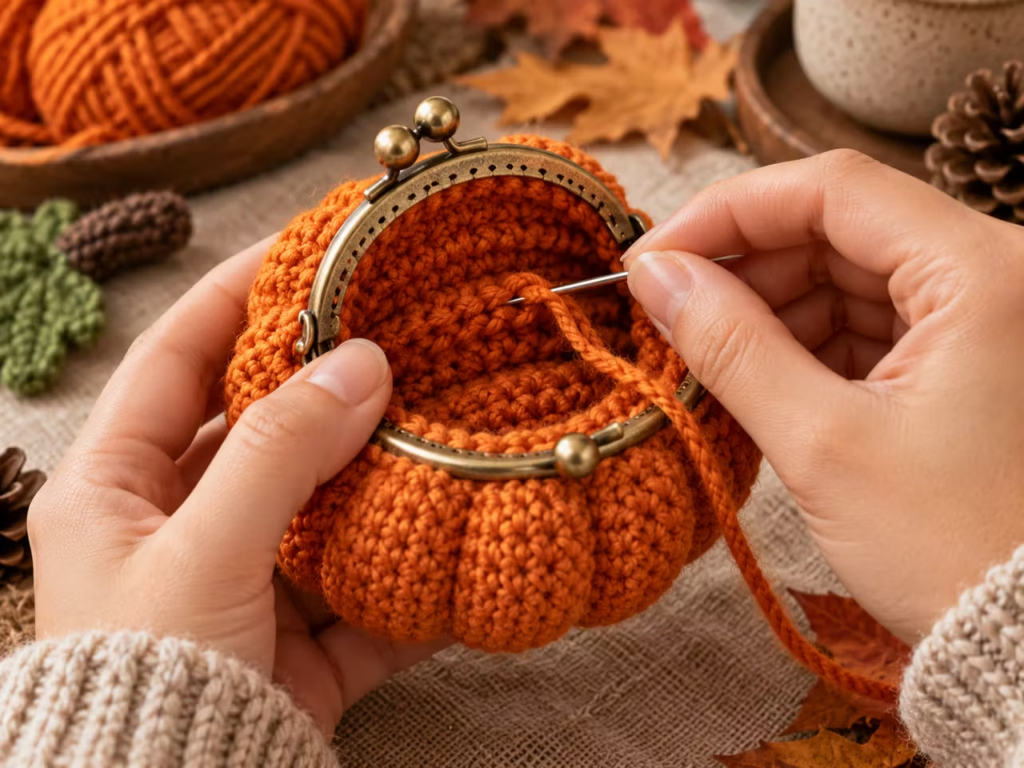
For a sturdier cord, slip stitch back along the chain or make a crocheted cord using your preferred method. Using a yarn needle, weave the cord through all 16 eyelets, alternating from outside to inside. Bring both ends together at the front.
Visual check: Pulling both ends should gather the opening evenly.
Common error: A cord that is too short makes the opening difficult to access.
Solution: Add length before securing the ends.
Expert tip: Use a contrasting cord temporarily to confirm the threading path, then replace it with your chosen color.
Step 5: Form the Pumpkin Ribs
A straight cylinder can become a convincing pumpkin when you add gentle vertical grooves.
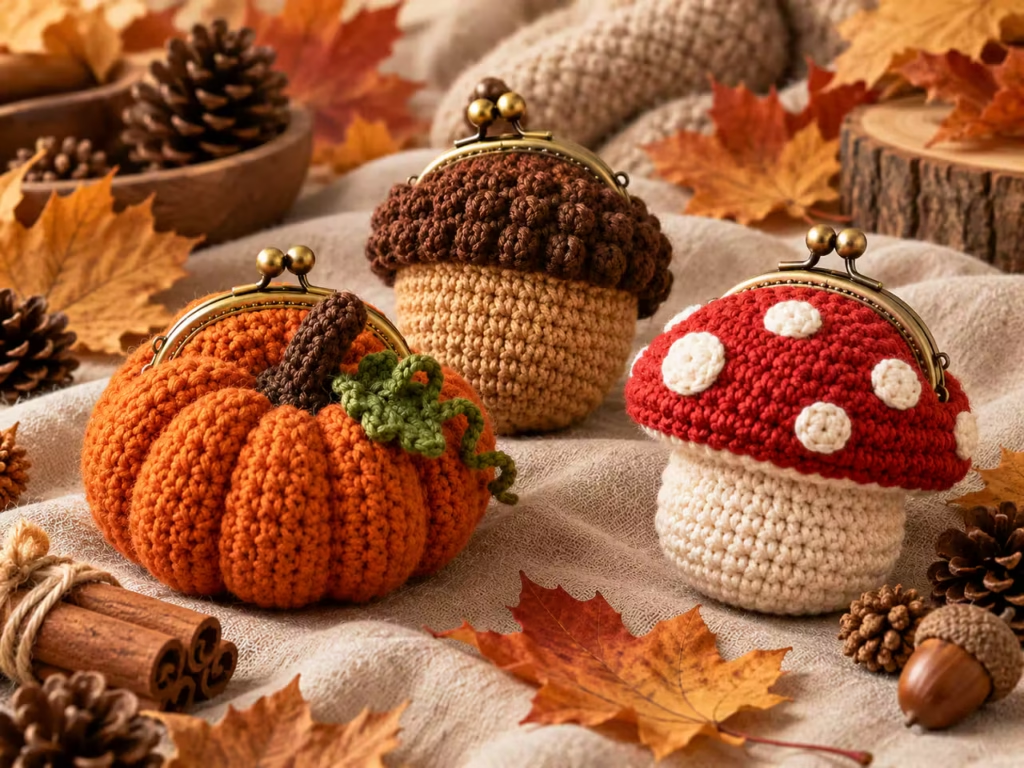
Cut several lengths of matching orange yarn, each comfortably longer than the finished pouch height. Thread one strand into a tapestry needle.
Starting near the lower edge, pass the needle through selected stitches along a vertical line toward the top. Use long surface stitches or a simple running-stitch method that catches the outer crochet fabric.
Repeat at approximately equal intervals around the pouch. Six decorative rib lines are a reasonable starting design, but their spacing and tension are artistic choices rather than fixed structural measurements.
Pull each line only enough to create a shallow groove. Tie off and hide ends securely inside the crochet fabric.
Visual check: The ribs should be visible without making the opening collapse.
Common error: Pulling too tightly distorts the pouch and reduces usable interior space.
Solution: Release the tension before securing the yarn, then reshape the body by hand.
Expert tip: Slightly irregular groove depth can produce a more organic pumpkin look, but preserve an even, functional opening.
Step 6: Add a Decorative Stem
Create a short brown stem using a simple crocheted tube.
Round 1: Work 6 SC into a magic ring. [6]
Rounds 2–4: Work 1 SC into every stitch. [6 per round]
Fasten off, leaving a sewing tail. Flatten the small tube gently and secure it near the upper edge, away from the eyelets and the cord’s moving path.
If desired, add a tiny green leaf using a short foundation chain and simple single crochet stitches. The stem is decorative, not a handle. Do not pull or carry the purse by it.
Visual check: The stem stands slightly above the pouch without interfering with closure.
Common error: Placing the stem directly over a drawstring opening prevents the cord from moving smoothly.
Solution: Position and pin the stem before sewing it permanently.
Expert tip: Sew through several body stitches to distribute the load rather than attaching the stem to a single loose loop.
Step 7: Secure the Finishing Details
Turn the pouch inside out. Weave yarn ends through several stitches, change direction, and continue through another short section before trimming. Avoid relying on a single knot to secure a tail in slippery yarn.
Inspect the inside for loose strands that could catch on coins. If you are adding a fabric lining, complete and install it before the final finishing inspection.
Visual check: The interior should feel smooth, with no long loose tails.
Common error: Cutting yarn tails immediately after fastening off allows ends to work loose.
Solution: Weave them securely before trimming.
Expert tip: Use a yarn needle sized closely to the yarn thickness to avoid stretching individual stitches.
Construction and Stitch Diagrams
The following diagrams show the construction sequence and stitch logic. They are schematic, not scaled illustrations.
Diagram 1: Bottom-Up Pouch Construction
ROUND 1 Magic ring: 6 SC | v ROUNDS 2–8 Six increases per round 12 → 18 → 24 → 30 → 36 → 42 → 48 | v ROUND 9 48 SC in back loops only | v ROUNDS 10–23 48 SC per round Build straight sides | v ROUND 24 16 drawstring eyelets | v ROUNDS 25–26 48 SC per round Reinforce opening | v FINISH Thread cord, embellish, secure ends, inspect
Diagram 2: Drawstring Eyelet Repeat
Previous round: 48 stitches
Repeat section: SC | SC | CH 1 + SKIP 1
Consumes: 3 previous stitches Produces: 2 SC + 1 chain space
48 ÷ 3 = 16 repeats
Total openings = 16
Next round: SC into each SC and chain space Final stitch count = 48
The count remains consistent because each skipped stitch is replaced by one chain space.
Diagram 3: Pumpkin Rib Placement
Suggested exterior rib sequence:
Rib A → Rib B → Rib C ↓ ↓ ↓ Lower edge of pouch ↑ ↑ ↑ Rib F ← Rib E ← Rib D
Work six approximately evenly spaced vertical decorative lines. This diagram indicates the number and distribution of decorative rib lines, not exact needle entry points. The correct placement must be checked directly on the finished crochet fabric.
Making Acorn and Mushroom Pouches
Once you understand the pumpkin construction, you can change its appearance without learning an entirely new base pattern.
Step 1 — Acorn Pouch Adaptation
Use golden brown or caramel yarn for the base and lower body.
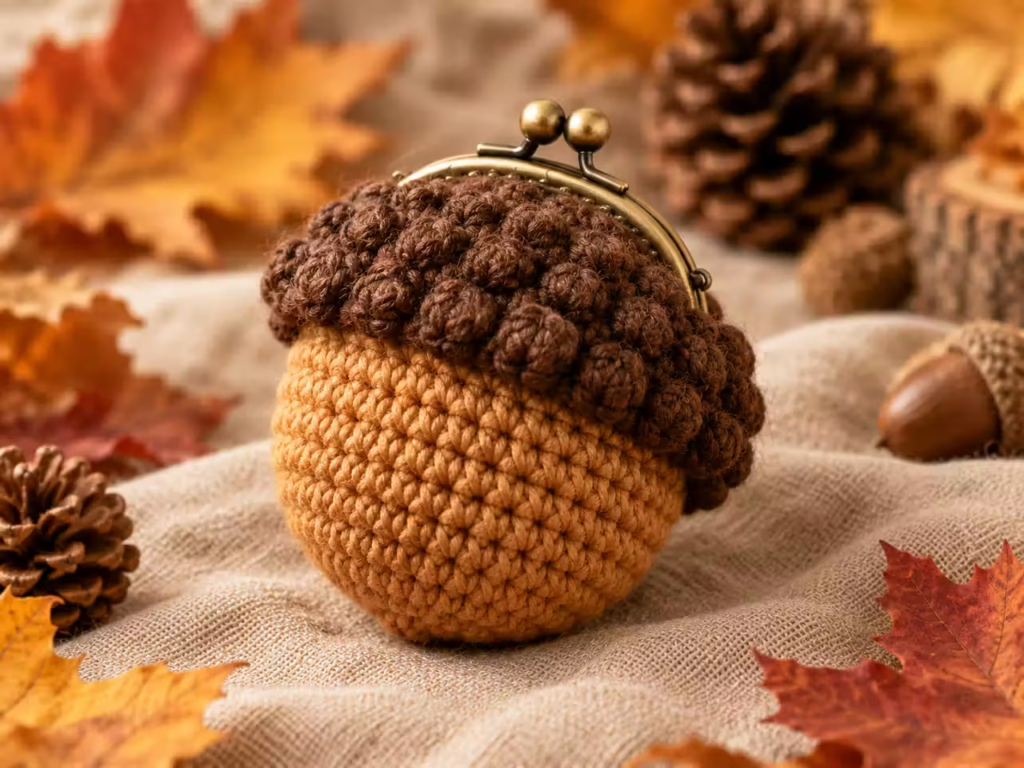
Follow the pumpkin pattern through Round 19. Switch to dark brown for Rounds 20–26, including the eyelet round. This creates a contrasting cap band around the top.
For a more textured acorn cap, add shallow surface embroidery across the brown section using short diagonal stitches. Keep embroidery away from the functional eyelets. Attach a short brown stem beside the upper opening.
The result is an acorn-inspired cylindrical coin purse rather than a sculpted, tapered acorn. For a more anatomically shaped version, you would need a separately graded pattern with verified decreases and finished dimensions.
Step 2 — Mushroom Pouch Adaptation
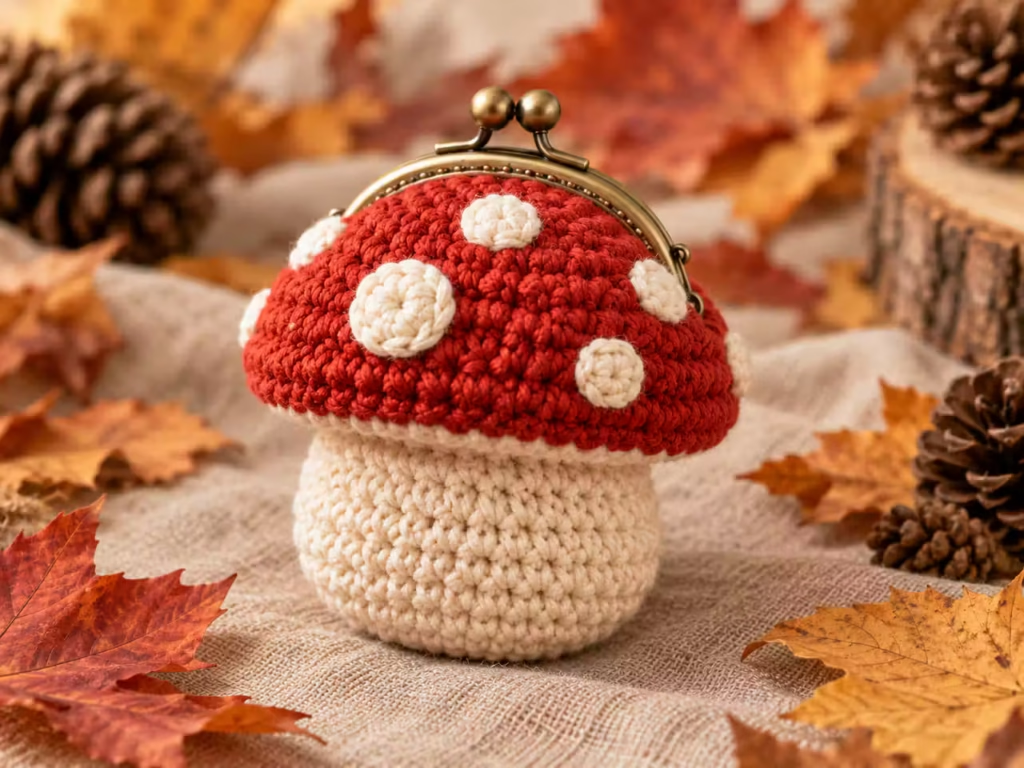
Use cream yarn for Rounds 1–18. Switch to red, burgundy, pink, or cocoa for Rounds 19–26. The upper colored section represents the mushroom cap.
Add small cream-colored embroidered spots to the upper band, avoiding the drawstring channel. For rounder spots, crochet tiny circles separately and sew them onto the fabric. A simple spot can begin with six single crochets in a magic ring. Close the circle and leave a long tail for sewing.
Use small stitches around its perimeter to attach it securely. For a true overhanging mushroom cap, a separate shaped cap component is needed. The color-blocked version presented here is a simpler, functional interpretation. These two adaptations retain the same 48-stitch opening and 16-eyelet construction as the pumpkin pouch.
Beginner-to-Pro Finishing Techniques
A well-finished crochet coin purse should feel sturdy, open smoothly, and hold its shape without excessive stretching.
Beginner: Focus on Even Tension
Your first goal is consistent single crochet stitches. Avoid repeatedly switching hooks or drastically changing the way you hold the yarn. Count stitches, inspect the base, and finish one complete pouch before attempting more elaborate shaping.
Intermediate: Add a Fabric Lining
A sewn cotton lining can make a substantial difference to how the pouch functions. The lining helps prevent small coins from pressing between crochet stitches. Measure the finished interior rather than assuming a standard lining size.
Cut fabric to fit the measured circumference and depth, allowing for seam allowances. Sew the side seam and bottom securely, then insert the lining with its wrong side facing the crochet. Turn the upper fabric edge under and hand-stitch it to the interior, below the eyelet channel. Avoid stitching through the drawstring openings.
Advanced: Install a Zipper
A zipper is a stronger choice for someone who plans to carry coins in a crowded handbag. Choose the zipper length based on the actual finished opening. Hand-stitch the zipper tape evenly around the top edge, keeping the crochet stitches from stretching.
For a clean result, attach the zipper to a fabric lining first, then sew the lining assembly into the crocheted body. A zipper changes the opening construction, so the drawstring eyelet rounds can be omitted or replaced with a suitable plain edging in a zipper-specific version.
Choosing the Best Closure
| Closure | Best for | Advantages | Limitations | Recommendation |
|---|---|---|---|---|
| Crocheted drawstring | Decorative everyday pouch | Simple, adjustable | May leave small gaps | Best beginner option |
| Braided cotton cord | Rustic woodland style | Flexible, strong feel | Ends need secure finishing | Good for acorns |
| Zipper | Frequent coin carrying | More secure when fully closed | Requires sewing | Best for a functional wallet |
| Button and flap | Larger accessory pouch | Easy visual detail | Can leave side openings | Better for larger items |
| Snap closure | Compact structured pouch | Quick access | Requires reinforced attachment | Suitable for lined designs |
A drawstring is an attractive and practical closure, but it is not completely spillproof. For very small coins or frequently carried valuables, choose a lining and a more secure opening.
Measurement and Sizing Verification
<!– gap –>
A pouch can have the correct stitch count and still finish larger or smaller than expected because gauge varies. The 48-stitch design provides a convenient opportunity to calculate your expected circumference. Suppose your measured gauge is 20 single crochet stitches across 4 inches.
Then:
Stitches per inch = 20 ÷ 4 = 5
Estimated circumference = 48 ÷ 5 = 9.6 inches
Estimated diameter = 9.6 ÷ 3.1416 ≈ 3.1 inches
This is an illustrative calculation, not a physically verified finished measurement. Crochet fabric can change size when stretched, gathered, lined, or shaped.
To verify your own pouch:
- Make a small swatch using the same yarn and hook.
- Measure the number of stitches across a central 4-inch section without stretching.
- Calculate stitches per inch.
- Divide 48 by that gauge to estimate the body circumference.
- Measure the actual pouch before making the lining or cord.
If your pouch is too wide, use a smaller hook or revise the base stitch count with a compatible increase sequence. Do not remove random stitches from later rounds, because this can distort the shape.
Durability and Professional Quality Control
<!– gap –>
Small purses receive more wear than their size suggests. Coins create concentrated pressure against the lower fabric, while repeated pulling on a drawstring stresses the upper edge.
Reinforce High-Wear Areas
Use a tight, even stitch structure for the bottom. Avoid oversized holes in the fabric.
For a purse that will be carried daily, line the inside with woven cotton and reinforce the attachment points around the upper opening. Do not sew the lining so tightly that it pulls the exterior out of shape.
Protect Decorative Pieces
Leaves, mushroom dots, and stems should be sewn on securely. Work through multiple crochet stitches rather than a single loop.
Check that embroidery doesn’t create long floating threads inside the pouch. For baby or toddler items, avoid detachable beads, buttons, and small decorative components. This coin purse is not a toy, and coins themselves are choking hazards.
Test the Closure
Place several coins inside. Close the pouch, turn it gently in different directions over a table, and inspect for slipping contents. If coins escape through the fabric or opening, add a suitable lining or replace the closure design.
Yarn Efficiency, Storage, and Care
<!– gap –>
Autumn crochet coin purses are useful small projects for leftover yarn, especially when your scraps have similar thickness and washability. For a coordinated set, divide your available yarn into three groups: main colors, contrast colors, and embroidery scraps.
Use larger leftovers for the pouch bodies and smaller amounts for stems, leaves, spots, and cords. Avoid mixing yarns with sharply different elasticity in one structural round. This can cause uneven tension and distort the shape.
How to Wash Your Pouch
Check the care instructions for every yarn and lining fabric used. When uncertain, gently hand-wash a sample before washing the completed purse. Empty the pouch, remove loose debris, and use cool water with a mild detergent suitable for the fibers.
Gently squeeze out moisture without twisting. Reshape the pouch and dry it flat. Cotton may relax after washing, so allow the purse to dry completely before evaluating its finished shape. Store seasonal pouches clean and dry, away from moisture and prolonged direct sunlight.
Troubleshooting Common Crochet Coin Purse Problems
| Symptom | Likely cause | Practical fix | Prevention |
|---|---|---|---|
| Base curls before side construction | Missing increases or overly tight center | Recount and redo incorrect round | Check all six increases |
| Base becomes wavy | Extra increases or inconsistent gauge | Remove excess stitches | Mark rounds carefully |
| Sides expand unexpectedly | Accidental increase | Correct first affected round | Maintain 48 stitches |
| Visible spaces between stitches | Hook too large or loose tension | Use smaller hook if comfortable | Make a firm gauge swatch |
| Eyelets are uneven | Incorrect skip sequence | Redo Round 24 | Repeat exact three-stitch grouping |
| Drawstring catches | Cord too bulky or eyelets obstructed | Use slimmer cord or clear obstruction | Test before decorating |
| Pumpkin ribs distort body | Surface yarn too tight | Loosen and reposition decorative stitches | Shape gradually |
| Acorn cap appears crooked | Uneven color transition or tension | Rework affected rounds | Change color at marked round |
| Mushroom spots pull fabric | Embroidery too tight | Relax attachment stitches | Sew with gentle tension |
| Lining bunches inside | Incorrect measurements | Resize fabric insert | Measure completed body |
| Coins slip through | Fabric gaps or incomplete closure | Add lining and secure closure | Test with actual contents |
Most shaping issues are easier to correct early. If your base is already distorted at Round 5, fix it there rather than relying on later rounds to hide the problem.
Styling Your Finished Autumn Pouches
The most attractive woodland collections share a consistent color story without making every piece identical. Pair one vibrant pumpkin pouch with a neutral cream mushroom and a rich chocolate acorn.
You can also group designs by theme:
- Harvest collection: Burnt orange, golden yellow, cinnamon, and caramel.
- Forest collection: Moss green, walnut brown, burgundy, and oatmeal.
- Soft cottage collection: Warm ivory, muted rose, taupe, and sage.
- Classic toadstool collection: Cherry red, cream, dark brown, and forest green.
Use the same crochet yarn weight and similar finishing methods across a set to create a balanced appearance. For everyday carrying, choose sturdier pieces with lining and reliable closures. For seasonal decorative storage, the simpler unlined versions may be sufficient.
Final Quality Checklist
Before calling your pouch complete, check its construction and function.
Essential Checks
- [ ] The base has 48 stitches after Round 8.
- [ ] The straight body rounds maintain 48 stitches.
- [ ] The eyelet round contains 16 openings.
- [ ] The drawstring moves freely through every opening.
- [ ] The opening closes evenly without severe distortion.
- [ ] Yarn tails are securely woven in.
- [ ] The interior has no long loose strands.
- [ ] Decorative parts are firmly attached.
- [ ] The finished pouch holds its intended contents during a gentle handling test.
Acceptable Variations
Slight differences in pumpkin rib depth, decorative spot placement, stem angle, and finished size are normal in handmade work. These do not require correction unless they affect the purse’s function.
Mistakes Worth Correcting
An uneven color transition, loose decorative element, or poorly positioned stem can usually be fixed without remaking the entire project.
Problems That Require Reworking
A hole in the base, a seriously miscounted eyelet round, or a structural seam that opens under gentle handling should be repaired before use. Functional strength matters more than decorative perfection.
Frequently asked questions
1. What is the best yarn for a crochet coin purse?
Worsted-weight cotton is a practical starting choice because it gives defined stitches and can produce a relatively firm fabric when crocheted at a tight gauge. Cotton blends also work, although stretch and washing behavior may differ. For a purse that will hold loose coins, prioritize dense fabric and a secure closure over softness alone.
2. Can beginners make a pumpkin crochet coin purse?
Yes. The basic pumpkin pouch uses single crochet, simple increases, a back-loop transition, and a drawstring channel. A beginner should practice a flat circle before starting and count stitches after each increase round. The pumpkin ribs and stem are decorative, so you can make a plain pouch first and add those details later.
3. How long does it take to crochet a small coin purse?
The time depends on your crochet speed, the chosen yarn, and the number of finishing details. A plain pouch involves fewer operations than one with a lining, embroidery, and several decorative pieces. Rather than using an unverified completion-time estimate, record the time for your first purse and use it to plan a matching set.
4. How can I keep coins from falling through crochet stitches?
Use a sufficiently small hook to produce compact stitches without large openings. A sewn woven-cotton lining provides another barrier between coins and the crochet fabric. The closure matters too: even a tightly crocheted purse can lose contents through a loosely gathered opening. Test the finished pouch with the coins you actually intend to carry.
5. What is the easiest way to make an acorn crochet pouch?
Start with the same circular base and cylindrical body used for a pumpkin purse. Work the lower section in caramel or golden brown, then switch to darker brown for the upper cap band. Add a small decorative stem and surface texture to suggest an acorn cap. This approach is simpler than crocheting a fully tapered acorn shape.
6. How do I attach mushroom spots securely?
Embroider spots directly onto the pouch or crochet small flat circles and sew them in place. Use secure stitches around each applique’s perimeter and weave the yarn ends into the interior fabric. Keep spots away from drawstring eyelets. For accessories intended for children, avoid beads and other easily detached decorations.
7. Can I resize the crochet coin purse?
Yes, but changes to the base affect the entire pattern. For a wider pouch, continue the standard six-increase sequence for additional rounds, then use the new stitch count consistently through the body. Adjust the eyelet repeat so it divides evenly into the new circumference. Make a gauge swatch to estimate finished size before proceeding.
8. Are crochet coin purses good projects for using scrap yarn?
They can be excellent scrap-yarn projects because the main body is small and decorative elements require only short lengths of yarn. Choose scraps of similar thickness for the structural sections. Different weights or highly elastic yarns can produce uneven shaping. Smaller leftovers are especially useful for embroidered mushrooms, pumpkin stems, and acorn cap details.
Create Your Own Cozy Autumn Crochet Collection
Start with one burnt orange pumpkin pouch and focus on getting the base, sides, and drawstring channel correct. Check the stitch counts, weave in every end, and test the closure with your intended contents.
Once that first pouch works smoothly, make a second version in golden brown with a contrasting acorn cap. Then try the cream-and-red mushroom adaptation to complete a coordinated woodland trio. The same foundation can support many of the 15 cozy autumn crochet coin purse ideas in this collection without requiring you to relearn the construction.
Save this tutorial for your next autumn crochet session, especially the stitch-count table, drawstring diagram, and troubleshooting checklist. For a related follow-up project, try making a matching crochet leaf keychain or a small lined accessory pouch using the same autumn color palette.
Pin “15 Cozy Autumn Crochet Coin Purse Ideas: Pumpkin, Acorn & Mushroom Pouches” so you can find it when the yarn arrives.
Get the next free pattern first
One email a week. New patterns, no noise.
Yarn weights and hook sizes in this guide follow the Craft Yarn Council standards.
Keep going: Black and Red Crochet Blanket: Stunning Gothic Chevron Pattern · Crochet Color Blanket Ideas for Soft, Balanced Texture · Crochet Baby Sneakers Pattern: Easy High-Top Booties





