
Crochet Baby Sneakers Pattern: Easy High-Top Booties
Crochet baby: The secret to miniature sneakers is not complicated stitching. It is firm, even tension, careful shaping, and a flexible sole that follows…

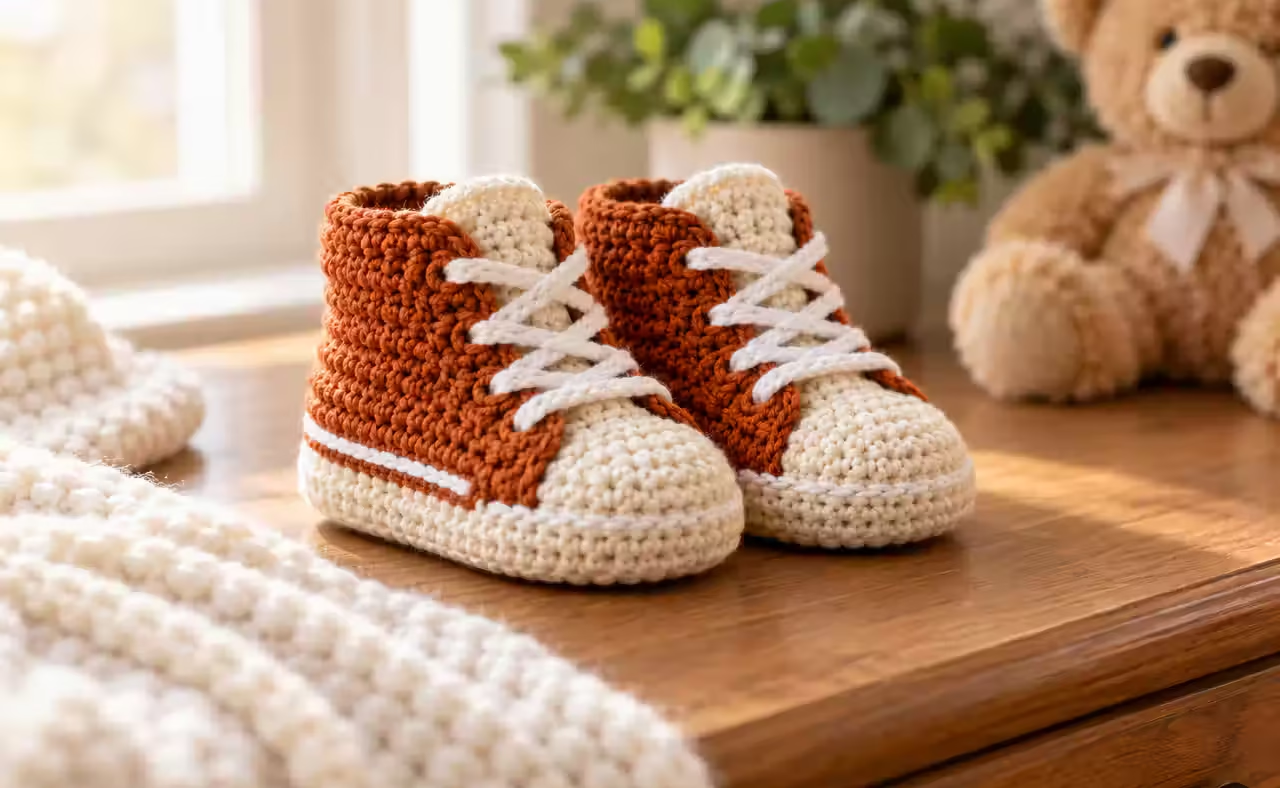
The secret to miniature sneakers is not complicated stitching. It is firm, even tension, careful shaping, and a flexible sole that follows the baby’s foot. Choose smooth, machine-washable yarn that makes each stitch easy to identify.
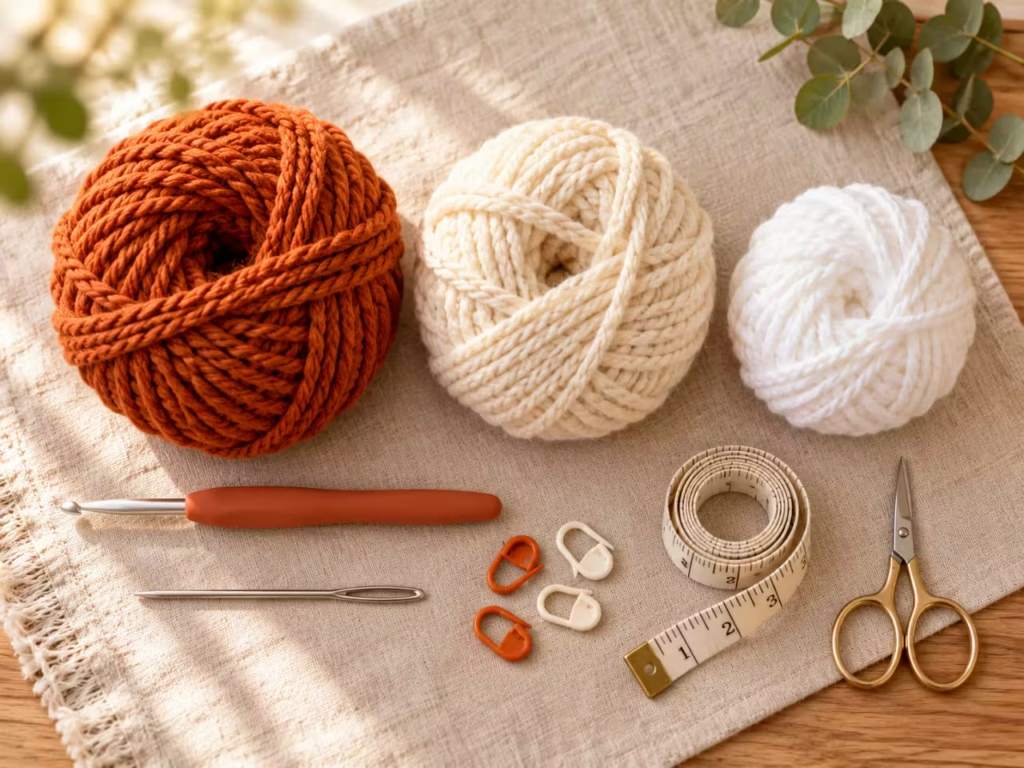
| Material | Quantity | Why Use It | Budget Alternative |
|---|---|---|---|
| DK-weight baby yarn | Approx. 60–90 yd total (estimate) | Soft, lightweight fabric | Leftover soft DK yarn |
| Main color yarn | Majority of total yarn | Forms the sneaker body | Cotton-acrylic blend |
| White yarn | Small amount | Sole edging and lace details | Soft yarn scraps |
| 3.5 mm crochet hook | 1 | Creates compact stitches | Hook needed to match gauge |
| Stitch markers | 2–4 | Track rounds and toe center | Short contrasting yarn strands |
| Yarn needle | 1 | Embroidery and finishing | Blunt tapestry needle |
| Scissors | 1 | Cut yarn neatly | Any clean craft scissors |
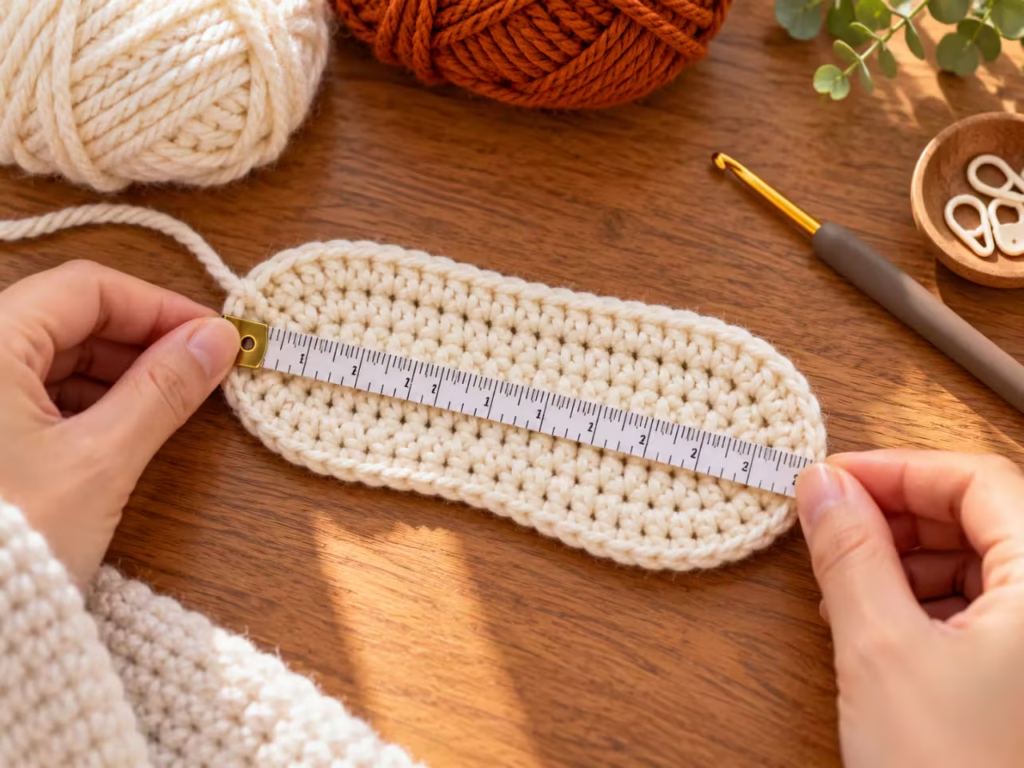
| Measuring tape | 1 | Check sole dimensions | Printable ruler verified at scale |
| Abbreviation | Meaning |
|---|---|
| ch | Chain |
| sc | Single crochet |
| sl st | Slip stitch |
| st/sts | Stitch/stitches |
| inc | Two single crochets in one stitch |
| sc2tog | Single crochet two stitches together |
| BLO | Back loop only |
| RS | Right side |
| WS | Wrong side |
Crochet Baby Sneakers Pattern
These basketball-inspired baby shoes start with an oval foundation rather than separate flat panels.
You build the sole first, crochet the upper directly onto it, reduce stitches around the toe, and finish with a small ankle cuff and decorative tongue. The result is a soft sneaker-shaped bootie rather than a rigid shoe.
Step 1 — Understand the Construction
Each bootie follows five stages:
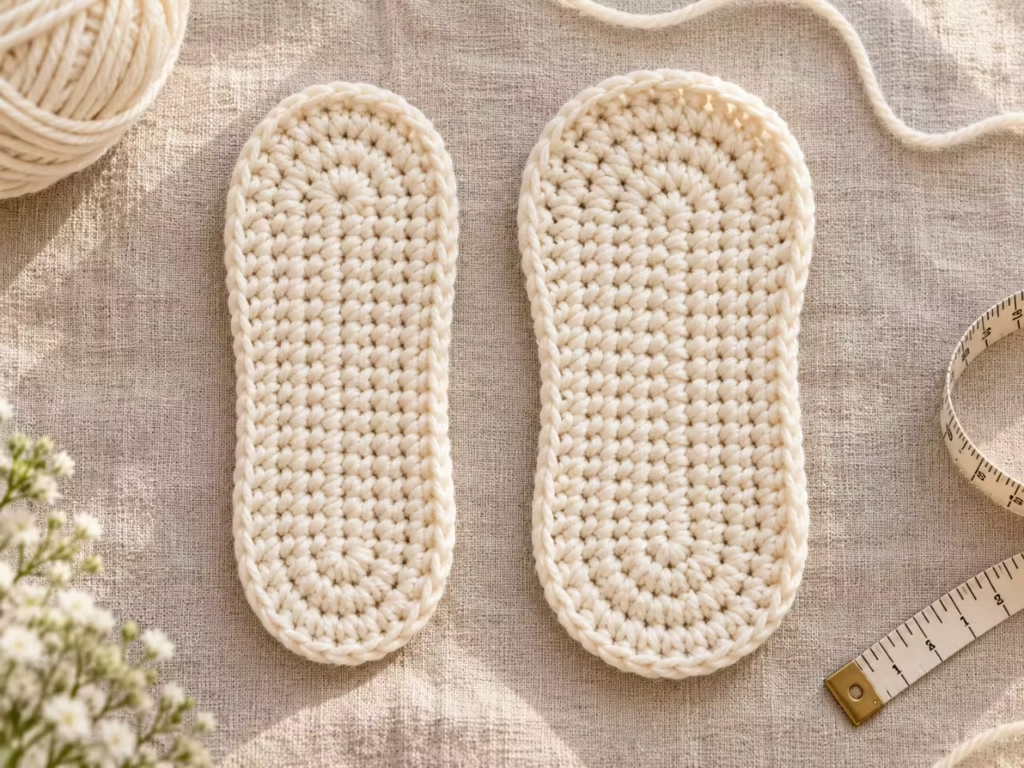
- Crochet an oval sole.
- Raise the sidewalls.
- Shape the rounded toe.
- Make the high-top cuff and tongue.
- Add sneaker-style decorative stitching.
The two booties use the same instructions. Their orientation becomes left or right when you position the tongue and decorative details.
Step-by-Step Sole Instructions
The pattern below uses joined rounds and a continuous oval foundation. For every joined round, the slip stitch and beginning chain do not count as stitches.
Step 1: Crochet the Foundation Chain
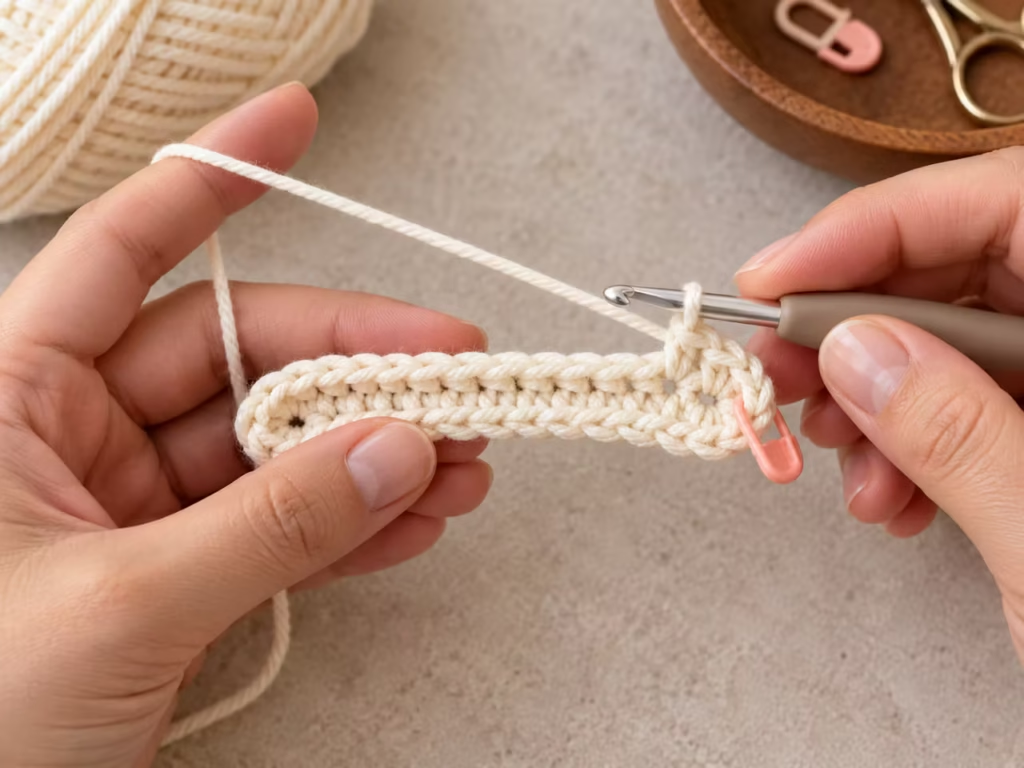
Using your sole color, make ch 11.
Work 2 sc in the second chain from the hook. Work 1 sc in each of the next 8 chains. Work 4 sc in the final chain.
Rotate the foundation so you can work along the opposite side. Work 1 sc in the next 8 unused chain loops. Finally, work 2 sc into the opposite side of the chain where you made the first 2 sc. Join with a sl st to the first sc.
Round 1 total: 24 stitches.
Visual check: You should see a narrow oval, with additional stitches around both rounded ends.
Avoid this mistake: Do not add an extra stitch into the turning area. The full round contains exactly 24 single crochet stitches.
Step 2: Expand the Oval Sole
Round 2
- Work 2 sc in each of the first 2 stitches.
- Sc in the next 8 stitches.
- Work 2 sc in each of the next 4 stitches.
- Sc in the next 8 stitches.
- Work 2 sc in each of the last 2 stitches.
- Join with a sl st.
Total: 32 stitches.
Round 3
- (Sc in next st, inc in next st) twice.
- Sc in next 8 sts.
- (Sc in next st, inc in next st) four times.
- Sc in next 8 sts.
- (Sc in next st, inc in next st) twice.
- Join with a sl st.
Total: 40 stitches.
The increase math is 24 → 32 → 40. Each expansion adds exactly eight stitches.
Visual check: Your work should resemble a smooth elongated oval with one rounded end slightly fuller than the other.
Avoid this mistake: If the sole becomes noticeably wavy, inspect the increase count before changing hook size.
Step 3: Check Your Sole Size
<!– gap –>
Measure the completed sole from the furthest heel point to the furthest toe point. Compare that number with the baby’s actual foot length. For a comfortable soft bootie, a reasonable starting allowance is approximately 1/4 inch beyond the foot length, but the correct fit also depends on yarn stretch and foot width.
If the sole is too small, do not simply add extra rounds. That would change the stitch counts needed for the upper. Instead, adjust your yarn or hook and remake the sole, keeping all 40 stitches. If you cannot obtain a suitable length and width with this construction, the pattern requires a separately recalculated size rather than improvised additional increases.
Shape the Toe and High-Top Upper
Step 4: Raise the Sneaker Sides
Change to the main sneaker color.
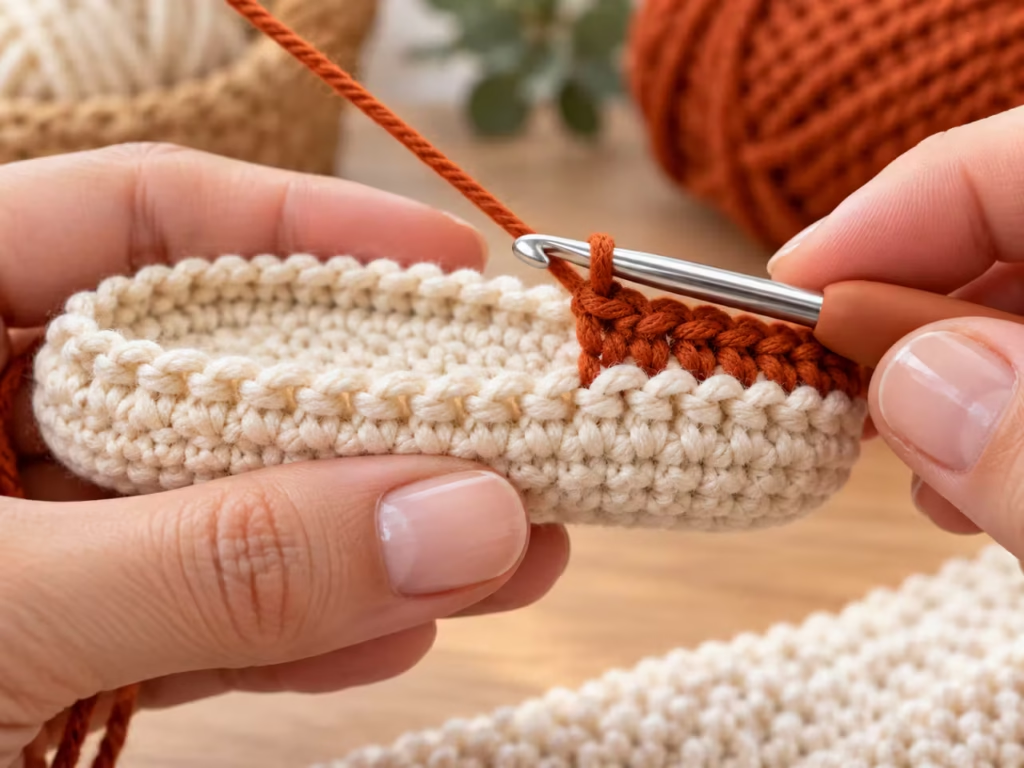
Round 4: Ch 1, sc BLO in every stitch around. Join. (40 sts)
Round 5: Ch 1, sc in each stitch around. Join. (40 sts)
Round 6: Repeat Round 5. (40 sts)
The BLO round creates the visible bend between the sole and the upper.
Visual check: The sides should rise from the base, forming a shallow oval bowl.
Avoid this mistake: Working through both loops in Round 4 will soften the sole-to-upper definition. It will not destroy the bootie, but the sneaker shape will be less pronounced.
Step 5: Form the Rounded Toe
You now reduce stitches across the fuller end of the oval.
Round 7
Ch 1.
Sc in the next 12 stitches.
Work sc2tog eight times across the following 16 stitches.
Sc in the final 12 stitches.
Join.
Total: 32 stitches.
Round 8
Ch 1.
Sc in the next 12 stitches.
Work sc2tog four times across the following 8 stitches.
Sc in the final 12 stitches.
Join.
Total: 28 stitches.
Round 9
Ch 1, sc in every stitch around. Join. (28 sts)
Fasten off.
Visual check: A gently rounded toe should curve upward while the back remains comparatively open.
Avoid this mistake: Always complete each sc2tog over two separate existing stitches. Skipping stitches instead of decreasing them creates unwanted holes.
Step 6: Crochet the High-Top Cuff
The cuff needs a front opening so it can sit around the baby’s ankle without forming a tight closed tube. Locate the four toe-center stitches created by the decreases in Round 8. After Round 9, these correspond to stitches 13–16, counted from the round marker.
Mark the center eight stitches, numbered 11–18. These will remain open for the tongue. Attach the main color yarn to stitch 19 of Round 9.
Cuff Row 1: Ch 1, sc in stitches 19–28, then continue into stitches 1–10. Turn. (20 sts)
Cuff Rows 2–5: Ch 1, sc across all 20 stitches. Turn. (20 sts)
Fasten off.
The cuff now wraps around the heel and sides, leaving an eight-stitch opening over the front of the ankle.
Visual check: Both cuff edges should be approximately the same height, with a centered front gap.
Avoid this mistake: Do not accidentally work across the eight stitches reserved for the tongue. Closing the opening makes the bootie harder to put on.
Make the Tongue and Sneaker Details
Step 7: Crochet the Tongue
Join the main color or contrasting yarn into stitch 11 of Round 9.
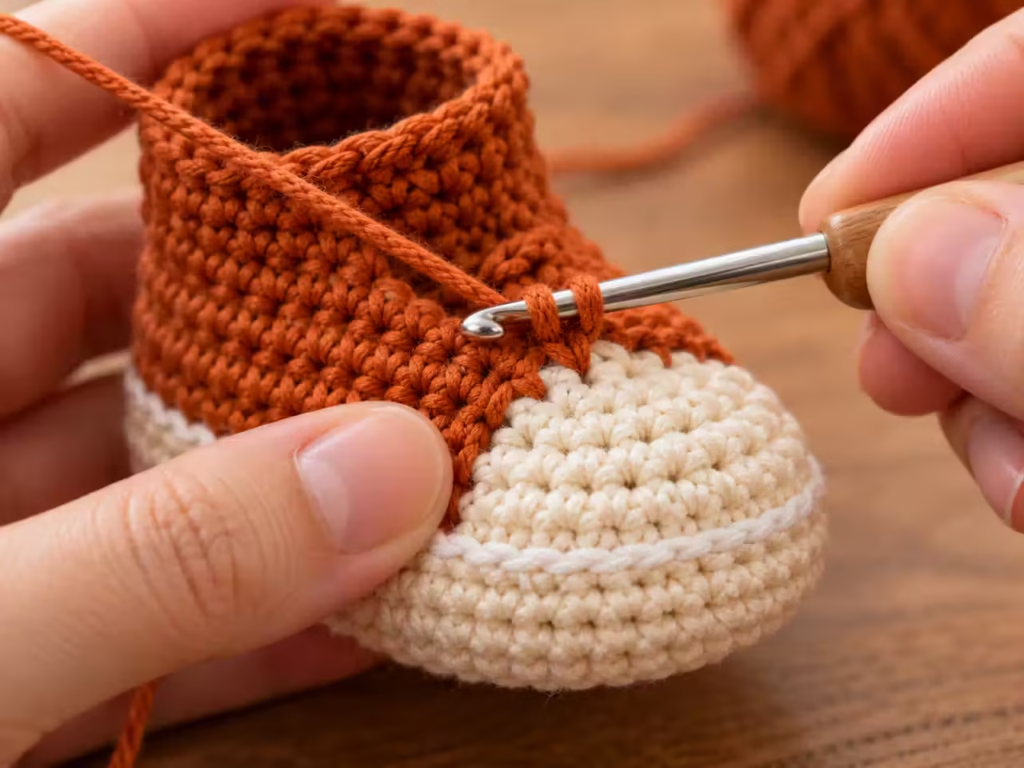
Working across the eight reserved stitches:
Tongue Row 1: Ch 1, sc in each of the eight stitches. Turn. (8 sts)
Tongue Rows 2–5: Ch 1, sc across. Turn. (8 sts)
Fasten off, leaving a tail for secure finishing. The tongue should sit inside the front cuff opening. If it curls, gently flatten it by hand. A light block appropriate to your yarn can improve its shape.
Visual check: The tongue should be centered over the toe and should not pull either side of the cuff inward.
Avoid this mistake: Do not sew the tongue tightly to both sides of the cuff. The opening must remain flexible.
Step 8: Add the White Sneaker Sole Detail
Using white yarn and a yarn needle, add a line of decorative surface stitching around the outer lower edge. Follow the transition between the foundation sole and the first upright sidewall round. Small, evenly spaced backstitches can suggest the rubber foxing found on classic basketball sneakers.
Keep the embroidery relaxed enough that the sole remains flexible. For a cleaner appearance, finish the yarn ends inside the bootie, then check that no rough knots press against the baby’s foot.
Step 9: Embroider the Shoelaces
<!– gap –>
Loose functional shoelaces are unnecessary for soft infant booties. Embroidered crisscross lines offer the same sporty appearance without long dangling cords. Thread a blunt needle with white yarn. Work three small X-shaped crosses across the tongue, catching a few stitches at each side of the opening.
Keep each crossing centered and approximately parallel to the others. Secure every yarn end by weaving it through several interior stitches, changing direction, and trimming the excess. Do not add loose bows, plastic eyelets, beads, buttons, or detachable decorations.
Visual check: The embroidered laces should form three tidy crossings without tightly drawing the tongue inward.
Avoid this mistake: Pulling the white yarn too tightly narrows the opening and may make the cuff uncomfortable.
Step 10: Finish the Second Bootie
Repeat the same construction for the second shoe.
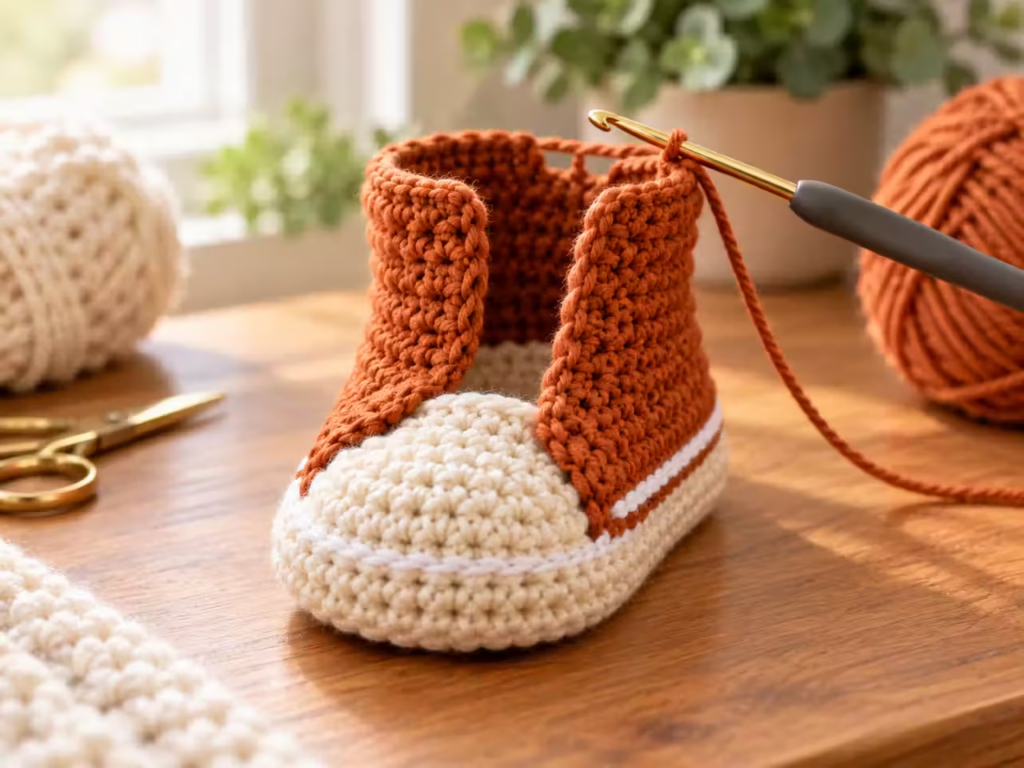
Use identical yarn, hook size, tension, and row counts. Lay both completed booties side by side. Compare their sole lengths, toe heights, and cuff openings. Small differences are common in handmade work, but noticeable size differences usually indicate inconsistent tension or a missed stitch.
Getting the Right Newborn Fit
<!– gap –>
Age labels are convenient, but foot measurements are more useful. Two babies of the same age may need very different bootie lengths.
Measure Before Crocheting
Place the baby’s foot gently against a piece of paper while it is relaxed. Mark the heel and the longest toe. Measure the distance and repeat for the other foot. Use the larger measurement as your starting point.
| Fit Check | What to Look For | Recommended Action |
|---|---|---|
| Length | Room beyond the toes | Compare sole against measured foot |
| Width | No squeezing across the forefoot | Check yarn stretch and sole shape |
| Ankle | Cuff sits softly | Avoid tight embroidery |
| Heel | Bootie does not immediately slip off | Confirm heel shape and overall fit |
| Movement | Foot moves naturally | Do not stiffen the sole |
This particular 40-stitch sole should be treated as one size prototype until your gauge and finished dimensions are established. For older infants and toddlers, a new graded pattern is preferable to enlarging only the foundation chain.
Five Common Crochet Sneaker Mistakes
| Symptom | Likely Cause | How to Fix It |
|---|---|---|
| Sole curls excessively | Tension too tight or missed increases | Recount Round 2 and Round 3; adjust hook only if counts are correct |
| Sole becomes wavy | Extra increases or loose tension | Check for 32 and 40 stitches in the correct rounds |
| Toe has large holes | Incorrect sc2tog technique | Work each decrease through two neighboring stitches |
| High-top cuff looks crooked | Front opening positioned off-center | Mark the eight front stitches before starting the cuff |
| One bootie is larger | Different yarn tension or missed rows | Compare gauge, sole size, and cuff row counts |
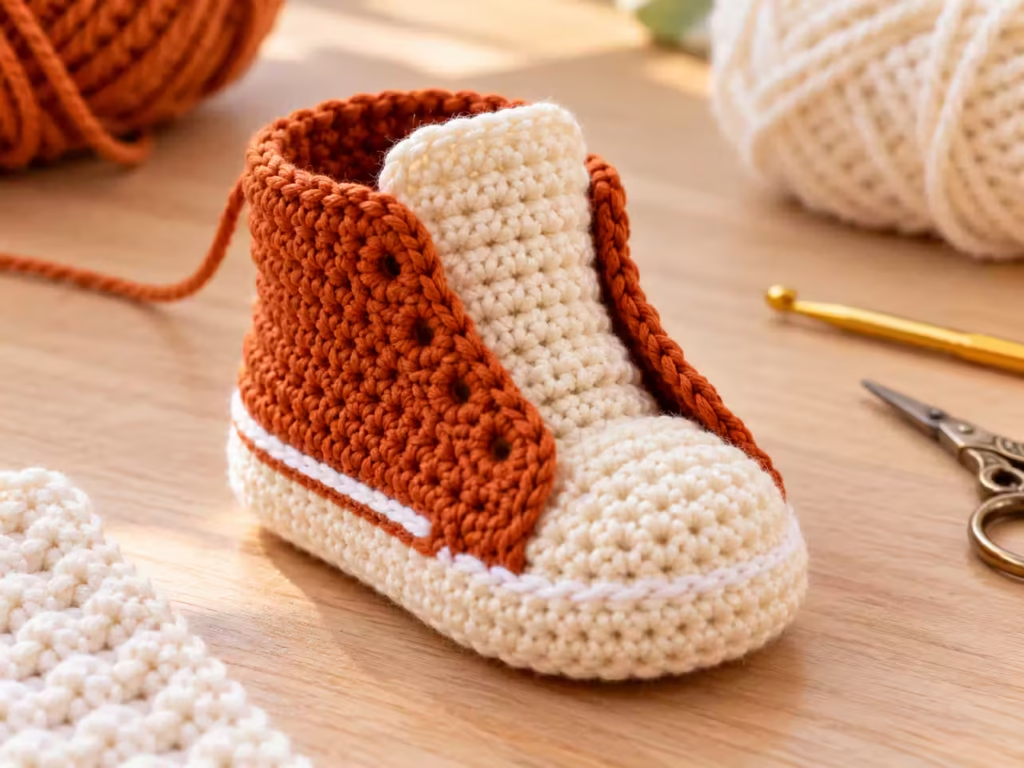
Why Does My Crochet Sneaker Look Like a Regular Bootie?
The sneaker appearance depends on contrast and structure. A visible sole edge, rounded toe, open high-top cuff, small tongue, and embroidered crisscross laces make the biggest difference. If every part uses the same color and the sole edge disappears into the upper, the result will naturally look more like a traditional bootie.
Yarn and Construction Comparisons
Choosing the right yarn and method has a greater effect on the finished appearance than adding extra decoration.
| Option | Main Advantage | Limitation | Recommendation |
|---|---|---|---|
| Soft DK cotton-acrylic | Defined stitches with some softness | Behavior varies by brand | Best starting choice |
| Baby acrylic DK | Lightweight and washable | Can stretch or pill | Good alternative |
| Pure cotton DK | Crisp sneaker structure | Can feel less elastic | Use only if comfortably soft |
| Worsted-weight yarn | Fast fabric buildup | May produce an oversized, bulky bootie | Requires a recalculated pattern |
| Joined rounds | Easy stitch-count checks | Join seam may show | Recommended here |
| Continuous rounds | Smoother appearance | Toe alignment takes more care | Better for adjusted patterns |
| Sewn-on decorative pieces | More design possibilities | Potential detachment risk | Avoid small detachable infant decorations |
Finishing and Baby-Safe Details
<!– gap –>
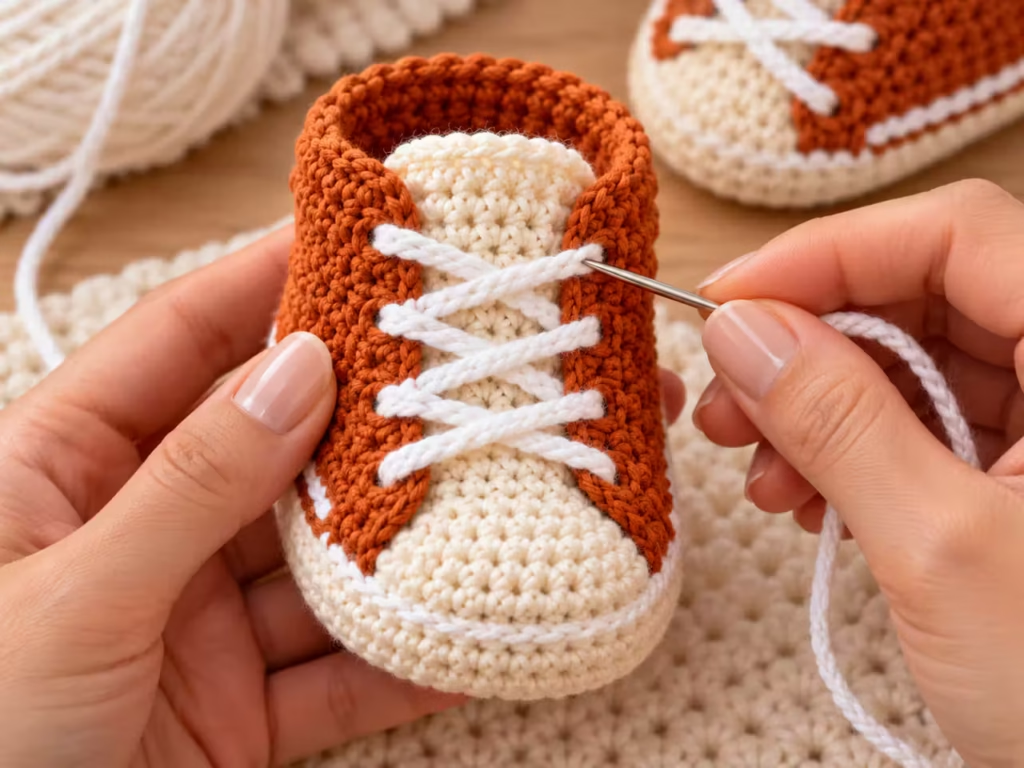
Before gifting the booties, turn each shoe inside out and inspect every finished yarn end. Nothing should hang loose, form a long loop, or create a hard lump against the skin. Gently stretch the cuff to confirm that the embroidered laces have not restricted the opening. Wash and dry the finished pair following the yarn manufacturer’s care instructions.
Crochet baby sneakers are best treated as decorative, supervised wear for nonwalking babies. They are not protective footwear, and handmade yarn soles are not suitable as non-slip walking shoes. Remove the booties before sleep, and keep them out of the crib or other infant sleep space.
How to Package Your Handmade Baby Sneakers
For a thoughtful handmade gift, place the finished pair in a small breathable fabric bag or clean gift box.
Add a care card with the yarn fiber content, washing instructions, and finished sole measurements. Avoid pins, detachable tags, and small ornaments attached directly to the booties. For craft sellers, record the time and actual material usage before setting a price. Do not assume that a small project always takes little labor.
Frequently asked questions
Are crochet baby sneakers beginner-friendly?
Yes, provided you already know how to chain, single crochet, decrease, and work around a foundation chain. The hardest parts are keeping accurate stitch counts in the oval sole and positioning the toe decreases. Make one practice sole before committing to your final yarn colors if oval construction is new to you.
What size crochet hook should I use for baby sneakers?
This pattern starts with a 3.5 mm hook and DK-weight yarn. However, hook size alone does not guarantee newborn sizing. Different crocheters produce different stitch sizes, even with identical materials. Measure your sole after Round 3 and change the hook or yarn if the finished proportions are unsuitable.
How much yarn do I need for newborn crochet baby shoes?
Approximately 60–90 yards total is a preliminary planning estimate for this small project, not a tested consumption figure. The exact amount depends on yarn thickness, stitch tension, decorative details, and finished dimensions. Small coordinated leftovers may be sufficient, but matching the yarn weight and texture matters more than using scraps.
Can I make these baby sneakers in a larger size?
A larger size needs more than a longer starting chain. Increasing the sole length changes the number of stitches around the perimeter, which affects toe decreases, cuff placement, and tongue width. For 6–12 months or toddler sizing, use a separately calculated and tested version rather than extending this pattern without revising the stitch counts.
Can crochet baby sneakers be machine washed?
That depends on the yarn. Many yarns marketed for babies are machine washable, but not all tolerate the same temperature or drying method. Follow the specific yarn label, use a gentle washing process when appropriate, and dry the booties fully. Check the embroidered details and woven-in ends after laundering.
Are crochet sneakers safe for babies learning to walk?
These soft crochet booties are intended for decorative wear, not as first-walker footwear. They do not provide a tested grip or stable walking surface. For a baby beginning to walk, barefoot movement on a safe indoor surface or properly fitted footwear suited to the environment is generally a better choice.
Can I sell baby sneakers made from this pattern?
You may use this original instructional design as a starting point, but selling physical infant products involves additional responsibilities. Test the completed pattern, record materials and sizing, review applicable product-safety requirements, and avoid unsecured decorative parts. A PDF version should include verified measurements, clear photographs, and accurate sizing information rather than promises based solely on age.
Your Next Crochet Project
Make a complete sample pair using the instructions above, then record the actual sole length, cuff opening, yarn used, and any fit adjustments.
Once the pattern has been tested, photograph the finished pair, the sole construction, and the toe-shaping process. Save this tutorial to your crochet inspiration board so you can return to the stitch counts when making matching pairs as handmade baby gifts.
For another beginner-friendly project, explore a simple crochet baby blanket or matching baby hat that uses the same yarn palette.
Pin “Crochet Baby Sneakers Pattern: Easy High-Top Booties” so you can find it when the yarn arrives.
Get the next free pattern first
One email a week. New patterns, no noise.
Yarn weights and hook sizes in this guide follow the Craft Yarn Council standards.
Keep going: Easy Moss Stitch Crochet Blanket Pattern for Beginners · Handmade Crocheted Bag: Make Your Own Custom Everyday Tote · Cute Crochet Baby Booties: Easy Free Pattern for Beginners





