
Crochet Moss Stitch: Easy Free Tutorial for Beginners
Some crochet stitches look complicated until you discover how simple they really are. Crochet moss stitch is one of those wonderful patterns that creates a…

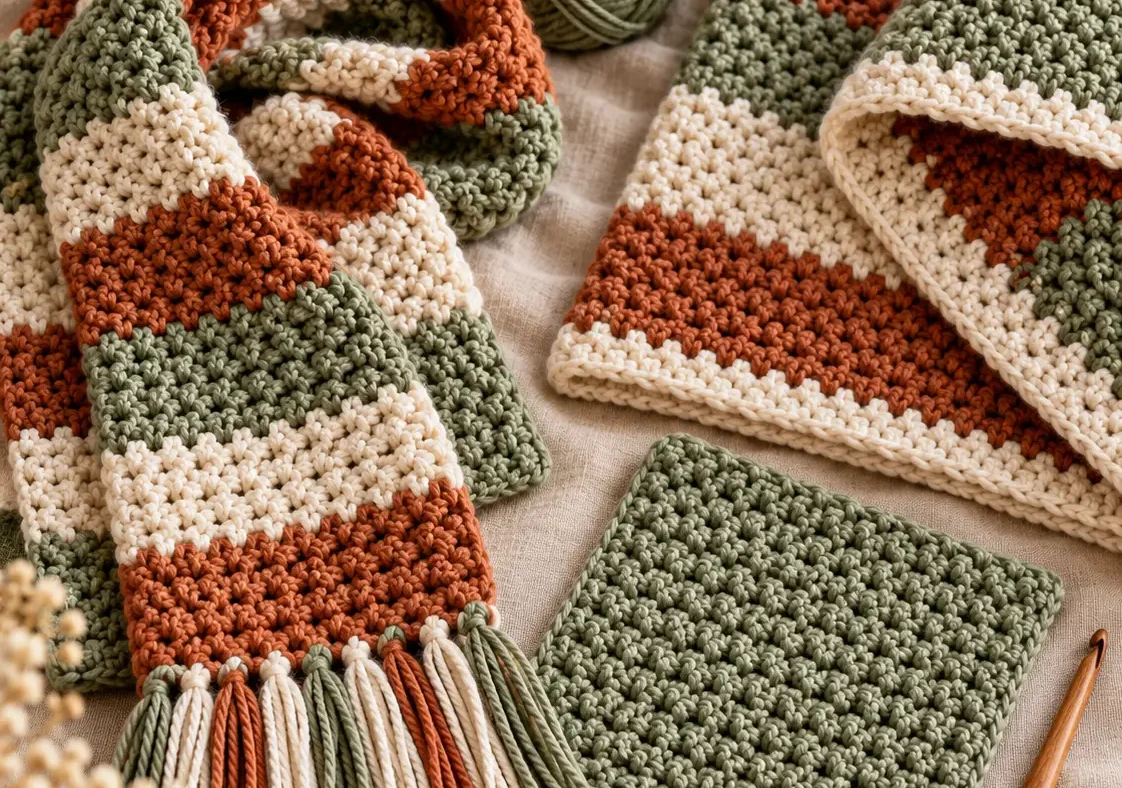
Some crochet stitches look complicated until you discover how simple they really are. Crochet moss stitch is one of those wonderful patterns that creates a beautiful, woven-looking texture using only single crochet stitches and chains. Once you understand where to place your hook, the pattern becomes a relaxing repeat that works beautifully for scarves, blankets, dishcloths, and handmade accessories.
What makes this stitch especially appealing is its balance of simplicity and texture. It doesn’t require complicated stitch combinations, yet the finished fabric looks carefully detailed.
If you’ve already learned how to chain and single crochet, you’re ready to give moss stitch a try. In this guide, you’ll learn how to crochet moss stitch from the beginning, understand the stitch repeat, avoid uneven edges, and turn your new skill into a finished project.
What Is Crochet Moss Stitch?
Moss stitch is a crochet technique that alternates single crochet stitches with chain-one spaces.
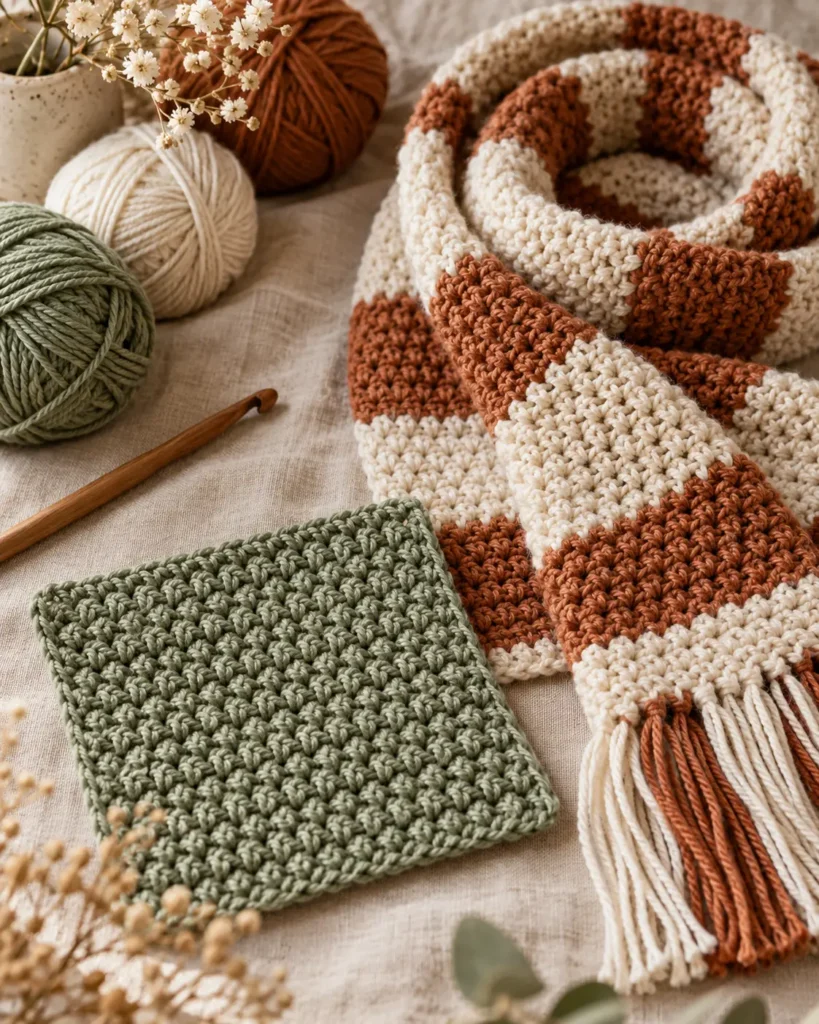
Instead of working every stitch directly into the top of a stitch from the previous row, you place your single crochets into the open chain spaces. This creates a subtle, staggered texture that resembles woven fabric.
The finished surface has small, evenly spaced stitches that look particularly beautiful in smooth yarn. Moss stitch is often used for projects that need a clean, modern appearance without heavy decorative details.
Is Moss Stitch the Same as Linen Stitch?
Yes, in many US crochet patterns, moss stitch is also known as linen stitch or granite stitch.
You may also see it described as woven stitch. These names commonly refer to the same basic combination of single crochet and chain-one spaces. However, different designers sometimes use different foundation chains and turning methods.
One tutorial may begin with a chain-two turn, while another uses a chain-one turn with separate edge stitches. Both can create moss stitch fabric. For this tutorial, we’ll use a consistent chain-one turning method with a single crochet at each edge. This makes the rows easier to count and helps beginners recognize the side stitches.
Why Beginners Love Moss Stitch
Moss stitch is an excellent technique to learn after mastering basic single crochet.
It Uses Simple Stitches
You only need to know how to make a chain and a single crochet. The main new skill is recognizing the chain-one spaces from the previous row.
It Creates Beautiful Texture
Moss stitch produces an attractive fabric without complicated stitches. The texture is noticeable but relatively flat. It’s a lovely choice when you want the yarn color and stitch pattern to work together.
It Looks Good on Both Sides
The fabric has an appealing texture on both faces. This makes it especially useful for scarves and blankets, where both sides may be visible.
It Works With Different Yarn Colors
Solid colors emphasize the woven texture. Striped patterns create small, interesting color transitions. Variegated yarn can also look beautiful, although the final effect depends on how frequently the yarn changes color.
It’s Easy to Memorize
Once you understand the foundation and repeating row, the stitch becomes easier to follow. You can concentrate on maintaining comfortable tension instead of checking complicated instructions after every stitch.
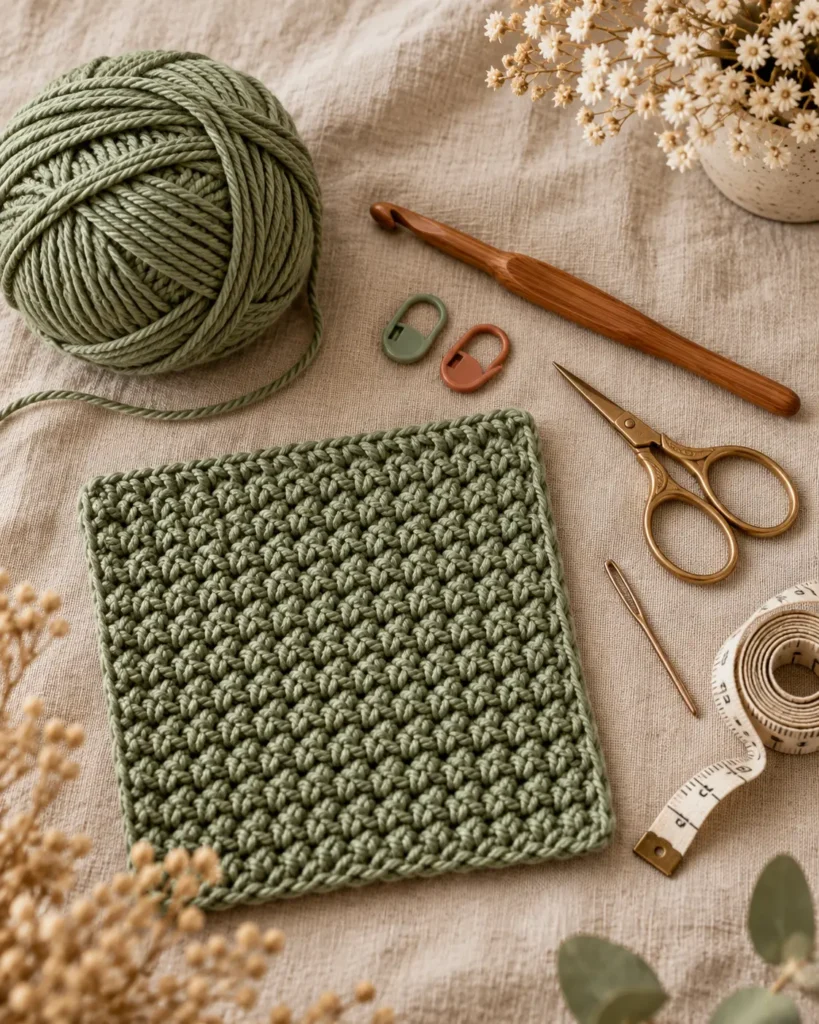
You don’t need special crochet equipment to learn moss stitch. A small amount of smooth yarn and a suitable hook are enough.
| Material | Recommendation |
|---|---|
| Yarn | Smooth worsted-weight yarn |
| Hook | 5.0 mm / US H-8 starting suggestion |
| Scissors | Small craft scissors |
| Tapestry needle | For weaving in ends |
| Stitch markers | Two removable markers |
| Measuring tape | For checking the finished sample |
For beginners, I recommend starting with a smooth yarn in a light or medium color. Sage green, dusty rose, cream, soft blue, and oatmeal are all good choices. The important thing is being able to see the stitches clearly.
Very dark yarn can make the small chain spaces difficult to recognize. Fuzzy yarn can hide the structure even more. After you’ve practiced the stitch, you can experiment with textured or darker yarns.
Start with the hook size recommended on the yarn label. For many worsted-weight yarns, a 5.0 mm hook is a reasonable starting point. If your fabric feels very stiff, try a slightly larger hook.
If it looks too loose for your intended project, experiment with a smaller hook. The best result is a fabric that feels comfortable and suits what you’re making.
Crochet Moss Stitch Abbreviations
This tutorial uses US crochet terminology.
| Abbreviation | Meaning |
|---|---|
| ch | Chain |
| sc | Single crochet |
| sk | Skip |
| st | Stitch |
| sts | Stitches |
| sp | Space |
| ch-1 sp | Chain-one space |
| rep | Repeat |
UK terminology note: A US single crochet is called a double crochet in UK patterns.
How to Crochet Moss Stitch Step by Step
Let’s make a small practice swatch.
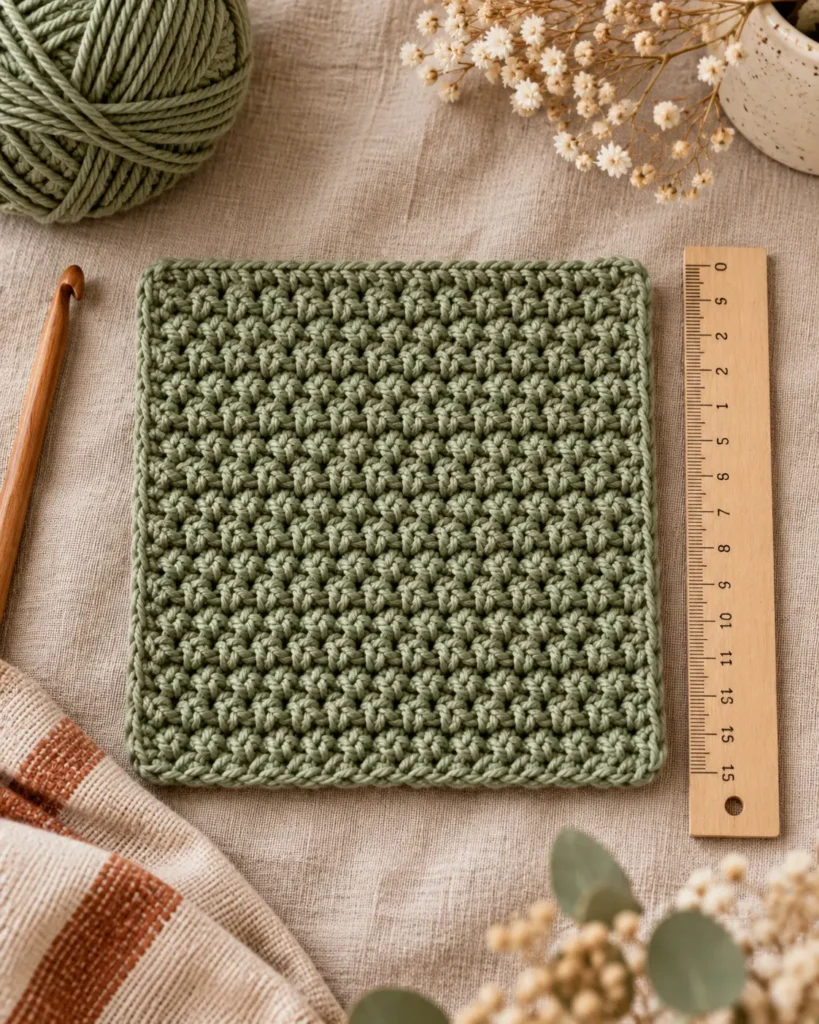
We’ll begin with 21 foundation chains. The following version uses an odd number of foundation chains and an extra single crochet at each edge. The completed rows should maintain the same stitch count throughout the sample.
Step 1: Make the Foundation Chain
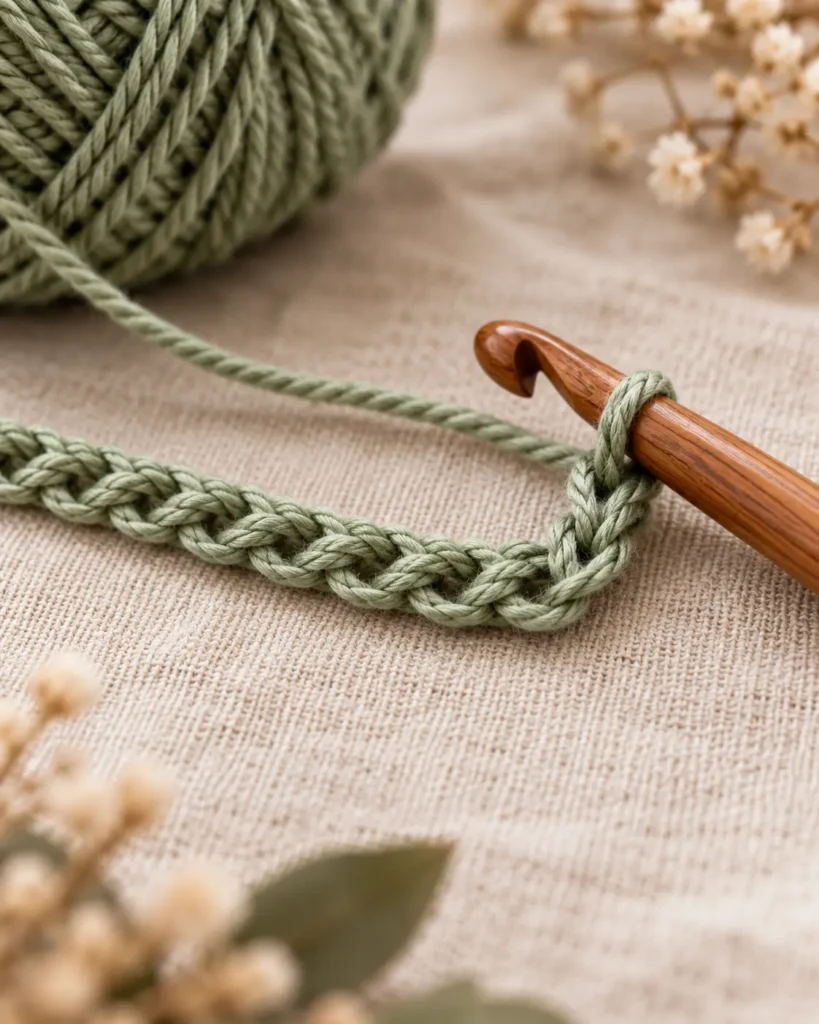
Create a slip knot and place it on your crochet hook.
Chain 21.
Try to keep your chains even and relaxed. A tight foundation can make the first row difficult to crochet. Count all 21 chains before beginning the next step.
Step 2: Work the First Single Crochet
Insert your hook into the second chain from the hook.
Yarn over and pull up a loop.
You should have two loops on your hook.
Yarn over again and pull through both loops.
You’ve completed the first single crochet.
Step 3: Make the First Chain-One Space
Chain one.
Skip the next chain in your foundation. Work one single crochet into the following chain. You have now created your first chain-one space. This small gap is what gives moss stitch its distinctive pattern.
Step 4: Continue Across the Row
Repeat the following sequence:
Chain 1, skip the next chain, single crochet into the following chain.
Continue until one foundation chain remains. Work one single crochet into the final chain. Your first row is now complete.
You should have:
- 11 single crochet stitches
- 9 chain-one spaces
The last two single crochets are next to each other in this edge variation.
That’s intentional.
Step 5: Find the Chain-One Spaces
Turn your work.
Look carefully between the single crochet stitches. You’ll notice small openings. These are your chain-one spaces.
When working the next row, insert your hook through the opening underneath the chain. You don’t need to work into the individual top loops of that chain. Finding these spaces correctly is one of the most important parts of the technique.
Step 6: Crochet Row 2
Chain one.
The turning chain does not count as a stitch. Work one single crochet into the first edge single crochet.
Chain one.
Skip the next single crochet and work one single crochet into the first chain-one space.
Repeat this combination across:
Chain 1, skip the next single crochet, single crochet into the next chain-one space.
Continue until you’ve worked into all the chain-one spaces. Then work one final single crochet into the remaining edge stitch. You should again have 11 single crochets and 9 chain-one spaces.
Step 7: Repeat Row 2
Continue repeating the instructions for Row 2.
Each row follows the same basic structure:
- Chain one and turn.
- Single crochet into the first edge stitch.
- Chain one.
- Skip the next single crochet.
- Single crochet into the next chain-one space.
- Repeat across the chain spaces.
- Finish with a single crochet in the final edge stitch.
After several rows, you’ll begin to see the woven texture more clearly. Continue until the fabric reaches your desired length.
Step 8: Fasten Off
Cut the working yarn, leaving a tail long enough to weave in securely. Pull the tail through the final loop. Thread the tail onto a tapestry needle.
Weave it through several stitches on the back of the fabric, changing direction to help secure it. Avoid pulling too tightly. Your first moss stitch sample is finished.
Free Crochet Moss Stitch Written Pattern
Here’s the shorter version you can keep beside you while working.
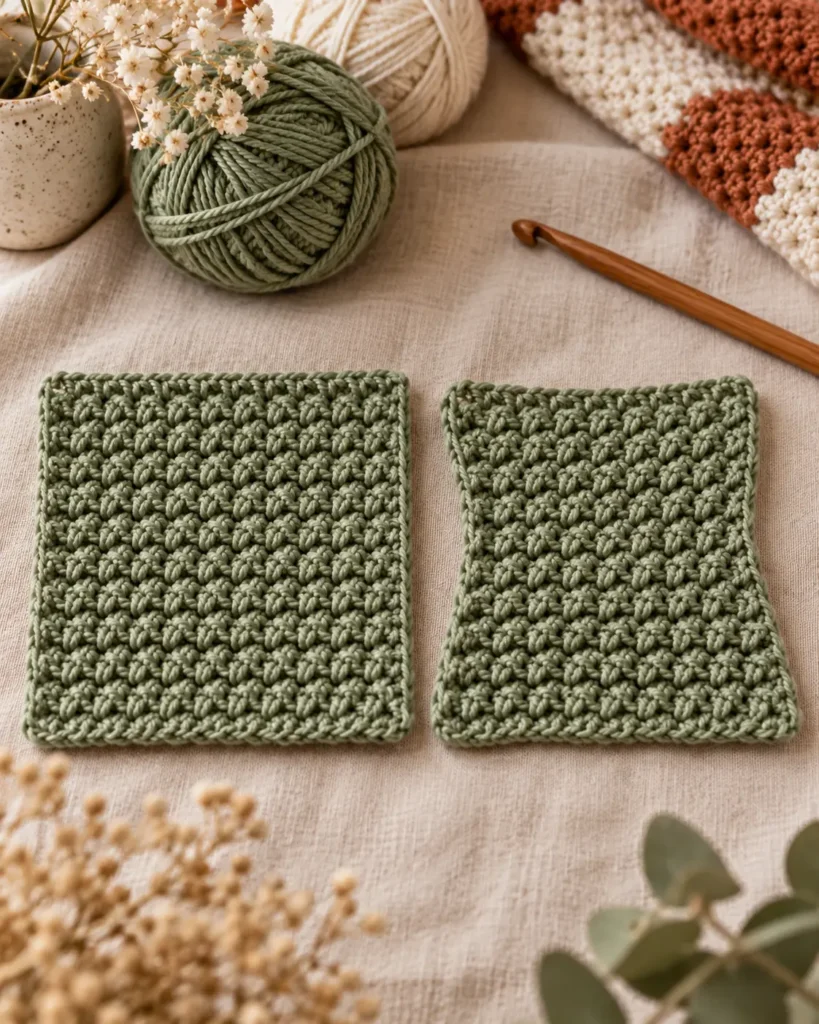
Foundation: Odd number of chains
Sample foundation: Ch 21
Turning chain: Ch 1, does not count as a stitch
Step 1 — Pattern Instructions
Foundation: Ch 21.
Row 1: Sc in 2nd ch from hook. Ch 1, sk next ch, sc in next ch. Repeat from until one foundation chain remains. Sc in last ch. Turn.
Row 2: Ch 1, sc in first sc. Ch 1, sk next sc, sc in next ch-1 sp. Repeat from across the chain-one spaces. Sc in final edge sc. Turn.
Row 3 and beyond: Repeat Row 2.
Finishing: Fasten off and weave in the yarn ends.
Step 2 — Stitch Count Reference
| Row | Single crochets | Chain-one spaces |
|---|---|---|
| Row 1 | 11 | 9 |
| Row 2 | 11 | 9 |
| Row 3 | 11 | 9 |
| Following rows | 11 | 9 |
Keep your stitch count consistent. If the count changes unexpectedly, check your edge stitches before continuing.
How to Keep Your Moss Stitch Edges Straight
Uneven edges are one of the most common problems beginners encounter with moss stitch.
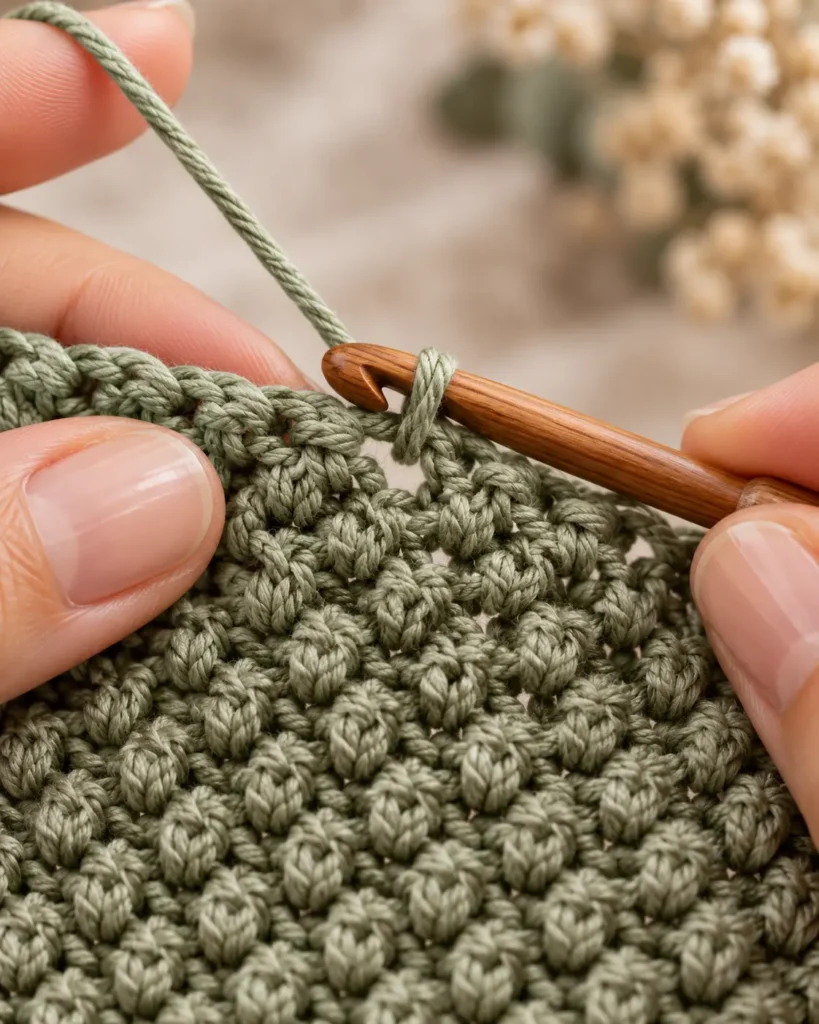
The good news is that they’re usually caused by a small, fixable mistake.
Step 3 — Use Stitch Markers
Place a stitch marker in the first and last single crochet of your row. Move each marker up as the fabric grows. This makes the edge stitches easier to identify.
Step 4 — Count Your Chain Spaces
For the sample pattern, you should have nine chain-one spaces in every row. If one is missing, check whether you’ve accidentally skipped it.
Step 5 — Keep the Turning Chain Relaxed
A very tight turning chain can pull the fabric inward. An excessively loose chain can create an uneven edge. Aim for a chain that’s similar in size to the others.
Step 6 — Don’t Add Extra Stitches
At the end of each row, finish with a single crochet in the final edge stitch. Don’t add another chain before turning.
Easy Moss Stitch Practice Project
Before beginning a large project, make a small moss stitch square.
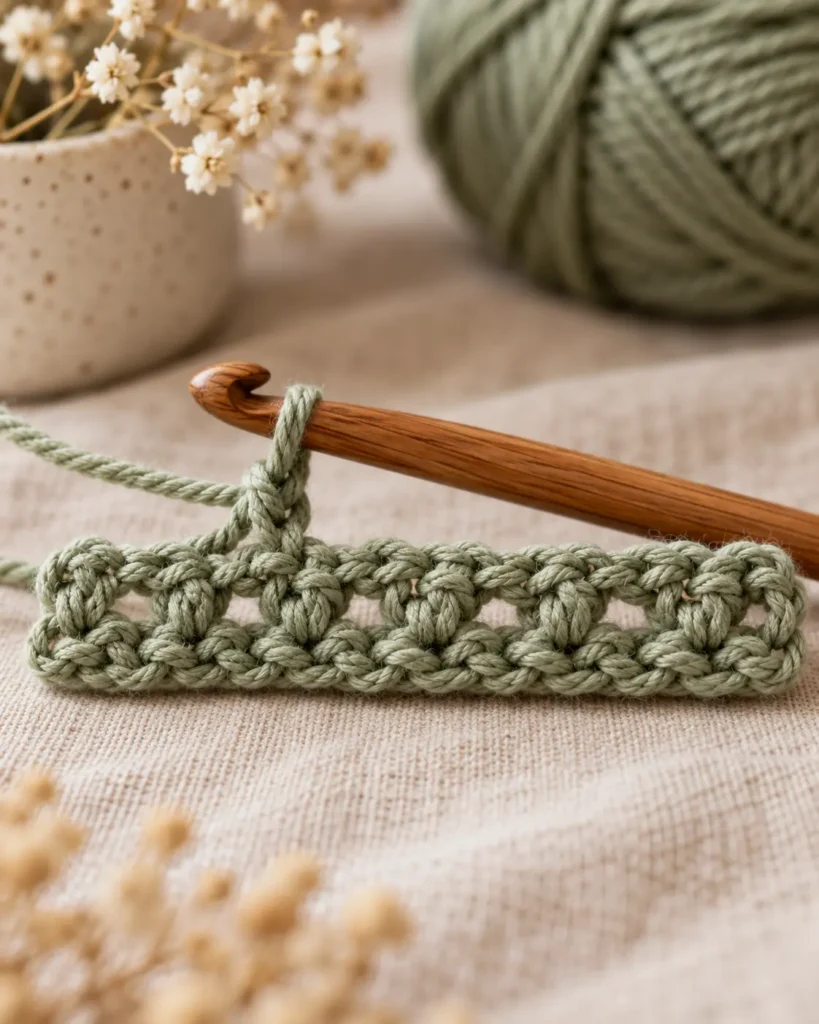
A finished sample helps you practice the stitch and understand how your yarn behaves.
Practice Square Instructions
- Chain 21.
- Follow the first-row instructions.
- Repeat Row 2 until the piece is approximately square.
- Lay the fabric flat without stretching it.
- Compare its width and height.
- Add more rows if needed.
- Fasten off and weave in the ends.
Your finished square won’t necessarily have the same dimensions as someone else’s.
Yarn weight, hook size, and personal tension all affect the result.
What Should the Finished Square Look Like?
The stitches should create a relatively even, woven-looking texture. Both edges should remain straight. The fabric should have a consistent width from bottom to top.
If your sample is stiff, consider trying a slightly larger hook next time. If it’s much looser than you prefer, experiment with a smaller hook.
Ways to Use Your Practice Square
You can keep it as a reference swatch. You can also turn it into a coaster using suitable yarn, or make several matching squares for a sampler blanket.
How to Change Colors in Moss Stitch
Adding stripes is an easy way to transform a simple moss stitch project.
You don’t need to change the actual stitch pattern. For beginners, changing colors at the end of a row is the easiest method to understand.
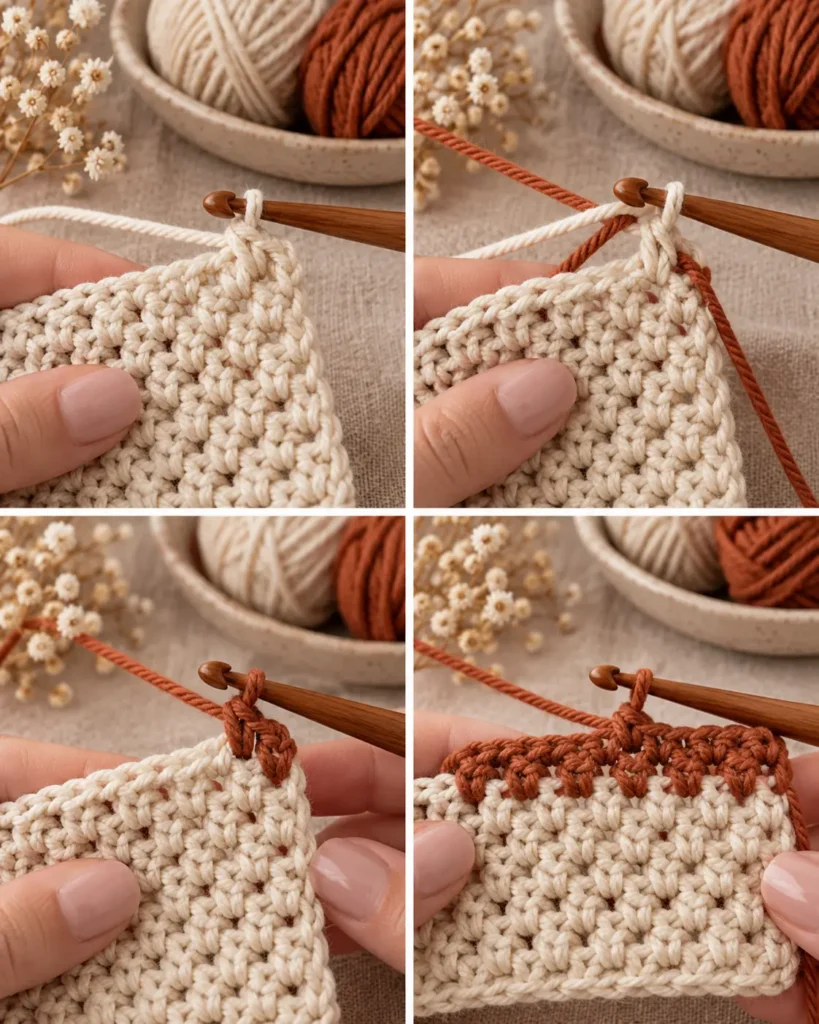
Step 7 — Step-by-Step Color Change
- Crochet across the row until you reach the final single crochet.
- Insert your hook into the last stitch.
- Yarn over with the old color and pull up a loop.
- Drop the old working yarn.
- Yarn over with the new color.
- Pull the new yarn through both loops.
- Turn and continue the pattern using the new color.
This introduces the next color as you complete the final stitch of the previous row.
Step 8 — Stripe Ideas
Try changing colors every two rows for frequent stripes. For broader color sections, change every four or six rows. You can also mix narrow and wide stripes.
Step 9 — Color Combinations for Fall
A few attractive autumn palettes include:
- Sage green and warm cream
- Terracotta and oatmeal
- Burgundy and dusty pink
- Mustard and chocolate brown
- Olive green, ivory, and rust
Best Yarn for Moss Stitch
The right yarn depends on what you want to make.
Cotton
Cotton provides clear stitch definition and works well for washcloths, dishcloths, and certain home accessories. It can produce a firmer fabric, so test the drape if you’re planning a garment.
Acrylic
Acrylic is available in many colors and is suitable for plenty of everyday projects. Choose a smooth yarn to show off the stitch texture.
Wool and Wool Blends
Wool and wool blends can be useful for warm accessories. Different blends have different amounts of stretch, softness, and drape. Always check the care instructions and test a swatch.
Which Yarn Is Best for a Beginner?
A smooth worsted-weight yarn in a light or medium color is a sensible choice. Once you’re comfortable with the repeat, try other fibers and hook sizes to see how they affect the fabric.
Beautiful Projects to Make With Moss Stitch
Once you’ve learned the technique, you can use it for a surprising number of projects.
1. Moss Stitch Blanket
A crochet moss stitch blanket has a subtle, modern texture. It looks beautiful in one color or in coordinated stripes. Make a gauge swatch before calculating the foundation chain for a larger blanket.
2. Moss Stitch Scarf
A scarf is a natural next project after your practice square. Choose a width that feels comfortable, then repeat the rows until you reach your preferred length. Soft yarn with good drape works especially well.
3. Crochet Baby Blanket
Moss stitch can create an attractive baby blanket fabric. Choose soft, washable yarn and avoid loose decorative attachments. Remember that loose blankets should not be placed in an infant’s sleep space.
4. Moss Stitch Washcloth
A cotton washcloth is a simple and practical project. Make a square in your preferred size. You can also add a contrasting border.
5. Crochet Fingerless Gloves
Moss stitch can be used in fingerless glove designs. However, fitted gloves require careful attention to gauge, stretch, hand measurements, and thumb placement. It’s best to follow a pattern specifically designed for gloves instead of assuming a rectangular swatch will fit automatically.
6. Decorative Pillow Covers
Moss stitch creates a subtle textured surface that works beautifully for cushion covers. Measure your insert and plan the panels before beginning.
Common Moss Stitch Mistakes and Troubleshooting
If your project doesn’t look quite right, check these common problems.
| Problem | Possible cause | Solution |
|---|---|---|
| Fabric gets narrower | Missed chain space or edge stitch | Count spaces and use markers |
| Fabric gets wider | Accidental extra stitch | Check each row’s count |
| Edges look bumpy | Inconsistent turning chains | Keep the turning method consistent |
| Fabric feels stiff | Tight tension or small hook | Try a larger hook |
| Holes look too big | Loose chains or large hook | Compare a smaller hook |
| Foundation curls | Tight starting chain | Work the foundation more loosely |
| Stripes look uneven | Inconsistent color changes | Change color at the same row position |
Why Is My Moss Stitch Getting Narrower?
You’re probably missing a chain-one space or an edge stitch. Count the stitches in the current row and compare them with the expected count. If the count is correct, tension differences may be causing the change in width.
Why Does My Moss Stitch Look Loose?
Some small gaps are normal. But if the fabric looks too open, your chain stitches may be significantly larger than your single crochets. Try working with more consistent tension.
Why Is My Moss Stitch Curling?
Curling can happen when the foundation is too tight or when tension changes between rows. Check the stitch count first. If the fabric is structurally correct, an appropriate blocking method may help it lie flatter.
Should I Undo a Row With a Mistake?
If the mistake changes the stitch count or shape, correcting it early is usually worthwhile. A small cosmetic irregularity may be less important, especially in a large project. For your first swatch, however, fixing mistakes is good practice.
Frequently asked questions
Is Crochet Moss Stitch Easy for Beginners?
Yes. Moss stitch uses only single crochet and chain stitches. Learning to identify the chain-one spaces is the main new skill.
Is Moss Stitch the Same as Linen Stitch?
In many crochet patterns, yes. Moss stitch, linen stitch, granite stitch, and woven stitch commonly describe the same basic texture.
How Many Chains Do I Need for Moss Stitch?
The foundation multiple depends on the tutorial variation. This pattern uses an odd number of chains, beginning with 21 for the sample.
Does Moss Stitch Use a Lot of Yarn?
Yarn consumption depends on the yarn, hook, tension, and finished dimensions. A measured swatch is the most reliable way to estimate your project requirements.
Is Moss Stitch Good for Blankets?
Yes. Its simple repeat and textured surface make it suitable for blankets in many sizes.
Can You Crochet Moss Stitch in the Round?
Yes. Moss stitch can be worked in joined or continuous rounds using an appropriate pattern. The turning and stitch placement differ from the flat-row method described here.
Why Are My Moss Stitch Edges Uneven?
Missed edge stitches, extra stitches, and inconsistent turning chains are common causes. Stitch markers and regular counting can help. —
Yarn weights and hook sizes in this guide follow the Craft Yarn Council standards.
Keep going: Crochet Fingerless Gloves: Easy Free Pattern for Beginners · Crochet Moss Stitch: Easy Step-by-Step Tutorial for Beginners · How to Crochet the Moss Stitch
Final Thoughts
Crochet moss stitch is one of those techniques that’s useful long after you’ve finished your first practice square. Its simple single crochet and chain-one repeat creates a beautiful woven texture that works with many yarns and color combinations.
Start slowly, focus on finding the correct chain spaces, and keep your edge stitches consistent. Once the pattern feels natural, try a small striped project before moving on to larger blankets or accessories.
Save this crochet moss stitch tutorial to Pinterest so you can return to the written pattern, color-change instructions, and troubleshooting tips whenever you need them.
The Crochet Side, Crochet tutorials, handmade inspiration, and creative patterns.
Pin “Crochet Moss Stitch: Easy Free Tutorial for Beginners” so you can find it when the yarn arrives.
Get the next free pattern first
One email a week. New patterns, no noise.





