
How to Crochet the Moss Stitch (Linen, Granite): A Complete Beginner-to-Pro Tutorial
The crochet moss stitch is a repeating combination of single crochet stitches and chain-one spaces. Instead of working every single crochet into the top…

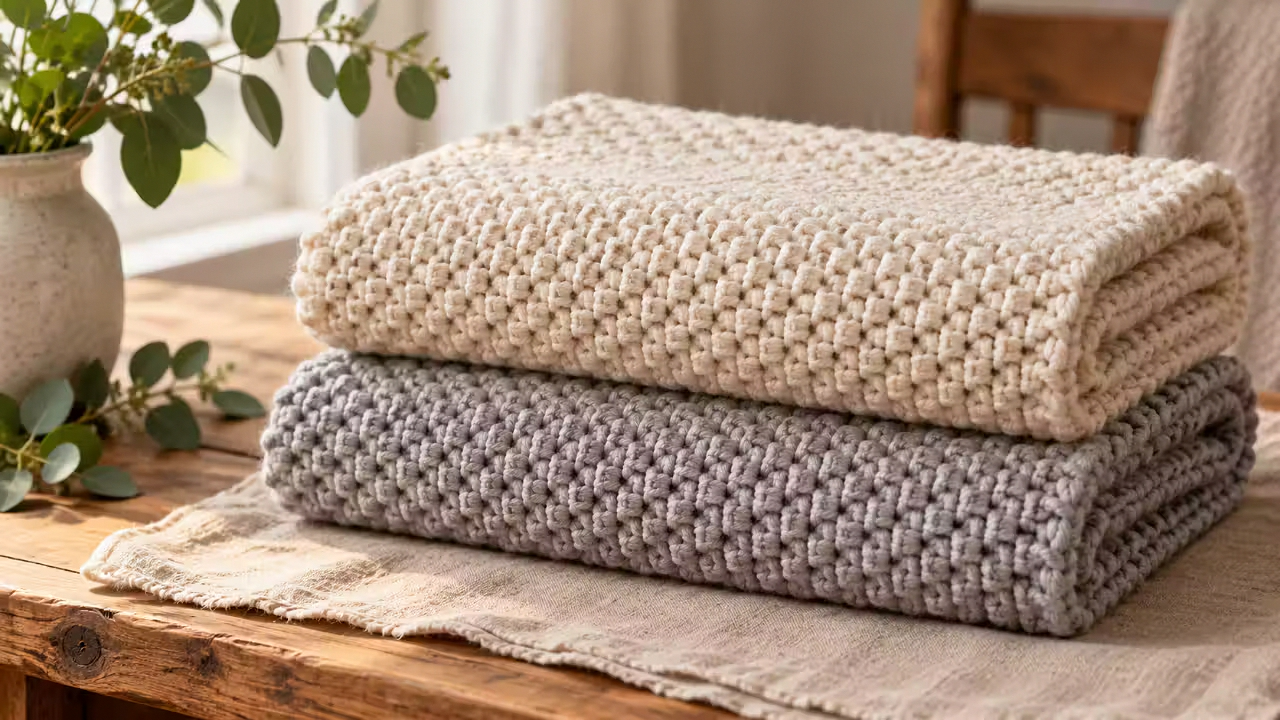
What Is the Crochet Moss Stitch?
The crochet moss stitch is a repeating combination of single crochet stitches and chain-one spaces. Instead of working every single crochet into the top loops of a stitch, you usually insert your hook into the chain-one space from the previous row.
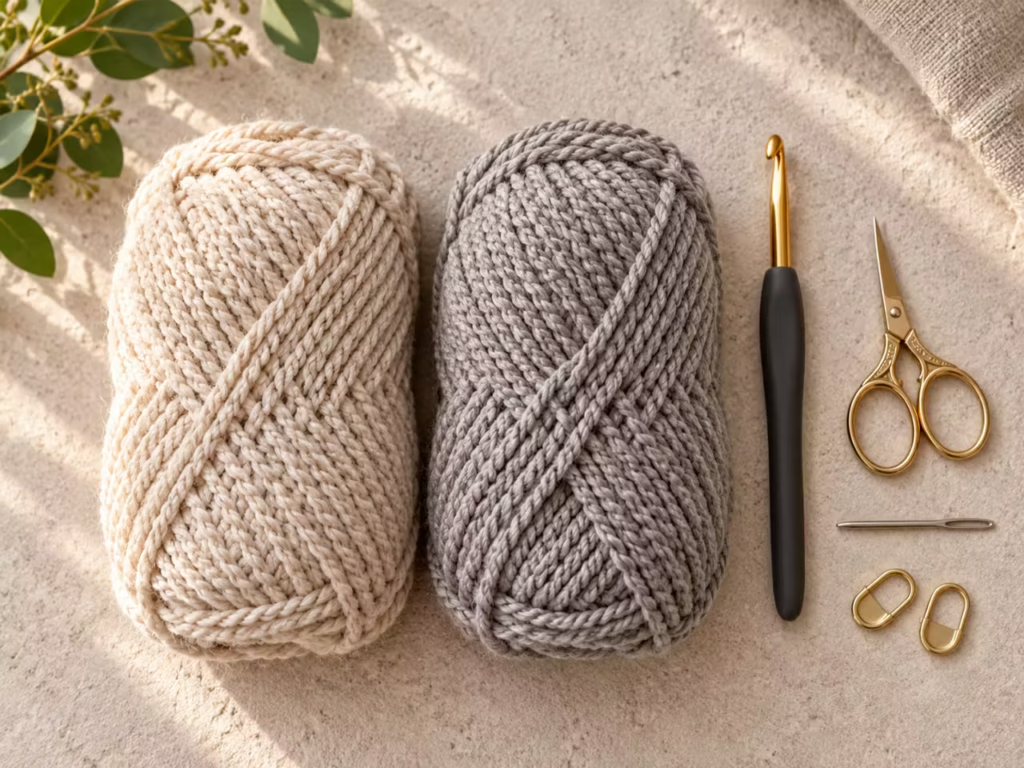
This creates a compact yet flexible fabric with a subtle woven appearance.
The stitch is widely known by three names:
- Moss stitch: The most common name in beginner crochet tutorials.
- Linen stitch: A name inspired by its woven, fabric-like appearance.
- Granite stitch: Another traditional name for the same basic crochet texture.
Some stitch dictionaries use these terms differently, so always follow the actual written stitch instructions rather than relying on the name alone.
Why Crocheters Love This Stitch
The moss stitch has several practical advantages. First, it uses only basic crochet movements. If you can make a chain and a single crochet, you already know the individual actions required.
Second, the fabric looks attractive on both sides. That makes it especially suitable for scarves, throws, and accessories where both surfaces are visible.
Third, the alternating stitches make colorful yarn combinations particularly effective. A striped moss stitch blanket can display small flecks of neighboring colors, producing a textured appearance without complicated colorwork.
Finally, the stitch works with many yarn weights. Fine cotton produces a neat, refined surface, while thicker wool or acrylic gives it a softer, chunkier character.
Is Moss Stitch Good for Beginners?
Yes, provided you can identify chain spaces.
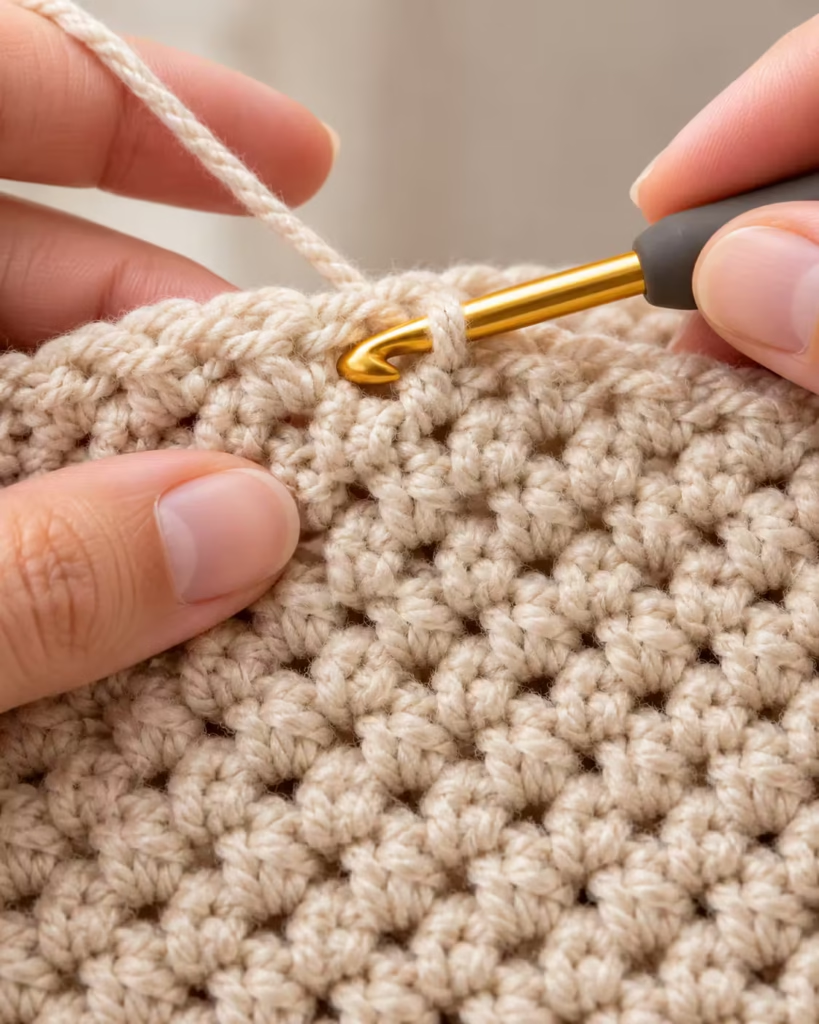
The hardest part is not forming the single crochet. It is learning where to insert the hook on subsequent rows. Beginners frequently try to work into the top loops of every visible single crochet. In this stitch, that changes the pattern.
Once you recognize the small gaps between the stitches, the repeat becomes straightforward.
Project Overview
This tutorial teaches a flat, rectangular moss stitch swatch using US crochet terminology.
| Project Detail | Description |
|---|---|
| Skill level | Confident beginner |
| Main stitches | Chain and single crochet |
| Construction | Flat, turned rows |
| Stitch repeat | Single crochet, chain one, skip one stitch or space as directed |
| Suggested yarn | Smooth worsted-weight cotton or acrylic |
| Suggested hook | 5.0 mm (H-8), adjusted to yarn and tension |
| Practice foundation | 22 chains |
| Pattern complexity | Two introductory rows followed by a repeating row |
| Fabric appearance | Fine woven texture |
| Reversible | Yes, with minor surface differences |
| Best projects | Scarves, blankets, washcloths, accessories |
The finished dimensions of your practice swatch will depend on your yarn, hook, tension, and number of rows. The 22-chain foundation is a learning example, not a guaranteed measurement. For a first attempt, choose a smooth, light-colored yarn. Dark, fuzzy, or heavily textured yarn makes it harder to identify chain-one spaces.
Materials and Tools
Essential Supplies
| Material | Specification | Purpose | Alternative |
|---|---|---|---|
| Yarn | Smooth worsted weight, category 4 | Makes the stitch structure visible | DK or bulky yarn with an appropriate hook |
| Crochet hook | 5.0 mm / H-8 | Forms stitches | Size recommended by yarn label |
| Scissors | Small craft scissors | Cuts yarn tails | Yarn snips |
| Tapestry needle | Blunt tip suitable for yarn | Weaves in ends | Large-eye yarn needle |
| Stitch markers | Two removable markers | Identifies edge positions | Contrasting scrap yarn |
| Measuring tape | Flexible tape | Checks width and gauge | Ruler for small swatches |
Optional Materials
A row counter can help track progress on longer projects. A notebook is useful for recording hook size, yarn type, gauge, and total row count. These records become especially valuable when making matching items. A blocking mat and rust-resistant pins may help when finishing suitable fibers, although they are not necessary for learning the stitch.
Choosing the Right Yarn
For beginners, smooth yarn is more important than expensive yarn.
Cotton provides clear stitch definition and works well for dishcloths, coasters, and structured accessories. Acrylic is often soft, accessible, and convenient for blankets. Wool can provide elasticity and warmth.
Avoid novelty yarn and highly fuzzy yarn until you can confidently locate each chain space.
Crochet Terms and Essential Skills
This tutorial uses standard US crochet abbreviations.
| Abbreviation | Meaning |
|---|---|
| ch | Chain |
| sc | Single crochet |
| ch-1 sp | Chain-one space |
| st | Stitch |
| sk | Skip |
| rep | Repeat |
| RS | Right side |
| WS | Wrong side |
How to Make a Chain
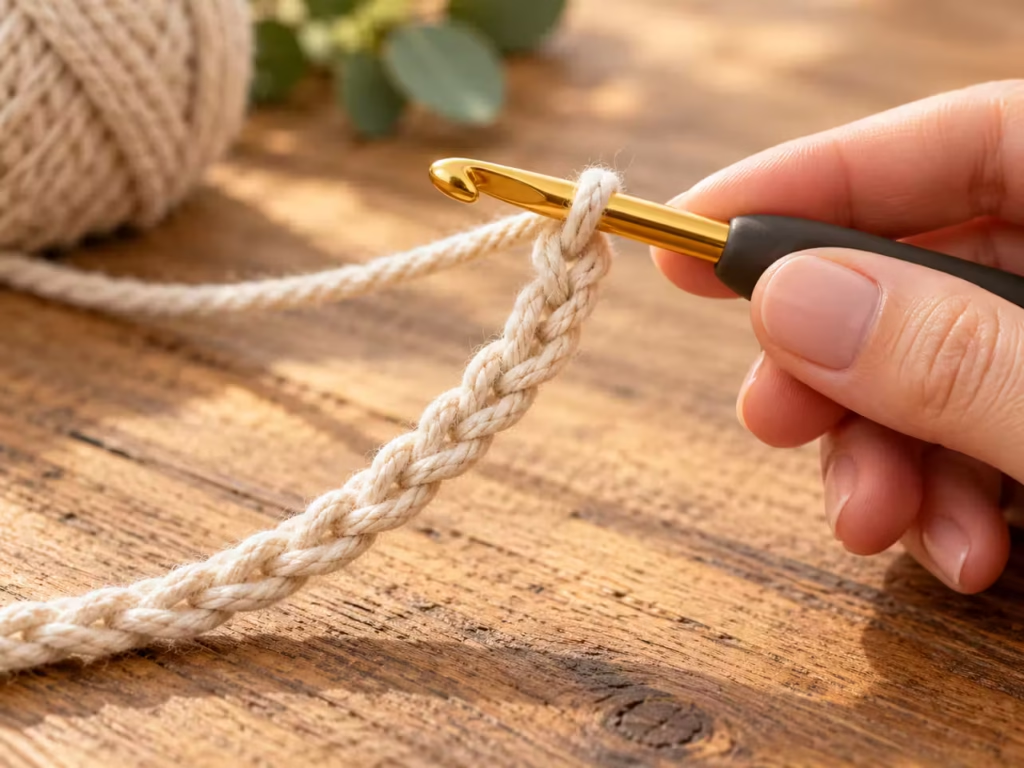
Make a slip knot and place it on your hook. Hold the working yarn under gentle tension. Wrap the yarn over your hook and pull it through the loop already on the hook.
That produces one chain. Repeat until you have the required number.
How to Make a Single Crochet
Insert your hook into the indicated stitch or chain space. Wrap the yarn over the hook and pull up a loop. You should now have two loops on your hook.
Wrap the yarn over again and pull through both loops. One single crochet is complete.
Understanding Chain-One Spaces
The most important concept in this tutorial is the chain-one space. A chain-one space is the opening created when you make a chain between neighboring stitches. In ordinary single crochet fabric, you typically work into the top loops of the stitches below.
In moss stitch fabric, the repeated single crochets are placed into the chain-one spaces. This placement creates the staggered, woven effect.
How to Crochet the Moss Stitch Tutorial (Linen, Granite)
The following method produces straight edges without requiring an increase or decrease.
For this specific flat-row pattern, start with an even number of foundation chains.
Step 1: Make the Foundation Chain
Create a slip knot.
Chain 22.
Count your chains carefully before beginning the next row. Do not count the loop currently sitting on your hook as a foundation chain.
Action: Make 22 chains with comfortable, even tension.
Visual check: Your foundation should resemble a flexible row of connected V shapes.
Common error: Pulling the chains too tightly.
Solution: Relax your yarn tension or use a slightly larger hook for the foundation chain.
Expert tip: Keep the foundation loose enough that the hook can enter the chains without stretching them.
Step 2: Work the Foundation Row
This row establishes the alternating structure.
Use the following instructions:
- Insert your hook into the second chain from the hook.
- Make one single crochet.
- Chain one.
- Skip the next foundation chain.
- Make one single crochet in the following foundation chain.
- Repeat steps 3–5 across the row.
Your final single crochet should land in the last foundation chain.
Foundation Row:
Sc in 2nd ch from hook, ch 1, sk next ch, sc in next ch; rep from across.
With 22 foundation chains, you will have 11 single crochets and 10 chain-one spaces. The row contains 21 worked positions when chain spaces and single crochets are counted together.
Visual check: You should see small, regularly spaced openings between the single crochets.
Common error: Forgetting to skip a chain after making ch 1.
Solution: Check that each new single crochet is separated from the previous one by a skipped foundation chain.
Expert tip: Count the single crochets after finishing this first row. Correcting the foundation is easier now than after another ten rows.
Step 3: Turn and Begin Row Two
Turn your work.
Chain two.
This turning chain acts as the beginning edge and includes the chain-one space needed for the next row. Insert your hook into the first chain-one space from the previous row. Work one single crochet.
Action: Turn, chain two, then single crochet into the first chain-one space.
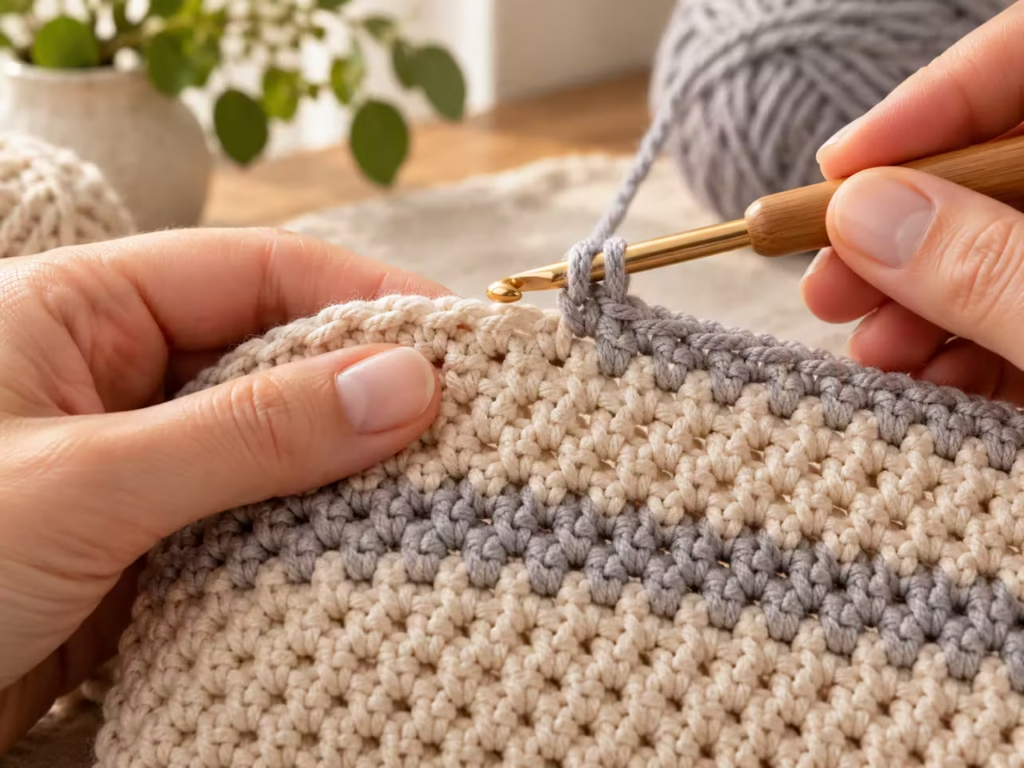
Visual check: The new single crochet should sit in the opening rather than in the top loops of the single crochet below.
Common error: Inserting the hook into the first single crochet stitch.
Solution: Look for the small horizontal chain spanning the opening. Insert your hook underneath that chain, through the space.
Expert tip: Gently spread the stitches with your fingers to expose the opening before inserting the hook.
Step 4: Continue Row Two
After making the first single crochet in a chain-one space:
- Chain one.
- Skip the next single crochet.
- Work one single crochet into the next chain-one space.
- Repeat across the row.
- At the end, chain one.
- Work one single crochet into the final edge single crochet from the previous row.
Row 2:
Ch 2, turn, sc in first ch-1 sp, ch 1, sc in next ch-1 sp; rep from across the remaining ch-1 spaces, ch 1, sc in last sc.
This row includes 11 single crochets, 10 interior chain-one spaces, and the turning chain at the beginning. The edge single crochet is important because it preserves the full width of the fabric.
Visual check: Small chain spaces should alternate with single crochets across the row, while the edges remain aligned.
Common error: Forgetting the final edge single crochet.
Solution: Before turning, check for the edge stitch beyond the last chain space.
Expert tip: Put a removable stitch marker into the edge single crochet while learning.
Step 5: Repeat the Moss Stitch Pattern
Continue working the same method used for Row 2.
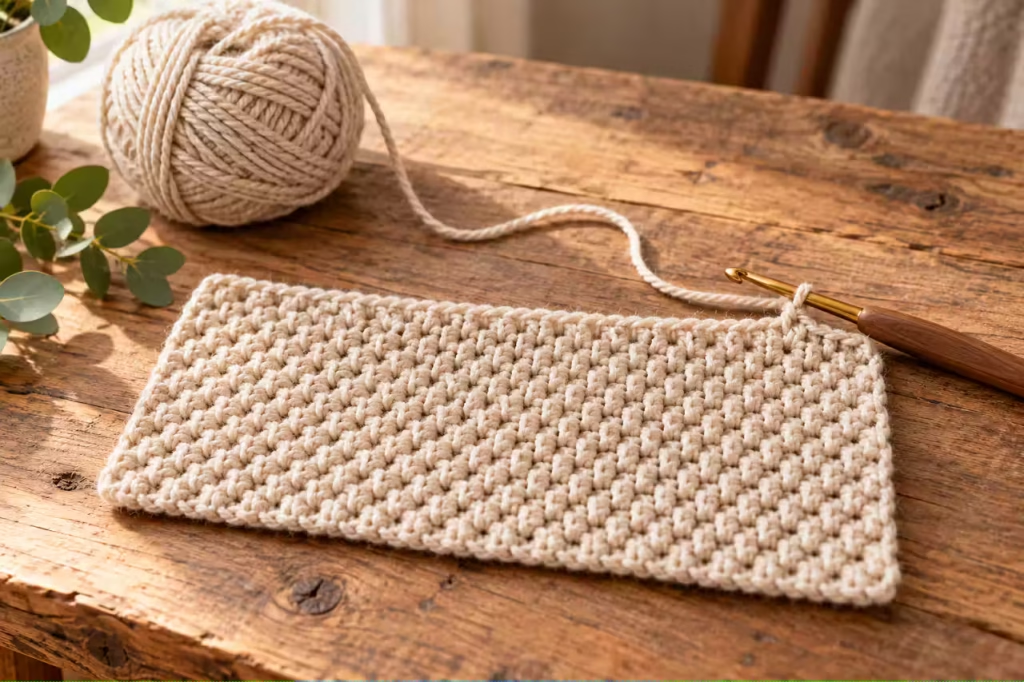
Row 3 and all following rows:
Ch 2, turn, sc in first ch-1 sp, ch 1, sc in next ch-1 sp; rep from across, ch 1, sc in last sc.
The initial chain-two forms the first edge chain space of the new row. Each successive single crochet sits within a chain-one opening.
Visual check: Each new row should produce the same staggered, closely woven surface.
Common error: Working into the top of a single crochet instead of its neighboring chain-one space.
Solution: Examine the row before making each stitch and aim for the visible gap.
Expert tip: Read your fabric in short sections. Identify three or four chain spaces before beginning a series of stitches.
Step 6: Check Your Stitch Count
After several rows, stop and inspect the swatch.
For the 22-chain example, each completed row after the foundation should contain:
- 11 single crochet stitches.
- 10 interior chain-one spaces.
- One beginning turning-chain space.
The turning chain is not counted as an additional single crochet.
Visual check: The width should remain consistent, with neither edge steadily moving inward or outward.
Common error: Accidentally making a single crochet into the turning chain and also the designated final edge stitch.
Solution: Follow the established edge placement and avoid adding extra stitches.
Expert tip: Count your single crochets every few rows rather than relying on the apparent width alone.
Step 7: Recognize the Woven Structure
The key to attractive moss stitch fabric is the relationship between the chain-one spaces and the single crochets. Single crochets create tiny vertical anchors. Chain-one spaces create the small horizontal sections that appear to interlock with neighboring rows. As the rows accumulate, the surface begins to resemble woven fabric.
Visual check: The texture should resemble tightly arranged horizontal dashes with small, balanced openings.
Common error: Using overly tight chains, making the fabric stiff and causing the spaces to disappear.
Solution: Slightly relax your chain-stitch tension.
Expert tip: If the entire swatch feels rigid, make another sample using a hook one size larger and compare the drape.
Step 8: Finish the Practice Swatch
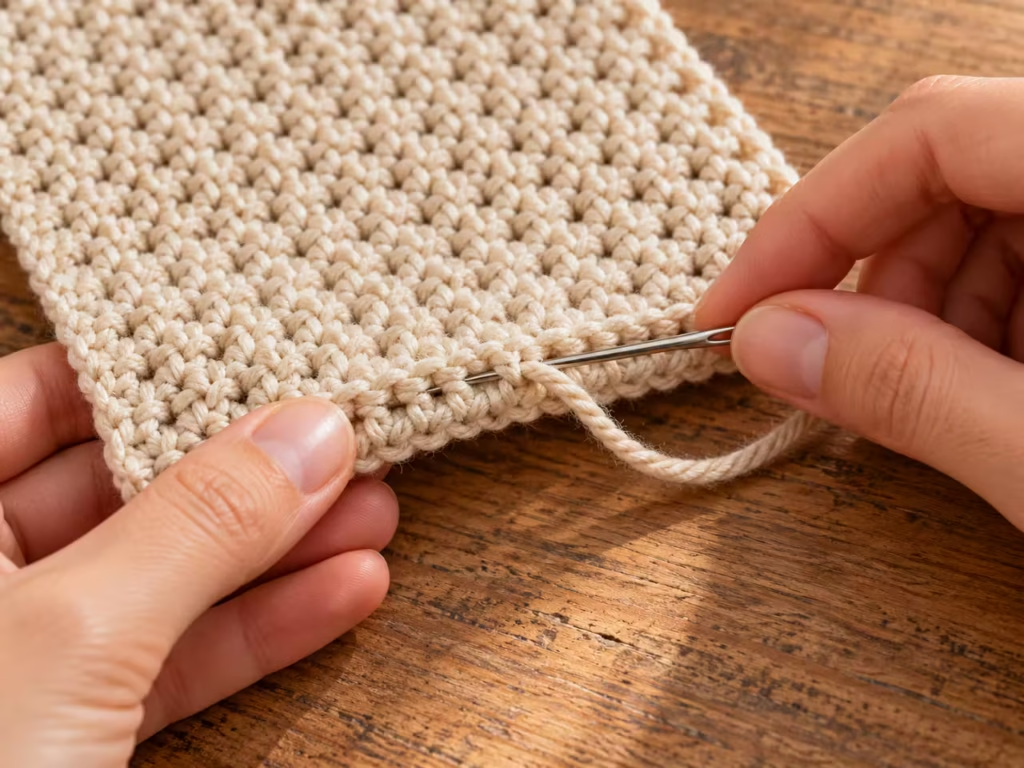
Once your swatch reaches the desired length, complete the last single crochet. Cut the yarn, leaving a tail long enough to secure and weave in. Pull the yarn tail fully through the final loop and tighten gently.
Thread the tail onto a tapestry needle. Weave it through several nearby stitches on the wrong side, following the shape of the crochet fabric and changing direction to improve security. Trim the excess yarn carefully.
Visual check: The ending corner should remain neat, without a loose loop or bulky knot.
Common error: Cutting the tail too short to weave securely.
Solution: Leave enough yarn to pass through several stitches and change direction.
Expert tip: Avoid pulling woven-in ends so tightly that they pucker the fabric.
Moss Stitch Diagram and Stitch Placement
A clear diagram helps explain why this stitch looks woven instead of stacked.
Basic Stitch Symbols
ch = Chain sc = Single crochet ch-1 sp = Chain-one space sk = Skip
Foundation Row Diagram
For 22 foundation chains:
Foundation chain: 1 2 3 4 5 6 … 20 21 22
Work back from the hook:
Ch 22 | v Skip first chain | v Sc in second chain | v Ch 1 → skip 1 chain → sc | v Repeat to final chain
The important rule is that every chain-one is paired with a skipped foundation chain.
Repeating Row Placement Diagram
This conceptual diagram shows the stitch sequence rather than the precise geometric positions of the yarn loops.
PREVIOUS ROW:
Edge SC, ch-1 space, SC, ch-1 space, SC ↑ ↑
Work SC here Work SC here
NEW ROW:
Turning ch-2 | v SC in space, ch 1 — SC in space, ch 1 | v Continue across and finish with SC in edge stitch
How the Rows Relate
| Row | Beginning | Repeating Movement | Ending |
|---|---|---|---|
| Foundation | Sc in second chain | Ch 1, skip chain, sc | Sc in final chain |
| Row 2 | Ch 2, turn | Sc in chain space, ch 1 | Sc in final edge stitch |
| Row 3 | Ch 2, turn | Sc in chain space, ch 1 | Sc in final edge stitch |
| Following rows | Repeat Row 3 | Maintain alternating pattern | Keep both edges straight |
A true close-up photograph remains the best reference for identifying where the hook passes beneath each chain-one space.
Beginner-to-Pro Techniques
Learning the stitch repeat is the first milestone. Refining the fabric is the next.
Level 1: Master a Single-Color Swatch
Start with one smooth yarn and one hook size. Focus on understanding the relationship between single crochets and chain spaces. Do not change colors or add borders until you can complete several rows without losing stitches. Practice identifying the first chain space, middle spaces, and last edge stitch.
Level 2: Develop Consistent Tension
Moss stitch tends to reveal uneven tension through inconsistent horizontal gaps. Practice making each chain one approximately the same size. Do not pull the working yarn tight immediately after making a chain.
Allow the hook shaft to determine a reasonably consistent loop size. For projects requiring soft drape, experiment with a slightly larger hook. For projects requiring stability, such as coasters or small bags, a firmer fabric may be preferable.
Level 3: Improve Edge Consistency
Straight edges become especially important when joining blanket panels or adding borders. At the beginning of each row, make the turning chain without pulling it tight. At the end of the row, locate the actual edge single crochet.
Place a marker in the edge stitch if necessary. If your edges look uneven, first check stitch placement before changing hook size.
Level 4: Plan Professional Color Transitions
For polished stripes, choose a consistent color-change position. Switch colors during the final pull-through of the last single crochet of the row. This positions the new color for the next row. A consistent color-change method produces more orderly transitions and makes the stripe rhythm easier to repeat.
Level 5: Use Gauge to Control Finished Dimensions
Experienced crocheters should measure the fabric after washing or blocking it according to the intended care method. This is especially valuable for fitted accessories, coordinated home textiles, and larger blankets. A small difference in gauge can become significant across a wide project.
How to Change Colors in Moss Stitch
Moss stitch is particularly attractive when worked in stripes.
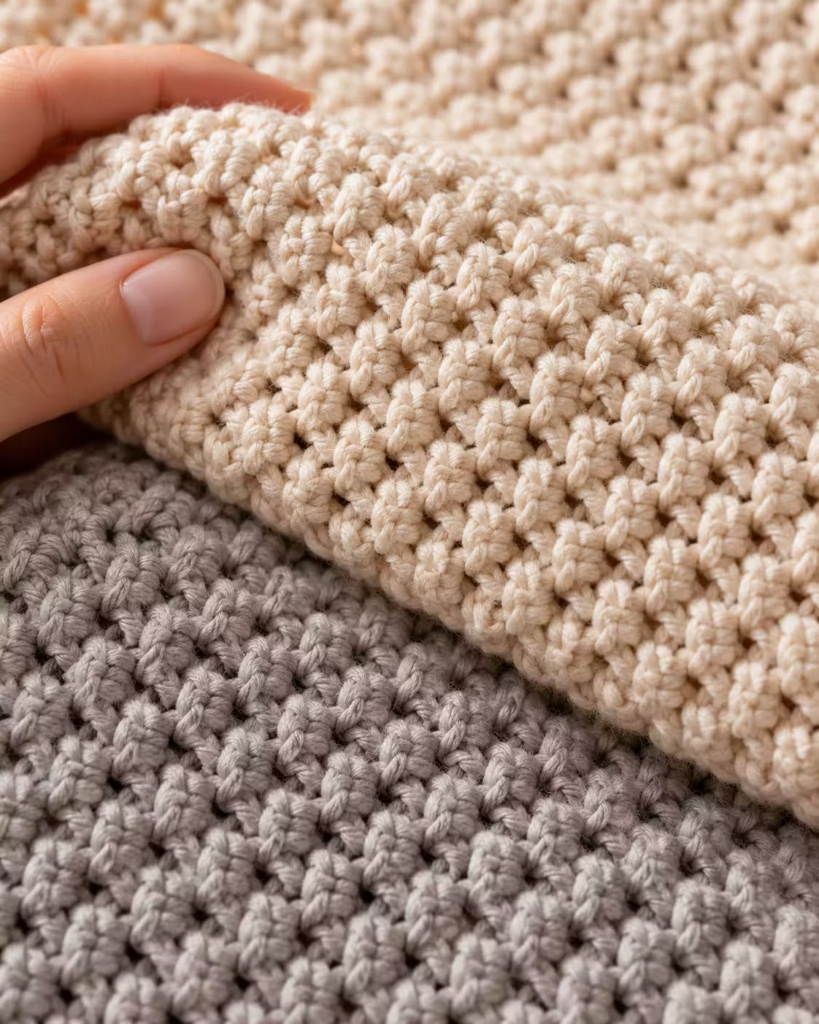
Because the stitches are staggered, neighboring colors appear to weave through the fabric rather than forming perfectly solid horizontal bands.
Step 1 — Step-by-Step Color Change
- Work to the final single crochet of the row.
- Insert the hook into the final stitch.
- Yarn over with the old color and pull up a loop.
- Drop the old working yarn.
- Yarn over with the new color and pull through the two loops.
- Turn and make the chain-two turning chain using the new color.
- Continue the established moss stitch repeat.
The color switch happens on the final pull-through of the preceding row’s last single crochet.
Step 2 — Simple Three-Color Stripe Plan
Try the following sample arrangement:
| Rows | Color |
|---|---|
| 1–4 | Warm cream |
| 5–8 | Sage green |
| 9–12 | Terracotta |
| 13–16 | Warm cream |
| 17–20 | Sage green |
| 21–24 | Terracotta |
Repeat this sequence for a longer project. The row numbers are a design example, not a requirement of the stitch.
Step 3 — Should You Carry the Yarn or Cut It?
For frequent color changes, carrying yarn neatly along the side may reduce the number of ends you need to weave in. However, carried strands can become visible, especially when neighboring colors contrast strongly.
Cutting and securing the yarn at each color change generally produces cleaner exposed edges but requires additional finishing. If you plan to cover the edges with a border, carefully managed carried strands may be practical.
Troubleshooting Common Moss Stitch Problems
| Symptom | Likely Cause | Practical Fix | Prevention |
|---|---|---|---|
| Fabric becomes narrower | Missing last edge stitch | Undo affected rows and restore stitch placement | Mark the final edge stitch |
| Fabric becomes wider | Extra stitch worked into an edge chain | Remove unintended stitch | Count single crochets regularly |
| Holes look uneven | Inconsistent chain tension | Adjust tension or redo the uneven section | Use relaxed, even chain movements |
| Fabric feels stiff | Hook too small for yarn or tight tension | Try a larger hook | Make a test swatch |
| Rows look misaligned | Single crochets placed into stitch tops | Return to last correct row | Work into chain-one spaces |
| Foundation edge curls | Tight foundation chain | Redo using a looser chain | Use a larger hook temporarily |
| Edges look wavy | Variable edge tension or extra stitches | Check edge placement and row counts | Keep turning chains consistent |
| Stripes have bulky joins | Poorly managed yarn tails | Weave ends through nearby stitches | Change color consistently at row ends |
| Finished swatch changes size | Fiber reacts to washing or blocking | Recheck gauge and care method | Wash a sample before sizing |
Why Does My Moss Stitch Curl?
Mild curling can happen because the foundation is tighter than the following rows, the overall tension is firm, or the fabric has not relaxed.
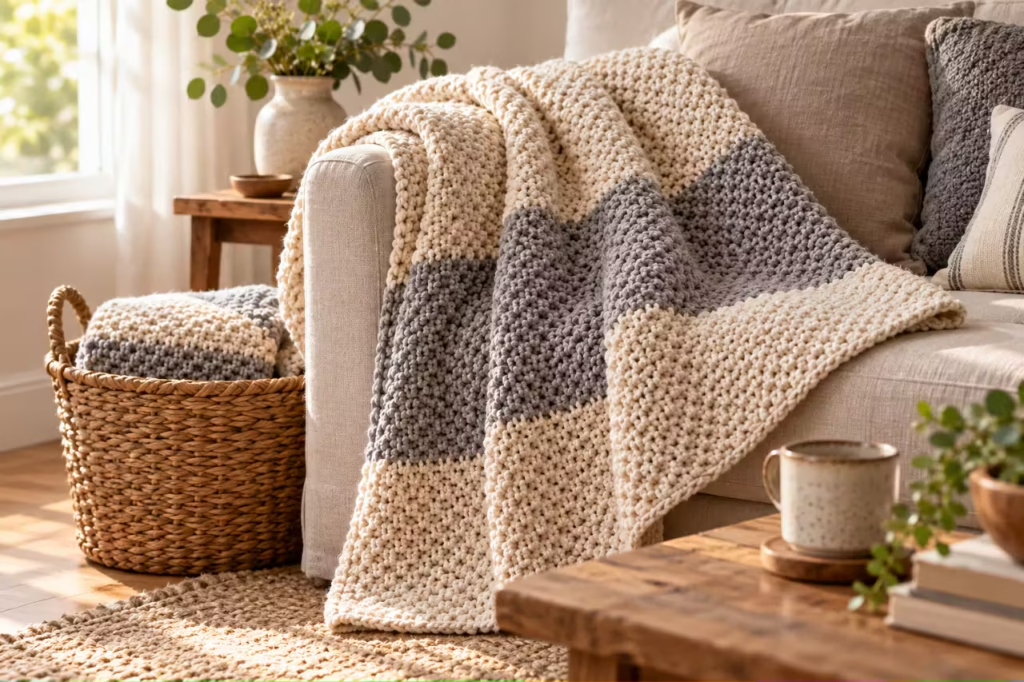
Try gently laying the fabric flat without stretching it. If the foundation chain is noticeably shorter than the body of the swatch, use a larger hook for the starting chain. Blocking may reduce mild curling, depending on the fiber. However, blocking should not be used to conceal major stitch-count errors.
Why Are My Edges Crooked?
Crooked edges most commonly result from working into the wrong stitch at the start or end of a row. Count the single crochets across several rows. If one row contains an extra or missing single crochet, identify where the change occurred.
Undo the incorrect row and repeat it. Trying to compensate with random increases or decreases often makes the edge less consistent.
Why Does My Moss Stitch Look Like Ordinary Single Crochet?
You may be inserting the hook into stitch tops rather than chain spaces.
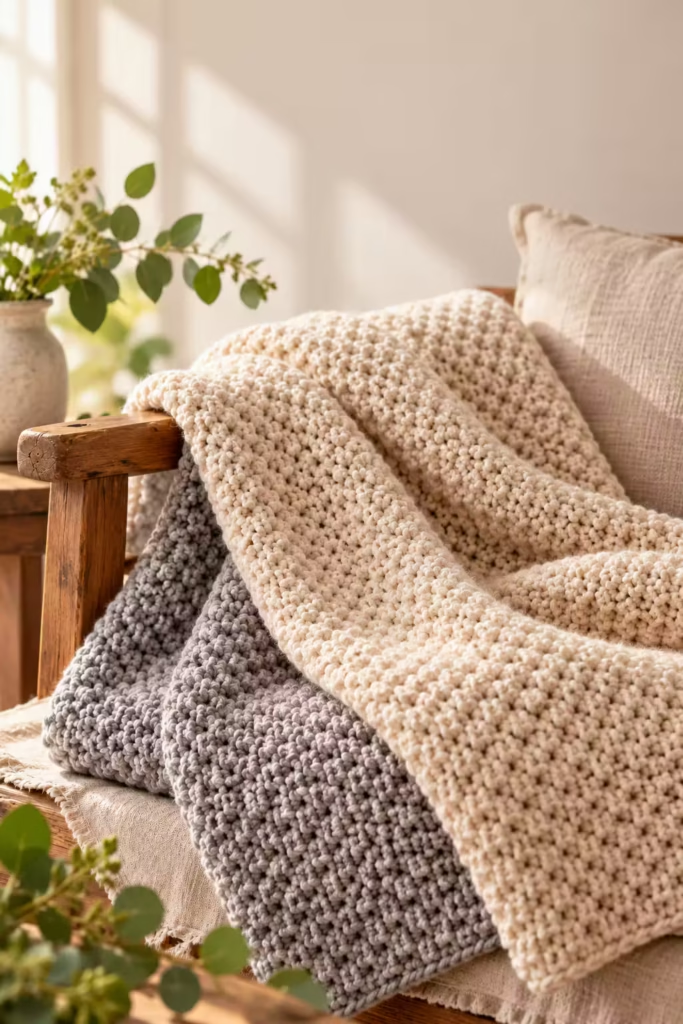
Look closely at the previous row. Each new single crochet should be worked into an opening made by a chain stitch, not the top V of a neighboring single crochet.
Moss Stitch vs. Other Crochet Stitches
Different crochet stitches suit different goals.
| Stitch | Best For | Advantages | Limitations | Recommendation |
|---|---|---|---|---|
| Moss stitch | Scarves, blankets, cloths | Woven texture, reversible surface | Requires attention to chain spaces | Choose for subtle texture and stripes |
| Single crochet | Dense accessories, amigurumi | Simple structure, firm fabric | Can become stiff | Choose for compact construction |
| Half double crochet | Blankets, sweaters | Adds height efficiently | Less woven appearance | Choose for faster fabric growth |
| Double crochet | Open, drapey projects | Taller stitches, rapid coverage | More open texture | Choose when speed and drape matter |
| Lemon peel stitch | Textured home décor | Alternating stitch heights | Different surface on each side | Choose for a pebbled texture |
Moss Stitch vs. Linen Stitch
For the pattern taught here, these names refer to the same alternating single crochet and chain-one structure. However, stitch naming is not perfectly consistent across all pattern publishers. Always compare the written instructions.
Moss Stitch vs. Granite Stitch
Granite stitch commonly refers to the same method. Its textured surface explains the name. If a pattern uses a different stitch repeat, the instructions take priority over the terminology.
Which Stitch Uses Less Yarn?
Yarn consumption depends on several factors:
- Stitch height and density.
- Yarn thickness.
- Hook size.
- Individual tension.
- Finished fabric dimensions.
It is unreliable to promise that moss stitch always uses less yarn than another stitch. For a meaningful comparison, make equal-size swatches using the same yarn and measure their yarn consumption.
<!– gap –>
Sizing, Gauge, and Custom Projects
One of the most useful moss stitch skills is learning how to calculate a foundation length for a real project.
Measure a Practice Swatch
Make a swatch larger than the area you intend to measure. Measure the center rather than the edges.
Record how many single crochet stitches appear across a selected width and how many completed rows appear within a selected height. For this stitch, it is useful to record both the width of the stitch repeat and the row gauge.
Example Gauge Calculation
Suppose your personal practice swatch measures 5 inches wide across 10 repeating stitch units.
Your measured gauge is:
10 units ÷ 5 inches = 2 units per inch
For a project approximately 12 inches wide:
12 inches × 2 units = 24 units
This is only an arithmetic illustration. It is not a tested gauge for any particular yarn. The exact foundation chain should be chosen using the stitch multiple for your selected pattern and adjusted after a measured sample. For the construction in this tutorial, 22 starting chains produce 11 single crochet positions in the foundation row.
A general starting relationship is:
Starting chains = 2 × foundation-row SC count
If you want 20 foundation-row single crochets:
20 × 2 = 40 starting chains
The resulting finished width depends on your personal gauge.
Allow for Borders
If you plan to add a border, decide whether the finished target dimensions include it. For example, a border that extends outward changes both the width and height. Make a small sample of the intended border before deciding on the final foundation chain.
Plan for Yarn Requirements
For large projects, use a measured swatch to estimate yarn needs. One practical method is to weigh the yarn used in a completed swatch. Then compare its area to the planned project area.
Estimated yarn weight = (Project area ÷ Swatch area) × Swatch yarn weight
This gives an approximation rather than a guarantee. Borders, color changes, tension variations, and joining methods can increase yarn usage. Purchase enough extra yarn to accommodate finishing and reasonable variation.
<!– gap –>
Three Practice Exercises to Improve Your Moss Stitch
Learning the repeat is easier when each practice session has a clear purpose.
Exercise 1: Find the Chain Spaces
Make a small foundation row. Stop before beginning the next row. Use a contrasting stitch marker or yarn scrap to identify several chain-one spaces.
Remove the markers and try finding the same spaces without assistance. The goal is visual recognition, not speed.
Exercise 2: Keep the Edges Straight
Work ten rows in one color. After every row, count the single crochet stitches. Place your finished swatch on a flat surface and inspect the edges.
If they begin drifting inward, review the final stitch placement. This exercise develops the habit that matters most for larger moss stitch projects.
Exercise 3: Compare Hook Sizes
Make two swatches with identical yarn and foundation counts. Use the yarn-label hook size for the first swatch. Use a hook 0.5 mm larger for the second, if you have one available.
Compare:
- Fabric flexibility.
- Openness of chain spaces.
- Width.
- Drape.
- Ease of inserting the hook.
Keep the swatch that best matches your intended project. A dishcloth may benefit from a firmer fabric, while a scarf may feel better with a softer drape.
<!– gap –>
Finishing, Blocking, and Care
Careful finishing can make a simple crochet fabric look significantly more polished.
How to Weave in Ends
Use a tapestry needle with an eye large enough for your yarn.
Thread the tail.
Weave it through several nearby stitches on the wrong side. Change direction and pass through another section of stitches to help prevent the end from sliding out. Avoid leaving a noticeable lump or pulling the fabric out of shape.
Should You Block Moss Stitch?
Blocking can help relax the fabric, improve overall shape, and make edges appear more consistent. The suitable method depends on fiber content.
Cotton: Often responds well to gentle wet blocking.
Wool: May be suitable for wet blocking, but always follow the yarn manufacturer’s care instructions.
Acrylic: Gentle shaping after washing may help. Heat can permanently alter synthetic fibers, so avoid direct high heat unless the fiber guidance specifically permits the method.
Basic Blocking Procedure
- Check the yarn care label.
- Wash or dampen the swatch using a method appropriate for the fiber.
- Remove excess water without aggressive twisting.
- Lay the fabric flat on a clean towel or blocking mat.
- Shape it gently to the desired dimensions.
- Allow it to dry completely.
Do not stretch a small swatch aggressively to force it into a target measurement.
How to Store Finished Crochet
Clean and dry your project before storing it. Fold blankets and scarves rather than leaving heavy pieces hanging for long periods. Store delicate wool items in a clean, breathable environment with suitable protection against pests. For frequently used dishcloths, allow the fabric to dry thoroughly between uses.
Best Projects to Make With Moss Stitch
Once you understand the basic repeat, you can adapt it to many rectangular projects.
1. Moss Stitch Dishcloth
A cotton dishcloth is a practical first project. It lets you practice straight edges, consistent tension, and finishing without committing to a large amount of yarn. Choose washable cotton and create a square or rectangular piece based on your preferred dimensions.
2. Crochet Moss Stitch Scarf
A scarf showcases the stitch’s reversible nature. A single-color scarf looks understated and refined. A striped scarf creates more visible interest. Choose yarn and a hook combination that produces comfortable drape.
3. Striped Moss Stitch Blanket
A crochet striped moss stitch blanket is ideal for exploring color combinations. Try three harmonious colors, such as sage, cream, and rust. Repeat each shade in a consistent number of rows for a balanced design. For a modern appearance, make the stripe widths unequal but repeat the same sequence throughout the blanket.
4. Moss Stitch Baby Blanket
Choose a soft, washable yarn appropriate for baby items. Work the basic repeat until the fabric reaches your chosen dimensions. Secure all ends carefully and inspect the finished blanket for loose yarn or embellishments. Avoid attaching buttons, beads, or other detachable decorations to an infant blanket.
Follow current safe-sleep guidance: blankets should not be placed loose in an infant’s sleep space.
5. Moss Stitch Table Runner
Cotton or linen-blend yarn can create a decorative table runner. A restrained color palette highlights the stitch’s woven appearance. Make a practice swatch before selecting the final length and width.
6. Moss Stitch Tote Bag Panels
Moss stitch can create attractive bag panels, especially with cotton yarn. For a functional tote, consider lining the bag to limit stretching and prevent small objects from slipping through the fabric. Strong handles and reinforced attachment points are essential.
7. Moss Stitch Cushion Cover
Two matching rectangular panels can form a simple cushion cover. Measure the intended insert carefully. Account for seam allowances and fabric stretch. A zipper or overlapping closure can make the cover easier to remove for washing.
How to Make Your Moss Stitch Look Professional
Small refinements can improve the final appearance of nearly any crochet project.
Step 4 — Keep Your Hook Movements Consistent
Try to pull each loop up to approximately the same height. Variable loop height can cause uneven rows.
Step 5 — Maintain Balanced Chains
The chain-one spaces should be large enough to work into comfortably without becoming oversized gaps.
Step 6 — Check Both Sides
Turn the fabric periodically. The moss stitch is reversible, but examining both surfaces can reveal loose strands, misplaced stitches, and uneven color transitions.
Step 7 — Choose Colors With Purpose
For a gentle appearance, combine neighboring tones such as cream, oatmeal, and pale sage. For stronger contrast, use deep navy, ivory, and mustard. For an autumn-inspired project, rust, olive, and warm beige create a seasonal palette.
Step 8 — Test Borders Before Committing
A border can improve the finish of a blanket or cloth, but a border with too many stitches may ripple. A border with too few stitches can pull inward. Make a small sample and adjust stitch placement before applying the border to a large piece.
Quality Checklist: Is Your Moss Stitch Correct?
Before calling your practice swatch complete, examine these points.
Stitch Structure
- [ ] Each single crochet is placed in the intended chain space or edge stitch.
- [ ] The chain-one spaces alternate consistently with single crochets.
- [ ] The foundation row follows the same repeat across its width.
- [ ] The stitch texture appears staggered and woven.
Shape and Dimensions
- [ ] Both edges are reasonably straight.
- [ ] The stitch count is consistent from row to row.
- [ ] The fabric lies comfortably without severe curling.
- [ ] The width is suitable for the planned project.
Tension and Appearance
- [ ] Chain spaces are generally similar in size.
- [ ] No unintended large holes appear.
- [ ] The fabric has an appropriate degree of flexibility.
- [ ] Color changes are neatly managed.
Finishing
- [ ] Yarn tails are woven securely.
- [ ] The final fastening-off loop is secure.
- [ ] No loose or accidentally skipped stitches remain.
- [ ] Blocking and care are appropriate for the chosen fiber.
Minor variations in stitch size are normal in handmade crochet. However, a steadily decreasing width or an incorrect stitch repeat should be corrected before continuing a large project.
Frequently asked questions
1. Is moss stitch the same as linen stitch in crochet?
In many crochet patterns, moss stitch and linen stitch refer to the same alternating combination of single crochet and chain-one spaces. Granite stitch is another common name. The fabric has a lightly woven surface, created by working single crochets into chain spaces rather than routinely into the tops of stitches. Since crochet terminology is not perfectly standardized, check the pattern’s stitch instructions before assuming two named stitches are identical.
2. Is crochet moss stitch easy for beginners?
Yes. It requires only chain stitches and single crochets, making it suitable for crocheters who already understand the basic movements. The primary learning challenge is recognizing chain-one spaces. A smooth, light-colored yarn and a small practice swatch make the process easier. Once you can find those spaces consistently, the repeating pattern becomes much more comfortable to work.
3. What is the best yarn for crochet moss stitch?
Smooth worsted-weight cotton or acrylic is an approachable choice for learning because the stitches are easy to see. Cotton works especially well for household cloths and structured accessories. Acrylic is a practical option for many blankets and scarves. Wool can provide warmth and elasticity. The most suitable yarn depends on the project’s purpose, desired drape, washing requirements, and texture.
4. Why is my moss stitch getting smaller?
Your fabric is probably losing stitches at the edges. In the flat-row method taught here, you must make the final single crochet in the designated edge stitch after working across the chain spaces. Beginners often overlook that stitch because it sits beyond the final obvious opening. Use a marker and count your single crochets regularly. If a row has already lost stitches, undo it and restore the correct repeat.
5. Does moss stitch use more yarn than single crochet?
There is no universal answer. Yarn consumption changes with hook size, yarn thickness, stitch density, tension, and the dimensions of the finished fabric. Moss stitch includes chain spaces, while ordinary single crochet forms a denser surface, but this does not guarantee a specific savings percentage. To compare them accurately for your project, make swatches of equal dimensions using the same yarn and measure how much yarn each consumes.
6. Can you crochet moss stitch in the round?
Yes. Moss stitch can be adapted to rounds, including joined rounds and spiral-style constructions. However, the placement of increases, turning chains, joins, and corners differs from a flat-row pattern. The tutorial above is specifically written for a rectangular piece worked back and forth. For a round coaster, basket, or square blanket, use a pattern that provides the correct increase and corner instructions for that construction.
7. Why does moss stitch look different with variegated yarn?
Variegated yarn changes color along its length, while moss stitch distributes those colors through alternating short stitches and chain spaces. This can produce flecks, broken stripes, or a subtly blended surface. The appearance depends on the length of each color section and the width of the project. A small swatch helps you see whether the yarn creates attractive distribution or unexpected pooling.
8. How do I make a moss stitch blanket with straight edges?
Start by using a consistent foundation count and follow one edge method throughout the entire project. In this tutorial, every repeating row starts with a chain-two turning chain and ends with a single crochet in the last edge stitch. Mark the edge stitches until you can identify them without assistance. Count the single crochets periodically, maintain steady tension, and correct missing or extra stitches as soon as they appear.
Save This Moss Stitch Tutorial for Your Next Crochet Project
The moss stitch is a useful skill because one simple repeat can produce so many different finished items. Begin with the 22-chain practice swatch, learn to recognize every chain-one space, and continue until both edges stay straight without constant counting.
Once your practice piece looks consistent, try a striped dishcloth or a soft scarf. When you are comfortable changing colors and maintaining even tension, use the same stitch to plan a full crochet moss stitch blanket.
Pinterest-ready description: Learn how to crochet the moss stitch with this beginner-friendly linen stitch tutorial. Follow clear row-by-row instructions, understand exactly where to insert your hook, fix uneven edges, learn simple color changes, and discover beautiful ideas for scarves, dishcloths, and striped crochet blankets. Save this practical crochet stitch guide for your next handmade project.
Your next step: Make one small single-color swatch, check the stitch count, practice a clean color change, and save this tutorial so you can return to the diagrams and troubleshooting instructions whenever you start a new moss stitch project.
Pin “How to Crochet the Moss Stitch (Linen, Granite): A Complete Beginner-to-Pro Tutorial” so you can find it when the yarn arrives.
Get the next free pattern first
One email a week. New patterns, no noise.
Yarn weights and hook sizes in this guide follow the Craft Yarn Council standards.
Keep going: Crochet Moss Stitch: Easy Step-by-Step Tutorial, Pattern & Blanket Ideas · Crochet Moss Stitch: Easy Free Tutorial for Beginners · Crochet Fingerless Gloves: Easy Free Pattern for Beginners





