
In Treble Afghan Square Pattern by Julie Yeager: Complete Crochet Guide
Afghan square: In this Crochet Granny guide, you'll learn how to prepare your materials, master treble crochet, understand the square's construction…

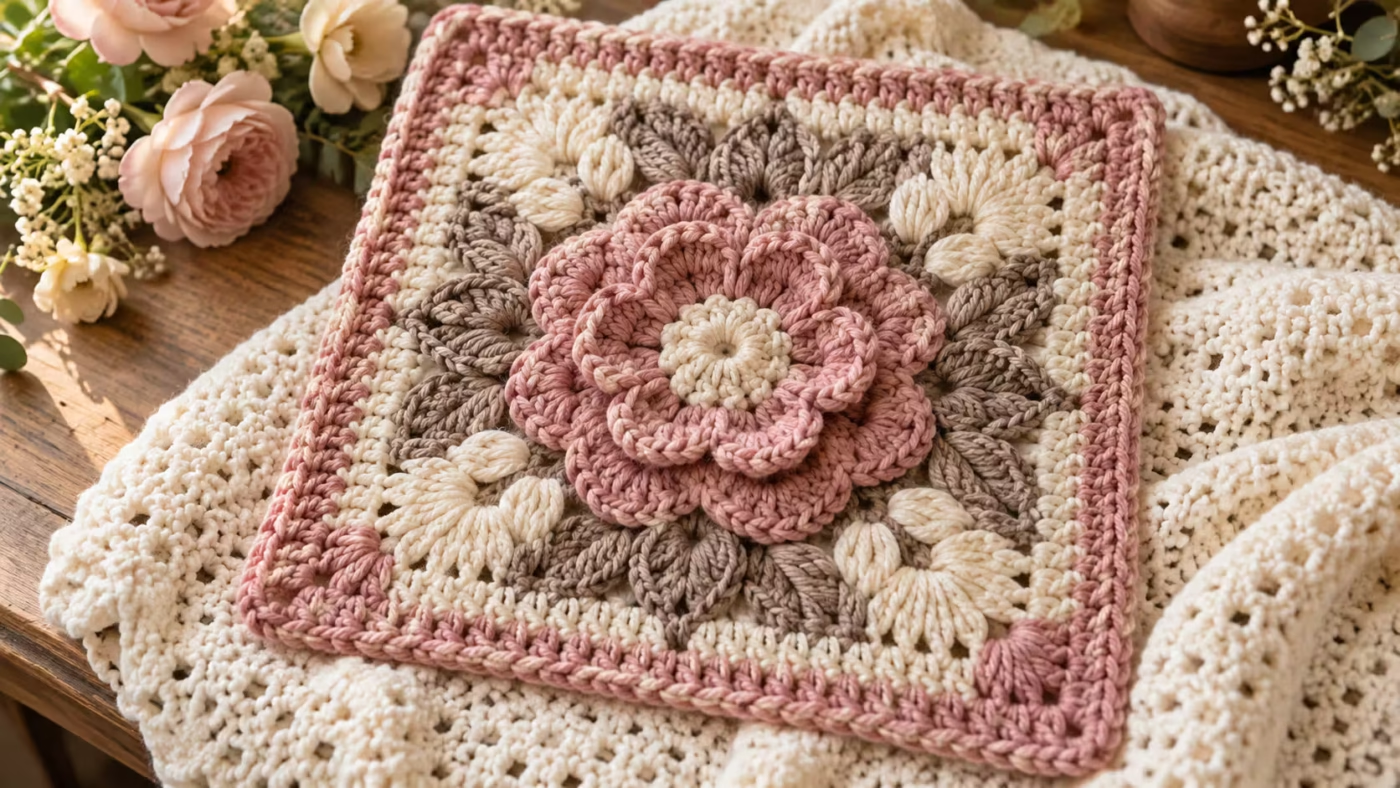
In this Crochet Granny guide, you’ll learn how to prepare your materials, master treble crochet, understand the square’s construction, control your tension, work toward a professional finish, and confidently follow Julie Yeager’s original design.
The original pattern is a separately sold design. This article is an independent learning companion, not a reproduction of its proprietary round-by-round instructions. For the exact stitch counts, special cluster directions, and round sequence, use the designer’s pattern alongside this tutorial.
Project Overview
| Project Detail | Information |
|---|---|
| Pattern name | In Treble Afghan Square |
| Original designer | Julie Yeager |
| Craft | Crochet |
| Finished size | Approximately 12 × 12 inches |
| Crochet terminology | US |
| Suggested yarn weight | Worsted weight (#4) |
| Recommended hook | 5.5 mm (US I/9) |
| Main technique | Treble crochet and textured floral construction |
| Construction | Worked in joined rounds |
| Border | Three rounds in the original design |
| Suggested skill level | Confident beginner to intermediate, depending on stitch familiarity |
| Uses | Afghan blankets, cushion fronts, decorative textile panels |
| Pattern publication | March 2012 |
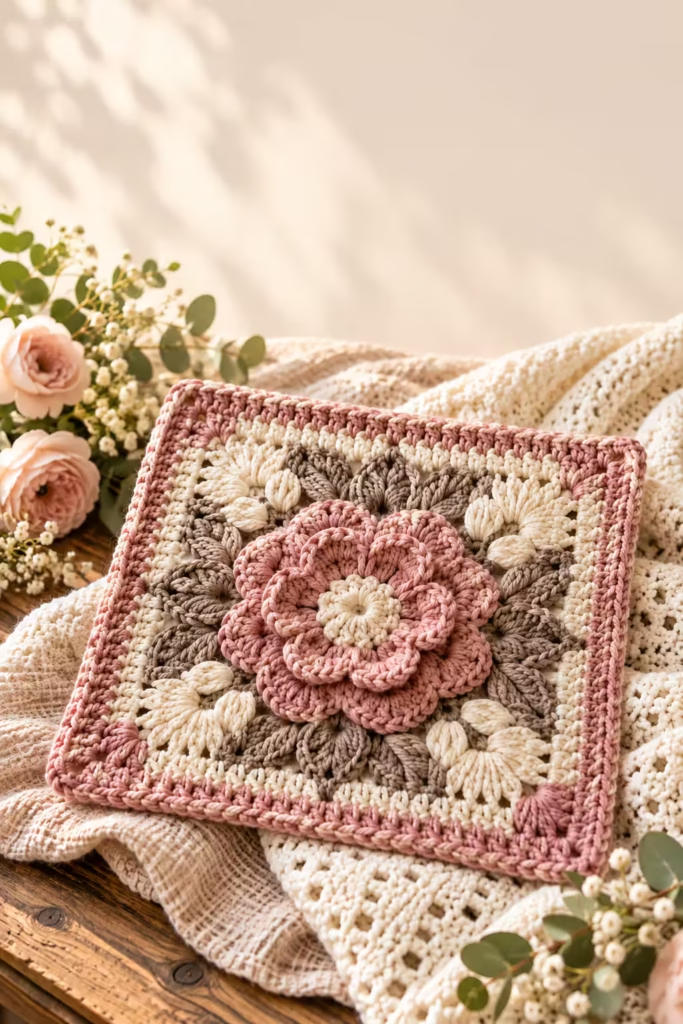
The original design uses tall treble stitches to create a prominent textured floral effect. Its square construction makes it particularly suitable for combining with other afghan blocks. The finished size of approximately 12 inches is the designer’s stated target, not a guarantee with every yarn and tension combination.
Original pattern: In Treble Afghan Square by Julie Yeager on Ravelry.
Understanding the In Treble Afghan Square Pattern
What distinguishes this square from a traditional granny square is its dramatic use of vertical texture.
A conventional granny square commonly relies on groups of double crochet stitches separated by chain spaces. In Treble uses taller stitches and raised floral elements to introduce a more sculptural appearance.
The original pattern is worked outward from the center, and the final border rounds produce a square suitable for joining into a blanket.
Step 1 — Why treble crochet changes the appearance
A US treble crochet stitch is taller than a US double crochet stitch.
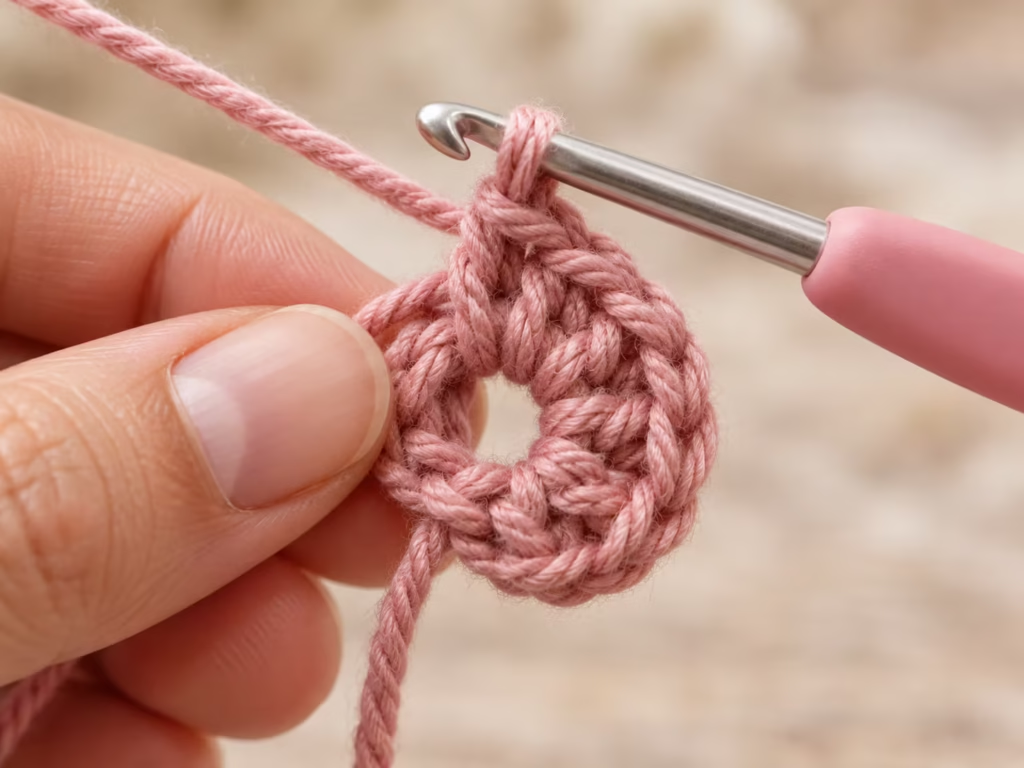
That additional height provides room for elongated stitch groups and pronounced decorative elements. It also makes tension control especially important. If your trebles are consistently loose, the work can become floppy. If they’re too tight, the fabric may pull inward and lose the openness that makes the textured design attractive.
Think of the project as two related goals: build an even decorative center, then obtain four balanced edges and corners.
The exact transitions between these elements are provided in Julie Yeager’s original written instructions.
Materials and Tools
| Material | Recommended specification | Purpose | Alternative |
|---|---|---|---|
| Yarn | Worsted weight #4 | Main crochet fabric | Comparable-weight acrylic, wool, or cotton |
| Crochet hook | 5.5 mm (US I/9) | Forming the stitches | Adjust size after measuring |
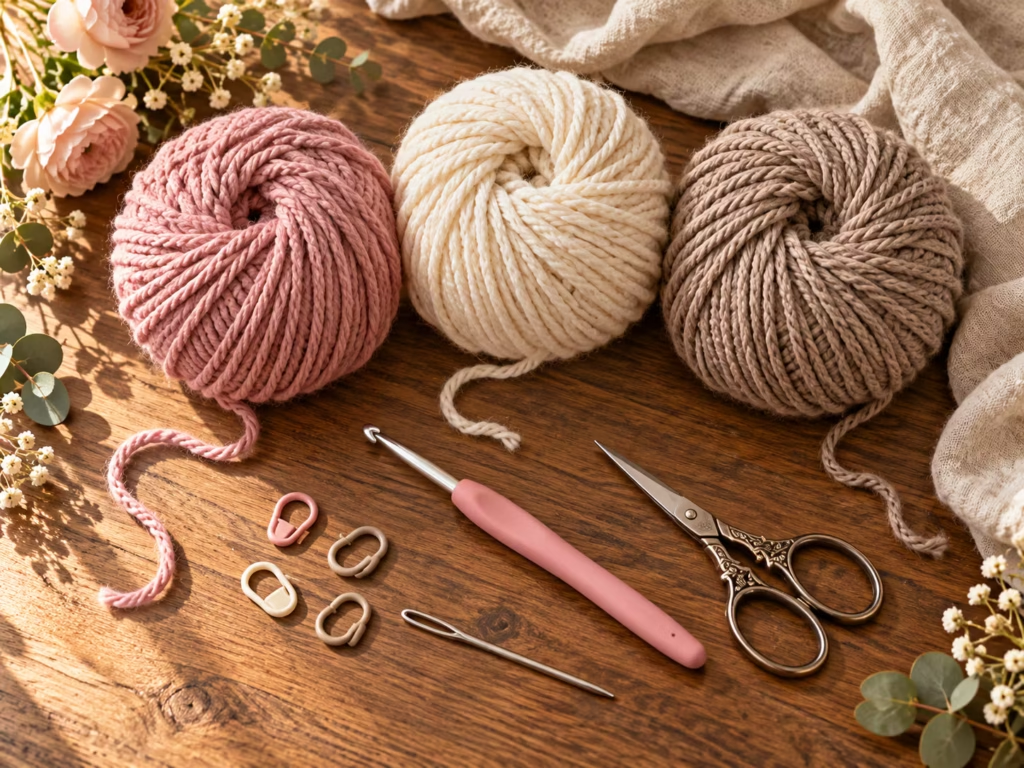
| Stitch markers | 4 removable markers | Tracking square corners | Contrasting scrap yarn |
| Tapestry needle | Blunt yarn needle | Weaving yarn ends | Large-eye finishing needle |
| Scissors | Small sharp scissors | Cutting yarn | Yarn snips |
| Measuring tape | Flexible tape | Checking dimensions | Rigid ruler |
| Pattern instructions | Julie Yeager’s original pattern | Exact round sequence and stitch counts | No direct substitute for the original design |
| Blocking equipment | Mats and rustproof pins | Professional finishing | Clean towels and a suitable flat surface |
The original listing recommends worsted yarn and a 5.5 mm hook. It does not establish a universal yardage requirement for every yarn substitution. For a multicolor sample, choose yarns with similar thickness and fiber characteristics. Mixing substantially different yarn weights may cause uneven rows and distorted corners.
Selecting your yarn
Acrylic is often a practical choice for blankets because it is generally affordable, available in many colors, and relatively easy to maintain. Cotton can provide clearer stitch definition and a firmer finished surface, although it may produce a heavier block.
Wool or wool blends can offer elasticity and softness, but care requirements depend on the specific yarn. For a first attempt, smooth, light-colored yarn is especially helpful. Very dark or fuzzy fibers can make it difficult to identify stitch tops and attachment points.
Essential Crochet Stitches
Before beginning the actual square, learn to recognize and execute the foundational stitches consistently.
US treble crochet (tr)
Treble crochet is the signature technique to understand for this project.
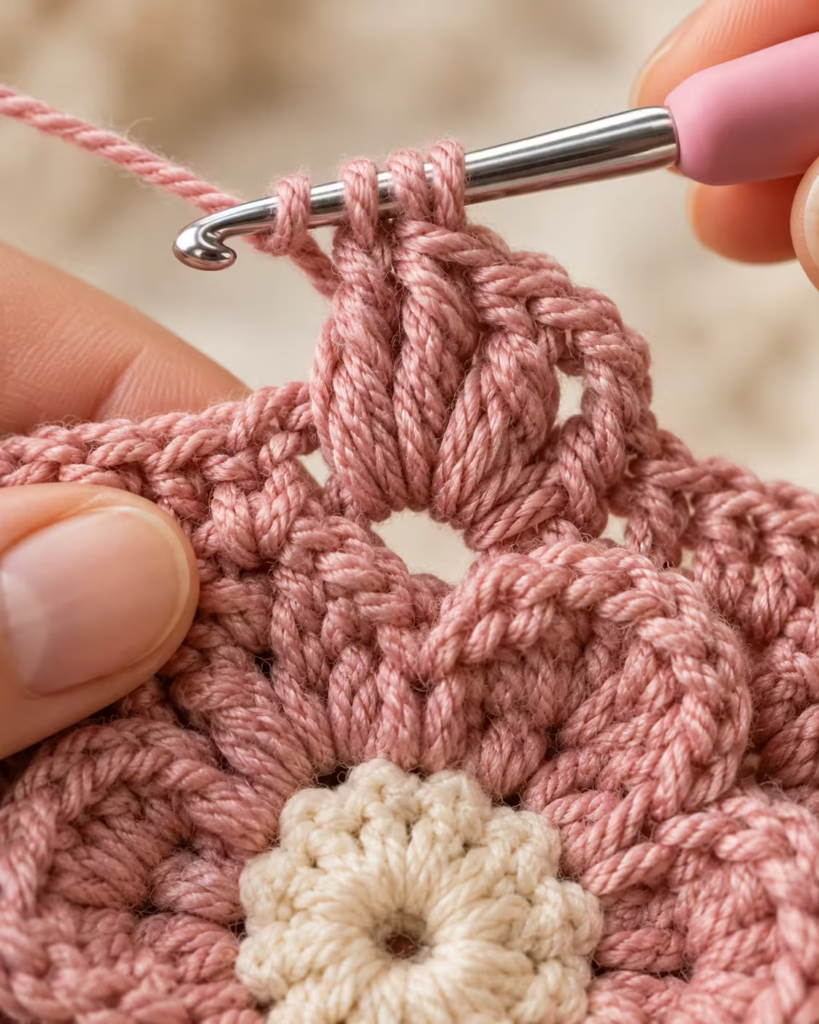
- Wrap the yarn around your hook twice.
- Insert the hook into the indicated stitch or space.
- Yarn over and pull up a loop. Four loops should be on the hook.
- Yarn over and pull through the first two loops.
- Yarn over and pull through the next two loops.
- Yarn over and pull through the final two loops.
You should have one loop remaining on your hook.
Visual checkpoint: The finished stitch should have a tall, relatively straight post and a clearly defined top.
Common mistake: Pulling through three loops instead of two during one stage changes the stitch structure.
Solution: Count your loops deliberately until the motion becomes familiar.
Treble clusters
A cluster brings several partially completed stitches together at one shared top. Because cluster structures vary, the exact number of stitches, insertion points, and closing method must come from the original pattern.
Practice the fundamental idea with this independent three-treble cluster exercise:
- Yarn over twice and insert your hook into a practice stitch.
- Pull up a loop and work through two loops twice, leaving the final step unfinished.
- Repeat the partial treble twice more into the same practice stitch.
- You should now have four loops on your hook.
- Yarn over and pull through all four loops to close the group.
This creates a sample three-treble cluster sharing one top. It is a technique exercise, not a verified reproduction of Julie Yeager’s special stitch.
Other essential abbreviations
| Abbreviation | Meaning |
|---|---|
| ch | Chain |
| sl st | Slip stitch |
| sc | Single crochet |
| hdc | Half double crochet |
| dc | Double crochet |
| tr | Treble crochet |
| st | Stitch |
| sp | Space |
| rnd | Round |
| rep | Repeat |
| YO | Yarn over |
Always check how the original pattern defines its special stitches and beginning chains. A starting chain may count as a stitch in one round but not in another.
Step-by-Step Crochet Guide
The following workflow explains how to approach the authentic pattern without replacing its purchased instructions.
Step 1: Prepare the yarn and establish your tension
Choose your color arrangement before crocheting. Wind loose skeins into manageable balls, check the yarn label, and place the working yarn where it can feed smoothly.
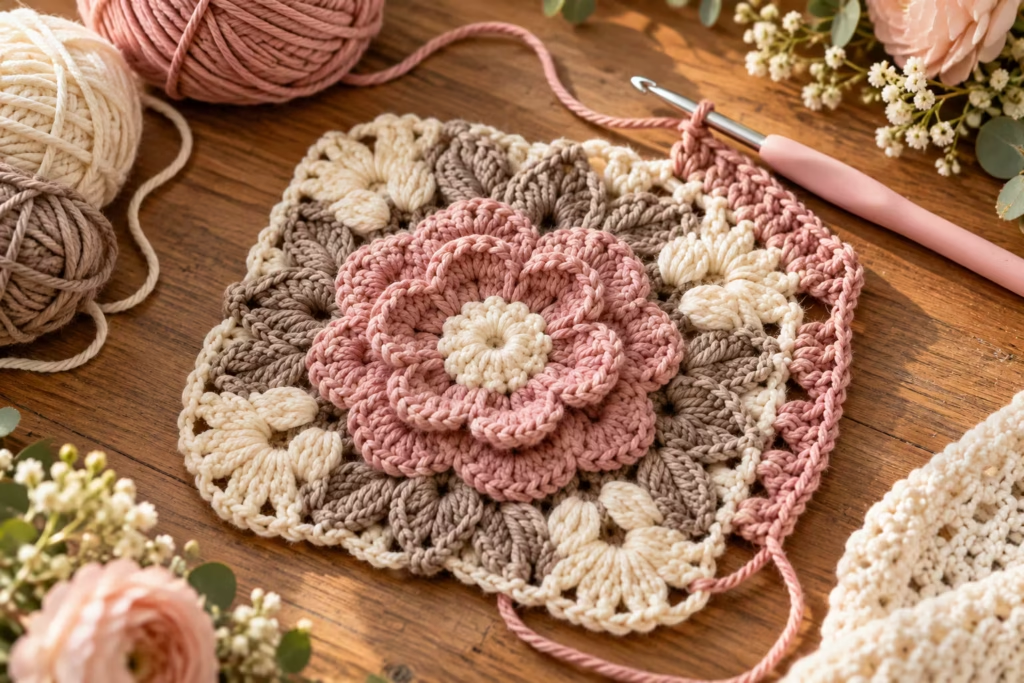
Make an independent treble practice swatch before starting. Work a short foundation chain and create several rows of regular treble stitches, using the correct turning height for your practice instructions.
Action: Crochet enough rows to recognize how your yarn and hook behave together.
Visual check: The posts should have consistent height, and the fabric should not contain unusually loose loops.
Common error: Gripping the working yarn tightly and producing shortened stitches.
Solution: Relax the yarn hand and let loops glide along the full hook shaft.
Expert tip: Pay particular attention to the first and last stitches of every practice row.
Step 2: Work the central foundation
Open the original pattern and follow its beginning instructions precisely. Use a removable marker to identify the start of the first round. If the pattern specifies a chain ring, work into that foundation. Do not replace it with a magic ring unless the design explicitly supports the substitution.
Visual check: Your center should lie reasonably flat, with the expected number of stitches and spaces.
Common error: Adding an extra stitch when joining a round.
Solution: Identify the specified joining stitch before completing the slip stitch.
Expert tip: Count the first few rounds carefully. Early errors are much easier to repair than mistakes hidden beneath later textured rounds.
Step 3: Develop the textured floral elements
Use the designer’s instructions for each cluster, chain space, and joining point. Pay attention to whether a decorative stitch is made into a stitch, into a space, or around an existing stitch structure. These positions are not interchangeable.
Action: Complete the specified texture round in the written sequence, pausing at every repeat.
Visual check: Repeated floral elements should have consistent size and spacing.
Common error: Accidentally placing one decorative group into the wrong chain space.
Solution: Locate the previous repeat, verify its placement, and correct the current repeat before proceeding.
Expert tip: Count both the decorative groups and the spaces between them. Matching only the total stitch count may not reveal incorrect placement.
Step 4: Maintain symmetry as the motif expands
As the circular design increases in size, regularly place the project on a flat surface. Avoid stretching the fabric while checking it.
Action: Compare repeated sections after every round and confirm the count given in the pattern.
Visual check: The floral sections should appear balanced rather than compressed on one side.
Common error: Gradually changing tension as longer treble groups are worked.
Solution: Maintain a consistent loop height and release excess tension from the working yarn.
Expert tip: Rotate the project occasionally while inspecting. Uneven elements can be easier to identify when viewed from another direction.
Step 5: Follow the transition into a square
This is a critical construction stage. The border must create four identifiable corners while keeping the center evenly positioned. Use the pattern’s exact increases, corner placement, and connecting stitches rather than guessing their arrangement.
Action: Mark each confirmed corner location once the pattern establishes it.
Visual check: The developing work should have four balanced sides and clearly defined corners.
Common error: Missing a corner increase and producing a curved or distorted edge.
Solution: Return to the last correct corner and compare the stitch sequence with the original instructions.
Expert tip: Keep corner markers in place through the final rounds, moving them upward as necessary.
Step 6: Complete the three-round border
Julie’s original design specifies three border rounds to bring the square to its intended size.
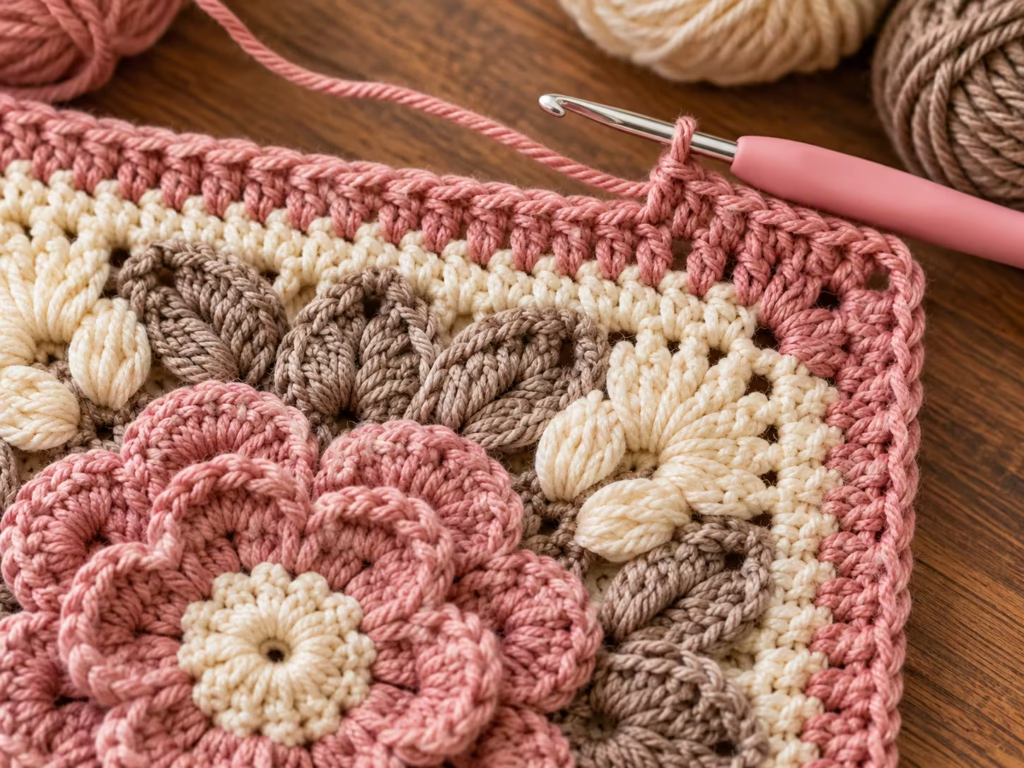
Work them in their written order.
Action: Check the stitch count on every side, excluding or including corner stitches exactly as the original pattern directs.
Visual check: Opposite sides should be similar in length, with corners positioned at approximately right angles.
Common error: Adding unnecessary stitches to compensate for a square that seems too small.
Solution: Finish the specified border before measuring. If sizing remains incorrect, investigate yarn weight, tension, and hook size rather than altering the pattern casually.
Expert tip: If making multiple blocks, use the same measuring method for every one.
Step 7: Fasten off and weave in ends
Cut the working yarn with sufficient length for secure finishing. Pull the tail through the final loop and gently tighten it. Thread the end onto a blunt needle, then weave it through several suitable stitches on the reverse of the fabric. Change direction to improve security without visibly distorting the front.
Visual check: The tail should be hidden and the border should retain its natural shape.
Common error: Cutting ends extremely short immediately after fastening off.
Solution: Leave usable tails until the weaving process is complete.
Expert tip: Stretch the finished area very gently before trimming the remaining tail, allowing the fabric to settle into its normal position.
Visual Stitch Diagrams
These diagrams teach general crochet structure. They are not the proprietary stitch chart or round layout of In Treble.
Understanding a treble stitch
START | v Yarn over twice | v Insert hook into stitch | v Yarn over, pull up loop | v 4 loops on hook | v Yarn over, pull through 2 | v 3 loops remain | v Yarn over, pull through 2 | v 2 loops remain | v Yarn over, pull through 2 | v 1 loop remains | v TREBLE COMPLETE
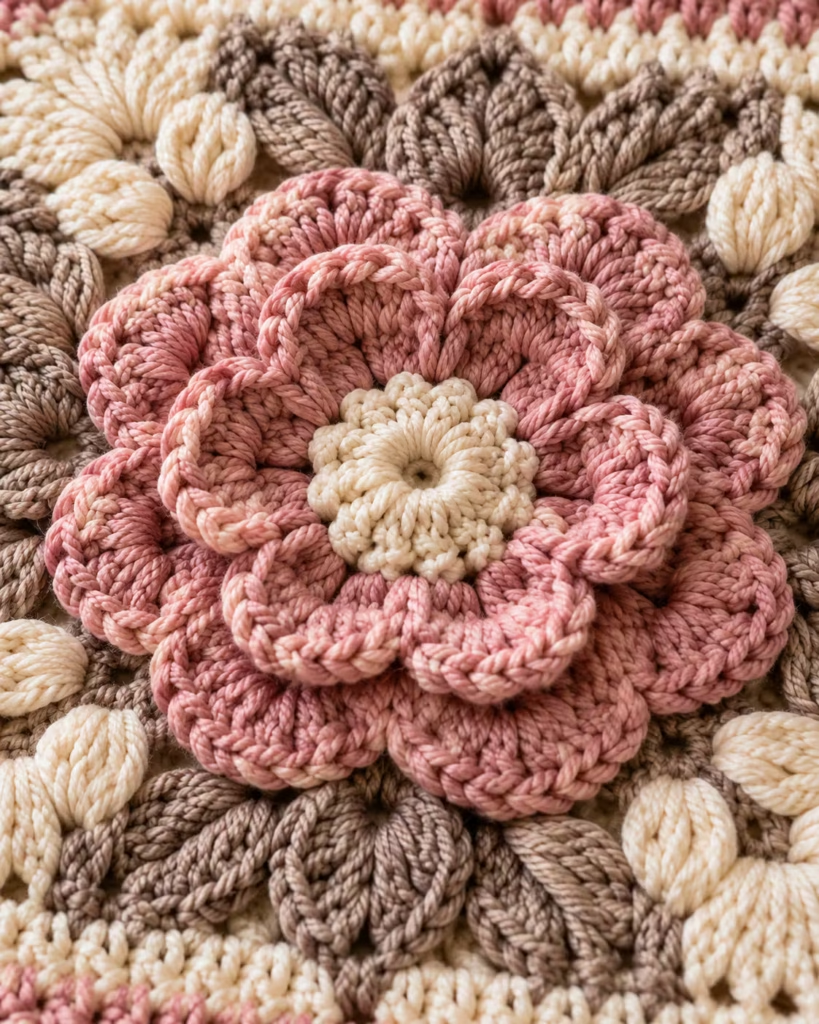
Understanding square geometry
A ——– B
| O |
|---|
D ——– C
O = decorative central motif A = upper-left corner B = upper-right corner C = lower-right corner D = lower-left corner
For a symmetrical square, the four corners should be evenly distributed around the center. Measure finished edges in a relaxed state. A square that looks balanced while pinned tightly may reveal distortion when released.
Crochet quality decision chart
Does the stitch count match? | +—-+—-+
YES NO
v v Check shape Recount previous round | v Do four corners align? | YES / NO | +– NO –> Check corner placement | v Check tension and size | v Finish and block
This simple process helps distinguish structural mistakes from minor tension variations.
Beginner-to-Advanced Techniques
Level 1: Build control with regular trebles
If you are new to tall stitches, begin with an ordinary rectangular swatch. Concentrate on keeping every treble the same height. Do not rush into clusters until you can reliably count loops and recognize completed stitches. A row counter and light-colored yarn can make practice much easier.
Level 2: Master textured clusters
Next, practice partially completed treble stitches and closing them together. Focus on controlled yarn overs and equal post height. A smooth yarn is preferable because it makes mistakes easier to undo. Once comfortable, return to the original pattern’s special-stitch definition and use that exact method.
Level 3: Improve color placement and finishing
Experienced crocheters can refine the finished appearance by planning color changes around complete pattern sections.
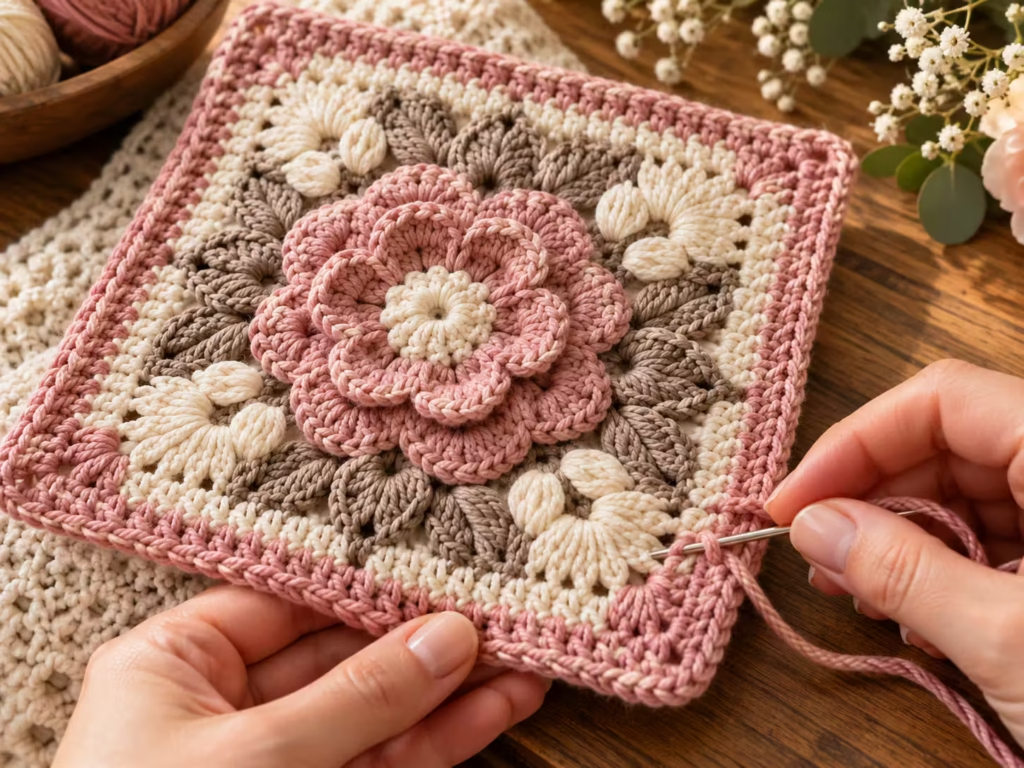
Make color changes only where they will not interfere with the specified stitch structure. For a more refined surface, use invisible finishing techniques where appropriate and choose joining seams that suit the weight of the finished blocks.
Troubleshooting Common Problems
| Problem | Likely cause | Practical fix | Prevention |
|---|---|---|---|
| Center curls upward | Excessively tight stitches or insufficient stitch expansion | Check stitch counts and tension | Relax tension and verify each round |
| Square ripples | Excess fabric, loose stitches, or incorrect increases | Check the relevant round before blocking | Follow specified increases carefully |
| Corners look rounded | Missing or misplaced corner stitches | Rework affected corner section | Mark all four corners |
| Treble stitches vary in height | Inconsistent loop tension | Practice tall stitches with steady movements | Use the same grip and loop height |
| Clusters look uneven | Different numbers of partial stitches or inconsistent tension | Recount and remake the affected group | Count partial stitches before closing |
| Edges are different lengths | Incorrect repeat or missed stitch | Compare opposing sides | Count each side after every round |
| Visible gaps at joins | Loose slip stitches or incorrect joining locations | Rework the join correctly | Identify joining points in advance |
| Finished square is too small | Tight tension or lighter yarn | Check hook size and yarn weight | Compare dimensions with the original target |
| Ends become visible | Insufficient weaving or trimming too close | Secure the tail again if enough remains | Weave through several stitches and change direction |
One of the most valuable crochet habits is correcting mistakes before adding another round. Decorative structures often conceal errors until the following section becomes difficult to work.
Creative Color Combinations
This floral afghan square can look dramatically different depending on how you distribute color.
<grid columns={2} gap={3}> <grid-item> <AsyncImage query=”crochet textured floral granny square dusty rose ivory taupe elegant handmade” aspectRatio=”1:1″/> Dusty Rose & Taupe
Soft, romantic colors for a cozy bedroom or vintage-style blanket. </grid-item> <grid-item> <AsyncImage query=”crochet textured floral granny square burgundy mustard gold olive autumn colors close up” aspectRatio=”1:1″/> Autumn Botanical
Burgundy, golden mustard, and olive green for a warm fall-inspired design. </grid-item> <grid-item> <AsyncImage query=”crochet floral granny square sage green cream beige textured pattern” aspectRatio=”1:1″/> Sage & Cream
A gentle, nature-inspired palette that emphasizes the raised stitch texture. </grid-item> <grid-item> <AsyncImage query=”crochet floral granny square dark navy teal ivory sophisticated colorful textured blanket block” aspectRatio=”1:1″/> Midnight Garden
Navy, deep teal, and ivory for stronger contrast and a modern decorative appearance. </grid-item> </grid>
How to choose colors intelligently
Use color contrast to emphasize the raised floral texture. For a subtle, sophisticated result, choose neighboring shades that vary mainly in lightness.
For a dramatic effect, combine a clearly lighter floral center with a darker surrounding border. If creating a full afghan, keep one repeated background or border color across the blocks to create visual unity, even when the center colors vary.
<!– gap –>
How Many Squares Do You Need for a Blanket?
A 12-inch crochet block is a useful starting point for planning, but your actual blanket measurements will also depend on joining methods and edging.
The following calculations assume every finished square measures exactly 12 inches and exclude seam and outer-border adjustments.
| Layout | Number of squares | Approximate dimensions before joining adjustments |
|---|---|---|
| 3 × 3 | 9 | 36 × 36 inches |
| 4 × 5 | 20 | 48 × 60 inches |
| 5 × 6 | 30 | 60 × 72 inches |
| 6 × 7 | 42 | 72 × 84 inches |
For example, a five-by-six arrangement of 12-inch squares creates a nominal 60-by-72-inch rectangle before any changes caused by joining or finishing. To estimate the yarn needed for a full blanket, weigh one completed square after trimming and finishing its ends.
Multiply that weight by the total number of squares, then add an allowance for joining and edging. Convert the estimate to yardage using the yarn label’s weight-to-yardage information. This approach is more reliable than assuming every textured square consumes the same yarn.
<!– gap –>
Choosing the Best Joining Method
| Joining method | Best for | Advantages | Limitations | Recommendation |
|---|---|---|---|---|
| Whipstitch | Simple blanket assembly | Easy to learn | Can create a visible seam | Good for beginners |
| Mattress stitch | Neater sewn joins | Relatively discreet appearance | Requires careful alignment | Ideal for understated seams |
| Single crochet join | Defined decorative outlines | Strong and visible | Can add thickness | Great for contrasting borders |
| Slip stitch join | Compact crochet seams | Minimal added bulk when worked loosely | Tight tension can shorten seams | Useful for clean modern layouts |
| Join-as-you-go | Planned connected motifs | Reduces later assembly | Requires compatible final-round instructions | Use only with a verified adaptation |
For In Treble, a sewn join can be a sensible starting choice because you can finish and measure all blocks before connecting them.
Blocking and Professional Finishing
Blocking helps improve the appearance of the finished square, especially if the border needs slight adjustment.
A practical blocking method
- Check the yarn label for fiber-specific care instructions.
- Place the finished square on a suitable blocking surface.
- If the fiber allows, lightly dampen the fabric or use an appropriate gentle blocking method.
- Arrange the square into a balanced 12-inch shape without aggressive stretching.
- Secure the corners with rustproof pins if appropriate.
- Allow the fabric to dry completely before removing it.
Avoid applying a hot iron directly to acrylic crochet. Excessive heat can permanently flatten or damage synthetic fibers. Blocking may improve minor inconsistencies, but it cannot reliably repair missing stitches or incorrect corner construction.
<!– gap –>
Final Quality Control Checklist
Before calling your project complete, inspect these details:
- [ ] All rounds match the original pattern’s stitch instructions.
- [ ] Decorative clusters appear consistent.
- [ ] The center is reasonably balanced.
- [ ] All four corners are correctly constructed.
- [ ] Opposite sides have matching stitch structures.
- [ ] The finished square measures approximately 12 × 12 inches as intended.
- [ ] Yarn ends are securely woven into the reverse.
- [ ] The square lies reasonably flat without forceful stretching.
- [ ] Color changes look tidy.
- [ ] The finished piece is ready for joining or practical use.
A slight size difference or modest unevenness may be manageable through blocking. A missing structural stitch, however, is best corrected before the square is joined to other pieces.
Creative Ways to Use Your Finished Square
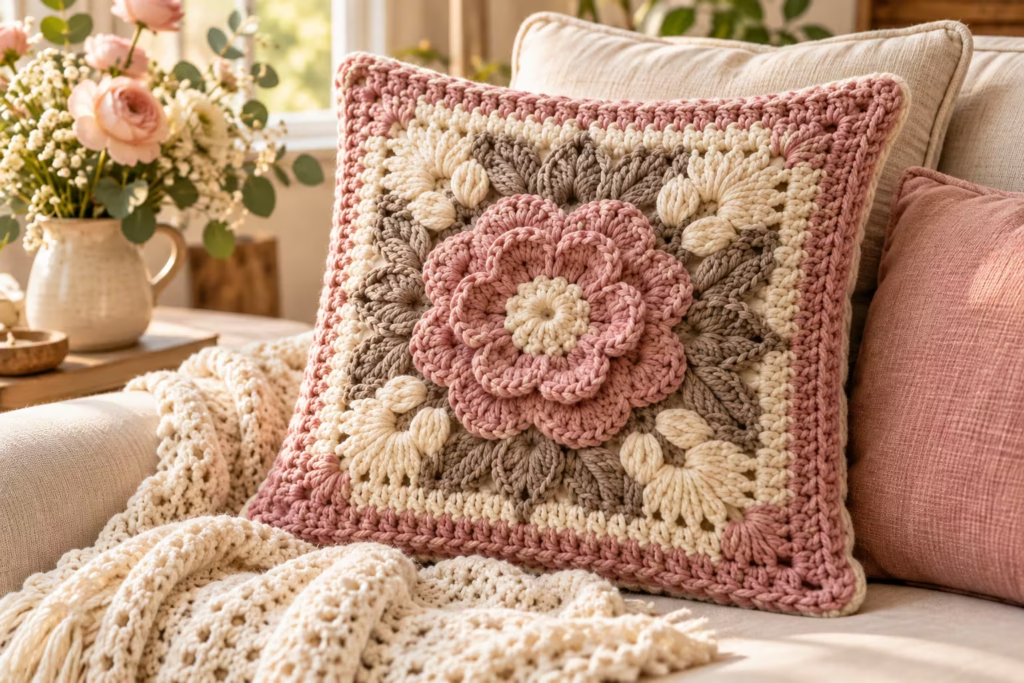
The In Treble design is not limited to a traditional afghan. Its raised floral texture makes it an attractive decorative textile element.
Throw pillows: Use the square as a front panel, adding appropriately sized backing and a suitable closure. For a larger cushion, consider a coordinating crochet frame.
Sampler blankets: Combine it with other 12-inch blocks to create variation in texture while retaining a consistent modular layout.
Wall décor: Mount a finished, blocked square in a suitable textile frame or hanging system without pulling the corners out of shape.
Decorative table accessories: A cotton version could serve as a decorative centerpiece, provided it is appropriate for the surface and intended use. Textured crochet should not be treated as heat protection.
Handmade gifts: A coordinated set of textured squares can become a personalized blanket or decorative cushion cover.
Frequently asked questions
1. Is the In Treble Afghan Square pattern free?
The original In Treble Afghan Square design by Julie Yeager is listed as a paid crochet pattern on Ravelry and LoveCrafts. Prices and availability can change. Purchasing the original gives you access to the designer’s specific instructions, which are necessary for faithfully reproducing the stitch sequence and decorative details.
2. Is this crochet square suitable for beginners?
It is best suited to crocheters who already understand chains, slip stitches, tall crochet stitches, and joined rounds. A motivated beginner can prepare by practicing treble stitches and clusters separately. Once these movements are comfortable, the original pattern becomes easier to follow without repeatedly stopping to learn unfamiliar techniques.
3. What size is the finished In Treble Afghan Square?
The designer specifies a 12-inch square. Actual measurements depend on your yarn thickness, hook size, and tension. If your block differs noticeably from the target, verify your stitch counts before changing hooks. Blocking can improve the shape, but should not be used to compensate for structural errors.
4. Can I crochet this square using cotton yarn?
Yes, cotton is a possible substitution, especially for projects where stitch definition is a priority. However, a cotton version may have different weight, drape, and dimensions compared with an acrylic version. Make a small sample, use an appropriate hook, and follow the cotton manufacturer’s washing and blocking recommendations.
5. How do I stop treble crochet stitches from becoming loose?
Maintain consistent yarn tension and use the full shaft of the hook when forming loops. Avoid pulling the working yarn excessively after each partial stitch. If the fabric remains consistently loose, experiment with a slightly smaller hook on a practice swatch. Do not change hook sizes midway through your actual project without a reason.
6. Can I combine In Treble squares with ordinary granny squares?
Yes, provided the completed squares have compatible edge dimensions and can be joined securely. Standard granny squares often have different stitch counts and edge structures, so you may need to adapt a separate square’s border. Avoid altering the In Treble design’s original instructions without checking how the modification affects its geometry.
7. Why does my floral center look uneven?
Uneven floral centers often result from inconsistent stitch height, incorrect placement, or a missing stitch within a repeated element. Compare each section against the original pattern and check the completed round’s stitch count. If the problem is structural, undo the affected section instead of trying to flatten the mistake with blocking.
8. How should I wash a finished crochet blanket made from these squares?
Follow the most delicate care requirements among the yarns used in the blanket. Some acrylic yarns allow gentle machine washing, while wool and certain blends require more careful treatment. Secure all loose ends before washing. Dry the blanket according to the yarn label, supporting its weight to reduce stretching when necessary.
Keep going: Black and Red Crochet Blanket: Stunning Gothic Chevron Pattern · Crochet Color Blanket Ideas for Soft, Balanced Texture · Easy Moss Stitch Crochet Blanket Pattern for Beginners
Final Thoughts: Make Your Square Beautiful and Consistent
The In Treble Afghan Square pattern by Julie Yeager is an appealing choice for anyone who enjoys dimensional crochet and floral motifs. The combination of tall stitches, textured details, and structured square edges creates a versatile block for blankets and home décor.
Start by mastering treble crochet, then follow the designer’s original instructions carefully while checking the stitch count and symmetry after every round. Finish with secure woven ends and gentle blocking.
For your next project, create a second square using a different color combination but the same yarn weight and hook. Comparing the two finished blocks is a practical way to improve stitch consistency and develop a coordinated blanket design.
Helpful next step: Save this guide as your technique reference, obtain the original In Treble Afghan Square pattern, and use both together to create your first accurately finished floral block.
Pin “In Treble Afghan Square Pattern by Julie Yeager: Complete Crochet Guide” so you can find it when the yarn arrives.
Get the next free pattern first
One email a week. New patterns, no noise.





