
Halloween Crochet: Easy Ghost, Pumpkin & Bat Patterns
Halloween crochet: You'll learn how to crochet each design step by step, choose suitable yarn, shape your pieces, and finish them neatly.

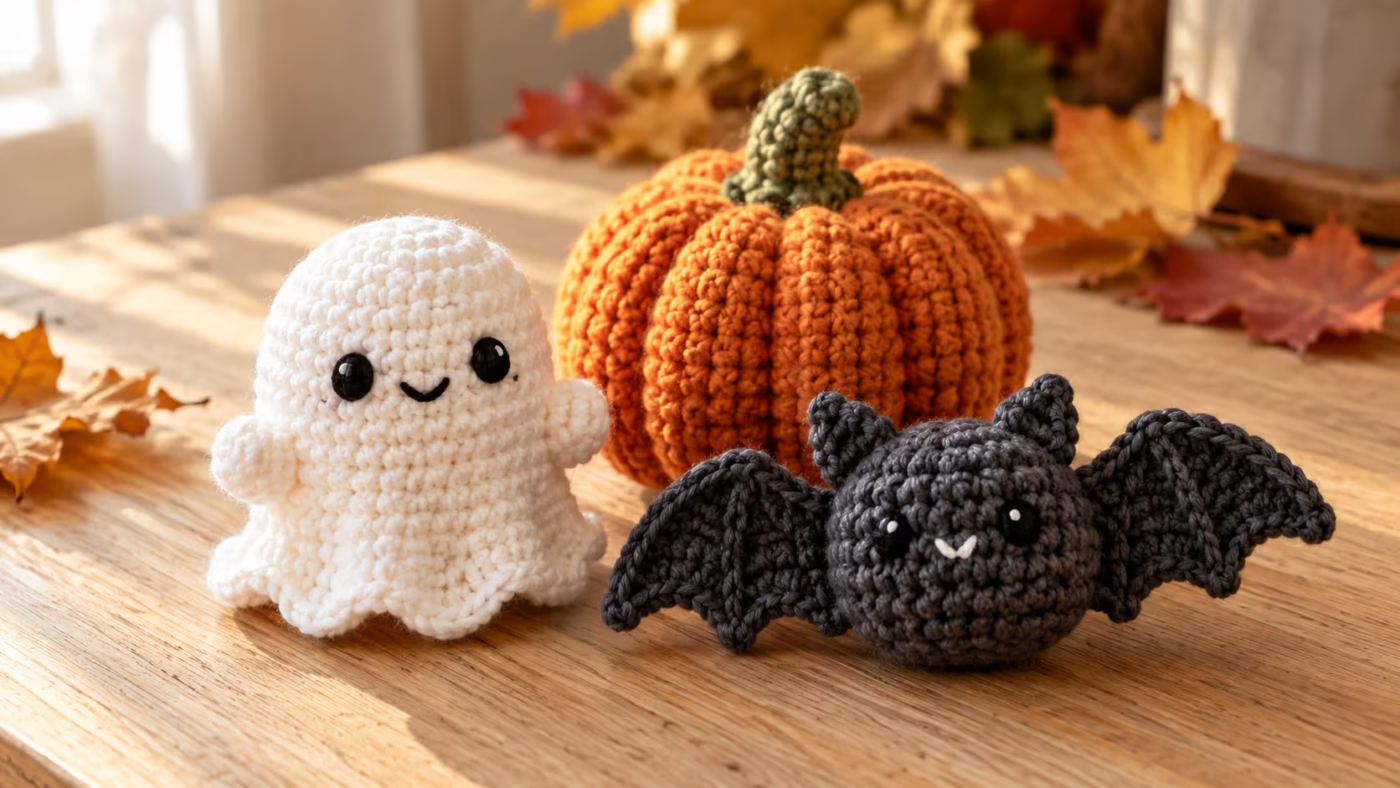
You’ll learn how to crochet each design step by step, choose suitable yarn, shape your pieces, and finish them neatly. The ghost and pumpkin introduce simple three-dimensional construction, while the bat offers a fun introduction to crocheting flat shapes and assembling small details.
Project Overview
These Halloween crochet patterns use manageable shapes and widely available crochet techniques. You can make one decoration or crochet the entire matching set.
| Feature | Details |
|---|---|
| Skill level | Beginner to confident beginner |
| Projects | Ghost, pumpkin, and bat |
| Yarn | Worsted-weight acrylic or cotton |
| Suggested hook | 3.5–4 mm, adjusted for your yarn |
| Main techniques | Chain, single crochet, increases, decreases, slip stitch |
| Construction | Worked in rounds, rows, and assembled shapes |
| Gauge | Not critical for decorations |
| Finished size | Varies with yarn, hook, and tension |
| Estimated time | Depends on experience and project |
| Terminology | US crochet terms |
The patterns below use specific stitch counts that have been checked for internal consistency. However, they have not been physically sample-crocheted. Finished measurements and exact yarn consumption should be confirmed with a sample before publishing them as guaranteed specifications.
| Item | Quantity or Specification | Purpose | Alternative |
|---|---|---|---|
| White yarn | Small amount, worsted weight | Ghost body | Cream yarn |
| Orange yarn | Small amount, worsted weight | Pumpkin body | Rust or mustard |
| Dark yarn | Small amount, worsted weight | Bat | Purple or dark gray |
| Green yarn | Small amount | Pumpkin stem | Brown yarn |
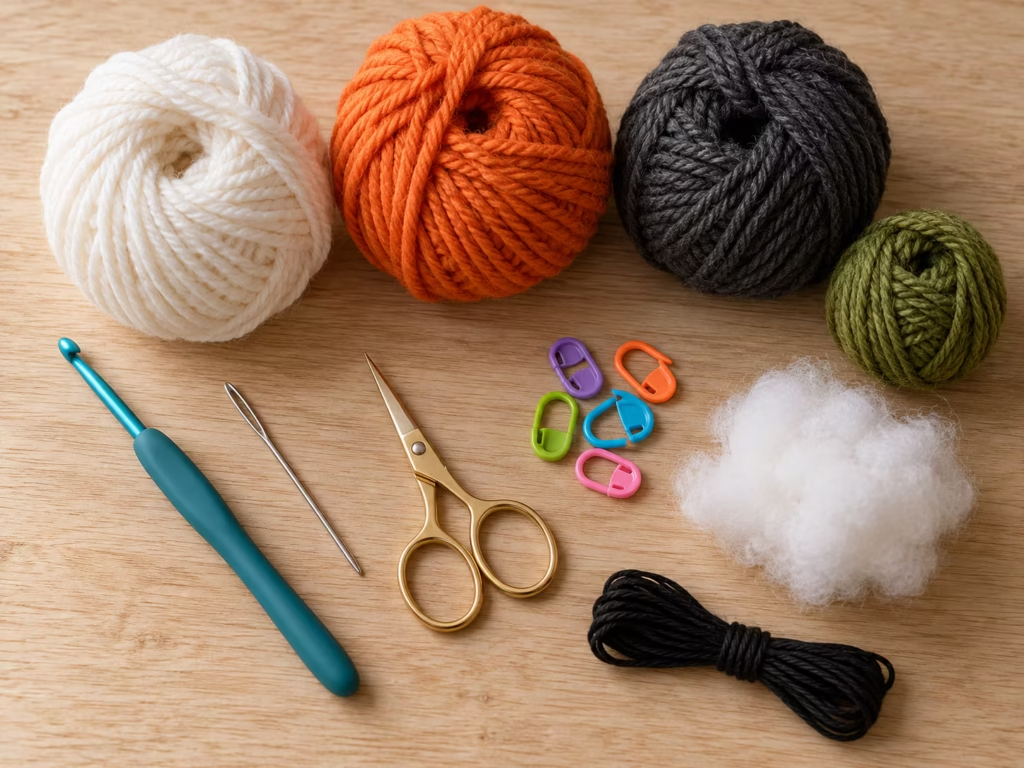
| Crochet hook | Approximately 3.5 mm | Dense ghost stitches | Hook suited to your tension |
| Crochet hook | Approximately 4 mm | Pumpkin and bat | Smaller hook for firmer fabric |
| Polyester fiberfill | Enough to stuff ghost and pumpkin | Three-dimensional shaping | Clean yarn scraps for decorative use |
| Yarn needle | One blunt tapestry needle | Sewing and weaving ends | Appropriate large-eye needle |
| Stitch markers | At least one | Marking rounds | Removable yarn marker |
| Scissors | One pair | Cutting yarn | Yarn snips |
| Black embroidery floss | Small amount | Facial details | Thin black yarn |
Crochet Stitches and Abbreviations
You only need a few fundamental stitches.
| Abbreviation | Meaning |
|---|---|
| ch | Chain |
| sc | Single crochet |
| sl st | Slip stitch |
| inc | Two single crochets in one stitch |
| dec | Single crochet decrease |
| BLO | Back loop only |
| st | Stitch |
| sts | Stitches |
| MR | Magic ring |
| FO | Fasten off |
| [ ] | Repeat instructions inside brackets |
How to Make a Single Crochet
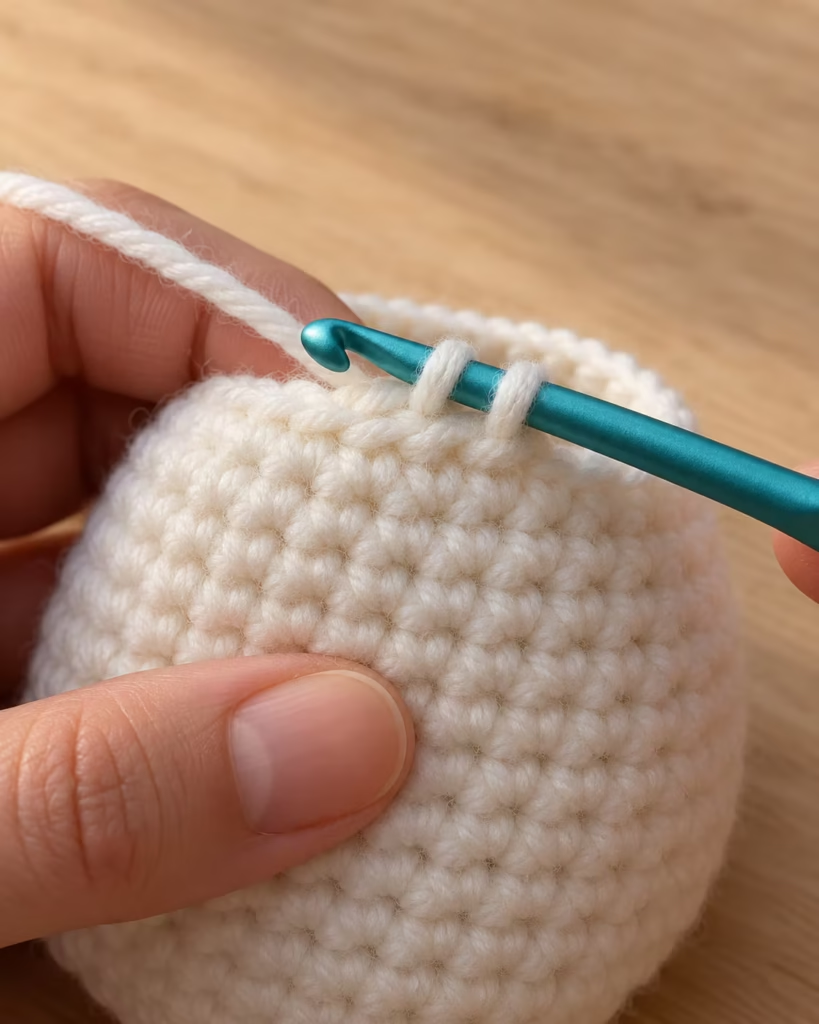
Insert the hook into the indicated stitch, yarn over, and pull up a loop. Yarn over again and pull through both loops. You should have one loop remaining on your hook.
How to Make an Increase
Work two single crochet stitches into the same stitch. Each increase adds one stitch to the round.
How to Make an Invisible Decrease
Insert your hook through the front loop of each of the next two stitches. Yarn over and pull through both front loops, then yarn over and pull through the remaining loops. An invisible decrease gives amigurumi a smoother appearance than an ordinary decrease.
How to Read the Patterns
Instructions such as:
[sc 2, inc] × 6
mean:
- Work one single crochet into each of the next two stitches.
- Work an increase in the following stitch.
- Repeat the entire sequence six times.
The final stitch count appears in parentheses at the end of each round. For the amigurumi sections, work in continuous spirals unless otherwise stated. Place a marker in the first stitch of each round and move it as you progress.
Pattern 1: Mini Crochet Ghost
This tiny ghost is an approachable Halloween crochet project because its body is worked in one piece. Its rounded head, tapered lower section, and softly scalloped hem create the recognizable ghost silhouette.
Step 1: Crochet the Ghost’s Head
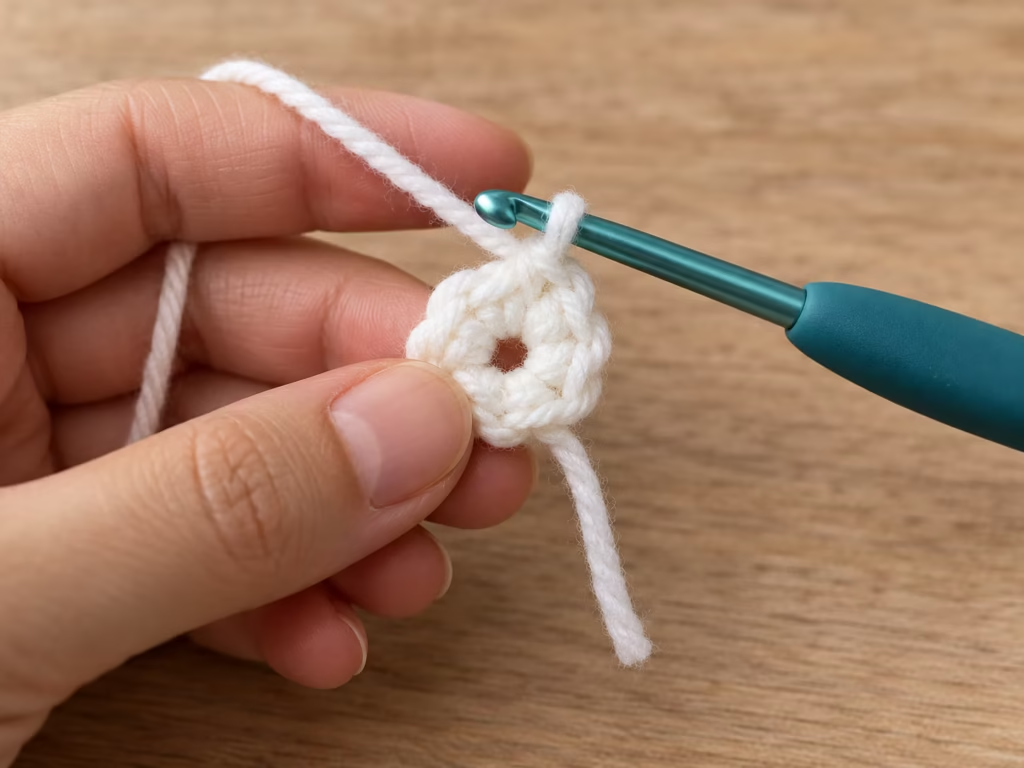
Using white yarn and a 3.5 mm hook, create a magic ring.
| Round | Instructions | Stitch Count |
|---|---|---|
| 1 | 6 sc in MR | 6 |
| 2 | inc in each st | 12 |
| 3 | [sc 1, inc] × 6 | 18 |
| 4 | [sc 2, inc] × 6 | 24 |
| 5 | [sc 3, inc] × 6 | 30 |
| 6–10 | sc around | 30 |
The head should resemble a shallow, rounded cup.
Visual check: The increases should be distributed evenly, without an obvious point at the top.
Common error: The magic ring remains open.
Solution: Pull the starting tail firmly to close the center, then secure it on the inside.
Expert tip: Offset increases slightly between rounds if visible diagonal lines begin forming.
Step 2: Shape the Ghost’s Body
Continue working downward.
| Round | Instructions | Stitch Count |
|---|---|---|
| 11 | [sc 3, dec] × 6 | 24 |
| 12 | sc around | 24 |
| 13 | [sc 3, inc] × 6 | 30 |
| 14 | sc around | 30 |
| 15 | [sc 4, inc] × 6 | 36 |
| 16 | sc around | 36 |
| 17 | [sc 5, inc] × 6 | 42 |
| 18 | sc around | 42 |
The body now widens beneath the head.
Visual check: The narrowed neck should transition into a gently widening base.
Common error: The body develops holes at the decreases.
Solution: Use a smaller hook or tighten the decrease stitches without pulling the surrounding fabric out of shape.
Expert tip: Keep the marked beginning of the round toward the back when positioning the face.
Step 3: Add the Ghost’s Face
Before stuffing the body, embroider its features.
For a simple expression:
- Identify the front center.
- Place two small vertical embroidered eyes approximately three stitches apart.
- Position them around rounds 8–9.
- Add a tiny curved mouth below the eyes if desired.
- Secure every embroidery tail inside the body.
Use black embroidery floss or fine black yarn. Keep the eyes symmetrical relative to the center of the head.
Visual check: Both eyes should appear level when the ghost is standing upright.
Common error: The face looks uneven after stuffing.
Solution: Add enough stuffing to preview the rounded shape before permanently tightening the embroidery.
Expert tip: Make the eyes with several short satin stitches rather than one long loose stitch.
Step 4: Create a Scalloped Ghost Hem
The scallops form a floating, wavy edge.
Round 19:
Work the following repeat seven times:
[sl st in next st, 3 sc in next st, sl st in next st, sl st in each of next 3 sts]
This consumes six stitches per repeat, using all 42 stitches around the opening. Fasten off and weave the tail securely into the fabric.
Visual check: Seven small scallops should appear evenly spaced around the hem.
Common error: The hem becomes excessively ruffled.
Solution: Check that each repeat is worked into exactly six stitches.
Expert tip: Avoid pulling slip stitches too tightly because they can distort the scallops.
Step 5: Stuff and Finish the Ghost
Add fiberfill through the open bottom. Concentrate stuffing in the head and upper body, leaving the scalloped hem flexible. The bottom remains open by design. If you want a closed decorative figure, create an optional circular base.
Optional Base Disk
Using white yarn:
- Round 1: 6 sc in MR (6)
- Round 2: inc around (12)
- Round 3: [sc 1, inc] × 6 (18)
- Round 4: [sc 2, inc] × 6 (24)
- Round 5: [sc 3, inc] × 6 (30)
- Round 6: [sc 4, inc] × 6 (36)
Leave a long sewing tail.
Position the disk inside the ghost’s lower opening, behind the scalloped edge. Sew it to the interior fabric around the lower body, easing the difference between the 36-stitch disk and the 42-stitch opening as you distribute the seam.
Do not pull the outer scallops into the seam. Finish stuffing before closing the final section.
Visual check: The ghost should hold its rounded shape without loose stuffing escaping.
Common error: The closed bottom puckers.
Solution: Distribute the six-stitch circumference difference evenly instead of gathering it at one location.
Expert tip: A lightly stuffed bottom will generally sit more neatly than a densely packed one.
Pattern 2: Easy Ribbed Crochet Pumpkin
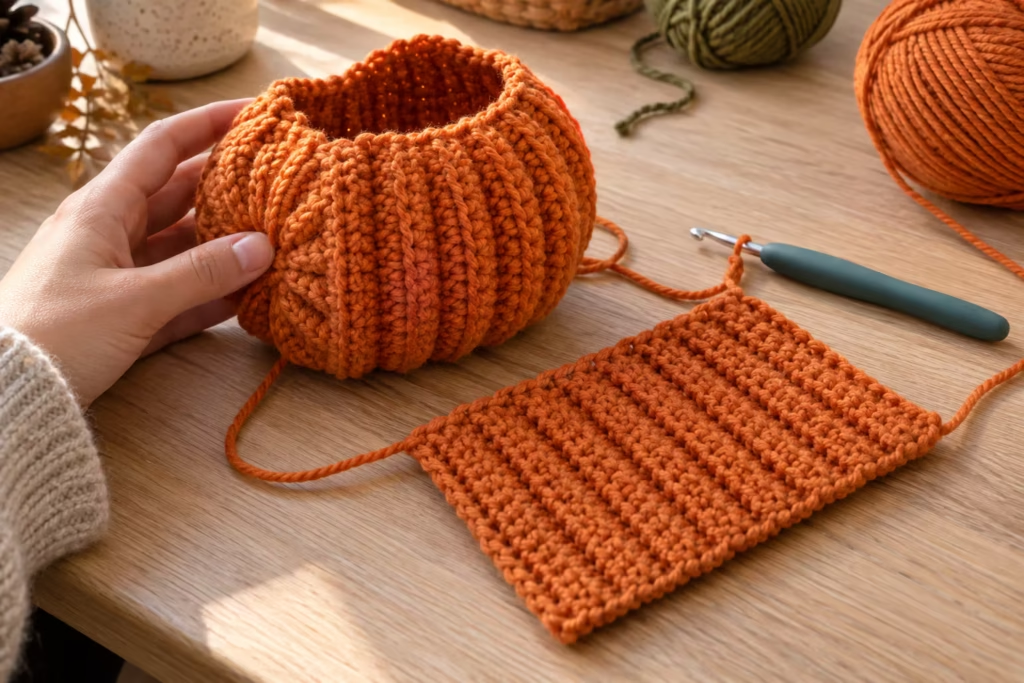
A ribbed crochet pumpkin is especially satisfying because a flat rectangle becomes a three-dimensional decoration. This method uses back-loop-only single crochet to create vertical ridges.
Step 1: Crochet the Ribbed Rectangle
Using orange worsted-weight yarn and a 4 mm hook:
Foundation: Ch 21.
Row 1: Sc in the second chain from the hook and in each remaining chain. (20 sts)
Row 2: Ch 1, turn. Sc in BLO across. (20 sts)
Rows 3–32: Repeat Row 2.
You should finish with a rectangle containing 32 rows and 20 stitches per row. The ribbed texture runs perpendicular to the rows.
Visual check: Stretch the fabric gently sideways. The raised ridges should expand and contract like a soft accordion.
Common error: The edges become slanted.
Solution: Count 20 stitches at the end of every row, particularly the first and final stitches.
Expert tip: Avoid excessively tight foundation chains. A slightly flexible foundation makes the final seam easier to align.
Pumpkin Construction Diagram
FLAT RECTANGLE ______________________
| ____________________ |
|---|
- Join the short ends.
- Create a ribbed tube.
- Gather one opening.
- Stuff the tube.
- Gather the other opening.
- Pull yarn through the center
to create a flattened pumpkin. This diagram illustrates the construction sequence, not exact dimensions or stitch geometry.
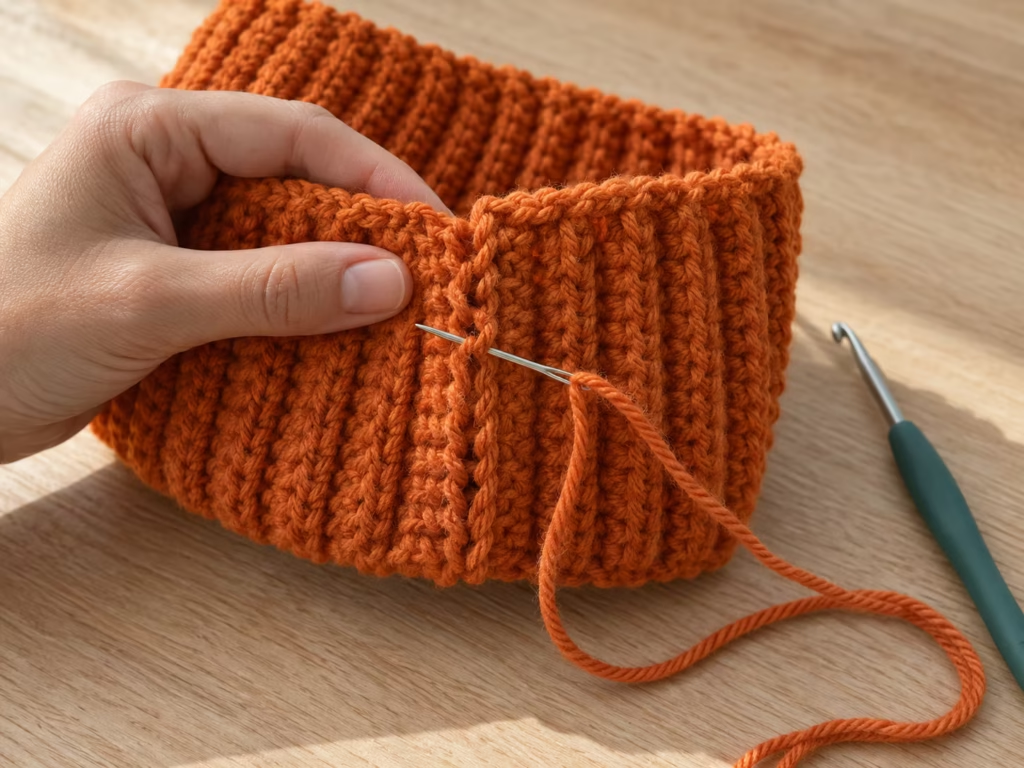
Step 2: Join the Rectangle into a Tube
Fold the rectangle so the first and last rows meet.
Using the long yarn tail and a tapestry needle:
- Align the two short edges.
- Sew the edges together with a consistent seam.
- Avoid pulling the seam tighter than the surrounding fabric.
- Turn the tube so the neater seam is on the inside.
Visual check: The seam should blend with the ribbed surface and stretch similarly to the rest of the fabric.
Common error: One edge ends up longer than the other.
Solution: Align corresponding row ends before sewing. Recount rows if the fabric twists.
Expert tip: Use a mattress-style seam if you want the join to be less visible.
Step 3: Gather and Stuff the Pumpkin
Thread a long length of orange yarn through the needle. Weave the needle in and out around one open end of the tube, passing through the edge stitches. Pull gently to gather the opening.
Secure the gathered center, leaving a small opening for shaping if needed. Add fiberfill through the opposite end. The stuffing should make the pumpkin rounded but not rigid. Gather the second opening using the same method.
Secure the yarn.
Visual check: Both ends should close around the center, and the ribbing should form vertical grooves.
Common error: Fiberfill shows through the gathered centers.
Solution: Add additional gathering stitches and secure them before attaching the stem.
Expert tip: Place smaller portions of stuffing around the inside perimeter rather than inserting one dense ball.
Step 4: Create the Pumpkin’s Shape
Insert the threaded needle through the center of the pumpkin from top to bottom. Bring it back through the center in the opposite direction. Pull carefully to draw the top and bottom toward each other.
Repeat if necessary. Secure the tension with several small stitches near the center. This creates the characteristic squat pumpkin silhouette.
Visual check: The center should be slightly depressed, while the outer ribbed sections remain rounded.
Common error: The pumpkin becomes too flat.
Solution: Release some tension and redistribute the stuffing.
Expert tip: Shape the pumpkin by hand before tying off. Even pressure creates smoother curves.
Step 5: Crochet and Attach the Stem
Using green yarn and a 3.5 mm hook:
- Round 1: 6 sc in MR (6)
- Rounds 2–5: Sc around (6)
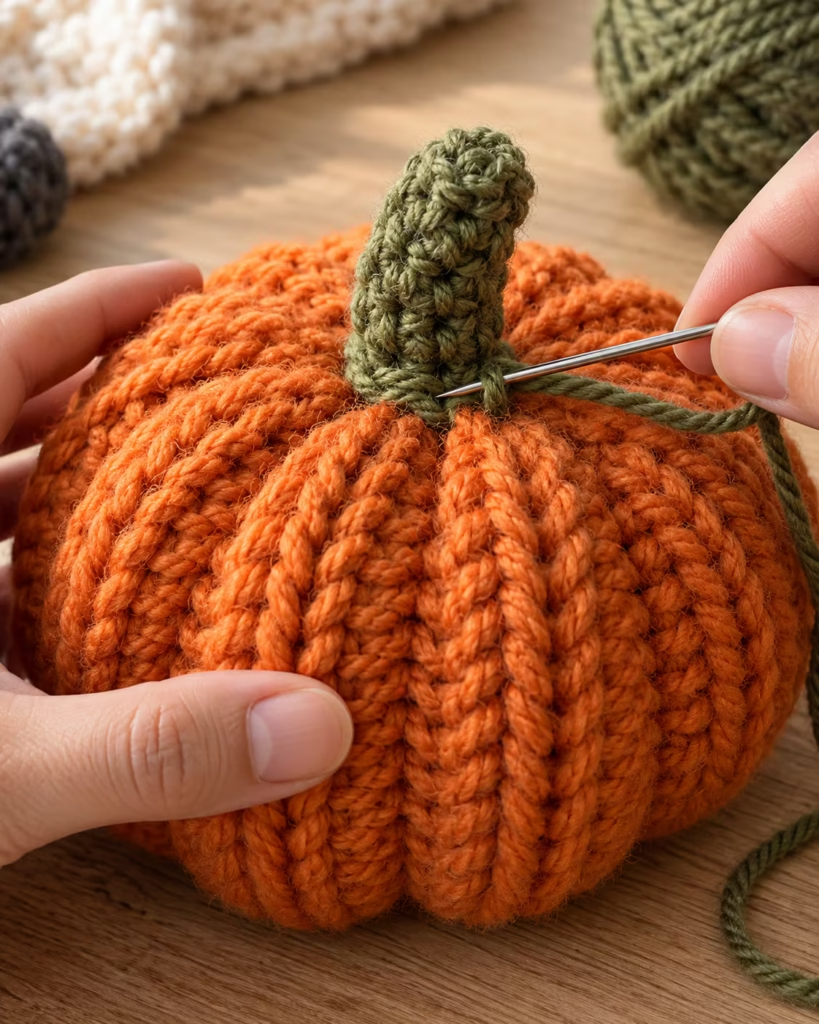
Fasten off, leaving a long sewing tail. Do not stuff the stem unless you need additional firmness. Sew the stem over the gathered top center.
Pass the needle through the base of the stem and the pumpkin fabric several times. Secure the yarn inside the pumpkin.
Visual check: The stem should stand upright or lean gently without wobbling at its attachment point.
Common error: The stem falls sideways.
Solution: Add another round of attachment stitches around its base.
Expert tip: A slightly imperfect, angled stem can make the pumpkin look more organic.
Pattern 3: Cute Halloween Crochet Bat
This small bat uses a flat oval body and two separately crocheted wings. It is a good project for practicing increases, simple shaping, and symmetrical assembly.
Unlike a stuffed amigurumi bat, this version is primarily flat and works well as a hanging decoration.
Step 1: Crochet the Bat Body
With charcoal or dark-purple yarn and a 4 mm hook:
- Round 1: 6 sc in MR (6)
- Round 2: inc around (12)
- Round 3: [sc 1, inc] × 6 (18)
- Round 4: [sc 2, inc] × 6 (24)
- Round 5: [sc 3, inc] × 6 (30)
Fasten off, leaving a sewing tail. This creates a flat circular base for the bat’s face and body. If you prefer a slightly elongated silhouette, gently shape the piece into an oval when blocking. The actual amount of elongation will depend on your fabric.
Visual check: The piece should lie mostly flat without cupping or forming large ruffles.
Common error: The body curls inward.
Solution: Loosen your tension slightly or use a marginally larger hook.
Expert tip: Cotton yarn produces more defined edges, while acrylic often makes softer-looking bat decorations.
Step 2: Crochet the Bat Wings
Make two identical wings. Each wing is worked in rows with a small stepped upper edge.
Foundation: Ch 7.
Row 1: Sc in the second ch from hook and across. (6 sts)
Row 2: Ch 1, turn, sc across. (6 sts)
Row 3: Ch 1, turn, sc in the first 4 sts. Leave the remaining 2 sts unworked. (4 sts)
Row 4: Ch 1, turn, sc across. (4 sts)
Row 5: Ch 1, turn, sc in the first 2 sts. Leave the remaining 2 sts unworked. (2 sts)
Row 6: Ch 1, turn, sc across. (2 sts)
Fasten off with a long tail for attachment. The wing will have a stepped silhouette with sections of six, four, and two stitches. For the opposite side, flip the second wing horizontally before sewing it to the body. This creates a mirrored pair.
Wing Shape Diagram
Wing A Wing B
██████ ██████ ██████ ██████ ████ ████ ████ ████ ██ ██ ██ ██
Flip the completed wings so their narrow ends point outward and the wider edges sit near the body. The blocks represent stitch-width changes, not exact fabric geometry.
Visual check: The wings should appear balanced when positioned on opposite sides of the body.
Common error: Both wings angle in the same direction.
Solution: Mirror one wing before attaching it.
Expert tip: Pin the wings temporarily or hold them in position before sewing. Symmetry matters more than perfect stitch-for-stitch placement.
Step 3: Add the Bat’s Ears
Create two small triangular ears.
For each ear:
Ch 4.
- Row 1: Sc in second chain from hook and across. (3 sts)
- Row 2: Ch 1, turn, sc2tog, sc 1. (2 sts)
- Row 3: Ch 1, turn, sc2tog. (1 st)
Fasten off with a sewing tail. Position the ears along the upper edge of the body. Attach each ear with secure stitches.
Visual check: The ears should project upward and be spaced evenly on either side of the top center.
Common error: The ears fold backward.
Solution: Sew a slightly wider portion of each ear’s base to the body.
Expert tip: A firm crochet tension gives small pieces enough structure to hold their shapes without additional support.
Step 4: Embroider the Bat’s Face
Use white, cream, or light-gray embroidery floss. Create two small eyes near the upper half of the body. For a friendly appearance, add a tiny curved mouth.
Keep the features small enough that the circular body remains clearly visible. Avoid long unsecured threads on the back.
Step 5: Assemble the Bat
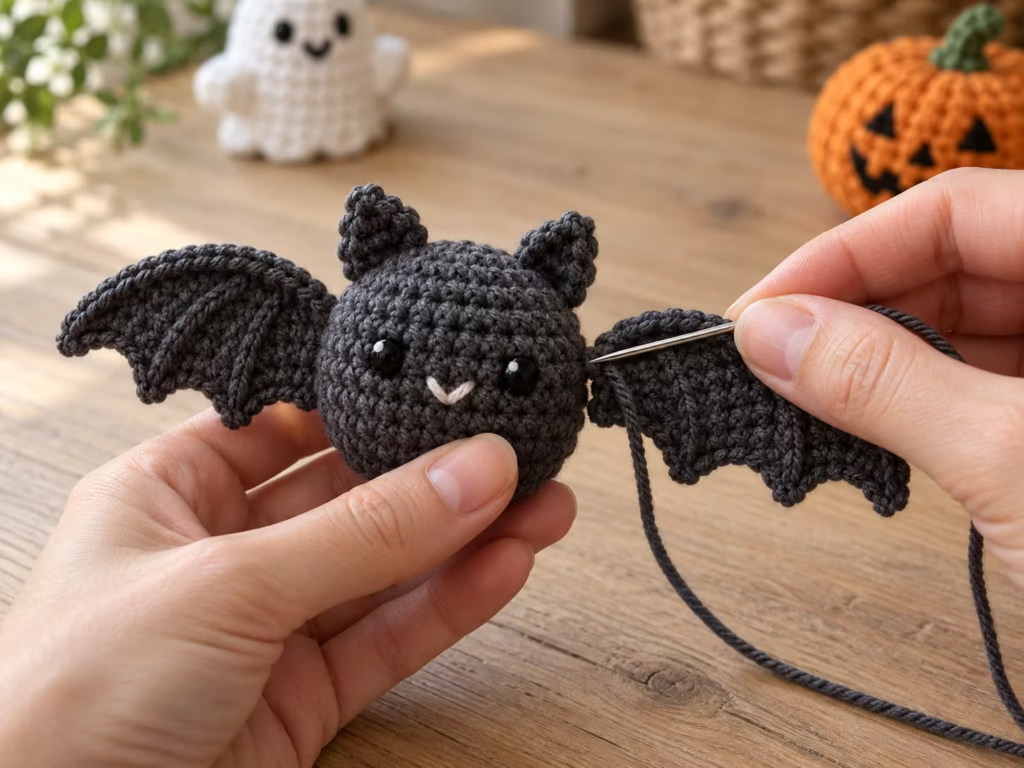
Position the broad inner edge of each wing behind the left and right sides of the body. Sew both wings securely. Attach the ears and weave in the remaining yarn tails.
For a hanging decoration, add a crocheted loop:
- Join yarn near the top center of the body.
- Chain 12.
- Slip stitch into the original attachment point.
- Fasten off and weave the tail securely.
The chain loop is intended for lightweight decorative hanging only.
Visual check: The wings should remain attached when lightly lifted, and the hanging loop should be centered.
Common error: One wing sits lower than the other.
Solution: Place both wings on a flat surface before completing the seam and compare their positions.
Expert tip: Use small, evenly distributed stitches to secure the wing along more than one point of contact.
Beginner-to-Pro Crochet Techniques
These Halloween crochet projects are useful practice because they introduce different construction methods.
| Skill Level | Technique | Benefit |
|---|---|---|
| Beginner | Consistent single crochet | More uniform fabric |
| Beginner | Stitch counting and markers | Prevents shaping errors |
| Intermediate | Invisible decreases | Smoother amigurumi |
| Intermediate | BLO ribbing | Stretchy, textured pumpkin |
| Intermediate | Mattress-style seaming | Less noticeable joins |
| Advanced | Controlled stuffing and sculpting | More intentional shaping |
| Advanced | Embroidered detail placement | Better facial symmetry |
Beginner: Prioritize Accurate Stitch Counts
Count at the end of every shaping round. If a round should contain 24 stitches but contains 25, identify the extra increase before moving forward. Small mistakes become more difficult to correct after several additional rounds.
Intermediate: Control Your Yarn Tension
For stuffed shapes, you want firm fabric without painful strain on your hands. For flat wings, maintain enough flexibility that the pieces lie flat. You may need different hook sizes for different parts of the same decoration.
Advanced: Refine Your Finishing
A polished crochet decoration depends on more than the stitch pattern. Use matching sewing yarn, distribute stuffing evenly, position features before securing them, and hide yarn tails inside seams or dense fabric. These details help homemade projects appear intentional and cohesive.
Troubleshooting Common Halloween Crochet Problems
| Symptom | Likely Cause | Practical Fix | Prevention |
|---|---|---|---|
| Ghost head has a hole | Magic ring not fully closed | Tighten and secure the starting tail | Check center before continuing |
| Fiberfill shows through | Loose stitches or overstuffing | Reduce stuffing or use a smaller hook | Check fabric density early |
| Pumpkin looks cylindrical | Not enough center shaping | Pull top and bottom toward each other | Sculpt before securing yarn |
| Pumpkin seam is visible | Uneven joining tension | Rework with a more discreet seam | Align row ends before sewing |
| Bat wings are uneven | Incorrect orientation | Mirror one wing before attachment | Compare pieces on a flat surface |
| Crochet circle curls | Tight tension or missed increases | Check count and adjust hook | Count every increase round |
| Crochet circle ripples | Loose tension or extra increases | Remove unintended increases | Check fabric after each round |
| Embroidery looks crooked | Features placed off-center | Remove and reposition stitches | Mark the center first |
| Decorative parts loosen | Insufficient attachment stitches | Reseam using multiple anchor points | Test gently before display |
How Do You Know When to Undo Crochet Stitches?
Not every irregularity requires starting again. A slightly uneven pumpkin rib can often be hidden during shaping. A missed increase that substantially changes the ghost’s stitch count is better corrected before you complete the body. If a stitch-count error affects later construction, undo the work to the incorrect round rather than attempting to compensate randomly.
Choosing the Best Yarn for Halloween Crochet
Your yarn affects the appearance, durability, and difficulty of every project.
| Yarn | Best For | Advantages | Limitations | Recommendation |
|---|---|---|---|---|
| Acrylic | General Halloween decorations | Accessible, lightweight, easy care | Can become fuzzy | Good everyday choice |
| Cotton | Crisp stitches and firm shapes | Excellent stitch definition | Less elastic | Ideal for structured details |
| Cotton blend | Balanced decoration fabric | Combines structure and flexibility | Properties vary by blend | Useful for mixed projects |
| Chenille | Plush Halloween characters | Soft, rounded appearance | Stitches can be harder to see | Better after mastering the pattern |
| Lightweight yarn | Tiny miniatures | Fine detail | Requires smaller tools and closer attention | Best for experienced crocheters |
For your first complete Halloween crochet set, using the same yarn weight for all three projects makes their relative proportions easier to control.
Can You Mix Yarn Brands?
Yes, but compare yarn weight, thickness, and fiber characteristics. Two skeins labeled worsted weight may still crochet differently. If you change yarn brands within one project, crochet a small swatch first and compare how closely the fabric matches.
Three Ways to Make Your Crochet Decorations Better
<!– gap –>
1. Check Scale Before Committing to a Full Set
Crochet decorations look more cohesive when they share a deliberate scale.
Before making several pieces:
- Complete one ghost, pumpkin, or bat.
- Measure its height and width.
- Record the hook size and yarn used.
- Decide whether the proportions suit your display.
- Adjust subsequent projects if necessary.
A decorative mantel arrangement may benefit from a larger pumpkin and smaller bats, while basket fillers often look more balanced when pieces are similar in size. Do not assume switching yarn automatically creates a predictable finished size. A new yarn and hook combination can change both width and height.
<!– gap –>
2. Improve Durability Without Making the Fabric Stiff
Small crochet decorations experience wear from handling, storage, and repeated seasonal display.
To make them last:
- Weave yarn tails through several neighboring stitches.
- Reverse the weaving direction when possible.
- Secure sewn components at multiple points.
- Avoid overstuffing.
- Keep delicate wings away from snagging surfaces.
- Store decorations completely dry.
For flat bats, consider placing them in a shallow box rather than underneath heavier decorations. For pumpkins, avoid compressing them tightly during storage, since this can flatten their ribbed texture.
<!– gap –>
3. Create a Matching Halloween Color Palette
A coordinated palette makes separate crochet projects feel like a collection.
Try one of these combinations:
| Theme | Main Colors | Accent Colors |
|---|---|---|
| Classic Halloween | Pumpkin orange, black, white | Deep green |
| Soft Pastel Halloween | Lavender, cream, blush | Pale peach |
| Rustic Autumn | Burnt orange, oatmeal, brown | Olive green |
| Gothic Halloween | Charcoal, wine, ivory | Muted gold |
| Minimal Halloween | Cream, warm gray, black | Dusty orange |
For a clean display, repeat the same accent color across several projects. For example, use olive-green pumpkin stems, muted-green bat details, and a small green ribbon near the ghost. Avoid adding decorations that interfere with the shapes or create unnecessary small detachable parts.
How to Display Your Halloween Crochet Projects
Once completed, the three decorations can be arranged in several ways.
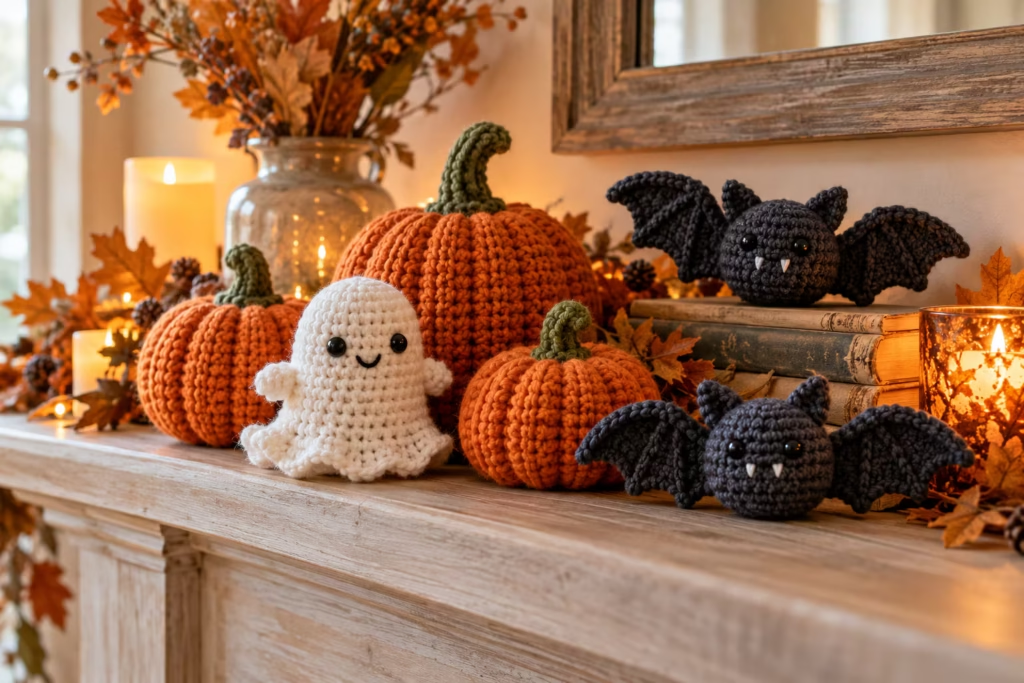
Step 1 — Halloween Mantel Display
Place the pumpkin in the center with the ghost slightly to one side.
Hang the bat above the arrangement or position it against a decorative background. Use battery-operated LED candles rather than placing yarn decorations near open flames.
Step 2 — Seasonal Table Centerpiece
Arrange several pumpkins in complementary colors. Add one ghost as a focal point. Use decorative foliage, keeping delicate yarn away from moisture or staining materials.
Step 3 — Halloween Gift Basket
Include one or two crochet decorations with wrapped treats or other seasonal gifts.
Keep edible items wrapped and separate from loose fibers or small attachments.
Step 4 — Hanging Halloween Garland
Make several flat bats and attach them along a decorative cord.
Space them evenly and check that every hanging loop is secure. Keep garlands and hanging cords away from infants, young children, and pets.
Finished Project Quality Checklist
Before displaying or gifting your Halloween crochet decorations, inspect the following details.
Stitch Quality
- [ ] All shaping rounds have the intended stitch count.
- [ ] No accidental holes expose the stuffing.
- [ ] Magic rings are securely closed.
- [ ] The yarn tension is reasonably consistent.
Shape and Construction
- [ ] The ghost has a rounded head and recognizable scalloped hem.
- [ ] The pumpkin has visible ribs and a slightly indented center.
- [ ] The bat wings are attached symmetrically.
- [ ] Sewn components remain secure during gentle handling.
Finishing
- [ ] Yarn tails are woven in.
- [ ] Embroidered details are secured.
- [ ] No sharp tools or temporary pins remain.
- [ ] Hanging loops are correctly positioned.
- [ ] Any remaining construction openings are intentional.
Acceptable Variation
Small differences in shape, texture, and size are normal for handmade crochet. A pumpkin with slightly uneven natural-looking sections or a ghost with a gently wavy hem can still look beautiful.
Mistakes Worth Correcting
Visible stuffing, detached details, major stitch-count errors, and unstable attachments should be repaired before display. For items intended for children, decoration patterns alone are not sufficient evidence of toy safety. Use an appropriate, separately assessed toy pattern and construction method instead.
Frequently asked questions
What is the easiest Halloween crochet project for beginners?
A simple ribbed pumpkin is an excellent starting project because most of the crochet consists of repeated single crochet rows worked into the back loops. You practice maintaining a consistent stitch count and then learn basic seaming, stuffing, and shaping. If you are completely new to crochet, make a small single crochet practice swatch before attempting the full rectangle.
How much yarn do I need for Halloween crochet decorations?
Small Halloween decorations generally require less yarn than garments or blankets, but the exact amount depends on yarn thickness, hook size, tension, and finished dimensions. The projects in this guide are intended for small amounts of yarn. For accurate planning, weigh a completed sample and add an allowance for tails, sewing, and adjustments.
What size crochet hook should I use for amigurumi?
Choose a hook that creates dense fabric with minimal gaps. For worsted-weight yarn, a 3.5 mm hook is one possible starting point, but the best size depends on your yarn and tension. If stuffing is visible between stitches, try a smaller hook. If the fabric becomes extremely stiff and difficult to work, consider a slightly larger one.
Can I make Halloween crochet without a magic ring?
Yes. Chain two, then work the first round’s stitches into the second chain from the hook. This creates a small starting circle. You may need to close the center gap with the yarn tail. The chain-two method can be easier for beginners who struggle to control an adjustable magic ring.
How do I keep my crochet pumpkin from losing its shape?
Use firm, evenly distributed stuffing and secure the gathered openings carefully. The center-sculpting yarn should hold the top and bottom gently together without excessively compressing the body. When storing the pumpkin, avoid placing heavy items on top. If the stuffing shifts, reshape the exterior by hand before displaying it again.
Can I use chunky yarn for these Halloween crochet patterns?
Yes, but thicker yarn produces larger stitches and usually a larger finished decoration. You will also need a hook suited to that yarn. Chunky yarn can make pumpkins especially plush, although small ghost faces and detailed bat components may require different proportions. Make one sample before preparing an entire matching set.
How do I wash crochet Halloween decorations?
Check the care instructions for every yarn and filling material used. If the materials allow washing, gentle hand-washing is often a practical option for delicate assembled decorations. Avoid rough wringing, excessive heat, and aggressive agitation. Reshape the pieces while damp and allow them to dry completely before storage.
Are handmade crochet Halloween decorations safe for babies?
These particular projects are designed as decorations, not infant toys. They have not undergone toy-safety testing. Small attachments, embroidery, filling, and hanging loops require special consideration. Keep these decorations out of reach of babies and young children, and choose a purpose-designed, appropriately assessed toy pattern when making something intended for a baby. —
Make Your Halloween Crochet Collection Your Own
The best Halloween crochet decorations combine recognizable seasonal shapes with neat stitches and thoughtful finishing.
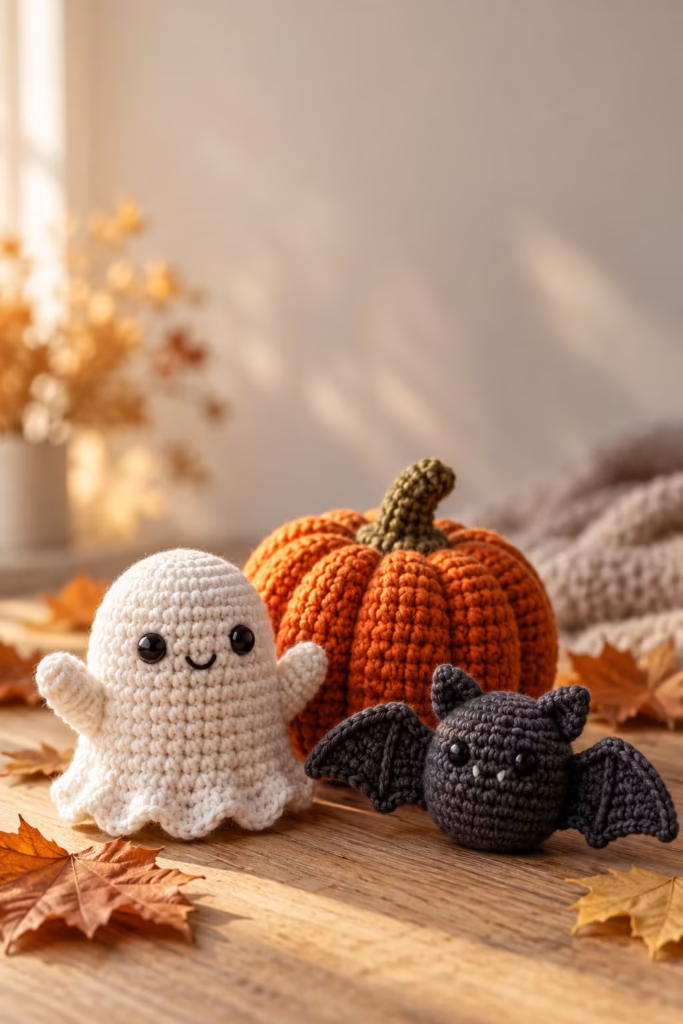
Start with the ribbed pumpkin if you want a repetitive, relaxing project. Try the ghost next to build confidence with continuous rounds and shaping. Finish with the bat to practice mirrored components and decorative assembly.
Once you have completed the first set, experiment with different yarn colors, coordinated accessories, and display arrangements. A few carefully finished pieces can become part of your seasonal decorating traditions.
Before putting your projects away, inspect the seams, remove lint, and store everything in a clean, dry container so your handmade decorations are ready for the next Halloween. Save this Halloween crochet tutorial to your Pinterest craft board so you can return to the stitch tables, troubleshooting tips, and project instructions whenever you need them.
Pin “Halloween Crochet: Easy Ghost, Pumpkin & Bat Patterns” so you can find it when the yarn arrives.
Get the next free pattern first
One email a week. New patterns, no noise.
Yarn weights and hook sizes in this guide follow the Craft Yarn Council standards.
Keep going: Cute Crochet Amigurumi Puppy Pattern Tutorial for Beginners · 15 Cozy Autumn Crochet Coin Purse Ideas: Pumpkin, Acorn & Mushroom Pouches





