
Crochet Puppy: Cute Amigurumi Pattern and Easy Tips
Crochet puppy: The instructions use US crochet terminology and include round-by-round stitch counts, assembly guidance, troubleshooting, and customization…

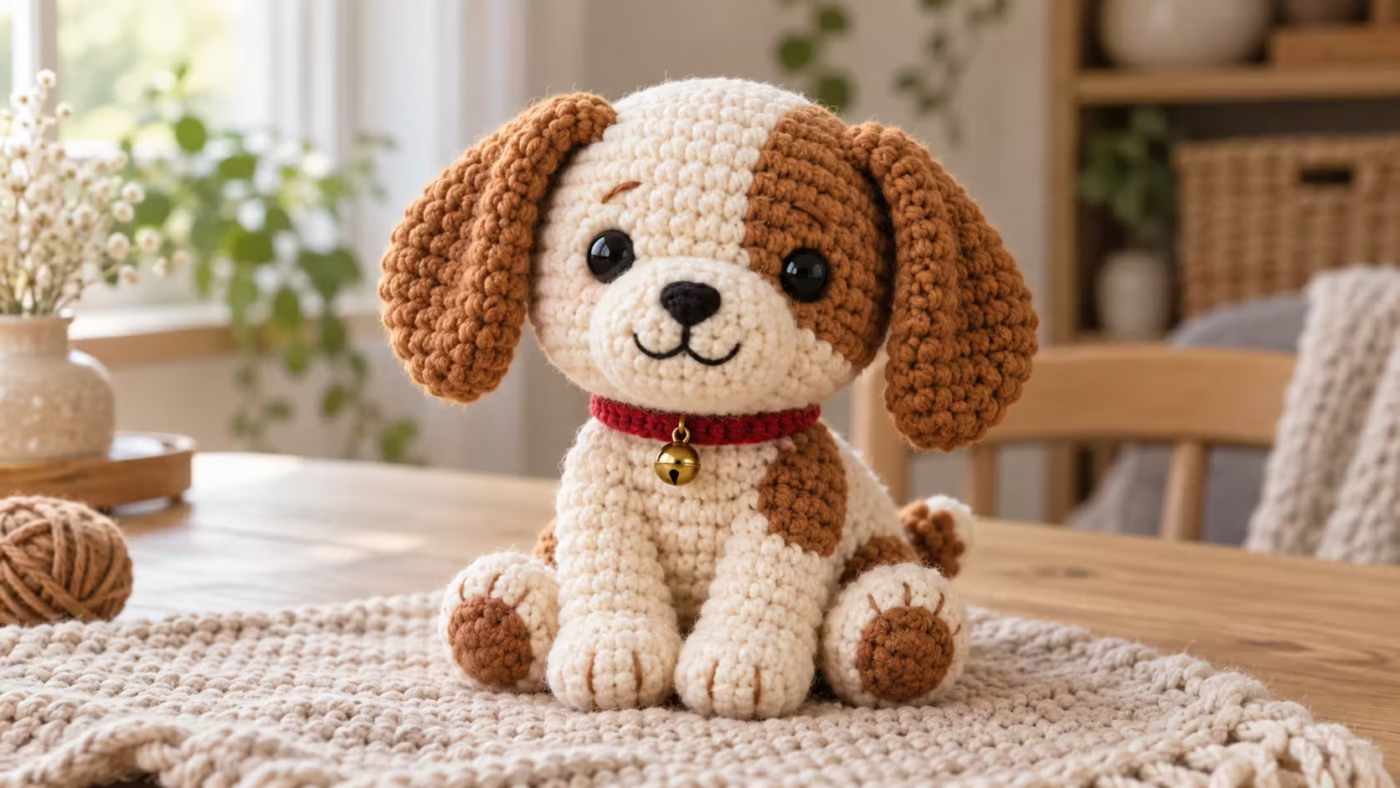
The instructions use US crochet terminology and include round-by-round stitch counts, assembly guidance, troubleshooting, and customization ideas. You’ll need to know how to single crochet, increase, and decrease, but the beginner checkpoints will help you follow every stage.
Crochet Puppy Pattern Overview
This amigurumi puppy is constructed from separate crocheted pieces. You’ll make the head, body, muzzle, ears, legs, arms, and tail, then sew them together.
The puppy has a sitting shape with a large rounded head and short limbs. Its simple silhouette makes it especially suitable for beginners who want to practice shaping and assembling a stuffed crochet animal.
| Project Detail | Description |
|---|---|
| Pattern name | Cute Sitting Crochet Puppy |
| Skill level | Confident beginner |
| Crochet terminology | US terms |
| Main stitch | Single crochet |
| Construction | Continuous spiral rounds and flat rows |
| Yarn | Worsted-weight yarn, Category 4 |
| Suggested hook | 3.5 mm (E/4), adjusted for tight fabric |
| Finished size | Approximately 6–8 inches tall, depending on yarn, tension, stuffing, and assembly |
| Main techniques | Magic ring, increases, decreases, sewing |
| Color options | Caramel, cream, white, black, or gray |
| Gauge | Not fixed; fabric must be dense enough to contain stuffing |
The finished size is an estimate, not a measurement from a physically tested sample. Differences in yarn and crochet tension will change the final dimensions.
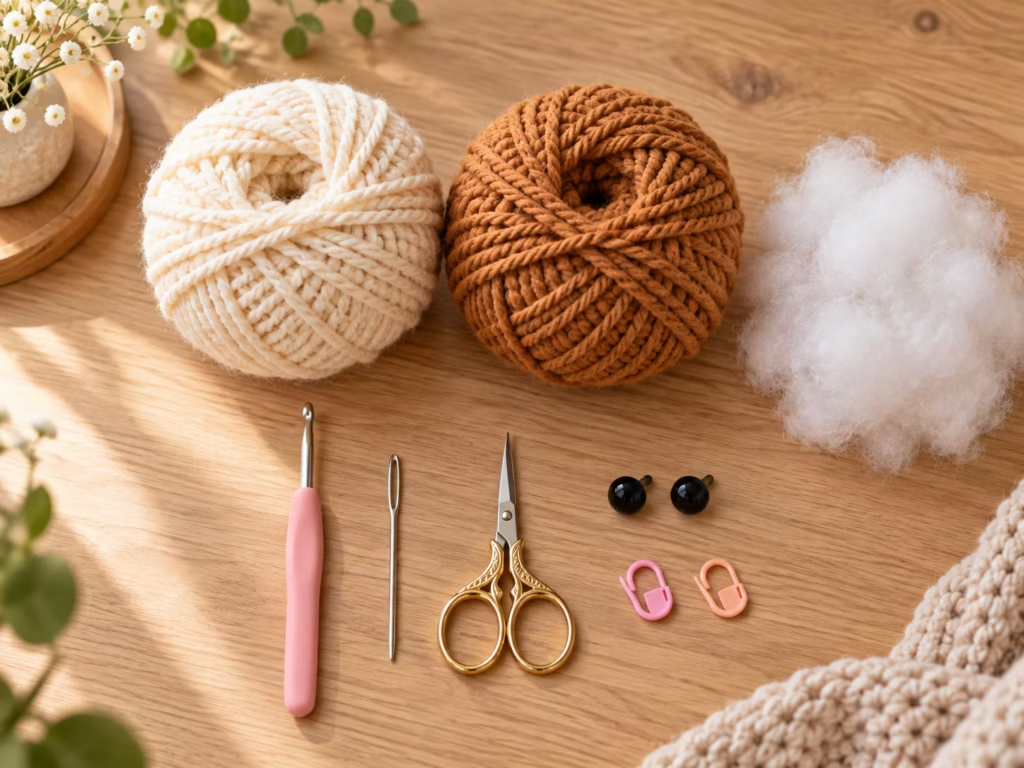
Choose smooth yarn that allows you to see your stitches. Medium-weight acrylic or cotton-blend yarn is a practical starting point.
| Material | Quantity or Specification | Purpose | Alternative |
|---|---|---|---|
| Main-color yarn | Approximately 60–90 yards | Head, body, legs, arms, ears, tail | Another smooth worsted-weight yarn |
| Cream yarn | Approximately 15–25 yards | Muzzle, tummy patch | White or light beige |
| Crochet hook | 3.5 mm | Produces firm amigurumi stitches | Adjust hook size for fabric density |
| Stuffing | Small handfuls as needed | Gives the puppy its shape | Clean polyester filling |
| Yarn needle | 1 blunt tapestry needle | Joining components | Appropriate large-eye sewing needle |
| Stitch marker | 1 removable marker | Marks the beginning of rounds | Contrasting yarn strand |
| Embroidery thread | Black and optional brown | Nose, mouth, optional eyes | Thin yarn |
| Scissors | 1 pair | Cutting yarn | Yarn snips |
The yarn quantities are planning estimates. Actual consumption depends on your yarn, stitch size, and tension.
Crochet Abbreviations and Essential Techniques
Before starting, become familiar with the following US abbreviations.
| Abbreviation | Meaning |
|---|---|
| MR | Magic ring |
| sc | Single crochet |
| inc | Increase: work 2 sc into the same stitch |
| dec | Invisible decrease over 2 stitches |
| st | Stitch |
| sts | Stitches |
| sl st | Slip stitch |
| ch | Chain |
| FO | Fasten off |
| BLO | Back loops only |
| ( ) × 6 | Repeat the instructions in parentheses six times |
How to work a magic ring
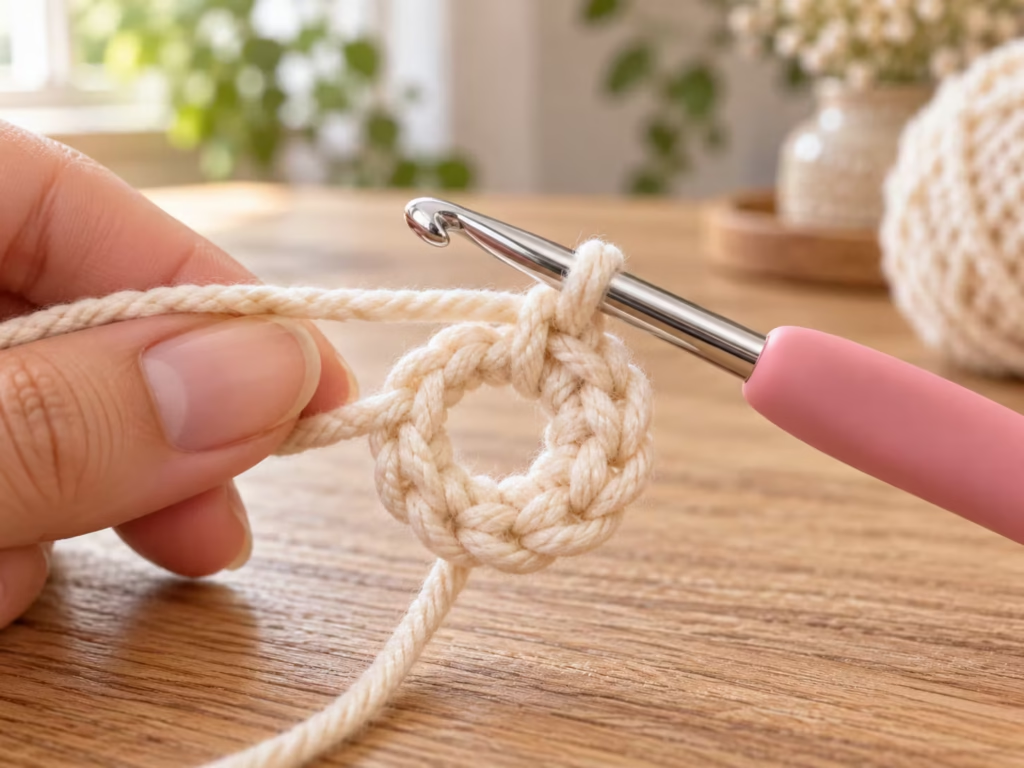
A magic ring creates an adjustable center that can be tightened after the first round.
- Make a loop with the yarn tail crossing behind the working yarn.
- Insert your hook through the loop.
- Pull up the working yarn and make a securing chain.
- Work the specified single crochet stitches into the center.
- Pull the yarn tail to close the opening.
Visual check: Your first round should resemble a small closed circle with six visible stitches.
Common error: The center stays open because the yarn tail was not pulled firmly enough.
Solution: Tighten the ring before crocheting the next round and weave the tail securely into the finished fabric.
How to make an invisible decrease
Invisible decreases help create smooth shaping with fewer visible gaps.
- Insert the hook under the front loop of the next stitch.
- Insert it under the front loop of the following stitch.
- Yarn over and pull through both front loops.
- Yarn over again and pull through the two loops on your hook.
An invisible decrease turns two stitches into one. Work it through the front loops of the next two stitches, not twice into a single stitch.
Working continuous rounds
Most amigurumi pieces are crocheted in a spiral without joining each round. Place a removable stitch marker in the first stitch of each round. Move it upward when you reach that stitch again.
Count every completed round before continuing. If your stitch count is incorrect, fixing it immediately is much easier than reshaping the entire piece later.
Crochet Puppy: Cute Pattern and Tips for Beginners
The pattern below makes one seated puppy. The crocheted pieces should have firm, closed stitches so the stuffing remains inside.
The head and body are crocheted from the top downward. Legs and arms are worked from their outer ends toward the open attachment edges.
Step 1: Crochet the puppy’s head
Main yarn: caramel brown
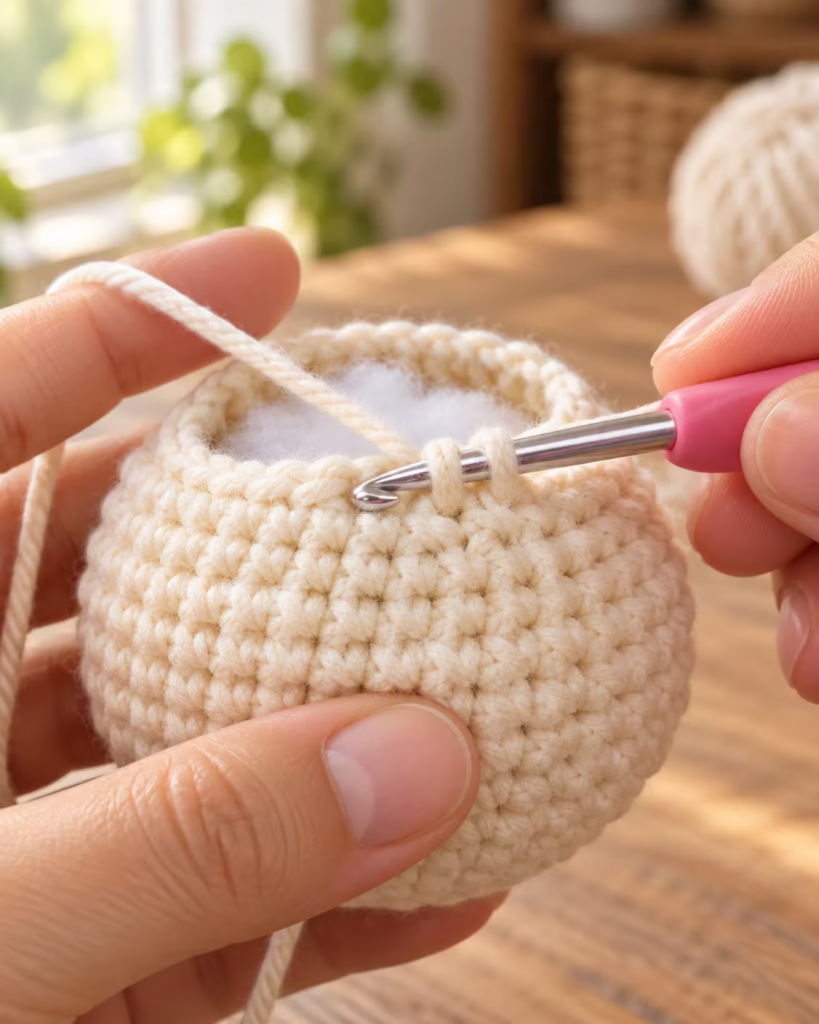
Start with a magic ring.
| Round | Instructions | Total Stitches |
|---|---|---|
| 1 | 6 sc in MR | 6 |
| 2 | inc × 6 | 12 |
| 3 | (1 sc, inc) × 6 | 18 |
| 4 | (2 sc, inc) × 6 | 24 |
| 5 | (3 sc, inc) × 6 | 30 |
| 6 | (4 sc, inc) × 6 | 36 |
| 7 | (5 sc, inc) × 6 | 42 |
| 8–14 | sc in every st | 42 |
| 15 | (5 sc, dec) × 6 | 36 |
| 16 | (4 sc, dec) × 6 | 30 |
| 17 | (3 sc, dec) × 6 | 24 |
| 18 | (2 sc, dec) × 6 | 18 |
| 19 | (1 sc, dec) × 6 | 12 |
| 20 | dec × 6 | 6 |
Add the eyes before closing the head
If using plastic eyes, place them between rounds 11 and 12, approximately seven stitches apart, measured center to center across the visible front of the head. Check their positions before fastening the backs. Once the backs are attached, repositioning may be impossible without damage. For embroidered eyes, wait until the head is closed and the muzzle is positioned, then use the muzzle as a guide to keep the face symmetrical.
Begin stuffing around round 16. Add small amounts as the opening narrows. After round 20, finish filling the head, cut the yarn, and pull the tail through the front loops of the remaining six stitches to close the opening.
Leave a long yarn tail for attaching the head to the body.
Visual check: The head should be round, evenly stuffed, and free from large holes.
Common error: Overstuffing creates wide spaces between stitches.
Solution: Remove a little stuffing and distribute the remaining filling more evenly.
Expert tip: Shape the head gently with your hands before sewing. This helps avoid a pointed top or lopsided face.
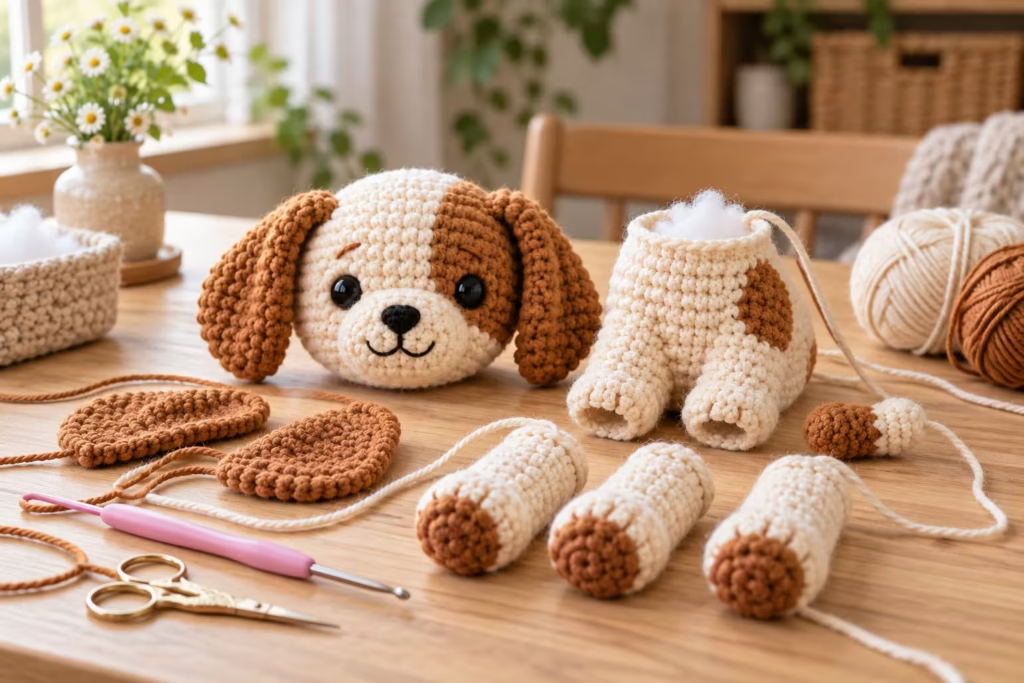
Step 2: Crochet the puppy’s body
Main yarn: caramel brown
| Round | Instructions | Total Stitches |
|---|---|---|
| 1 | 6 sc in MR | 6 |
| 2 | inc × 6 | 12 |
| 3 | (1 sc, inc) × 6 | 18 |
| 4 | (2 sc, inc) × 6 | 24 |
| 5 | (3 sc, inc) × 6 | 30 |
| 6 | (4 sc, inc) × 6 | 36 |
| 7–11 | sc in every st | 36 |
| 12 | (4 sc, dec) × 6 | 30 |
| 13 | sc in every st | 30 |
| 14 | (3 sc, dec) × 6 | 24 |
| 15 | sc in every st | 24 |
| 16 | (2 sc, dec) × 6 | 18 |
| 17 | sc in every st | 18 |
Fasten off, leaving a long tail for sewing. Do not close the top opening. Stuff the lower body firmly enough to give the puppy a rounded belly. Keep the neck area slightly softer so it can be adjusted during head attachment.
Visual check: The body should be widest near the bottom and narrower at the neck.
Common error: A tightly packed neck can make the head sit unnaturally high.
Solution: Use less stuffing in the upper two body rounds.
Expert tip: For a flatter sitting base, gently shape the stuffed bottom against a table before joining the head.
Step 3: Crochet two floppy puppy ears
Make two identical ears with caramel yarn.
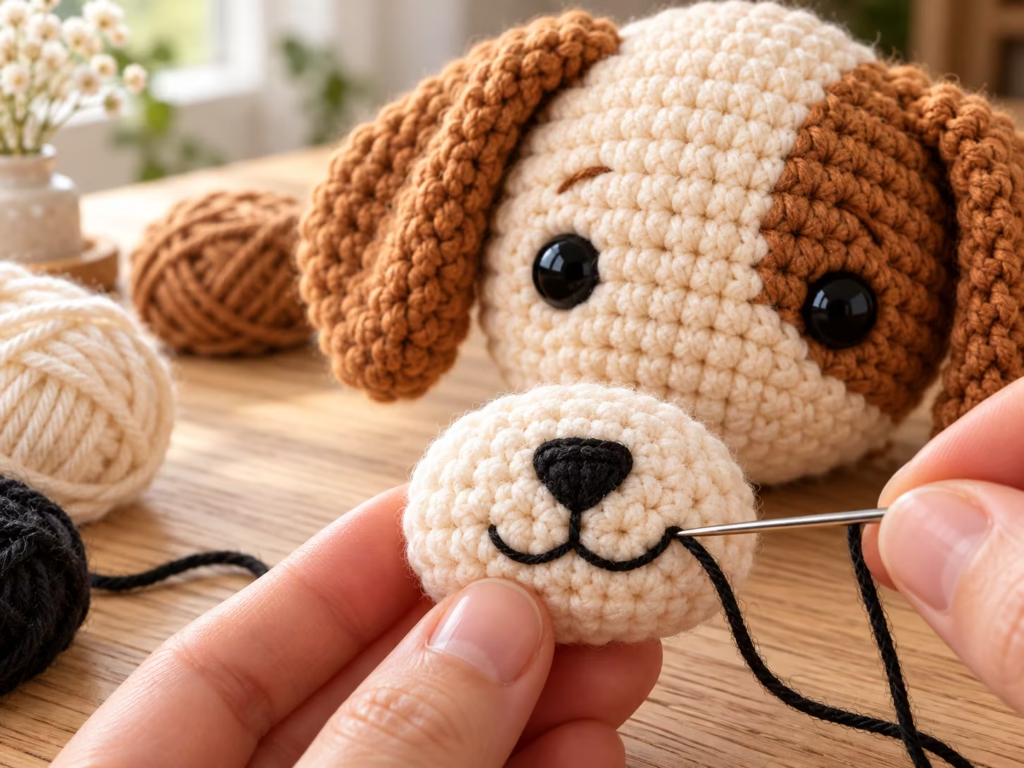
These ears are worked in continuous spiral rounds and remain unstuffed.
| Round | Instructions | Total Stitches |
|---|---|---|
| 1 | 6 sc in MR | 6 |
| 2 | (1 sc, inc) × 3 | 9 |
| 3 | (2 sc, inc) × 3 | 12 |
| 4 | (3 sc, inc) × 3 | 15 |
| 5–8 | sc in every st | 15 |
| 9 | (3 sc, dec) × 3 | 12 |
| 10–11 | sc in every st | 12 |
Flatten the opening so the front and back layers lie together. Fasten off, leaving a long tail on each ear.
Visual check: Both ears should have matching lengths and softly rounded tips.
Common error: One ear looks larger because rounds were skipped or repeated.
Solution: Count the rounds and compare both pieces before attaching them.
Expert tip: Flatten the attachment edge before sewing. This helps the ears hang naturally rather than standing straight outward.
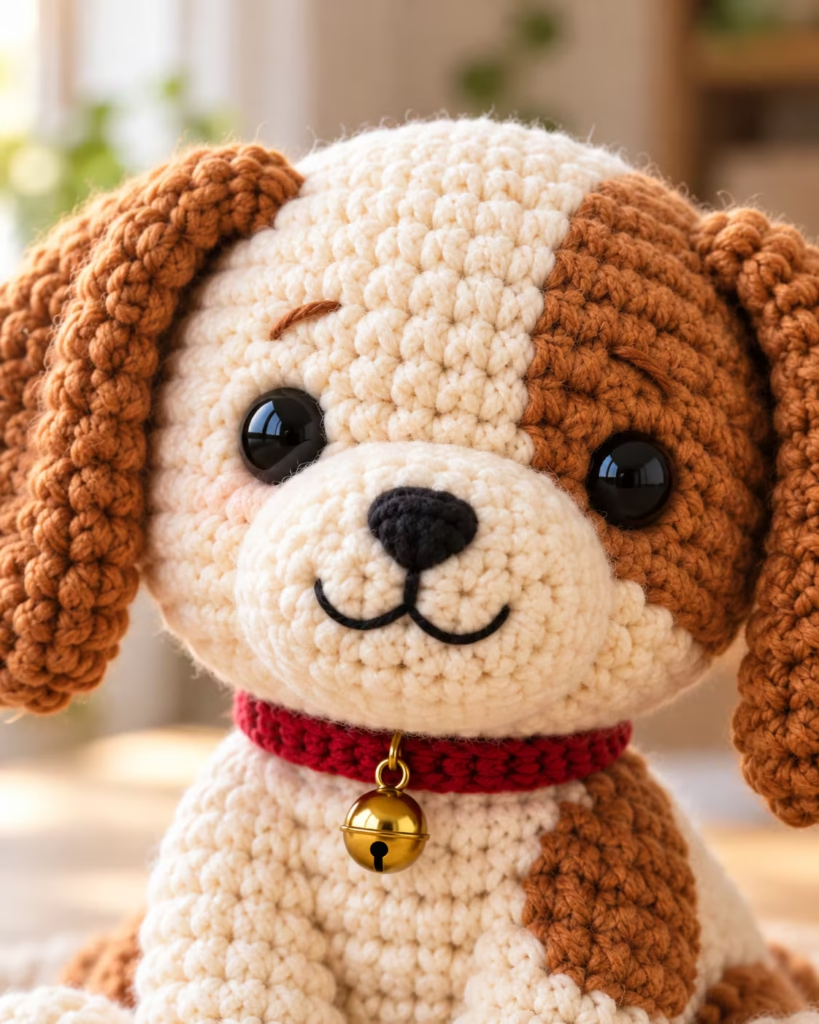
Step 4: Crochet the cream puppy muzzle
Use cream or ivory yarn.
| Round | Instructions | Total Stitches |
|---|---|---|
| 1 | 6 sc in MR | 6 |
| 2 | inc × 6 | 12 |
| 3 | (1 sc, inc) × 6 | 18 |
| 4 | sc in every st | 18 |
Fasten off, leaving a long sewing tail. Add a small amount of stuffing just before the final stitches that attach the muzzle to the head. The muzzle should be gently rounded, not spherical.
Embroider the puppy’s nose
Use black embroidery thread to stitch a small triangle near the upper center of the muzzle.
Make several short horizontal satin stitches, then add a short vertical line beneath the nose. For a friendly expression, add a small curved mouth extending to either side.
Visual check: The nose should look centered and lie flat against the muzzle.
Common error: Long, loose embroidery stitches snag or create an uneven nose.
Solution: Use several shorter stitches and secure the thread neatly on the reverse.
Expert tip: Embroider the nose before attaching the muzzle. It is easier to hide thread ends inside the piece.
Step 5: Crochet the front arms
Make two identical arms with the main color.
| Round | Instructions | Total Stitches |
|---|---|---|
| 1 | 6 sc in MR | 6 |
| 2 | (1 sc, inc) × 3 | 9 |
| 3–8 | sc in every st | 9 |
Lightly stuff the lower half of each arm. Flatten the top opening. Fasten off, leaving a long yarn tail.
Visual check: Each arm should be slightly rounded at the paw and flatter at its upper attachment edge.
Common error: Too much stuffing makes the arms stick out stiffly.
Solution: Remove excess stuffing from the upper half.
Expert tip: Match the position of each arm against the body before sewing either one permanently.
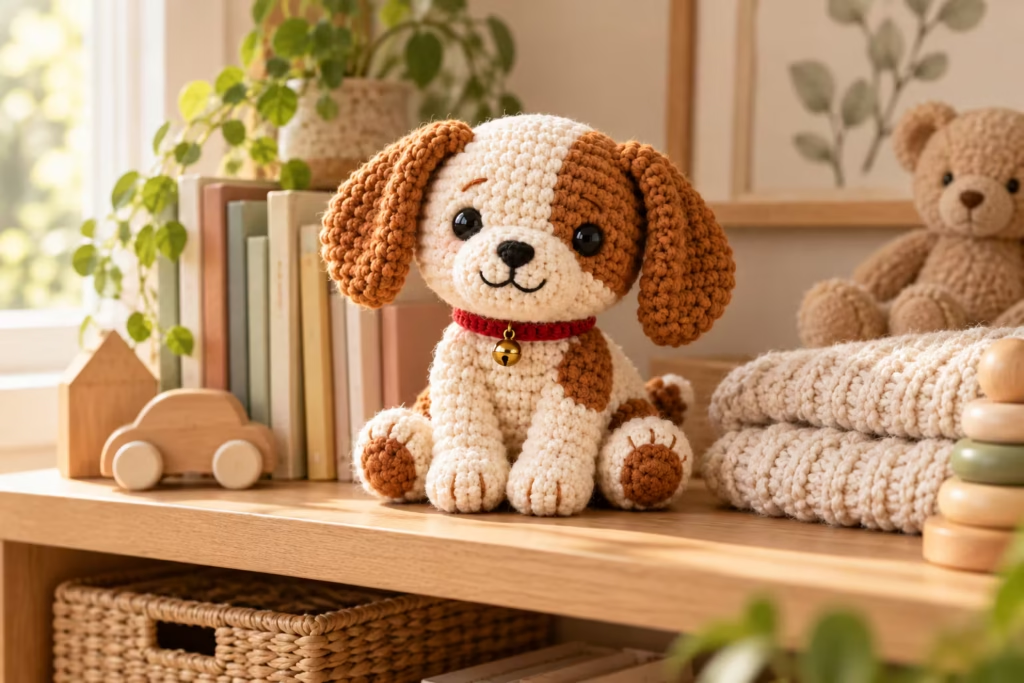
Step 6: Crochet the puppy’s back legs
Make two identical legs with caramel yarn.
| Round | Instructions | Total Stitches |
|---|---|---|
| 1 | 6 sc in MR | 6 |
| 2 | inc × 6 | 12 |
| 3–5 | sc in every st | 12 |
| 6 | (2 sc, dec) × 3 | 9 |
| 7 | sc in every st | 9 |
Add stuffing to the rounded paw end and leave the upper opening flexible. Flatten the top and fasten off with a long sewing tail.
Visual check: Both legs should have plump rounded paws and matching upper edges.
Common error: Uneven stuffing gives the puppy one larger foot.
Solution: Compare the shapes side by side and adjust before attaching.
Expert tip: Slightly angle the feet outward when pinning them to the body for a relaxed sitting pose.
Step 7: Crochet a small tail
Use caramel yarn.
| Round | Instructions | Total Stitches |
|---|---|---|
| 1 | 6 sc in MR | 6 |
| 2–5 | sc in every st | 6 |
Fasten off, leaving a sewing tail. The tail is a short narrow tube. Leave it unstuffed for flexibility.
Visual check: It should have a rounded tip and a narrow attachment opening.
Common error: A loosely attached tail folds downward immediately.
Solution: Sew around the entire base using several secure stitches.
Step 8: Make a cream tummy patch
Use cream yarn to crochet a flat oval.
Foundation: Ch 7.
- Round 1: Work 1 sc in the second chain from the hook and in each of the next four chains. Work 3 sc in the final chain. Continue along the opposite side of the foundation chain, work 1 sc in each of the next four chains, and work 2 sc in the final chain. (14 sts)
- Round 2: Work 2 sc in the first stitch, 1 sc in each of the next four stitches, 2 sc in each of the next three stitches, 1 sc in each of the next four stitches, and 2 sc in each of the final two stitches. (20 sts)
Fasten off with a long sewing tail. Check that the oval lies flat. If it curls, gently reshape it with your fingers without stretching the edge. This small patch is decorative rather than structural, so you can omit it if you prefer a one-color puppy.
How to Assemble Your Amigurumi Puppy
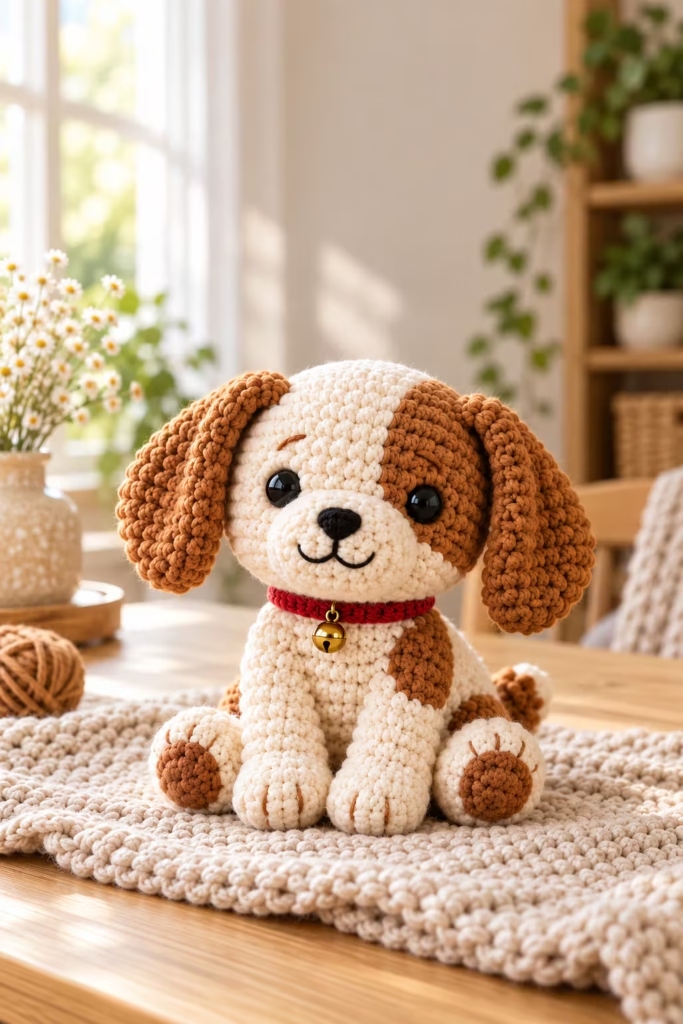
Assembly has a major influence on the finished puppy’s expression and posture. Before sewing, arrange the components with removable markers or pins so you can check the proportions.
Step 9: Attach the muzzle and facial details
Position the muzzle on the front of the head, below the eyes, approximately across rounds 12–16. Pin it in place and check the face from the front.
Use the long cream yarn tail to sew around the muzzle edge, adding a tiny amount of stuffing before closing the final section. If using embroidered eyes, add them now. Keep their size and spacing symmetrical.
Visual check: The muzzle should sit centrally between the cheeks without covering the eyes.
Common error: The nose appears crooked because the muzzle was attached off-center.
Solution: Remove the attachment stitches and reposition before completing the assembly.
Expert tip: Check the face from above and from eye level. Features that appear centered from one angle may look uneven from another.
Step 10: Attach the ears
Place the ears on either side of the head, starting around rounds 7–9. The exact position can be adjusted to suit the expression you want.
- Ears positioned higher can create an alert-looking puppy.
- Ears positioned slightly lower create a softer, sleepy expression.
- Angling the ears forward makes the face appear more expressive.
Sew the flattened attachment edges securely to the head.
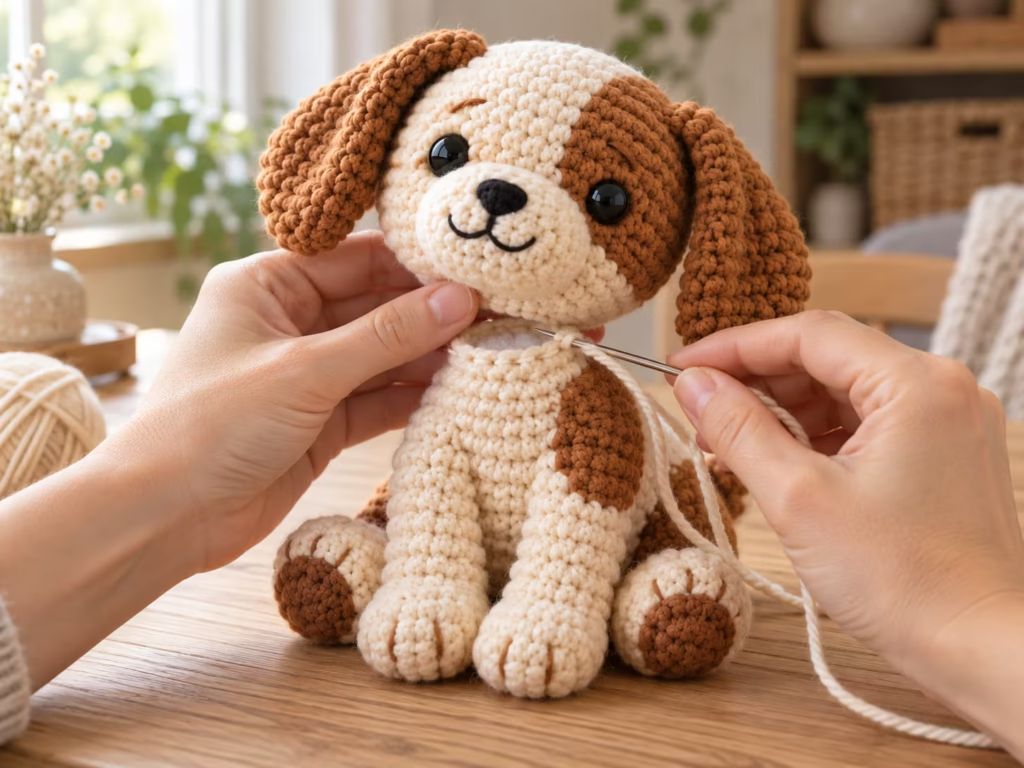
Step 11: Join the head and body
Place the head on top of the stuffed body, with its closed bottom centered over the body opening.
Using the long yarn tail from the body, sew the body’s 18-stitch opening to a roughly corresponding circular area on the underside of the head. Work small, evenly spaced stitches, catching the head fabric securely.
The head’s closure has only six final stitches, so do not attempt to join it stitch-for-stitch directly to all 18 neck stitches. Instead, sew around the surrounding underside fabric to create a stable attachment ring.
Add or redistribute a small amount of stuffing in the neck before fully tightening the seam.
Visual check: The head should sit upright without wobbling excessively.
Common error: Sewing only a few stitches around the neck creates a weak connection.
Solution: Use an evenly spaced circular seam and reinforce it with a second pass if needed.
Expert tip: Rotate the puppy as you sew rather than pulling the head toward you. This makes it easier to keep the attachment balanced.
Step 12: Attach the arms, legs, and tail
Attach the arms just below the neck, one on each side of the upper body. Position the legs on the lower front of the body so the puppy appears to sit with its paws facing forward. Sew the legs securely around their flattened attachment edges. Attach the tail to the lower back of the body, near the bottom.
Simple puppy assembly diagram
FRONT VIEW
Left ear Right ear \ / [ HEAD ] [ MUZZLE ] || ARM [BODY] ARM || LEG LEG
SIDE VIEW
HEAD | BODY |\ LEG TAIL
ASSEMBLY ORDER
- Crochet all parts
↓
- Add facial embroidery
↓
- Attach muzzle
↓
- Attach ears
↓
- Join head and body
↓
- Attach tummy patch
↓
- Attach arms and legs
↓
- Attach tail
↓
- Secure and hide yarn ends
This diagram shows the component relationships and assembly sequence, not exact proportions or stitch placement.
Step 13: Finish and shape the puppy
After assembly:
- Check that every component is securely attached.
- Gently shape the head and belly.
- Adjust the paws so the puppy sits evenly.
- Weave remaining yarn tails through multiple stitches inside the body.
- Trim excess yarn only after the ends are secure.
Avoid cutting a sewing tail close to its knot. A short unsecured end may work loose with handling.
Beginner-to-Pro Crochet Tips
The difference between an uneven first amigurumi and a polished crochet puppy often comes from small changes in technique rather than complicated stitches.
Beginner level: Keep your stitches consistent
Focus on three habits:
- Use a stitch marker every round.
- Count your stitches after every increase or decrease round.
- Keep enough tension that the stuffing does not show through.
If you are struggling to insert the hook, your stitches may be too tight. Try relaxing your grip rather than immediately switching hook sizes.
Intermediate level: Improve the shaping
Use invisible decreases for the head and body. For decrease rounds, distribute the shaping evenly around the piece. The pattern’s repeated sequences help maintain symmetry. When possible, adjust the orientation of your pieces so the more attractive fabric surface faces outward.
Advanced level: Refine the finish
Experienced crocheters can improve the puppy’s appearance with thoughtful finishing:
- Use mattress-style stitching where appropriate to minimize visible seams.
- Add small embroidered paw details.
- Vary ear placement to create different expressions.
- Use carefully balanced stuffing to support the neck.
- Arrange the legs before sewing so the puppy can sit upright.
- Hide embroidery knots and yarn tails inside secure seams.
The goal is a stable, symmetrical toy with soft contours, not a rigid stuffed shape.
Common Crochet Puppy Problems and Fixes
Most amigurumi problems are easier to fix before the individual pieces are assembled.
| Problem | Likely Cause | Practical Fix | Prevention |
|---|---|---|---|
| Stuffing shows between stitches | Loose tension or oversized hook | Use a smaller hook or reduce stuffing | Check fabric density before starting |
| Head looks pointed | Tightening or stuffing concentrated at the top | Redistribute stuffing and reshape | Add stuffing in small amounts |
| Puppy leans sideways | Uneven assembly or stuffing | Reposition components and balance filling | Pin components before sewing |
| Ears are different lengths | Incorrect round counts | Remake the mismatched ear | Count rounds with a row counter |
| Visible gaps at decreases | Standard decreases or loose tension | Use invisible decreases | Practice decrease placement |
| Muzzle is crooked | Off-center attachment | Unpick and resew | Mark the center of the face |
| Neck feels unstable | Weak seam or insufficient upper-body support | Reinforce the circular seam | Sew evenly around the neck |
| Legs point in different directions | Uneven placement | Reposition before final stitches | Compare from front and side |
| Yarn tails work loose | Ends cut too short | Re-secure ends if accessible | Weave through multiple directions |
Why are my amigurumi stitches uneven?
Uneven stitches often come from changing yarn tension while working. Try holding the yarn in a comfortable, repeatable position. Crochet slowly enough to maintain consistent loop size, especially during increase rounds. If one part appears much larger than its matching part, compare stitch counts before blaming tension.
Why does my puppy have holes around the decreases?
Visible holes usually form when the two stitches being decreased are stretched apart. Invisible decreases help by working through the front loops. A smaller hook can also improve fabric density. Do not pull excessively on the working yarn after each decrease; strong tension can distort the surrounding stitches.
How do I stop my crochet puppy from falling over?
A sitting puppy needs balanced stuffing and correctly positioned legs. Make sure the bottom of the body is gently flattened. The legs should form a stable front support rather than pointing straight downward. If the puppy tips forward, check whether the head is leaning too far forward or the lower body is overstuffed.
Creative Puppy Customization Ideas
Once you understand the basic construction, you can turn this crochet puppy pattern into several different-looking dogs.
1. Golden retriever-inspired puppy
Use warm golden yarn for the body and slightly lighter cream yarn for the muzzle. Keep the ears softly rounded and hanging beside the face. A small embroidered brown nose can create a gentle expression.
2. Dalmatian-inspired puppy
Use white yarn for the head and body. Add irregular black spots with small pieces of felt for an adult decorative item, or securely embroidered spots for a more durable fabric-only option. One black ear and one white ear can create a playful asymmetrical appearance.
3. Chocolate-brown puppy
Replace the caramel yarn with dark brown. Use a medium-brown or tan muzzle for contrast. Choose embroidery thread that remains visible against the dark head.
4. Sleepy puppy
Replace open eyes with gently curved embroidered eyelids. Use short, symmetrical curved lines for a peaceful resting expression. Position the ears a little lower for a relaxed look.
5. Autumn-inspired crochet puppy
For a seasonal October display, create a tiny removable orange scarf for decoration. Keep any removable accessory away from infants and young children.
Choosing the Best Yarn for Your Crochet Puppy
Different yarns change the look and feel of the finished dog.
| Yarn Type | Best For | Advantages | Limitations | Recommendation |
|---|---|---|---|---|
| Acrylic worsted | Beginners | Affordable, widely available, easy care | Texture varies between brands | Good first choice |
| Cotton worsted | Crisp stitch definition | Durable, holds shape | Can feel less plush | Choose for detailed toys |
| Cotton-acrylic blend | Balanced structure and softness | Clear stitches, flexible fabric | Exact feel varies | Good all-purpose option |
| Chenille | Plush decorative puppies | Soft, cuddly texture | Difficult to see stitches, may shed | Better after practicing |
| Bulky yarn | Oversized puppies | Larger result with fewer stitches | Requires hook and stuffing adjustments | Use when confident |
If you change from worsted to bulky yarn, do not expect the same finished dimensions. Your stitch counts can remain unchanged, but the resulting pieces will become larger. For a first amigurumi puppy, a smooth worsted-weight yarn is easier to control than fuzzy chenille.
<!– gap –>
How to Adjust the Size of Your Crochet Puppy
Changing yarn thickness is the simplest way to change the finished size without rewriting the stitch counts.
Step 1 — Make a smaller puppy
Use thinner yarn and a hook that creates a tight, firm fabric. The finished puppy will become smaller because each stitch occupies less space. Keep in mind that tiny pieces, particularly the muzzle and tail, will become more difficult to handle.
Step 2 — Make a larger puppy
Use thicker yarn and an appropriately sized hook. Check that stuffing cannot escape through the stitches. A larger puppy will require more filling, and the head may become relatively heavy. Reinforce the neck attachment and check balance carefully.
Step 3 — Verify your actual dimensions
Before committing to the complete project, crochet a small test circle with your chosen yarn and hook. Make six rounds using the head’s increase sequence. Measure the circle across its widest point without stretching.
This gives you a practical reference for your tension. It does not provide a fully verified finished height, because stuffing, shaping, and assembly also influence the result. If you need an exact finished size, a physically measured sample using the same yarn and hook is necessary.
<!– gap –>
How to Make Your Crochet Puppy More Durable
Durability matters when a handmade toy will be handled frequently.
Step 4 — Reinforce attachment seams
Sew through full stitches rather than catching only loose yarn fibers. For the head, distribute the seam around the entire neck opening. Arms, legs, and ears should each have several secure attachment points.
Step 5 — Choose practical decorations
Embroidery is generally preferable to glued-on details for a frequently handled crochet piece. Avoid hot glue for structural joints. Do not rely on a single knot to hold an arm or ear.
Step 6 — Protect the stuffing
Use dense single crochet stitches throughout the puppy. If gaps appear when the fabric stretches around the stuffing, use a smaller hook or reduce the amount of filling.
Stuffed toys intended for children should be checked for loose seams and protruding fiberfill before use and regularly afterward. A handmade pattern alone does not establish compliance with applicable toy safety standards.
<!– gap –>
Caring for and Cleaning Your Crochet Puppy
The safest cleaning method depends on the yarn manufacturer’s instructions and the materials used for stuffing and decoration.
Gentle spot cleaning
For small marks:
- Dampen a soft cloth with cool water.
- Add a small amount of mild detergent if appropriate for the yarn.
- Gently blot the affected area.
- Remove detergent with another damp cloth.
- Let the puppy air-dry completely.
Avoid aggressively rubbing the stitches.
Washing a stuffed crochet puppy
Check the yarn label first. If all materials are washable, gentle handwashing may be suitable. Support the puppy’s shape while wet and avoid twisting or wringing it.
Press out excess moisture using a clean towel. Dry thoroughly in a ventilated area before storage or use. Dense stuffing can retain moisture longer than the outer crochet fabric.
Storage
Store the finished puppy in a clean, dry space away from prolonged direct sunlight. If displayed on a shelf, occasional gentle dusting helps maintain the appearance of the stitches. Avoid compressing a stuffed puppy under heavy objects for extended periods.
Final Quality Checklist
Before declaring your crochet puppy complete, inspect the finished project carefully.
Shape and symmetry
- [ ] The head is evenly rounded.
- [ ] The body has a clear sitting shape.
- [ ] Both ears have similar lengths.
- [ ] The muzzle sits centrally.
- [ ] The eyes and nose are balanced.
- [ ] The legs are positioned symmetrically.
Construction
- [ ] The head is securely sewn to the body.
- [ ] The arms, legs, ears, and tail are firmly attached.
- [ ] No large gaps expose the stuffing.
- [ ] Yarn tails are securely woven in.
- [ ] The stuffing is evenly distributed.
- [ ] The puppy can sit without excessive leaning.
Appearance
- [ ] The face looks balanced from the front.
- [ ] The muzzle has a smooth, rounded outline.
- [ ] The ear placement matches the intended expression.
- [ ] No unwanted knots or loose threads are visible.
Slight differences in paw shape or ear angle are normal in handmade crochet. Loose attachments, exposed stuffing, and unsecured decorations require correction before the puppy is used.
Frequently asked questions
Is this crochet puppy pattern suitable for beginners?
Yes, it is designed for a confident beginner who already knows basic single crochet and is ready to practice shaping. The head and body use repeated increases and decreases, while the ears and limbs introduce small tubular pieces. If you have never made amigurumi, practice a magic ring, basic increase, and invisible decrease before starting the puppy.
What size crochet hook should I use for an amigurumi puppy?
A 3.5 mm hook is a reasonable starting point with the suggested worsted-weight yarn, but the correct size depends on your tension and yarn. Amigurumi generally requires a tighter fabric than ordinary garments. If stuffing shows between your stitches, try a smaller hook. If the stitches are too difficult to work, adjust your tension or hook size.
How much yarn do I need to crochet a puppy?
For this small puppy design, plan for approximately 60–90 yards of main-color yarn and 15–25 yards of cream yarn. These are estimates rather than measured consumption from a tested sample. Buy a little extra if you intend to add spots, a larger tummy patch, or decorative accessories. Thicker yarn will change how much you need.
Can I crochet this puppy without safety eyes?
Absolutely. Embroidered eyes make an attractive alternative and are preferable to detachable plastic eyes for projects intended for very young children. Use black embroidery floss or thin yarn and keep both eyes consistent in size. Secure the embroidery ends inside the head. All seams and decorations still need careful inspection before a handmade toy is given to a child.
Why does my crochet puppy look different from the reference picture?
Even with identical stitch counts, differences in yarn thickness, hook size, stuffing, and tension can change the final proportions. Ear placement and facial embroidery have an especially noticeable effect on expression. Compare individual pieces before assembly, check the stitch counts, and adjust placement with pins. The image descriptions in this article are planned visual references, not photographs of a verified tested sample.
Can I make a crochet puppy with plush yarn?
Yes, but plush and chenille yarn are more difficult to work with because the stitches can be hard to see. Use stitch markers consistently, count carefully, and select a hook that forms a dense fabric. Plush yarn also changes the finished dimensions significantly. For your first attempt, practice the pattern with smooth yarn before switching to a fuzzy texture.
How do I make my crochet puppy sit upright?
Start with balanced stuffing. The body should be firm at the bottom but slightly softer near the neck. Attach the back legs so their paws extend toward the front and help support the puppy. The head should be centered over the torso rather than leaning forward. Before securing the final assembly stitches, place the puppy on a flat surface and check its balance.
Can I sell puppies made from this pattern?
Selling a finished handmade toy involves considerations beyond following the instructions, including originality, applicable design rights, product safety, labeling, and marketplace requirements. This article does not establish that a finished toy meets any particular safety standard. If you plan to sell finished puppies in the United States, check the requirements that apply to your intended customers and product category. —
Your Next Crochet Project
Your finished crochet puppy should now have a rounded head, expressive floppy ears, a softly shaped muzzle, and four little paws that give it a friendly sitting pose.
Before gifting or displaying it, check the neck seam, inspect every attachment, and gently reshape the stuffing where needed. If your first puppy is slightly uneven, compare the components and stitch counts rather than immediately starting over. Small assembly adjustments often make a noticeable difference.
Save this crochet puppy pattern so you can return to the round-by-round instructions when making another dog. Try a golden puppy, a spotted Dalmatian-inspired version, or a sleepy puppy with embroidered closed eyes.
Once you’re comfortable with this construction, a crochet kitten or teddy bear is a natural next project. Both use many of the same amigurumi skills: shaping with increases and decreases, stuffing evenly, and assembling small parts into an expressive handmade animal.
Pin “Crochet Puppy: Cute Amigurumi Pattern and Easy Tips” so you can find it when the yarn arrives.
Get the next free pattern first
One email a week. New patterns, no noise.
Yarn weights and hook sizes in this guide follow the Craft Yarn Council standards.
Keep going: Halloween Crochet: Easy Ghost, Pumpkin & Bat Patterns · Cute Crochet Amigurumi Puppy Pattern Tutorial for Beginners · 15 Cozy Autumn Crochet Coin Purse Ideas: Pumpkin, Acorn & Mushroom Pouches





