
Crochet Color Blanket Ideas for Soft, Balanced Texture
Crochet color blanket ideas: In this guide, you'll learn three distinct color combinations, how to crochet a striped moss stitch blanket, how to adjust its…

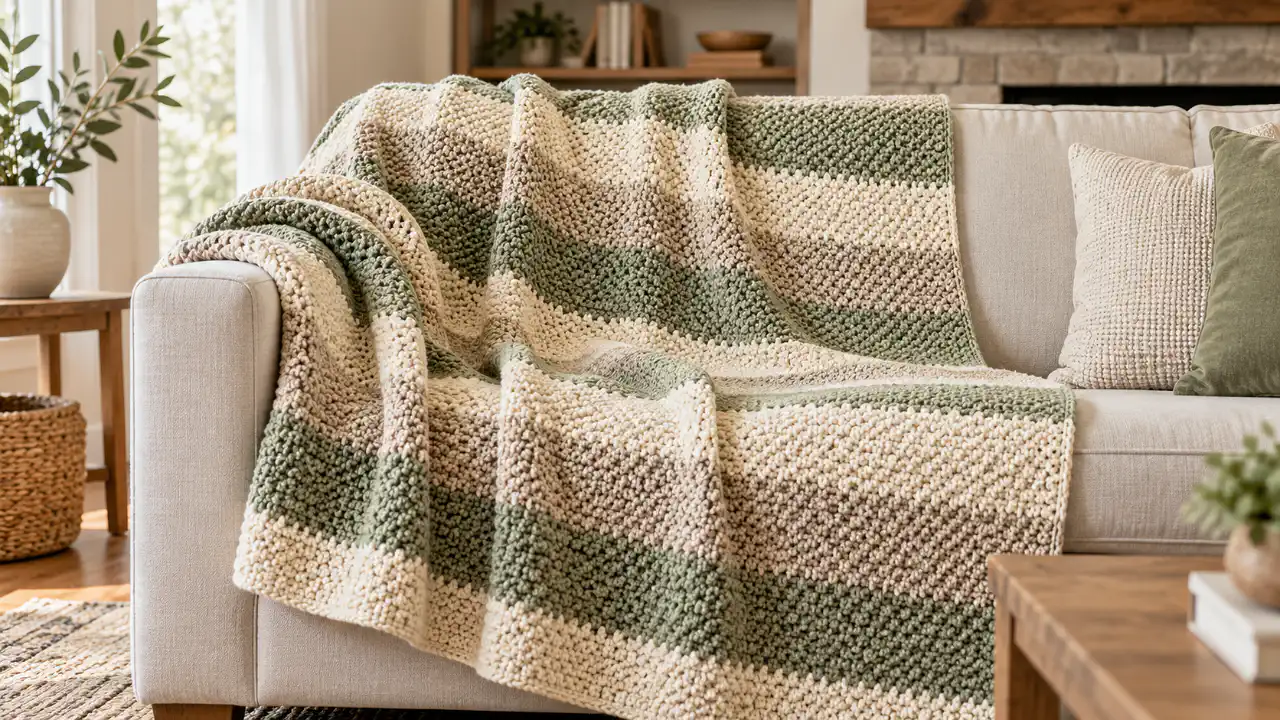
In this guide, you’ll learn three distinct color combinations, how to crochet a striped moss stitch blanket, how to adjust its size, and how to achieve clean color changes and an even finish.
Project Overview
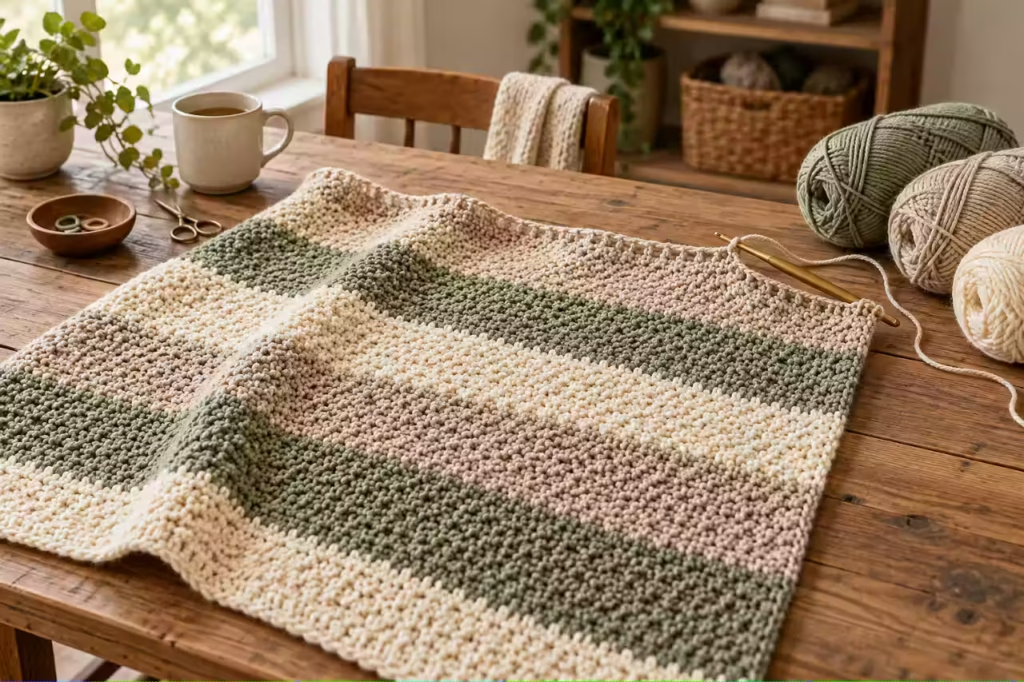
This project uses US crochet terminology and a repeating moss stitch, also called linen stitch or granite stitch.
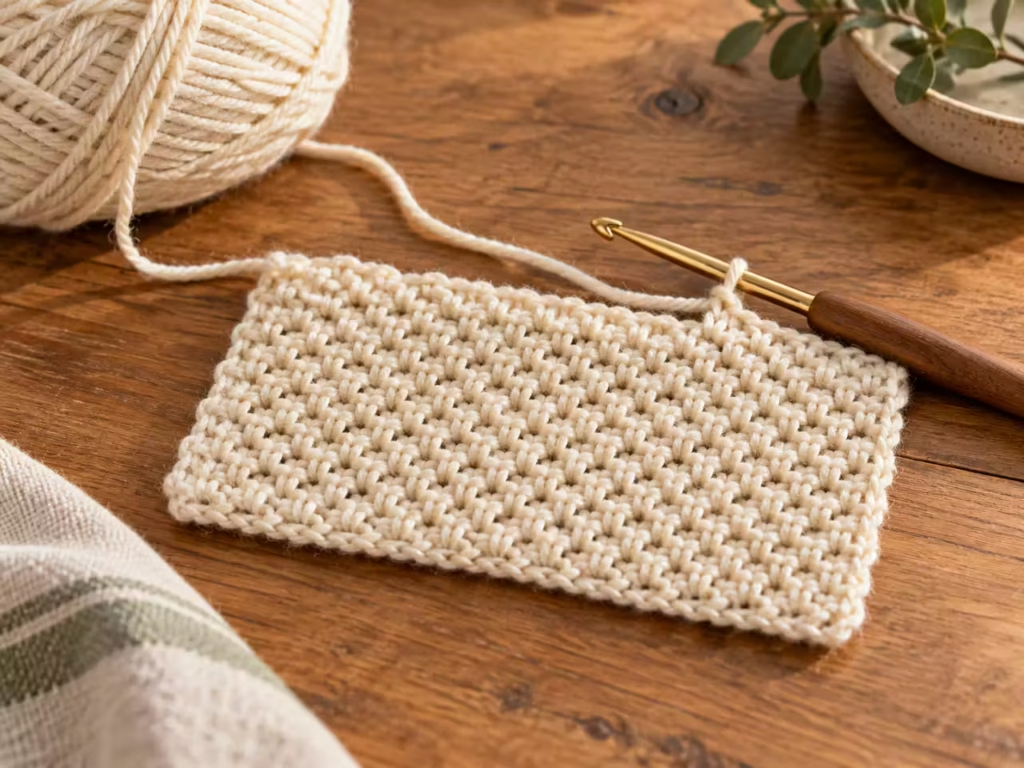
Moss stitch combines single crochet stitches with chain-one spaces. Its low-profile surface makes it especially suitable for blankets featuring multiple colors because the stripes remain visible without competing against raised stitch patterns.
| Project Detail | Description |
|---|---|
| Skill level | Confident beginner |
| Main stitch | Moss stitch |
| Colors required | Three coordinated yarn colors |
| Yarn weight | Worsted weight, Category 4 |
| Suggested hook | 5.5 mm (US I-9), subject to yarn label and gauge |
| Construction | Flat, back-and-forth rows |
| Shaping | No increases or decreases |
| Color changes | At the ends of selected rows |
| Finishing | Woven ends and optional border |
| Suggested size | Approximately 40 × 50 inches |
| Exact finished dimensions | Determined by personal gauge |
| Time required | Depends on size, yarn, and crocheting speed |
The instructions below give a reusable stitch foundation rather than promising a particular measurement from an untested gauge.
Three Crochet Color Blanket Ideas for Soft, Balanced Texture
Choosing colors is often harder than selecting stitches. A combination can look attractive in individual yarn skeins but feel disjointed once those shades repeat across an entire blanket.
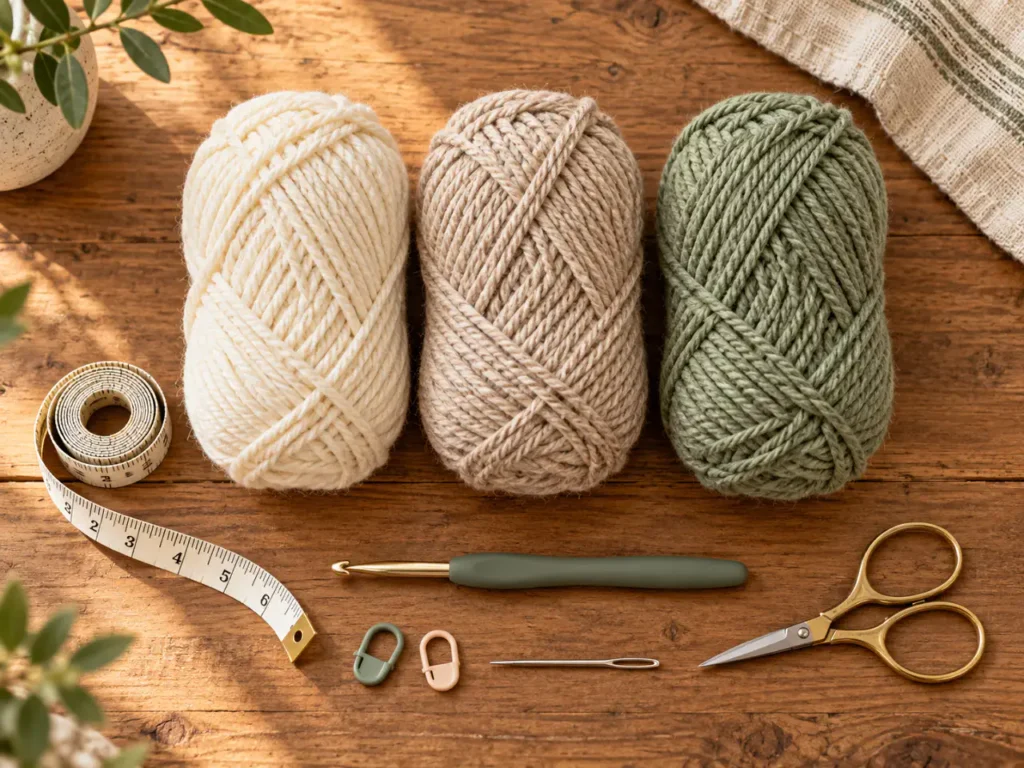
The following palettes are designed around three roles:
- Base color: A visually restful shade that occupies the largest area.
- Supporting color: A secondary shade that adds warmth, coolness, or depth.
- Accent color: A distinctive shade used more selectively.
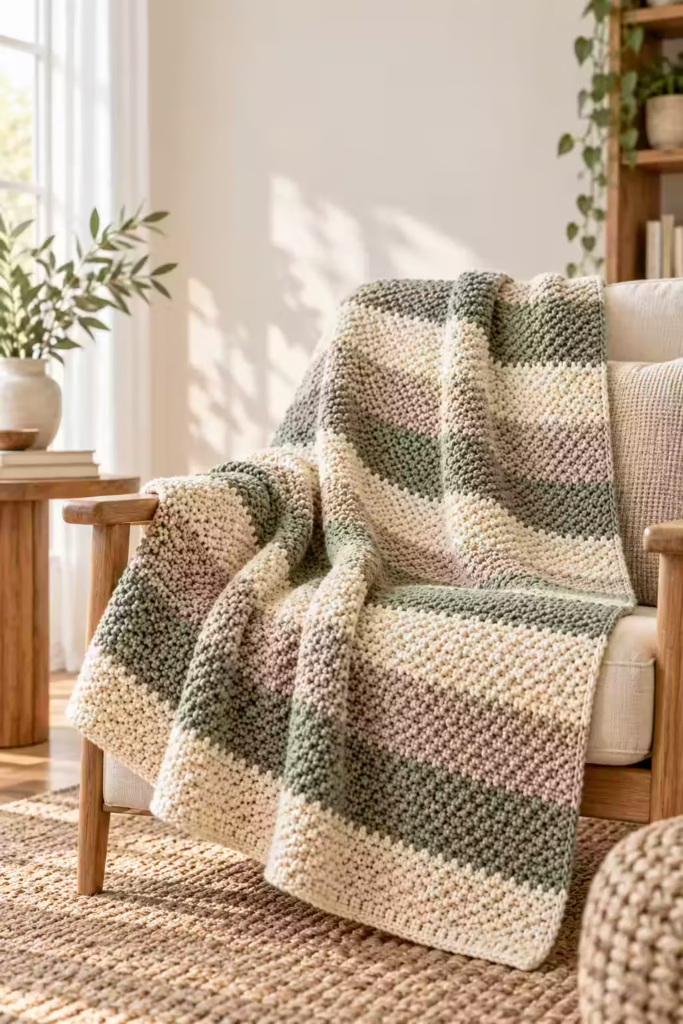
Idea 1: Warm Ivory, Oatmeal, and Sage Green
This palette creates a light, earthy blanket that suits natural interiors and cozy fall decorating.
| Color | Suggested Role | Approximate Share |
|---|---|---|
| Warm ivory | Base color A | 50% |
| Oatmeal beige | Supporting color B | 30% |
| Muted sage green | Accent color C | 20% |
The ivory establishes a quiet background, while oatmeal adds warmth without creating a hard boundary between shades. Sage introduces a botanical accent.
For a balanced striped appearance, organize the colors into a repeating 10-row sequence:
- Rows 1–5: Ivory
- Rows 6–8: Oatmeal
- Rows 9–10: Sage
Repeat the sequence across the blanket. This approach uses color proportions rather than equal-size blocks, creating a steady visual rhythm.
Best for: Neutral living rooms, modern farmhouse décor, and understated handmade gifts.
Design refinement: Choose yarns with similar surface finishes. A glossy sage paired with fuzzy matte ivory can make the accent appear more dominant than intended.
Idea 2: Dusty Rose, Cream, and Soft Taupe
For a softer and slightly romantic look, combine dusty rose with warm cream and taupe.
| Color | Suggested Role | Approximate Share |
|---|---|---|
| Warm cream | Base color A | 50% |
| Dusty rose | Supporting color B | 30% |
| Soft taupe | Accent color C | 20% |
This combination has gentle contrast and looks especially attractive in textured crochet stripes.
Try the following 10-row repeat:
- Rows 1–5: Cream
- Rows 6–8: Dusty rose
- Rows 9–10: Taupe
Cream prevents the pink from feeling overwhelming, while taupe gives the finished design subtle definition.
Best for: Nursery-inspired décor, soft bedroom accessories, and handmade seasonal gifts.
Design refinement: Place the yarn samples together in daylight. Warm pinks can appear noticeably different under yellow indoor lighting.
Idea 3: Muted Blue, Oatmeal, and Cloud Gray
This palette creates a cooler, contemporary crochet blanket.
| Color | Suggested Role | Approximate Share |
|---|---|---|
| Oatmeal | Base color A | 50% |
| Muted blue | Supporting color B | 30% |
| Cloud gray | Accent color C | 20% |
The combination balances a cool blue with a warm neutral, keeping the overall appearance comfortable rather than stark.
Use the same stripe structure:
- Rows 1–5: Oatmeal
- Rows 6–8: Muted blue
- Rows 9–10: Cloud gray
Best for: Modern bedrooms, relaxed coastal-inspired spaces, and versatile everyday throws.
Design refinement: Avoid pairing a strongly saturated blue with extremely pale neutrals if your goal is subtle texture. A dusty or gray-blue creates gentler color transitions.
Which Three-Color Palette Should You Choose?
| Palette | Overall Mood | Contrast | Best Feature |
|---|---|---|---|
| Ivory, oatmeal, sage | Earthy and natural | Soft | Warm botanical accent |
| Cream, dusty rose, taupe | Gentle and inviting | Soft to moderate | Delicate warmth |
| Oatmeal, muted blue, gray | Cool and contemporary | Moderate | Clean coordinated stripes |
All three designs use the same construction technique. Only the yarn colors change.
A soft blanket depends on more than choosing attractive colors. Fiber content, yarn weight, stitch tension, and finishing all affect the way the fabric feels.
| Item | Specification | Purpose | Alternative |
|---|---|---|---|
| Yarn | Three colors of worsted-weight yarn | Blanket fabric | Another consistent yarn weight |
| Crochet hook | Start with 5.5 mm | Form stitches | Adjust after swatching |
| Measuring tape | Flexible tape | Check dimensions | Ruler for small samples |
| Yarn needle | Blunt tapestry needle | Secure yarn ends | Suitable finishing needle |
| Scissors | Sharp craft scissors | Trim yarn | Small yarn snips |
| Stitch markers | Two removable markers | Identify row edges | Contrasting scrap yarn |
A smooth, soft acrylic or washable acrylic blend can be practical for everyday blankets. Cotton blends may provide more weight and definition. Wool blends can add warmth and elasticity but may require more careful washing.
Before purchasing, check that all three shades have compatible:
Using three colors from the same yarn line is a convenient way to reduce differences in thickness and behavior. For blankets intended for frequent washing, easy-care yarn is generally a sensible choice.
Understanding Moss Stitch
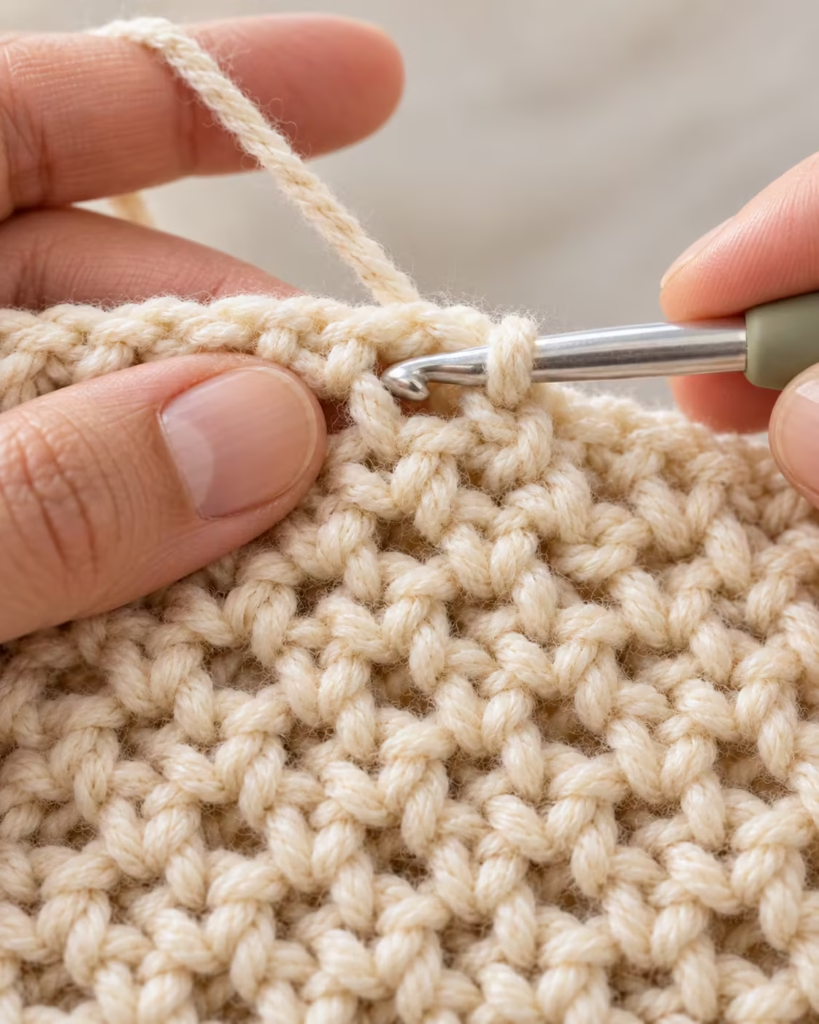
Moss stitch creates a gently woven appearance by alternating a single crochet with a small chain space. The next row places single crochet stitches into the chain spaces from the previous row, rather than stacking every stitch directly on top of another. This creates a flexible, subtly textured fabric.
Essential Crochet Abbreviations
| Abbreviation | Meaning |
|---|---|
| ch | Chain |
| sc | Single crochet |
| ch-1 sp | Chain-one space |
| st | Stitch |
| rep | Repeat |
| RS | Right side |
| WS | Wrong side |
All stitch instructions use US terminology.
Why Moss Stitch Works for Striped Blankets
Moss stitch offers three useful properties. First, its short stitches create a relatively flat surface. This helps narrow stripes remain visible. Second, the chain spaces add flexibility without requiring complicated stitch combinations.
Third, the simple repeat makes it easier to concentrate on color placement and consistent tension. The finished fabric should appear closely woven but not rigid.
Complete Step-by-Step Blanket Tutorial
The following construction method uses an even-numbered foundation chain and a repeating two-chain turning edge. The initial three skipped chains establish the first edge unit. On subsequent rows, the chain-two turning unit represents the first edge single crochet and its neighboring chain space.
The foundation number below is a practice example, not a guaranteed width. Make a gauge swatch first and calculate the chain count for your chosen blanket size.
Step 1: Make Your Gauge Swatch
Before beginning the full blanket, make a sample with your selected yarn and hook. Start with an even-numbered foundation chain, such as 30 chains. Follow the moss stitch instructions in Steps 2 and 3 until the swatch is large enough to measure an interior section without including the edges.
Measure the stitches and rows across a central 4-inch area. Do not stretch the sample. Record your measurements.
Visual check: The sample should lie reasonably flat and show evenly sized gaps.
Common error: Measuring immediately along the foundation edge may give an inaccurate gauge.
Solution: Measure away from the starting chain and outer edges.
Expert tip: Wash and dry the swatch according to the yarn instructions before measuring again. Use the post-wash dimensions for more accurate size planning.
Step 2: Crochet the Foundation Chain
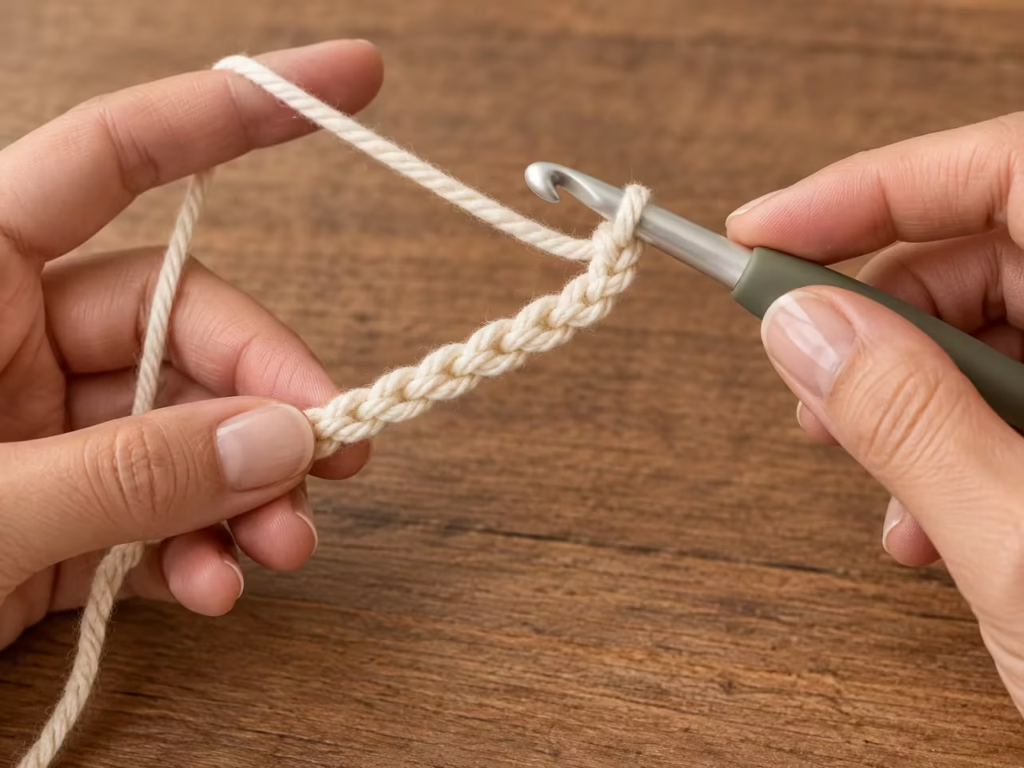
For a small practice sample, chain 30. For a full blanket, use the even chain count calculated from your gauge and desired width. Keep your foundation chain relaxed. A tight chain can pull the bottom edge inward and create a curved or pinched appearance.
Visual check: The chain should form a flexible, untwisted line.
Common error: Making the foundation much tighter than the rest of the fabric.
Solution: Loosen your tension or use a slightly larger hook for the foundation chain before switching to your main hook.
Expert tip: Count the foundation chains in groups of 10 and place temporary markers to reduce miscounting.
Step 3: Work the First Moss Stitch Row
Use Color A.
- Insert the hook into the fourth chain from the hook.
- Make one single crochet.
- Chain one.
- Skip the next foundation chain.
- Make one single crochet into the following chain.
- Repeat Steps 3–5 until you reach the final foundation chain.
Your final single crochet should be worked into the last foundation chain.
For the 30-chain practice sample, the row contains 14 worked single crochets, seven? No: the single crochets occupy foundation chains 4, 6, 8, through 30, giving 14 worked single crochets. Including the turning-chain edge unit, the row has 15 effective single-crochet positions.
Keep the work relaxed.
Visual check: Small gaps should appear between the single crochet stitches, with the taller turning-chain unit forming one edge.
Common error: Forgetting to skip a foundation chain.
Solution: Undo the affected section and restore the sc–chain–skip rhythm.
Expert tip: Work several practice rows before judging the texture. The fabric becomes easier to recognize as the stitch pattern develops.
Step 4: Crochet the Repeating Moss Stitch Rows
At the end of the first row:
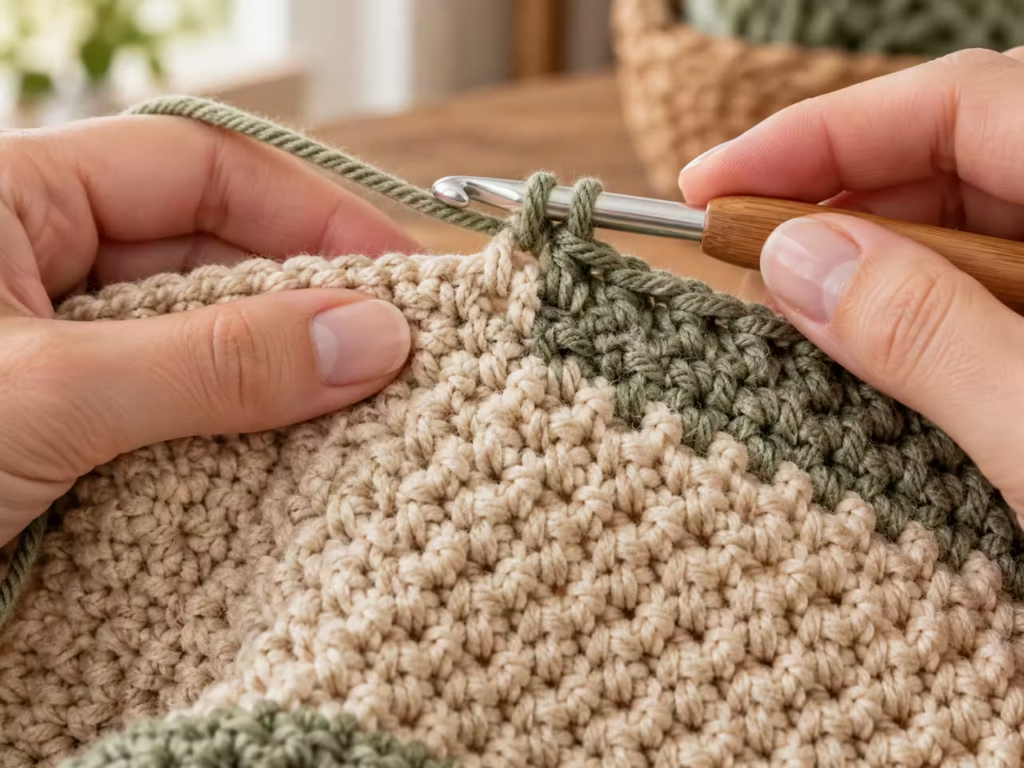
- Chain two and turn.
- Skip the first single crochet directly below the turning chain.
- Insert your hook into the first chain-one space.
- Work one single crochet into that space.
- Chain one.
- Skip the next single crochet.
- Work one single crochet into the next chain-one space.
- Continue across the row.
- At the far edge, place the final single crochet into the chain space formed by the turning-chain unit of the preceding row.
Chain two and turn to begin the next row. Repeat this row until you reach a scheduled color change. The turning chain counts as the first edge unit; do not add an extra single crochet into the first stitch.
Visual check: The new single crochet stitches should settle into the gaps of the previous row.
Common error: Working into the tops of the single crochet stitches instead of the chain-one spaces.
Solution: Spread the fabric slightly with your fingers and locate the horizontal chain bridges.
Expert tip: Use a stitch marker to identify the final turning-chain space if you frequently miss the edge.
Step 5: Establish Your First Color Block
Continue crocheting with Color A for five rows in total. Count the foundation row as Row 1.
The first color block should contain:
- Row 1: Foundation moss stitch row
- Rows 2–5: Repeating moss stitch rows
Check the width regularly. A small amount of natural movement is normal, but the blanket should not gain or lose noticeable width with each row.
Visual check: After five rows, the fabric should show a consistent texture and a clearly defined rectangular shape.
Common error: Accidentally increasing at the row edge.
Solution: Remember that the turning chain already supplies the first edge unit.
Expert tip: Place a removable marker every 10 rows. This makes color planning and row counting easier as the blanket grows.
Step 6: Change to Color B Cleanly
A neat color transition begins in the final stitch of the preceding row.
When you reach the last single crochet of Row 5:
- Insert the hook into the final chain space.
- Yarn over with Color An and pull up a loop.
- Leave two loops on the hook.
- Drop Color A.
- Yarn over with Color B.
- Pull Color B through both loops.
- Chain two with Color B.
- Turn and continue the next moss stitch row.
This produces a cleaner transition than simply attaching the new color midway through a row. Leave yarn tails long enough to weave securely.
Visual check: The new color should begin at the edge without an unusually large knot or loop.
Common error: Pulling the new yarn excessively tight.
Solution: Adjust the new loop to match the surrounding stitch tension.
Expert tip: If a yarn color will not be used again for several rows, cutting and weaving the end is often preferable to carrying a long strand along the edge.
Step 7: Create the Three-Color Stripe Sequence
Use the following repeating structure:
| Rows Within Each Repeat | Color | Number of Rows |
|---|---|---|
| 1–5 | Color A | 5 |
| 6–8 | Color B | 3 |
| 9–10 | Color C | 2 |
Repeat the complete 10-row sequence until the blanket is approaching your desired length. Keep the stripe order consistent throughout the project.
For example:
Repeat 1: A / B B B / C C
Repeat 2: A / B B B / C C
Repeat 3: A / B B B / C C
The wider base-color stripe provides a visual resting area, while the shorter accent stripe adds rhythm.
Visual check: Each completed repeat should have the same stripe proportions.
Common error: Changing colors after the wrong number of rows.
Solution: Maintain a written tally or use a row counter.
Expert tip: Photograph the blanket after the first three repeats. Viewing it from a distance can reveal whether the color distribution feels balanced.
Step 8: Monitor Texture, Width, and Length
As the blanket grows, measure its width at several places. Check near the beginning, center, and most recently completed rows. Compare measurements without stretching the fabric.
For length, measure from the foundation edge to the current working edge on a flat surface. Do not rely exclusively on row count because gauge varies between crocheters and can change with yarn, hook, or tension.
Visual check: The blanket should remain rectangular, with stripes running parallel to one another.
Common error: Gradually pulling tighter as you become more comfortable with the pattern.
Solution: Pause occasionally to compare the newest rows with the earlier fabric.
Expert tip: Check the fabric after each complete 10-row stripe repeat rather than measuring after every row.
Step 9: Finish at a Planned Color Boundary
Continue until you have reached your preferred length. For the most coordinated appearance, finish after a complete stripe repeat or add a final short base-color section. If you use an extra ending section, include its additional length and yarn consumption in your plan.
Cut the working yarn, leaving a generous tail. Pull the tail through the final loop and tighten gently. Avoid pulling so hard that the corner becomes distorted.
Visual check: The final edge should remain flexible and straight.
Common error: Ending immediately after an accent stripe without checking the overall design.
Solution: Lay the blanket flat and evaluate the final color distribution before fastening off.
Expert tip: Compare the beginning and ending color blocks. A similar neutral presence at both ends can make the blanket feel especially intentional.
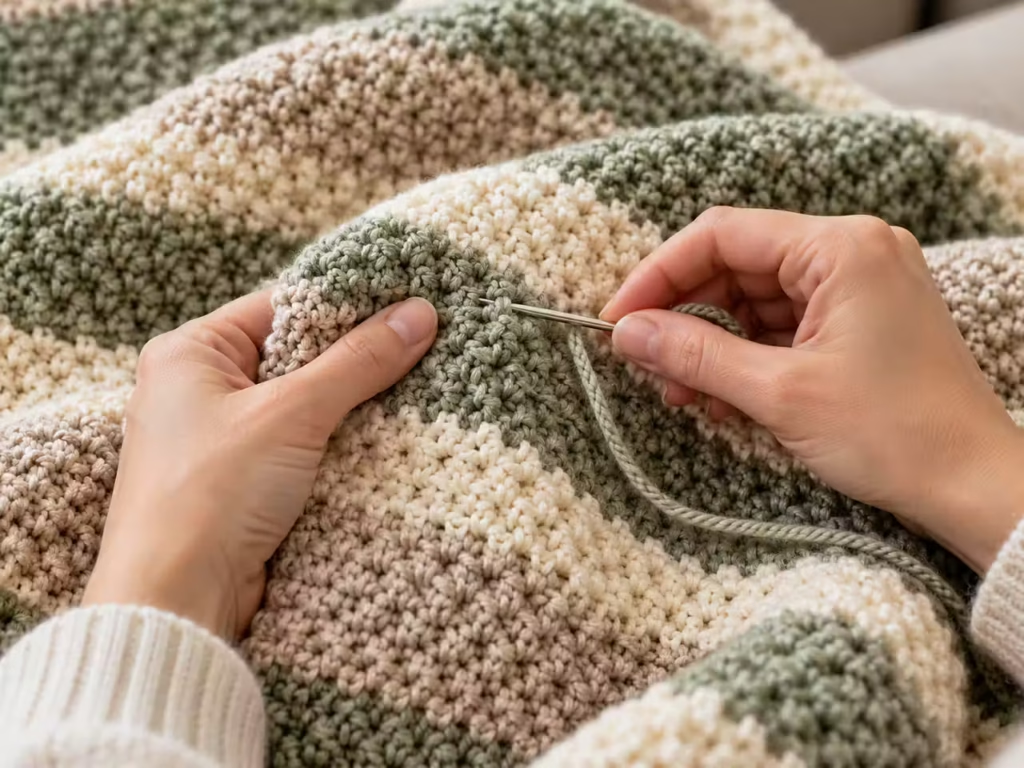
Step 10: Weave In the Yarn Ends
Thread each yarn tail through a blunt tapestry needle. Work the tail through several nearby stitches on the wrong side of the fabric, following the structure of the stitches rather than pulling straight across an open space. Reverse direction through another secure path where practical.
Avoid tightening the tail enough to bunch the fabric. Trim only after checking that the end is secure.
Visual check: The woven tail should not be clearly visible from the front.
Common error: Trimming the yarn immediately after changing colors.
Solution: Leave sufficient length for secure weaving.
Expert tip: Weave dark-colored tails through matching dark sections to reduce visibility.
Professional Stitch and Color Diagrams
Diagrams can make the repeat easier to understand, especially when visualizing how the stitches shift into chain spaces.
Diagram 1: How Moss Stitch Is Structured
Symbol key:
- SC = single crochet
- CH = chain one
- SP = chain-one space from the previous row
- T = turning-chain edge unit
Conceptual stitch placement:
FOUNDATION: CH, CH, CH, CH, CH, CH, CH, CH—…
FIRST ROW: T SC, CH, SC, CH, SC, CH, SC
NEXT ROW: T SC into SP CH SC into next SP CH SC into next SP … final SC into turning-chain SP
The single crochet stitches are worked into spaces created below them. This diagram describes the stitch sequence rather than an exact geometric scale.
Diagram 2: The Three-Color Stripe Repeat
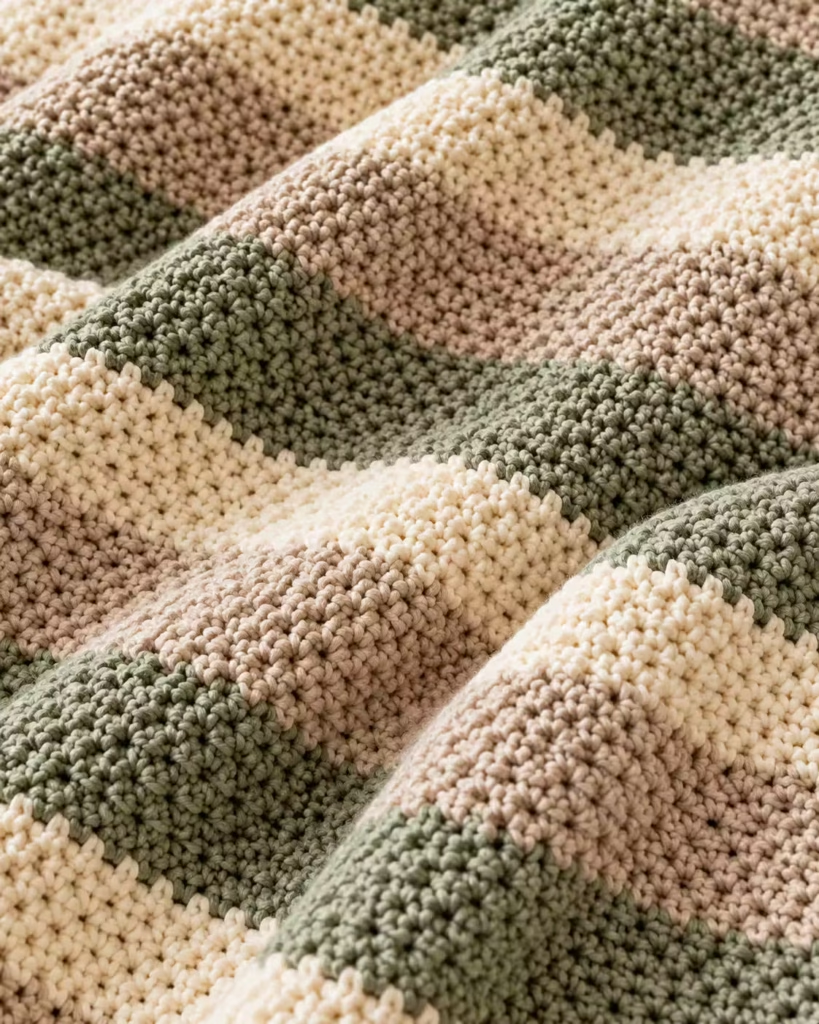
TOP OF REPEAT ┌────────────────────────────┐ │ C Accent Row 10 │ │ C Accent Row 9 │ ├────────────────────────────┤ │ B Supporting Row 8 │ │ B Supporting Row 7 │ │ B Supporting Row 6 │ ├────────────────────────────┤ │ A Base Row 5 │ │ A Base Row 4 │ │ A Base Row 3 │ │ A Base Row 2 │ │ A Base Row 1 │ └────────────────────────────┘ BOTTOM OF REPEAT
Repeat upward as needed. This is a row-count diagram. Actual stripe heights depend on your row gauge.
Diagram 3: Blanket Construction Sequence
Select three coordinated yarns ↓ Make gauge swatch ↓ Calculate foundation chains ↓ Crochet first moss row ↓ Repeat moss stitch rows ↓ Work A / B / C color plan ↓ Check width and row count ↓ Reach desired length ↓ Secure yarn ends ↓ Add optional border ↓ Wash or block as suitable ↓ Inspect completed blanket
Beginner-to-Pro Techniques
One of the advantages of this project is that you can improve the final appearance without learning complicated stitches.
Beginner Level: Master the Repeat
Concentrate on three things:
- Find the correct chain-one space.
- Maintain consistent tension.
- Finish every row at the correct edge.
Ignore advanced embellishments until these elements feel reliable. A small practice swatch is more useful than repeatedly unraveling a large blanket.
Intermediate Level: Improve Color Rhythm
Once the stitch pattern becomes familiar, start making more deliberate design choices. Use a dominant neutral and two supporting shades. Consider how colors interact in both daylight and artificial light.
You can also experiment with longer base-color stripes to make the finished fabric appear calmer. Keep changes deliberate and record the final stripe formula.
Advanced Level: Refine the Edges
Professional-looking blankets often depend on edge consistency rather than elaborate stitch patterns.
Experienced crocheters can focus on:
- Consistent turning-chain tension
- Even spacing at stripe boundaries
- Minimal yarn tails along the edges
- Careful blocking
- A discreet finishing border
A border should frame the fabric, not overpower it. For this design, a simple single crochet edging in the base color is often sufficient.
Troubleshooting Common Crochet Blanket Problems
Even a straightforward moss stitch blanket can develop unwanted shapes or uneven texture. Use the following table to diagnose problems before continuing.
| Symptom | Likely Cause | Practical Fix | Prevention |
|---|---|---|---|
| Blanket edges angle inward | Missing final edge stitches or tightening tension | Recheck edge placement and unravel affected rows if necessary | Mark the turning-chain spaces |
| Fabric gradually widens | Extra stitches near turning chains | Remove incorrect rows and restore the repeat | Count edge units consistently |
| Stripes look uneven | Incorrect row count | Correct the affected stripe section | Maintain a row tally |
| Foundation edge curls inward | Tight starting chain | Redo with looser tension if severe | Use a larger foundation hook |
| Fabric feels too stiff | Hook too small for yarn and tension | Test a larger hook | Swatch before starting |
| Visible color bumps | Loose or inconsistent color changes | Adjust the transition and weave ends carefully | Change color during the final stitch |
| Small holes appear unexpectedly | Chain spaces stretched too widely | Improve tension consistency | Avoid pulling chain stitches too tall |
| Border ripples | Too many edging stitches | Remove and redistribute the border stitches | Measure and place edging evenly |
| Blanket corners pull inward | Too few corner stitches or tight edging | Redo the affected corner | Check each corner independently |
A Useful Quality-Control Photograph
If a problem persists across several rows, stop and identify the specific cause. Adding a border rarely fixes a substantial stitch-count problem. Correcting the construction usually produces a better result.
<!– gap –>
How to Calculate Blanket Size Before Starting
Blanket sizing becomes much more reliable when you use personal gauge instead of relying on an arbitrary chain count.
Step 1: Choose Your Target Dimensions
These are approximate planning sizes, not mandatory crochet standards.
| Blanket Type | Example Target Size |
|---|---|
| Small lap blanket | 36 × 48 inches |
| Everyday throw | 40 × 50 inches |
| Larger sofa throw | 50 × 60 inches |
| Oversized throw | 60 × 70 inches |
You can adjust the dimensions to match your needs. For a baby blanket, consider the intended age and use; loose blankets should not be placed in an infant’s sleep space.
Step 2: Measure Your Stitch Gauge
For this even-chain moss stitch method, count the effective stitch positions across the measured swatch, including the single crochet and its neighboring chain space as one repeating unit. Suppose your own swatch measures 16 effective stitch positions across 4 inches.
That gives:
16 ÷ 4 = 4 positions per inch
For a target width of 40 inches:
40 × 4 = 160 effective positions
This specific foundation method uses:
Foundation chains = 2 × effective positions
Therefore:
160 × 2 = 320 foundation chains
This is an arithmetic example, not a tested gauge recommendation. Your actual chain count may differ substantially.
Step 3: Estimate Row Count
Measure your row gauge.
For example, if your swatch has 20 rows across 4 inches:
20 ÷ 4 = 5 rows per inch
For a target blanket length of 50 inches:
50 × 5 = 250 rows
Because the stripe pattern repeats every 10 rows:
250 ÷ 10 = 25 complete repeats
This gives a convenient color-planning structure. Again, these numbers are illustrative. Use your own washed and measured swatch before committing yarn.
Step 4: Adjust for a Border
A border adds to the finished width and length. If your chosen border adds approximately half an inch on each side, the interior fabric should be planned smaller to compensate. Measure an actual border sample where precision matters, rather than assuming every edging method adds the same amount.
<!– gap –>
How Much Yarn Will You Need?
Yarn consumption depends on gauge, fiber, stitch density, blanket size, and the length of yarn in each skein.
The most reliable planning method is to measure a representative swatch.
Swatch-Based Yarn Estimation
- Crochet a measured sample using your chosen yarn.
- Record its width and height.
- Determine the yarn used by weighing it with a sufficiently accurate scale, or carefully measuring the length consumed.
- Calculate the proposed blanket area.
- Divide blanket area by sample area.
- Multiply the result by the yarn consumed in the sample.
- Add a reasonable allowance for borders, yarn ends, and differences in tension.
For example:
Sample area: 8 × 8 = 64 square inches
Planned blanket: 40 × 50 = 2,000 square inches
Area ratio: 2,000 ÷ 64 = 31.25
Your estimated main-fabric yarn consumption would be approximately 31.25 times the sample’s consumption, assuming similar gauge throughout. Allow additional yarn for finishing and practical variation.
Divide the Yarn Among Three Colors
For the 5:3:2 stripe pattern:
| Color | Row Share | Planning Share |
|---|---|---|
| A | 50% | Approximately 50% |
| B | 30% | Approximately 30% |
| C | 20% | Approximately 20% |
Equal-length rows in the same stitch generally use similar yarn quantities, making row proportions a useful initial estimate. However, use the actual yarn usage and available skein lengths for purchasing decisions. If possible, purchase enough matching dye-lot yarn to complete the blanket.
<!– gap –>
Finishing Details That Make a Blanket Look More Professional
A carefully finished blanket often looks more refined than one featuring more complicated stitches but uneven edges.
Add a Simple Border
A single crochet border can help visually unify the three-color design.
Use Color A if you want the border to blend into the main fabric. Work evenly around the blanket perimeter. Along horizontal edges, place stitches into appropriate edge stitches or spaces without crowding them.
Along vertical sides, distribute stitches according to your row height and fabric tension rather than automatically working one stitch into every row end. At each corner, add enough stitches to turn smoothly without creating a ruffle. A common starting approach is three single crochets at a corner, but adjust the treatment if your particular fabric requires it.
Make one round, lay the blanket flat, and inspect the result before adding another. If the edging ripples, reduce stitch density. If it pulls inward, add stitches where necessary.
Block the Blanket Carefully
Blocking can improve overall shape and relax small irregularities. Always follow the yarn manufacturer’s care instructions. For a washable yarn, gentle washing and careful reshaping may be enough.
Lay the fabric on a suitable flat surface and arrange the corners into a rectangle without overstretching. Allow it to dry thoroughly before folding or storing. Avoid applying direct high heat to synthetic fibers because heat can permanently change their texture or damage them.
Inspect Both Sides
Moss stitch often produces a pleasing appearance on both sides.
Check for:
- Loose yarn tails
- Large gaps around color transitions
- Uneven edge tension
- Missed stitches
- Unexpected knots
- Distorted border corners
Correct small problems before the blanket enters regular use.
Choosing Alternative Stitch Patterns
Moss stitch is the foundation of this tutorial, but other crochet stitches can also work with three-color palettes.
| Stitch Option | Best For | Advantages | Limitations | Recommendation |
|---|---|---|---|---|
| Moss stitch | Soft, balanced stripes | Subtle woven texture | Requires accurate space placement | Best for this project |
| Single crochet | Dense everyday fabric | Simple construction | Can feel firm and use more yarn | Useful for structured blankets |
| Half double crochet | Faster-growing fabric | More height per row | Produces a different stripe texture | Good for quicker throws |
| Granny stripe | Traditional colorful blankets | Recognizable cluster pattern | More open spaces | Good for decorative designs |
| Extended single crochet | Flexible flat fabric | Adds height and drape | Different technique and gauge | Suitable for experimentation |
If you change the stitch pattern, make a new gauge swatch and recalculate stitch and row counts. Do not assume the moss stitch yarn estimate will remain accurate.
Three Ways to Customize the Finished Blanket
1. Make the Stripes More Subtle
Choose three colors with similar lightness. For example, cream, pale beige, and light mushroom can create gentle tonal changes. The texture becomes the main visual feature. This works particularly well in minimalist rooms.
2. Add a Little More Contrast
Keep two colors subdued and choose a deeper accent. Examples include ivory, oatmeal, and forest green or cream, taupe, and muted terracotta. Use the deeper shade sparingly so it doesn’t dominate the blanket.
3. Create an Asymmetrical Color Layout
Experienced crocheters can depart from the repeating 5:3:2 arrangement.
Instead of evenly repeating stripes, try:
A: 12 rows B: 4 rows A: 8 rows C: 3 rows A: 12 rows B: 6 rows A: 8 rows C: 3 rows
Repeat or mirror this arrangement based on the planned length. This creates a more contemporary, less repetitive design. Record the layout before starting so the final blanket appears intentional.
Final Quality Checklist
Before calling your three-color crochet blanket finished, inspect the fabric carefully.
Construction
- [ ] The stitch pattern is consistent.
- [ ] No accidental increases or decreases remain.
- [ ] The row edges are reasonably straight.
- [ ] The stripe order matches the chosen plan.
- [ ] The desired dimensions have been checked.
Appearance
- [ ] Color changes are tidy.
- [ ] The finished stripes appear balanced.
- [ ] The border lies flat, if added.
- [ ] The blanket has no obvious puckering.
- [ ] The corners are reasonably square.
Durability and Care
- [ ] All yarn tails are securely woven in.
- [ ] No loose knots or loops remain.
- [ ] The fabric has been cleaned or blocked appropriately.
- [ ] The yarn care instructions are retained.
- [ ] The blanket is completely dry before storage.
A minor difference between the top and bottom widths may be acceptable in a handmade textile. A steadily increasing width, repeated missing stitches, or unsecured joins should be corrected before the project is considered complete.
How to Care for Your Crochet Blanket
Good care helps preserve the surface texture and shape. Always begin with the instructions supplied for your exact yarn. For yarn labeled machine washable, a gentle wash cycle may be suitable.
A large blanket can become heavy when wet, so avoid lifting it by one corner or stretching it unnecessarily. When drying, support the fabric and follow the yarn’s recommended drying method.
Store clean and completely dry blankets folded in a ventilated location away from prolonged direct sunlight. If the blanket is made with delicate fibers, washing a small swatch first can help you understand how the fabric responds.
Frequently asked questions
1. What is the best crochet stitch for a three-color blanket?
Moss stitch is a strong choice because its small stitches produce a relatively uniform surface, allowing color changes to stand out. It also has a pleasant woven appearance and can be used for both decorative and everyday blankets. Half double crochet and granny stripe are alternatives if you prefer a taller or more open stitch.
2. How do I choose three crochet blanket colors that look good together?
Start with a neutral base color, add a supporting shade with a similar undertone, and choose a third color that provides gentle contrast. Compare the yarns in natural light before committing. A 50:30:20 distribution is a useful starting point, though balanced designs can also use equal proportions or more complex stripe arrangements.
3. Is moss stitch suitable for beginner crocheters?
Yes. Moss stitch mainly requires basic chains and single crochet stitches. The trickiest part is locating the chain-one spaces and maintaining accurate edge placement. A small practice swatch helps beginners recognize the stitch structure. Once the repeat becomes familiar, it is straightforward to work across larger blanket sections.
4. How can I stop my crochet blanket from becoming wider?
Unexpected widening generally results from extra stitches or incorrect turning-chain placement. Mark the first and last usable spaces of each row and check the edge stitch count. Compare the width after several rows. If the error occurred recently, unraveling and correcting those rows is usually more effective than attempting to hide the problem with a border.
5. Should I crochet a border around a striped moss stitch blanket?
A border is optional. Moss stitch already produces an attractive surface, and a neat edge may be sufficient without additional finishing. A narrow single crochet border can make the colors feel more unified and help frame the blanket. Test the first edging round carefully to avoid puckering or curling.
6. Can I use cotton yarn for a moss stitch blanket?
Yes. Cotton yarn can create well-defined stitches and a smooth surface. However, some cotton yarns produce a heavier blanket and have less elasticity than wool or certain acrylic blends. Make a swatch to assess comfort, weight, and drape. A cotton blend may offer a softer feel depending on its construction.
7. How do I make the color changes look seamless?
Change yarn colors during the final yarn-over of the last single crochet in the preceding row. This allows the new color to complete the stitch and begin the next row cleanly. Keep the new loop at the same tension as the surrounding stitches, then secure the yarn tails carefully on the wrong side.
8. How long does it take to crochet a three-color moss stitch blanket?
The time depends on the blanket size, yarn thickness, crocheting speed, and how frequently you change colors. Moss stitch has short stitches, so a large blanket requires many rows. For useful planning, time yourself while making a representative swatch and estimate the full project from your actual working rate rather than relying on a generic completion promise.
Yarn weights and hook sizes in this guide follow the Craft Yarn Council standards.
Keep going: Crochet Baby Sneakers Pattern: Easy High-Top Booties · Easy Moss Stitch Crochet Blanket Pattern for Beginners · Handmade Crocheted Bag: Make Your Own Custom Everyday Tote
Final Thoughts: A Beautiful Three-Color Blanket Starts With Balance
The most attractive striped crochet blankets don’t necessarily use complicated patterns. They combine thoughtful color distribution, consistent stitch tension, and careful finishing.
Start with one of the three palettes, crochet a small moss stitch sample, and calculate your measurements before making the full foundation chain. As the blanket grows, check each completed stripe repeat for consistent texture and clean edges. Once finished, inspect the joins, secure every yarn tail, and care for the fabric according to its fiber content.
Save this tutorial with your chosen color formula and gauge notes so you can recreate the blanket in a different palette later. The same construction can become a neutral living room throw, a colorful handmade gift, or a matching cushion-cover project.
Pin “Crochet Color Blanket Ideas for Soft, Balanced Texture” so you can find it when the yarn arrives.
Get the next free pattern first
One email a week. New patterns, no noise.





