
Cute Crochet Amigurumi Puppy Pattern Tutorial for Beginners
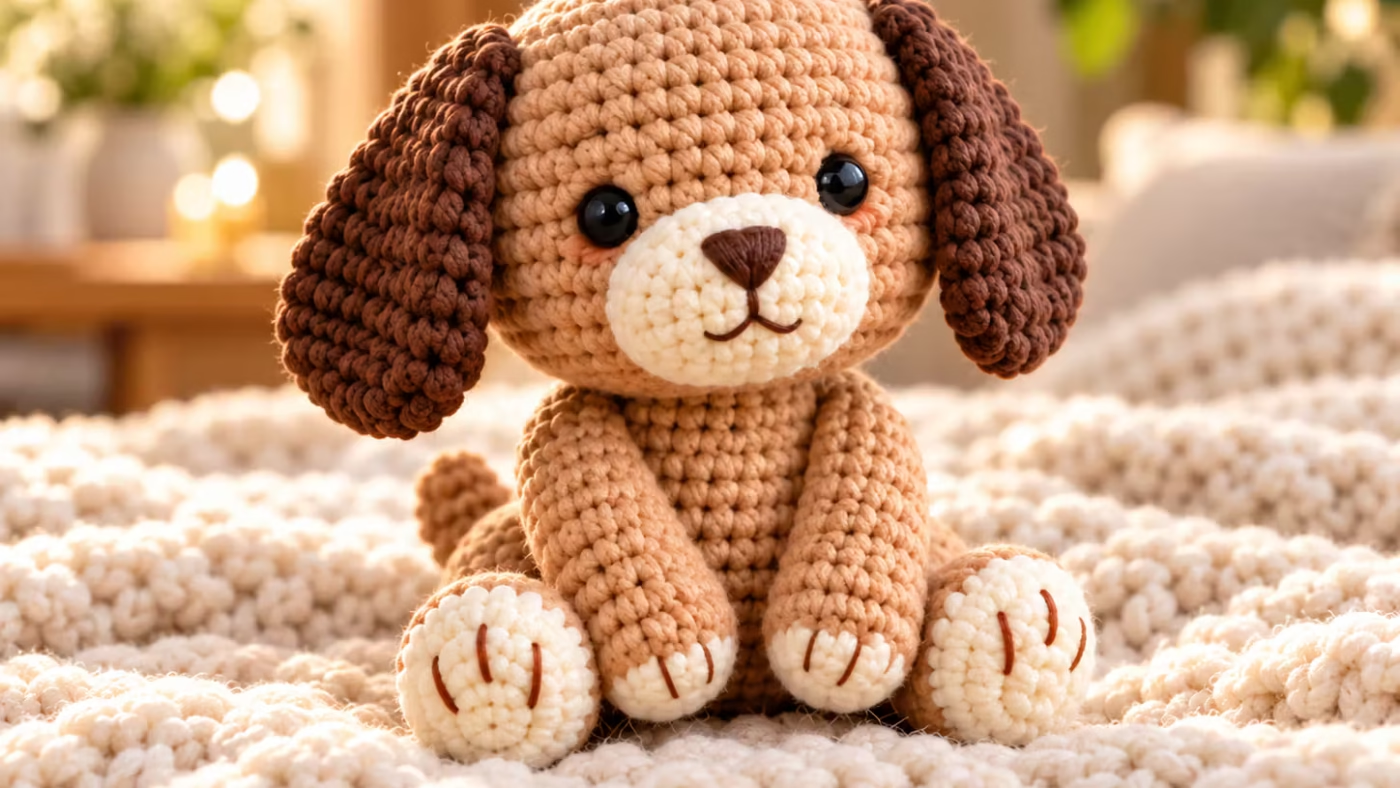
Amigurumi puppy: The puppy is made from simple shapes worked in continuous rounds. You'll learn how to increase, decrease, stuff, and assemble each piece…

Materials list
- Safety note: For a puppy intended for a baby or young child, choose securely embroidered facial features rather than plastic safety eyes. Plastic eyes may detach and become choking hazards. Inspect seams and loose yarn regularly, and do not assume a handmade toy meets applicable toy-safety standards without appropriate assessment.
The puppy is made from simple shapes worked in continuous rounds. You’ll learn how to increase, decrease, stuff, and assemble each piece, with stitch counts and visual checkpoints to help you along the way.
Project Overview
This beginner-friendly amigurumi puppy uses single crochet stitches, simple shaping, and basic sewing techniques.
| Project Detail | Description |
|---|---|
| Skill level | Beginner with basic single crochet knowledge |
| Crochet terminology | US terms |
| Construction | Separate pieces sewn together |
| Main stitches | Single crochet, increase, invisible decrease |
| Yarn | Medium-weight (category 4) |
| Suggested hook | 3.5 mm (E/4), adjusted for tight stitches |
| Colors | Main puppy color, ear color, muzzle color |
| Finished size | Depends on yarn, hook, tension, and stuffing |
| Estimated completion time | |
| Pattern status | Original written pattern; not physically sample-tested |
The finished puppy has a large round head, short legs, a slightly smaller body, and floppy ears.
Before starting: The stitch counts have been checked mathematically, but the complete pattern has not been physically sample-tested. Make a sample before publishing a guaranteed finished measurement or completion time.
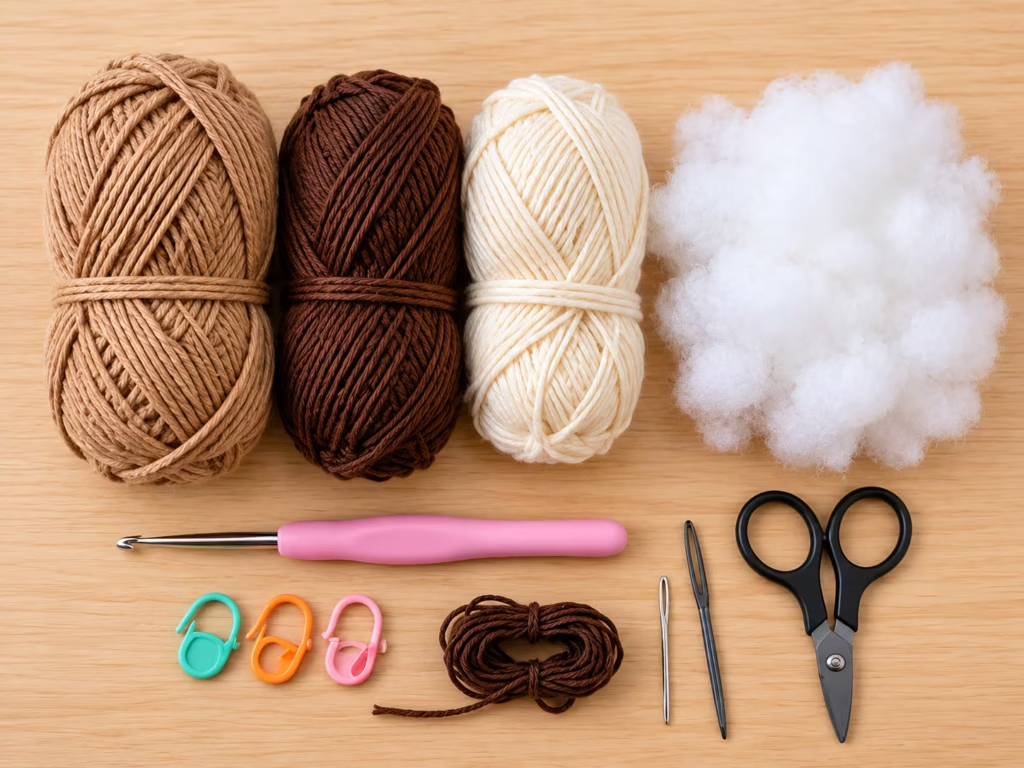
You don’t need an extensive crochet kit to make this puppy.
| Item | Quantity or Specification | Purpose | Alternative |
|---|---|---|---|
| Main-color yarn | Category 4, light brown | Head, body, legs, arms, and tail | Beige, gray, or golden yarn |
| Accent yarn | Small amount, darker brown | Floppy ears | Same yarn as body |
| Muzzle yarn | Small amount, cream | Puppy snout | White or pale beige |
| Crochet hook | Suggested 3.5 mm | Creates compact stitches | Adjust to match yarn and tension |
| Stuffing | Polyester fiberfill, as needed | Shapes the puppy | Clean, suitable toy stuffing |
| Yarn needle | Blunt-tipped | Sewing and hiding yarn ends | Other suitable tapestry needle |
| Stitch marker | One removable marker | Tracks continuous rounds | Contrasting yarn scrap |
| Scissors | One pair | Cutting yarn | Thread snips |
| Embroidery thread | Dark brown or black | Eyes, nose, and mouth | Thin dark yarn |
A small comb can help smooth fuzzy yarn. Straight pins or removable stitch markers can temporarily hold the parts in place while you check their positions. Avoid relying on glued decorations. Sewn features are generally more secure.
Crochet Stitches and Abbreviations
This pattern uses US crochet terminology.
| Abbreviation | Meaning |
|---|---|
| MR | Magic ring |
| sc | Single crochet |
| inc | Increase: 2 sc in the same stitch |
| dec | Invisible decrease over 2 stitches |
| st | Stitch |
| sts | Stitches |
| R | Round |
| FO | Fasten off |
| ( ) × 6 | Repeat the instructions six times |
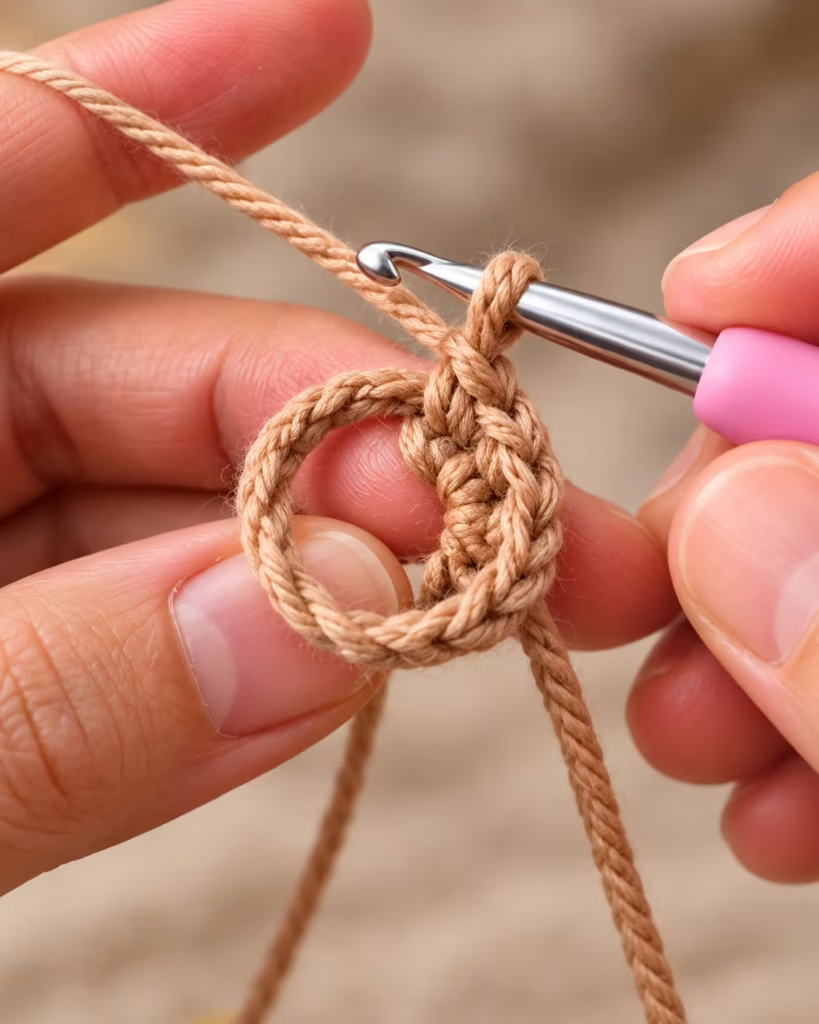
How to make a magic ring
- Wrap the yarn around your fingers to form an adjustable loop.
- Insert the hook into the loop and pull up a strand.
- Chain one to secure the working loop.
- Work the specified number of single crochet stitches into the ring.
- Pull the yarn tail gently to close the center.
The chain used to secure the ring does not count as a stitch.
If the magic ring feels difficult, make a small starting loop using two chains and crochet the first round into the second chain from the hook. This is an easier alternative, although the center may be less adjustable.
How to increase and decrease
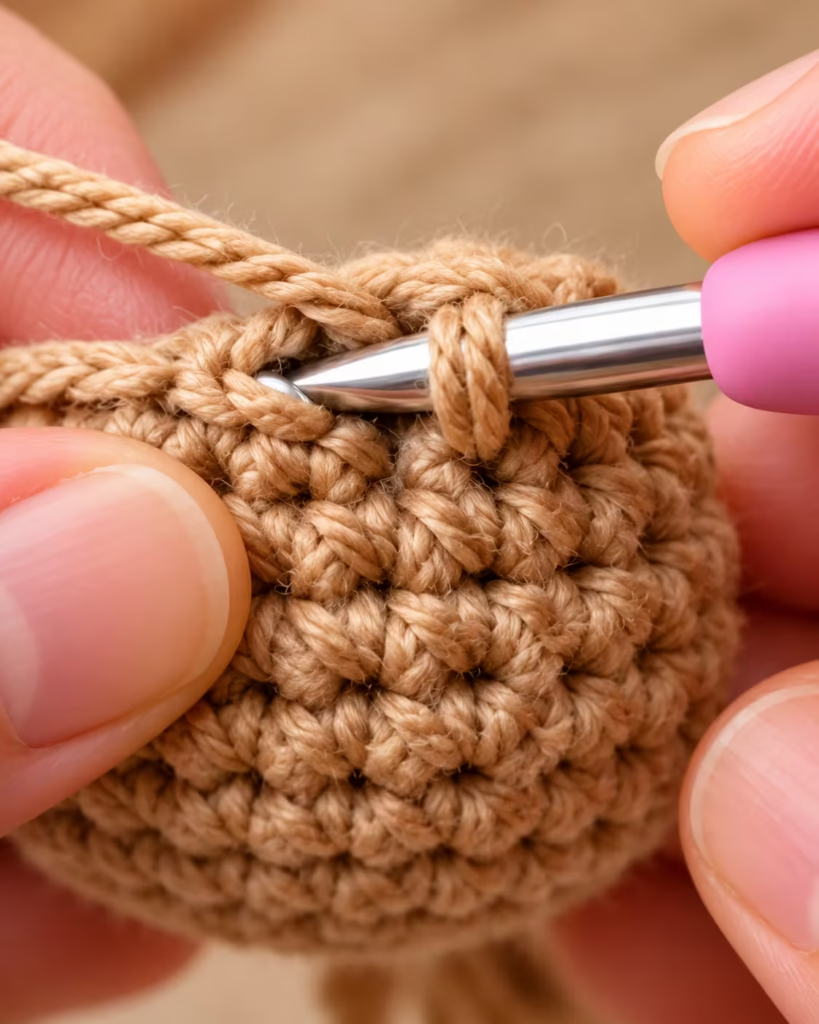
An increase means working two single crochet stitches into one stitch. Each increase adds one stitch.
An invisible decrease combines the next two stitches into one:
- Insert your hook under the front loop of the next stitch.
- Insert it under the front loop of the following stitch.
- Yarn over and pull through both front loops.
- Yarn over and pull through the remaining two loops.
An invisible decrease creates less bulk than a regular single crochet two together. Keep the right side of the crochet facing outward as you work, so the neat V-shaped stitches remain visible on the outside.
Cute Crochet Amigurumi Puppy Pattern
Work in continuous spiral rounds without joining rounds with a slip stitch unless instructed otherwise.
Place a stitch marker into the first stitch of each round and move it upward as you progress.
Step 1: Crochet the puppy’s head
Use your main-color yarn.
| Round | Instructions | Stitch Count |
|---|---|---|
| R1 | 6 sc in MR | 6 |
| R2 | inc × 6 | 12 |
| R3 | (1 sc, inc) × 6 | 18 |
| R4 | (2 sc, inc) × 6 | 24 |
| R5 | (3 sc, inc) × 6 | 30 |
| R6 | (4 sc, inc) × 6 | 36 |
| R7–R12 | sc in each stitch | 36 |
| R13 | (4 sc, dec) × 6 | 30 |
| R14 | (3 sc, dec) × 6 | 24 |
| R15 | (2 sc, dec) × 6 | 18 |
| R16 | (1 sc, dec) × 6 | 12 |
Fasten off, leaving a long tail for sewing.
Visual check: After R6, the piece should look like a shallow rounded bowl. By R12, it should have developed into a dome with straight sides. The final decreases draw the opening inward.
Common mistake: Accidentally adding an extra stitch at the beginning of a round causes uneven shaping.
Fix: Count the stitches after every increase or decrease round. Use a contrasting stitch marker to distinguish the first stitch.
Expert tip: Add small amounts of stuffing before the opening becomes difficult to access. Fill the head evenly without stretching the stitches apart. Leave the final 12-stitch opening accessible for assembly.
Step 2: Crochet the body
Use the main-color yarn.
| Round | Instructions | Stitch Count |
|---|---|---|
| R1 | 6 sc in MR | 6 |
| R2 | inc × 6 | 12 |
| R3 | (1 sc, inc) × 6 | 18 |
| R4 | (2 sc, inc) × 6 | 24 |
| R5 | (3 sc, inc) × 6 | 30 |
| R6–R10 | sc around | 30 |
| R11 | (3 sc, dec) × 6 | 24 |
| R12 | (2 sc, dec) × 6 | 18 |
| R13 | (1 sc, dec) × 6 | 12 |
Fasten off with a long sewing tail. The initial magic ring forms the bottom of the body. The last round forms the neck opening.
Visual check: The body should resemble a short, rounded pear with a narrower upper edge. It should be smaller than the head.
Common mistake: Stuffing the body too firmly can make the neck difficult to attach.
Fix: Add fiberfill gradually. Keep the upper opening flexible while filling the lower body enough to hold its shape.
Step 3: Crochet two floppy ears
Use the darker accent yarn. Make two identical ears.
| Round | Instructions | Stitch Count |
|---|---|---|
| R1 | 6 sc in MR | 6 |
| R2 | (1 sc, inc) × 3 | 9 |
| R3–R6 | sc around | 9 |
Fasten off with a long tail. Do not stuff the ears. Flatten each small tube so it forms a soft, rounded flap.
Visual check: Both ears should have approximately the same length and width. They should lie flat and bend easily.
Common mistake: Stuffing the ears creates stiff, protruding shapes rather than floppy ears.
Fix: Leave the ears empty and fold their openings flat before sewing.
Expert tip: Fold the ear opening slightly inward when attaching it to create a gentle downward curve.
Step 4: Make four small legs and arms
Front arms — make two
Use the main-color yarn.
- R1: 6 sc in MR (6)
- R2–R5: sc around (6)
Fasten off, leaving a sewing tail. Add a tiny amount of stuffing near the paw end if needed.
Hind legs — make two
Use the main-color yarn.
- R1: 6 sc in MR (6)
- R2: (1 sc, inc) × 3 (9)
- R3–R5: sc around (9)
Fasten off, leaving a sewing tail. Lightly stuff the lower section of each hind leg and leave the upper opening flexible.
Visual check: The hind legs should be slightly wider than the arms. Each pair should match in round count and general shape.
Common mistake: Filling every limb tightly makes the puppy stiff and complicates sewing.
Fix: Concentrate any stuffing toward the ends. Leave room near the attachment points.
Expert tip: Arrange each pair side by side before sewing. If one limb is visibly longer, compare stitch counts and tension rather than trying to hide the difference during assembly.
Step 5: Crochet the muzzle
Use cream-colored yarn.
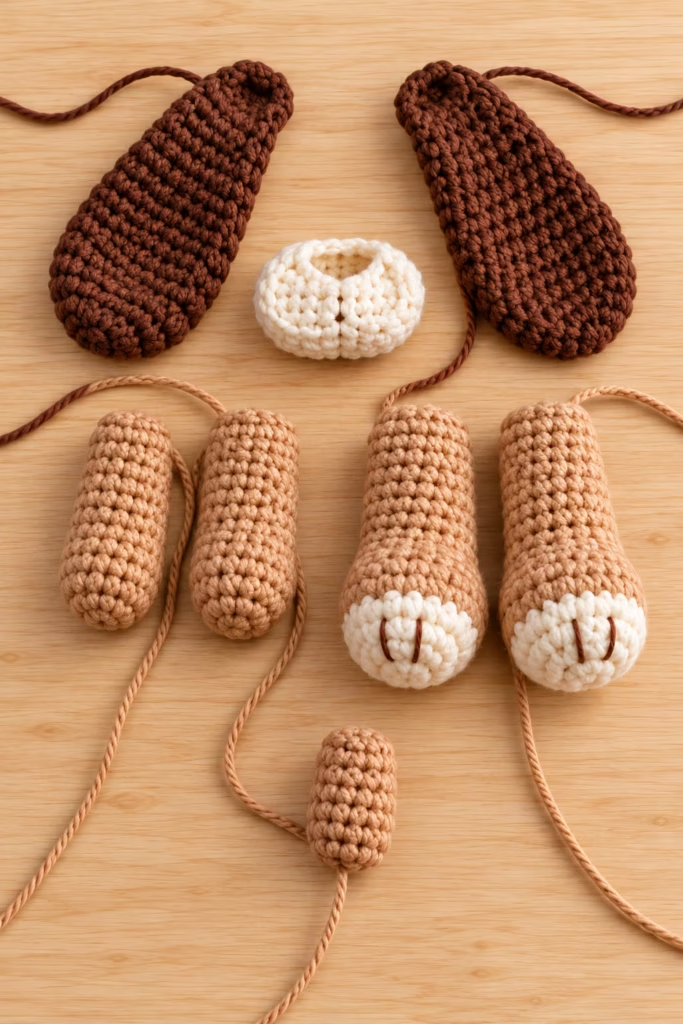
- R1: 6 sc in MR (6)
- R2: inc × 6 (12)
- R3: sc around (12)
Fasten off, leaving a long tail. This creates a small cup-shaped muzzle with a gently rounded front. Add a tiny amount of stuffing just before completing the attachment to the face.
Visual check: The muzzle should be centered beneath the intended eye position. Its top edge should not cover the entire front of the head.
Common mistake: Overstuffing the muzzle makes the snout appear oversized.
Fix: Use only enough filling to round the front surface. Adjust it while sewing.
Step 6: Crochet the tail
Use the main-color yarn.
- R1: 6 sc in MR (6)
- R2–R4: sc around (6)
Fasten off, leaving a sewing tail. Leave the tail unstuffed or add only a small amount of filling near the tip.
Visual check: The tail should be a short, flexible tube that can be attached slightly upward.
Common mistake: Attaching the tail directly underneath the puppy can interfere with sitting.
Fix: Position it on the back of the body above the bottom center.
How to Assemble Your Puppy
Crocheting the individual pieces is only half the process. Careful assembly gives the puppy its personality.
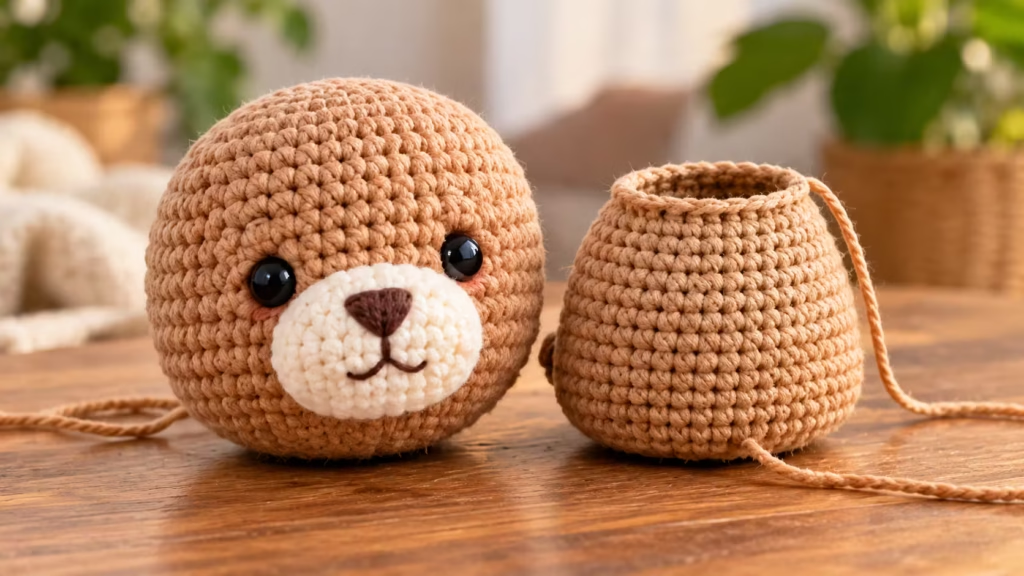
Step 7: Attach the head to the body
Both the head and body have 12-stitch openings.
Align these openings with their centers directly above one another.
A simple assembly sequence is:
HEAD (12-stitch opening) || Sew edges together || BODY (12-stitch opening) || Attach hind legs || Add arms and tail
Use the yarn needle and one of the long sewing tails to join the two openings stitch by stitch. Work through corresponding edge stitches around the full circumference. Keep the seam even and tighten each stitch gently.
Visual check: The head should sit upright and be centered over the body.
Common mistake: Pulling the seam too tightly can create a pinched neck.
Fix: Loosen and redistribute the stitches before securing the yarn. If the neck feels weak, add suitable stuffing before closing the seam completely.
Step 8: Sew on the ears and muzzle
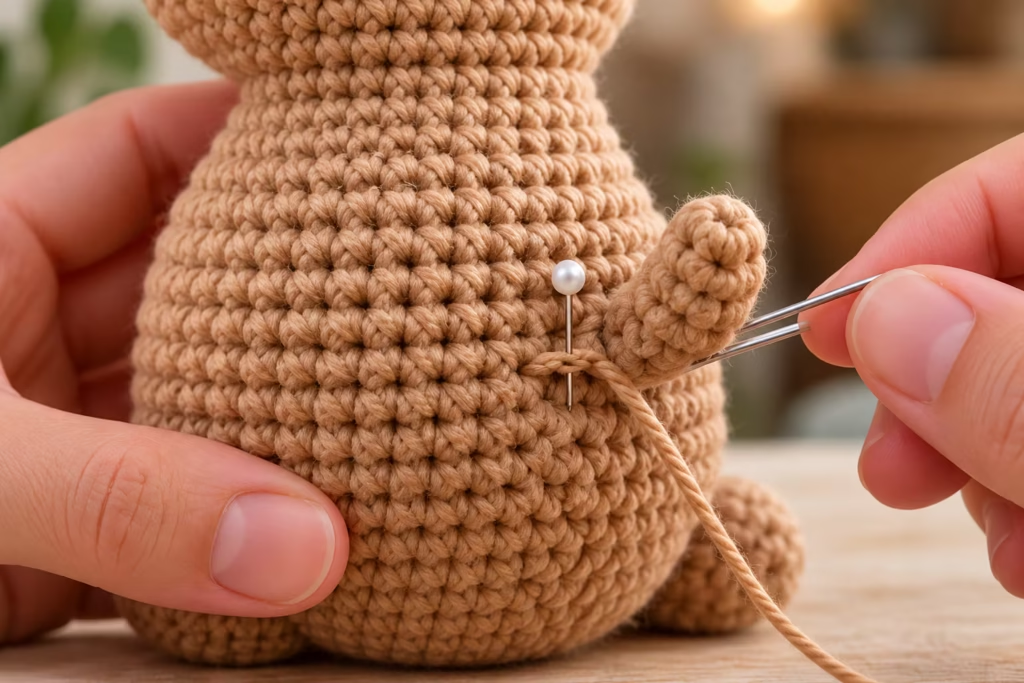
Place the ears on opposite sides of the upper head. Use the head’s top center as a reference and position both ears at matching heights. Sew each flattened ear opening securely to the head, checking symmetry before knotting the yarn.
Next, position the cream muzzle on the lower front of the face. Sew around its 12-stitch rim, adding a little stuffing before completely closing the seam.
Visual check: The ears should frame the face evenly, and the muzzle should sit beneath the eyes.
Common mistake: Attaching the ears at noticeably different heights.
Fix: Temporarily pin both ears, view the puppy from the front, and adjust their positions before sewing.
Step 9: Embroider the puppy’s face
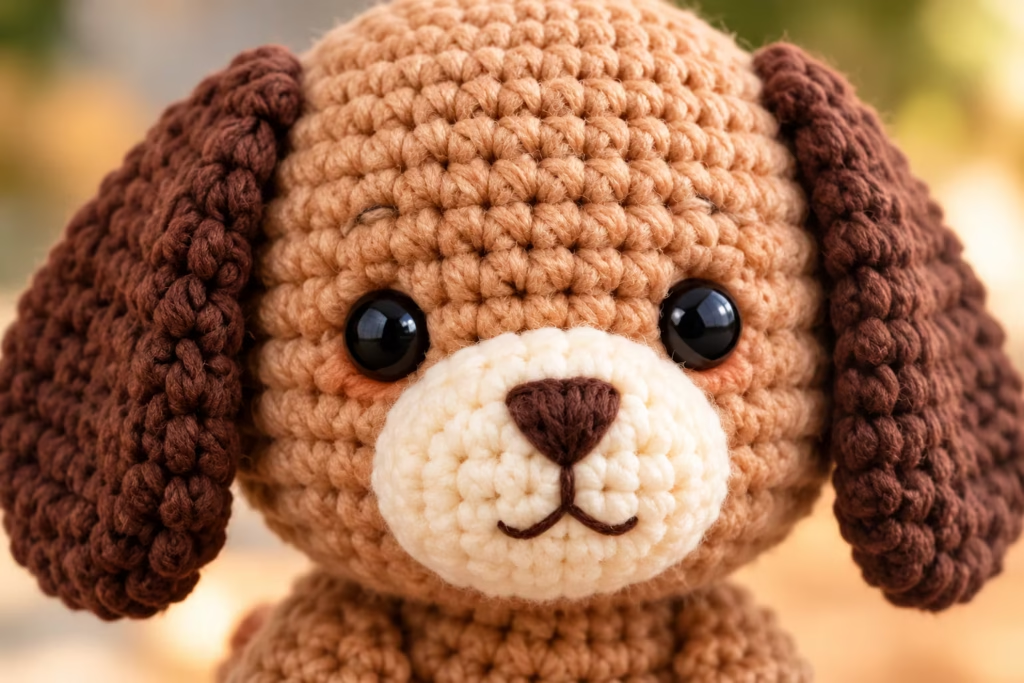
The eyes and nose give this crochet amigurumi puppy its recognizable expression.
Use dark embroidery thread to make:
- Two small embroidered eyes above the muzzle.
- A compact triangular nose centered on the muzzle.
- A short vertical stitch beneath the nose.
- Two small curved mouth stitches branching from the vertical line.
For a sleepy expression, use short curved eye lines instead of round eyes.
A helpful placement guide:
LEFT EAR RIGHT EAR \ / \ o o / \ / [ NOSE ]
/ \
o = embroidered eye NOSE = center of muzzle / and \ = mouth stitches
This is a symbolic placement guide, not a scale drawing. Test the face arrangement visually before securing the thread.
Visual check: The eyes should appear balanced, and the nose should sit between them and slightly below their level.
Common mistake: Pulling embroidery threads too tightly creates dents in the stuffed head.
Fix: Keep embroidery tension firm enough to hold the thread in place without compressing the fabric.
Expert tip: Insert temporary pins where the eyes will go, then rotate the head to check the expression from several angles.
Step 10: Attach the arms, legs, and tail
Place the arms on opposite sides of the upper body, just below the neck. Position the hind legs toward the lower front of the body, with their rounded ends pointing slightly forward. Attach the tail at the lower back, above the base of the body.
Visual check: Both arms should sit at similar heights. The hind legs should support the seated appearance rather than pointing straight downward.
Common mistake: Sewing the legs too far apart can make the puppy look unbalanced.
Fix: Pin the limbs in place and test the puppy’s resting position before stitching permanently.
Expert tip: Sew through several adjacent stitches along each attachment area rather than relying on a single anchor stitch.
Step 11: Finish and shape
Use the yarn needle to weave each remaining tail through several interior stitches.
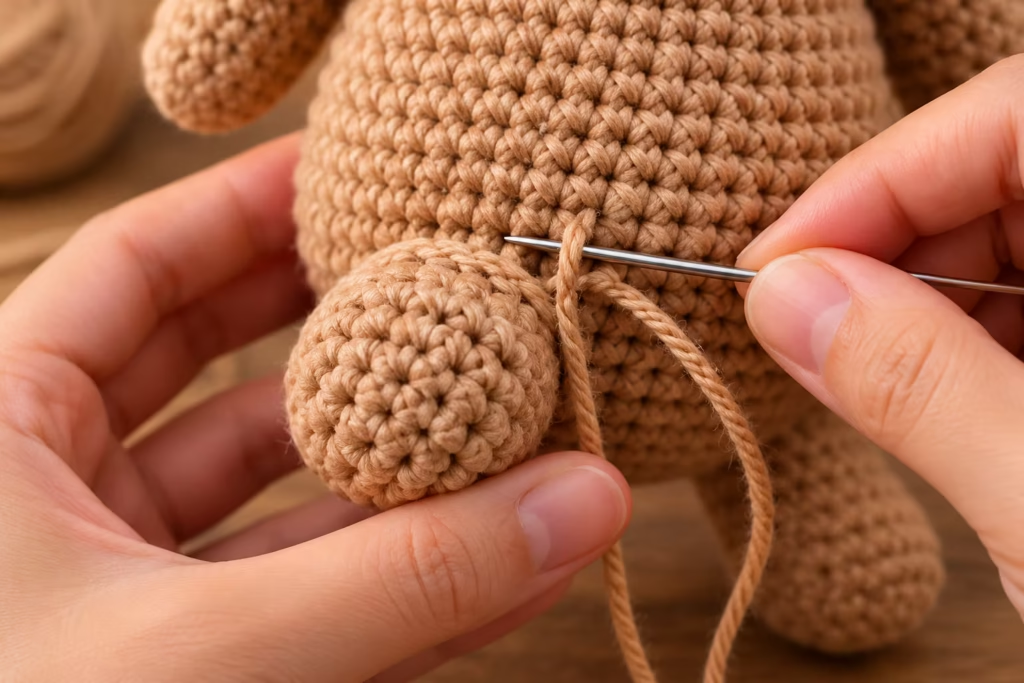
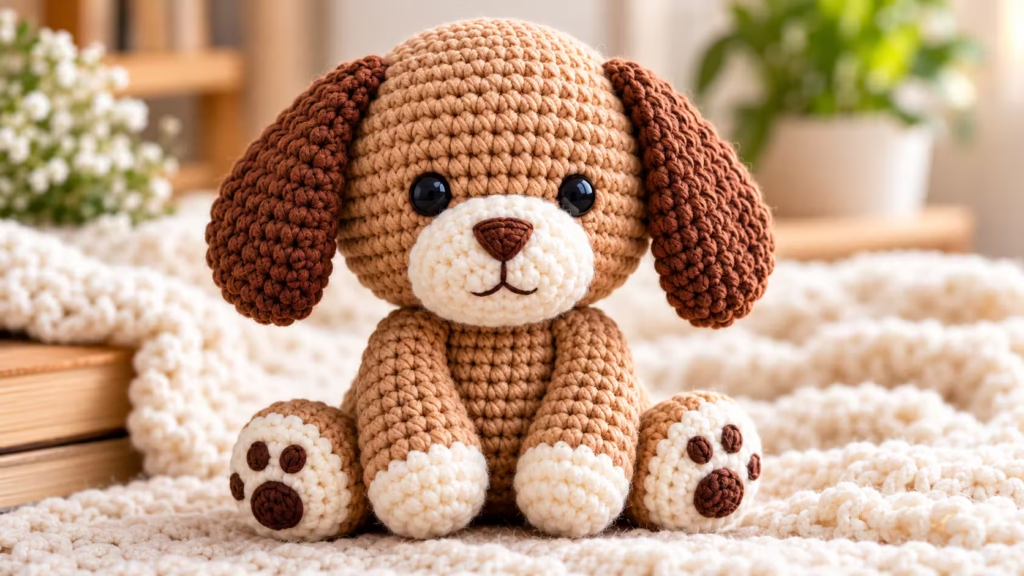
Trim only after the yarn is securely anchored. Gently shape the head, muzzle, and body with your fingers, redistributing the stuffing as needed. The completed puppy should have a rounded head, compact seated body, evenly positioned limbs, and ears that hang naturally.
Beginner-to-Pro Crochet Techniques
Once you’ve completed one puppy, a few refinements can improve your next version.
| Skill Level | Technique | Benefit |
|---|---|---|
| Beginner | Mark every round and count stitches | Prevents accidental increases |
| Improving | Use invisible decreases | Produces smoother shaping |
| Intermediate | Match tension across components | Improves symmetry |
| Advanced | Use yarn-under single crochet consistently | Creates dense, often more defined stitches |
| Advanced | Plan facial embroidery before attachment | Gives greater control over expression |
Improve stitch consistency
Hold the working yarn with enough tension to form firm stitches without straining your hands. If stuffing shows through the fabric, a smaller hook may help. However, moving to a smaller hook also changes the finished size and may make the fabric harder to work.
Work neatly in spirals
Continuous crochet rounds naturally shift slightly as they build.
This means the beginning of each round will not always create a perfectly vertical line. Use the stitch marker as your round reference, but position facial details by looking at the finished shape rather than counting only from the marker.
Create a polished finish
Before closing any seam, check:
- Is the component positioned correctly?
- Does its stuffing match the surrounding shape?
- Are visible sewing stitches small and even?
- Can the fabric tolerate gentle handling without gaps?
These checks are especially useful when making handmade gifts.
Common Problems and How to Fix Them
| Symptom | Likely Cause | Practical Fix | Prevention |
|---|---|---|---|
| Stuffing shows through stitches | Loose crochet tension | Try a smaller hook | Check fabric density early |
| Head looks lopsided | Uneven increases or stuffing | Recount rounds or redistribute filling | Mark each round |
| Puppy cannot sit neatly | Poor limb positioning | Reposition hind legs | Test placement before sewing |
| Ears look stiff | Overstuffing | Remove stuffing | Leave ears unstuffed |
| Muzzle looks too large | Excess filling | Reduce stuffing | Add filling gradually |
| Face looks uneven | Incorrect eye placement | Remove and re-embroider | Mark positions first |
| Neck feels loose | Weak or uneven seam | Reinforce attachment | Join corresponding stitches securely |
| Visible gaps at seams | Missed edge stitches | Reseam affected area | Inspect the entire seam |
| Limbs twist outward | Uneven attachment | Reposition and resew | Pin both sides symmetrically |
Step 1 — A simple stitch-count example
Suppose a round contains 24 stitches and the next instruction is:
(3 sc, inc) × 6
Each repeat uses four existing stitches and produces five stitches.
Six repeats therefore produce:
6 × 5 = 30 stitches. If you finish with 29 stitches, check for a missed increase. If you have 31, look for an accidental extra increase or stitch. Counting is easier than trying to reshape incorrect fabric after stuffing.
Yarn and Technique Alternatives
Different yarns and methods produce different results.
| Option | Best For | Advantages | Limitations | Recommendation |
|---|---|---|---|---|
| Smooth acrylic yarn | First amigurumi projects | Clear stitch visibility, accessible care | Can vary in softness | Good beginner choice |
| Smooth cotton yarn | Defined stitches | Firm structure and crisp details | Can feel less stretchy | Useful for tidy shaping |
| Chenille yarn | Plush-style puppies | Soft, fuzzy appearance | Difficult stitch visibility | Try after mastering the pattern |
| Embroidered eyes | Soft facial features | No separate hard eye components | Requires careful stitching | Preferred for child-oriented designs |
| Plastic safety eyes | Decorative display projects | Consistent rounded appearance | Detachment and choking risk | Avoid for baby and young-child toys |
A yarn substitution may change the puppy’s finished size, firmness, stitch definition, and amount of stuffing needed.
The suggested hook size is a starting point, not a verified gauge for every yarn. Always check whether your fabric is dense enough to contain the stuffing.
Three Ways to Make Your Puppy Even Better
1. Check your size before making every piece
The pattern provides stitch counts but does not guarantee finished measurements. If you need a puppy of a particular height, make the head first and measure its maximum width and height after stuffing.
Record:
- Yarn brand and weight
- Hook size
- Approximate head dimensions
- Your crochet tension
- Amount and type of stuffing
Keep the same materials and technique for all pieces. Changing yarn or hook size halfway through can make the head and body look mismatched. For repeat projects, keep a small measurement record so future puppies are more consistent.
2. Make the puppy more durable
A decorative amigurumi puppy and a frequently handled toy need different levels of attention.
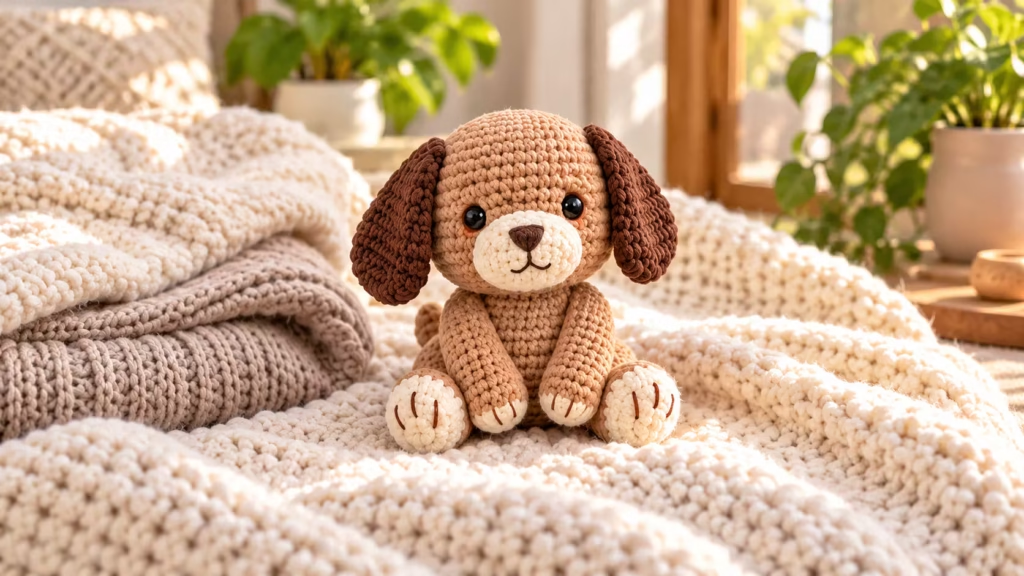
For a puppy that will be handled regularly, reinforce the neck, ear, and limb attachments. Sew across several stitches, secure the thread carefully, and check that no stuffing escapes when the fabric is gently moved. Avoid long, loose embroidery strands that can catch on fingers or other objects.
For young children’s toys, review the entire design for detachable pieces, exposed loops, and loose threads. Material selection and careful assembly alone do not establish regulatory compliance or safety.
3. Customize the puppy without rewriting the pattern
Small changes can create several distinct puppy personalities.
Golden retriever-inspired puppy: Use golden-beige body yarn with slightly darker floppy ears.
Dalmatian-inspired puppy: Work in white and add embroidered or securely stitched black spots.
Sleepy puppy: Replace round eyes with gently curved embroidered eyelids.
Autumn puppy: Use warm caramel and cream shades, or add a removable decorative scarf for adult display.
To change the size substantially, choose a different yarn weight and suitable hook rather than randomly adding increases. Adding stitches without redesigning the shaping can distort the proportions. For the first attempt, keep the original stitch counts.
How to Care for Your Finished Crochet Puppy
Store the finished puppy in a clean, dry place away from prolonged direct sunlight. If it needs cleaning, first check the yarn manufacturer’s washing instructions. For a lightly soiled decorative puppy, spot-clean the affected area with a damp cloth and mild detergent suitable for the yarn.
Avoid aggressively rubbing embroidered details or pulling the ears. If the materials permit washing, support the toy during cleaning, avoid excessive twisting, and allow it to dry thoroughly. Dense stuffing may take longer to dry than the surrounding crocheted fabric. Do not store a damp stuffed toy in an enclosed container.
Final Quality Checklist
Before calling your puppy complete, inspect each part.
Shape and structure
- [ ] Head is rounded and evenly stuffed.
- [ ] Body is smaller than the head and holds its shape.
- [ ] Neck seam is secure.
- [ ] Arms and legs are attached symmetrically.
- [ ] Tail does not interfere with the puppy’s intended resting position.
Appearance
- [ ] Ears are similar in length and placement.
- [ ] Muzzle is centered.
- [ ] Embroidered eyes are balanced.
- [ ] Nose and mouth stitches are secure.
- [ ] Loose yarn ends are hidden.
Acceptable differences
Slight variations in ear shape, body roundness, and facial expression are normal in handmade amigurumi.
Correctable problems
Uneven stuffing, crooked ears, or misplaced facial embroidery can often be corrected without remaking the complete puppy.
Problems that require reworking
Large stitch-count errors, structurally weak seams, or openings that expose stuffing should be repaired before the puppy is displayed or handled.
Frequently asked questions
Is this amigurumi puppy pattern suitable for complete beginners?
Yes, if you’re comfortable making a single crochet stitch or willing to practice it first. The pattern introduces magic rings, increases, invisible decreases, and sewing. These are standard beginner amigurumi techniques, but combining them can take patience. Start with the head, count every round, and keep the stitch marker in place until the piece is finished.
What is the easiest yarn for a crochet puppy?
Smooth medium-weight acrylic or cotton yarn is easier for many beginners because individual stitches remain visible. Choose a lighter color for your first project so you can identify increases and decreases. Very dark yarn and fluffy chenille can make it harder to see the stitches and correct mistakes.
How much yarn do I need for an amigurumi puppy?
The exact amount depends on yarn thickness, tension, hook size, and finished size. This pattern has not been physically sample-tested for yarn consumption, so a guaranteed yardage is not available. Keep sufficient main-color yarn for the head, body, and limbs, plus smaller quantities for the ears and muzzle. Record usage when making a sample.
Why does my amigurumi puppy have holes?
Visible holes often result from loose tension, a hook that’s too large for the yarn, or excessive stuffing. Try a smaller hook and check the fabric before filling. Crocheting more tightly is not always the best solution; it can cause hand discomfort. Aim for consistent, compact stitches that hold the stuffing securely.
Can I make this puppy without a magic ring?
Yes. Chain two and work the first round’s six single crochet stitches into the second chain from the hook. Continue the pattern normally. This alternative may create a slightly more visible opening than a tightly closed magic ring, so check the center carefully before stuffing.
How do I make the puppy bigger?
Use thicker yarn with a suitable hook to create a larger version while keeping the original stitch counts. The exact increase in dimensions cannot be guaranteed without a sample. For a proportional result, use the same yarn and hook throughout the project, and check that the stuffing does not show through the fabric.
Can I sell puppies made from this pattern?
Physical items made from original crochet instructions may generally be sold, but selling responsibilities depend on applicable laws and any relevant pattern terms. If you’re selling toys in the US, investigate applicable product-safety and labeling requirements, particularly for products intended for children. Never describe a handmade toy as safety-certified without supporting evidence.
How can I make the puppy look more professional?
Focus on three details: even tension, symmetrical assembly, and clean facial embroidery. Use a stitch marker, maintain consistent stuffing density, and pin every component before sewing. Small differences in eye height or ear placement often affect the expression more than minor variations in body measurements.
Save This Cute Crochet Puppy Pattern for Later
Your handmade puppy is ready once every piece is securely attached, the seams are closed, and the face looks the way you want it to. Before starting another project, write down the yarn, hook size, and any adjustments that worked well. Those notes will make your next amigurumi puppy easier to reproduce.
Save this cute crochet amigurumi puppy tutorial to your Pinterest crochet board so you can find the stitch counts, assembly guide, and troubleshooting tips whenever you need them.
For your next project, try using the same basic shaping techniques to make a tiny crochet teddy bear, bunny, or kitten. Each one builds on the same core skills: working in rounds, increasing, decreasing, stuffing, and sewing.
The best part of learning amigurumi is that once you understand these simple shapes, you can turn them into countless handmade characters.
Save this for later
Pin “Cute Crochet Amigurumi Puppy Pattern Tutorial for Beginners” so you can find it when the yarn arrives.
Get the next free pattern first
One email a week. New patterns, no noise.
Yarn weights and hook sizes in this guide follow the Craft Yarn Council standards.
Keep going: Crochet Keychain Tutorial: Make a Cute Mini Bee Bag Charm · In Treble Afghan Square Pattern by Julie Yeager: Complete Crochet Guide · How to Crochet Moss Stitch or Linen Stitch: Complete Beginner Guide





