
Crochet Keychain Tutorial: Make a Cute Mini Bee Bag Charm
Crochet keychain: This beginner-friendly pattern creates a small, three-dimensional crochet insect bag charm. The main body is worked in continuous spiral…

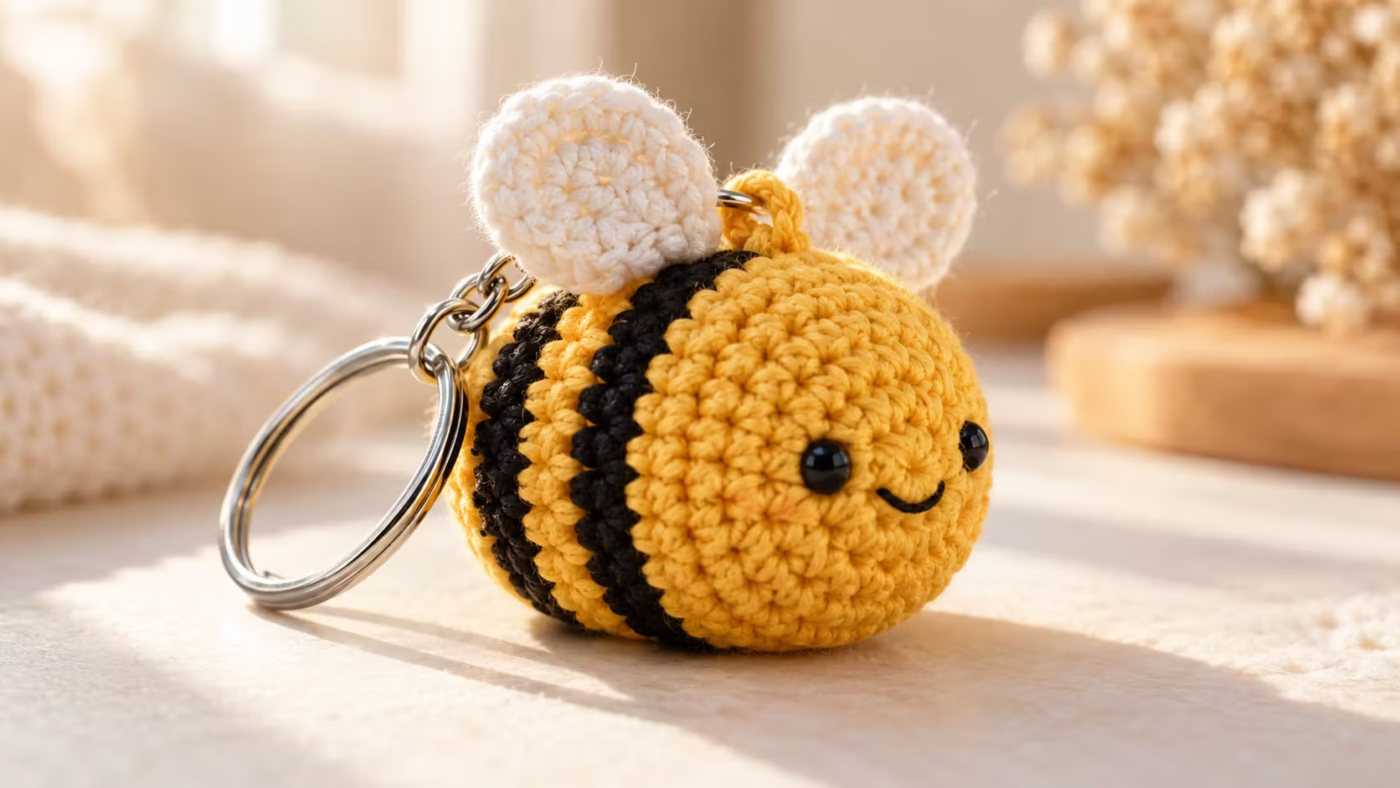
Project Overview
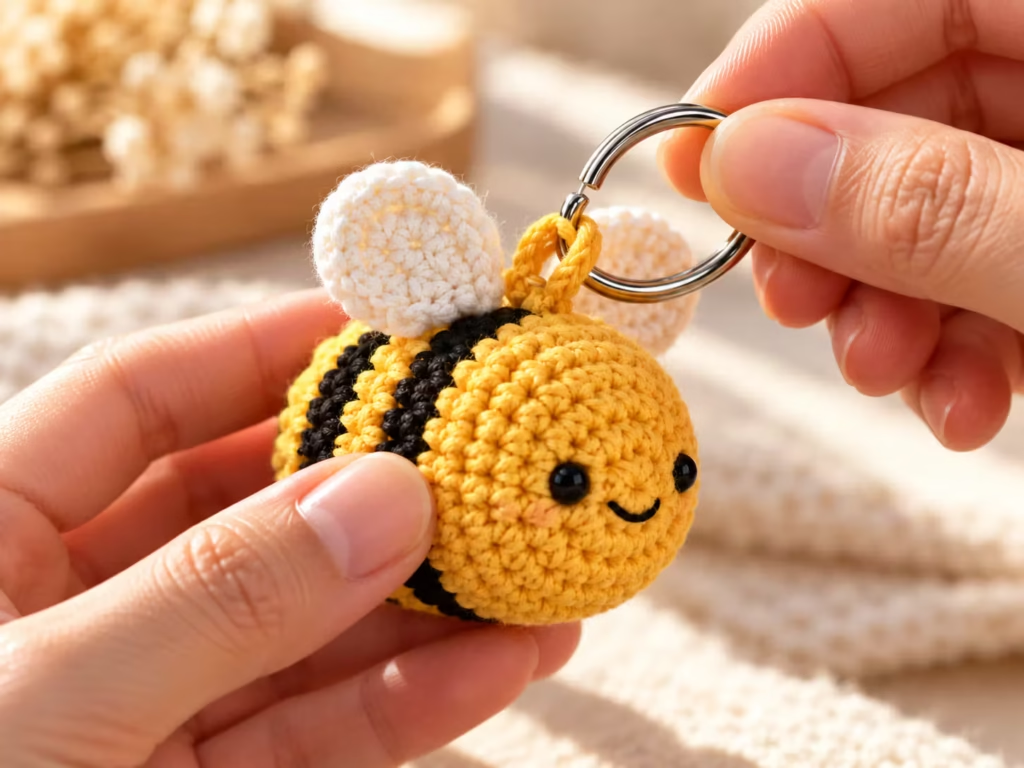
This beginner-friendly pattern creates a small, three-dimensional crochet insect bag charm. The main body is worked in continuous spiral rounds, with color changes forming two black stripes. Separate wings add dimension without requiring complicated shaping. This crochet keychain pattern takes you from the first stitch to the finishing touches.
| Project Detail | Description |
|---|---|
| Project | Mini crochet bee keychain |
| Skill level | Confident beginner |
| Techniques | Magic ring, single crochet, increases, invisible decreases, color changes |
| Yarn | Cotton or cotton-blend yarn |
| Hook | 2.5–3 mm, adjusted for yarn and tension |
| Estimated working time | Approximately 60–90 minutes for a crocheter familiar with basic stitches |
| Finished size | Approximately 1.5–2.5 inches tall, depending on yarn and gauge |
| Construction | Spiral-round amigurumi with separate wings |
| Best uses | Keychains, bag charms, gifts, decorative accessories |
| Pattern terminology | US crochet terms |
Pattern note: The stitch counts and construction sequence below have been checked for consistency, but the project has not been physically sample-tested. Finished size, working time, and material consumption will vary.
The completed bee should have a firm, evenly stuffed body, clearly defined stripes, symmetrical wings, and a hanging loop that carries the weight of the charm without pulling on its decorative stitches.
Materials and Crochet Tools
Choose yarn that produces a dense fabric when crocheted with your selected hook. Keychains receive more handling than decorative shelf toys, so tight stitches and strong assembly matter.
Required materials
| Item | Quantity or Specification | Purpose | Alternative |
|---|---|---|---|
| Yellow yarn | Small amount of light or DK-weight yarn | Main bee body | Gold, peach, or pastel yellow |
| Black yarn | Small amount, same weight | Stripes and facial details | Dark brown for softer contrast |
| White yarn | Small amount, same weight | Wings | Cream or pale blue |
| Crochet hook | Suggested 2.5–3 mm | Tight amigurumi stitches | Smaller hook compatible with yarn |
| Stuffing | Small handful | Shapes body | Clean polyester filling from a craft supply |
| Tapestry needle | Blunt-tipped | Embroidery and sewing | Smaller yarn needle |
| Stitch marker | One | Identifies beginning of each round | Contrasting scrap yarn |
| Key ring | One sturdy split ring | Attachment | Secure swivel-clasp hardware |
| Scissors | One pair | Trim yarn | Thread snips |
Optional supplies
A removable locking marker helps hold the wings in position before stitching. A small ruler is useful for checking wing symmetry, and needle-nose pliers can make it easier to open a stiff split ring.
For a washable, frequently handled charm, cotton yarn is often a practical choice because it gives small stitches clear definition. Acrylic also works, though a soft acrylic may produce a less structured body.
Avoid loose buttons and plastic safety eyes on charms intended for babies or young children. Embroidered features eliminate those detachable facial components, but small keychain hardware and stuffed charms can still present hazards and are not suitable as infant toys.
Crochet Basics and Preparation
Before beginning, become familiar with the abbreviations used throughout the pattern.
| Abbreviation | Meaning |
|---|---|
| MR | Magic ring |
| sc | Single crochet |
| inc | Increase: 2 sc in one stitch |
| inv dec | Invisible decrease |
| st | Stitch |
| sts | Stitches |
| FO | Fasten off |
| BLO | Back loop only |
| ( ) × n | Repeat instructions inside parentheses n times |
The bee uses continuous rounds rather than joined rounds. Do not slip stitch to close a round unless instructed. Move your stitch marker into the first stitch of every new round. Counting accurately is especially important during increases and decreases, because a single extra stitch can distort the body.
How to make a single crochet
Insert the hook into the next stitch, yarn over, and draw up a loop. You should have two loops on the hook. Yarn over again and pull through both loops.
How to make an invisible decrease
Insert the hook through the front loop of each of the next two stitches. Yarn over, draw through both front loops, yarn over again, and pull through the remaining two loops. This reduces two stitches to one while keeping the decrease less noticeable on the right side.
How to change yarn colors
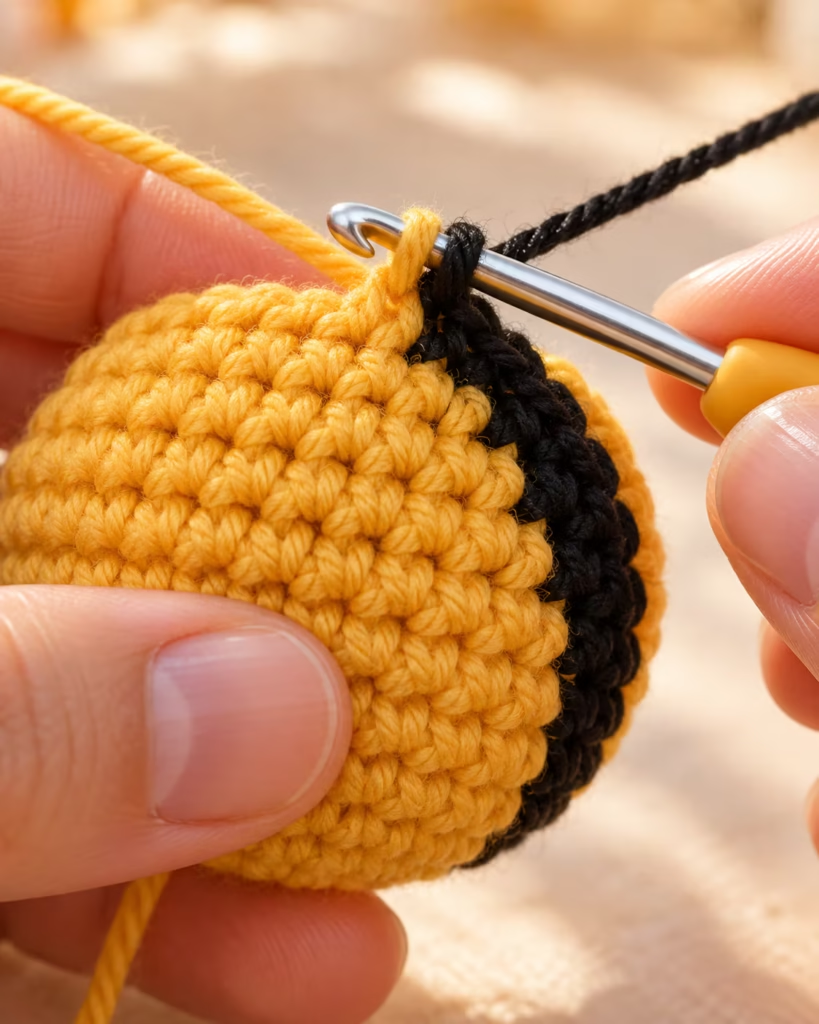
Begin the last single crochet before the color change using the current color. When two loops remain on the hook, complete that stitch with the new color. The next stitch will then begin in the new color. This produces a cleaner change than switching after completing the stitch entirely.
In continuous rounds, the stripe boundary will have a small natural step. This is normal.
Step-by-Step Crochet Bee Keychain Pattern
The body begins at the front of the bee and expands toward the middle before tapering at the rear.
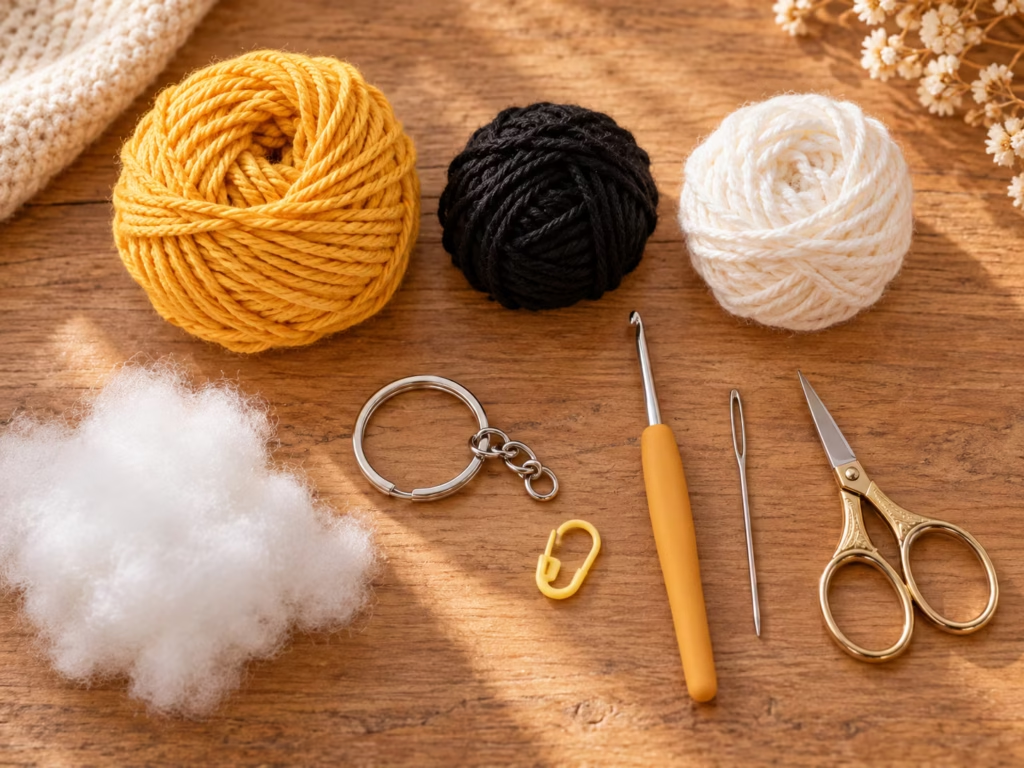
Keep your tension consistent throughout, especially while changing colors.
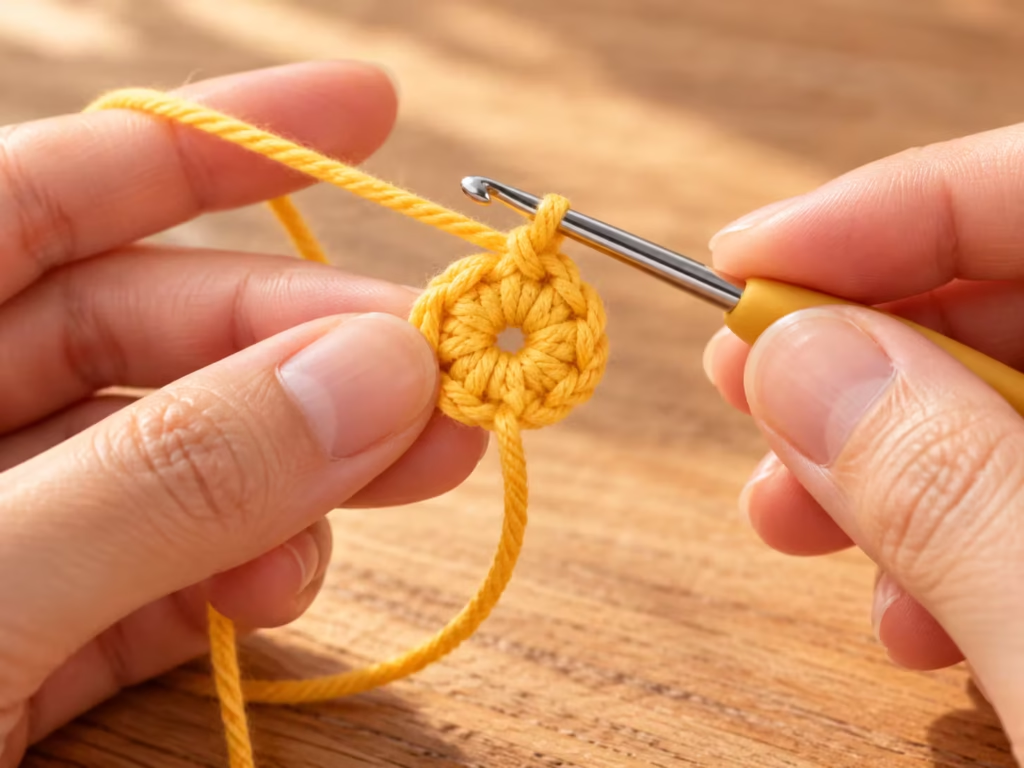
Step 1: Create the magic ring
Using yellow yarn:
Round 1: Work 6 sc into a magic ring. (6 sts)
Pull the yarn tail until the center closes securely.
Visual check: You should see six evenly spaced stitches surrounding a closed center.
Common error: The center remains loose because the initial ring was not tightened properly.
Solution: Pull the starting tail carefully while holding the stitches in place. Secure the tail when finishing the project.
Expert tip: If magic rings are difficult, begin with 2 chains and work 6 sc into the second chain from the hook. This creates a functional alternative, though the center may be slightly more visible.
Step 2: Increase the body circumference
Continue with yellow yarn.
- Round 2: Inc in each stitch around. (12 sts)
- Round 3: (1 sc, inc) × 6. (18 sts)
- Round 4: (2 sc, inc) × 6. (24 sts)
You now have a small rounded cup forming the front of the bee.
Visual check: The fabric should expand evenly without large holes or severe rippling.
Common error: Stitching both an increase and an extra single crochet in one position produces too many stitches.
Solution: Count after every round. For Round 4, you must finish with exactly 24 stitches.
Expert tip: Staggering increase positions can reduce visible corners in larger amigurumi pieces. For this small bee, the written increase arrangement is sufficiently simple and effective.
Step 3: Build the yellow front section
Rounds 5–6: Sc in every stitch around. (24 sts per round)
Keep the yellow yarn active until the final stitch of Round 6. At the final stitch of Round 6, switch to black yarn using the color-change method described earlier.
Visual check: The front section should have a rounded shape and consistent stitch density.
Common error: The body becomes noticeably wider after increasing stops.
Solution: Avoid accidentally working increases. Every round from this point through Round 11 contains 24 stitches.
Expert tip: Keep the inactive yarn tails inside the piece instead of carrying contrasting yarn behind every stitch. This can help prevent dark strands from showing through lighter fabric.
Step 4: Make the first black stripe
Round 7: With black yarn, sc around. (24 sts)
Change to yellow on the final stitch.
Rounds 8–9: With yellow yarn, sc around. (24 sts per round)
Change to black on the final stitch of Round 9.
Visual check: The first black band should be one round wide and surrounded by yellow.
Common error: Loose stitches appear at the stripe transition.
Solution: Gently tighten the first few stitches after each color change, without pulling so firmly that the fabric puckers.
Expert tip: Position the color-change line along the underside when displaying the charm. The spiral jog will then be less prominent.
Step 5: Add the second stripe
Round 10: With black yarn, sc around. (24 sts)
Change to yellow on the final stitch.
Round 11: With yellow yarn, sc around. (24 sts)
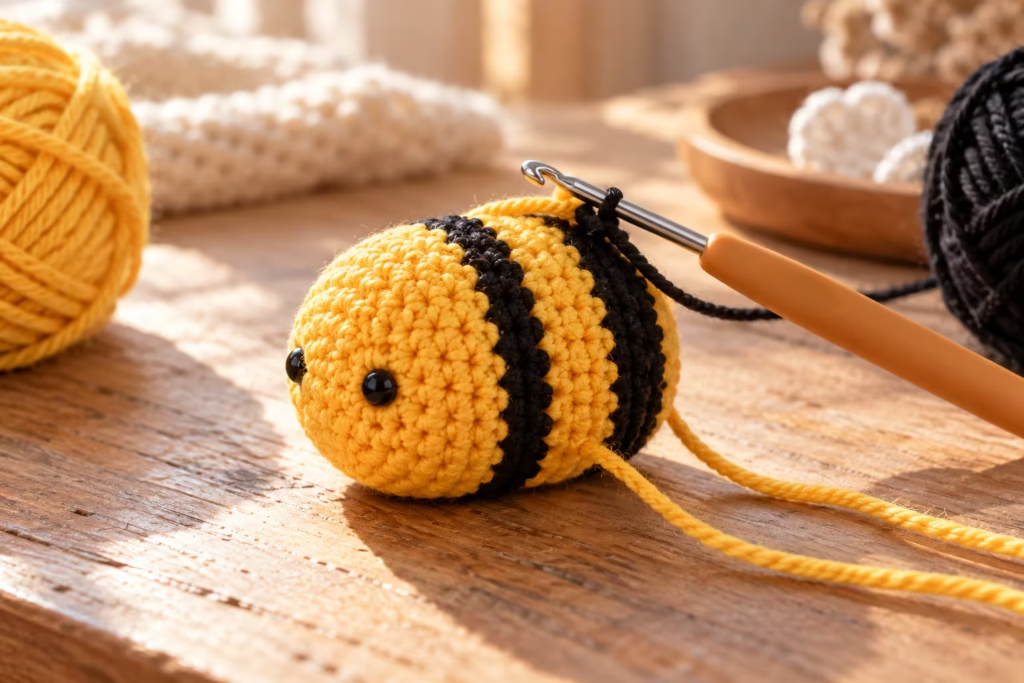
The bee now has two black bands separated by two yellow rounds.
Visual check: Both dark stripes should be clearly distinguishable and approximately the same width.
Common error: The dark yarn is visible through the yellow stitches.
Solution: Use compatible yarn weights and avoid stretching the fabric. Cut and secure unused strands inside the body rather than carrying dark yarn loosely across light sections.
Expert tip: A small tonal difference between the two black stripes is acceptable, but consistent yarn weight matters more than an exact color match.
Step 6: Shape the rear of the bee
Continue in yellow.
Round 12: (2 sc, inv dec) × 6. (18 sts)
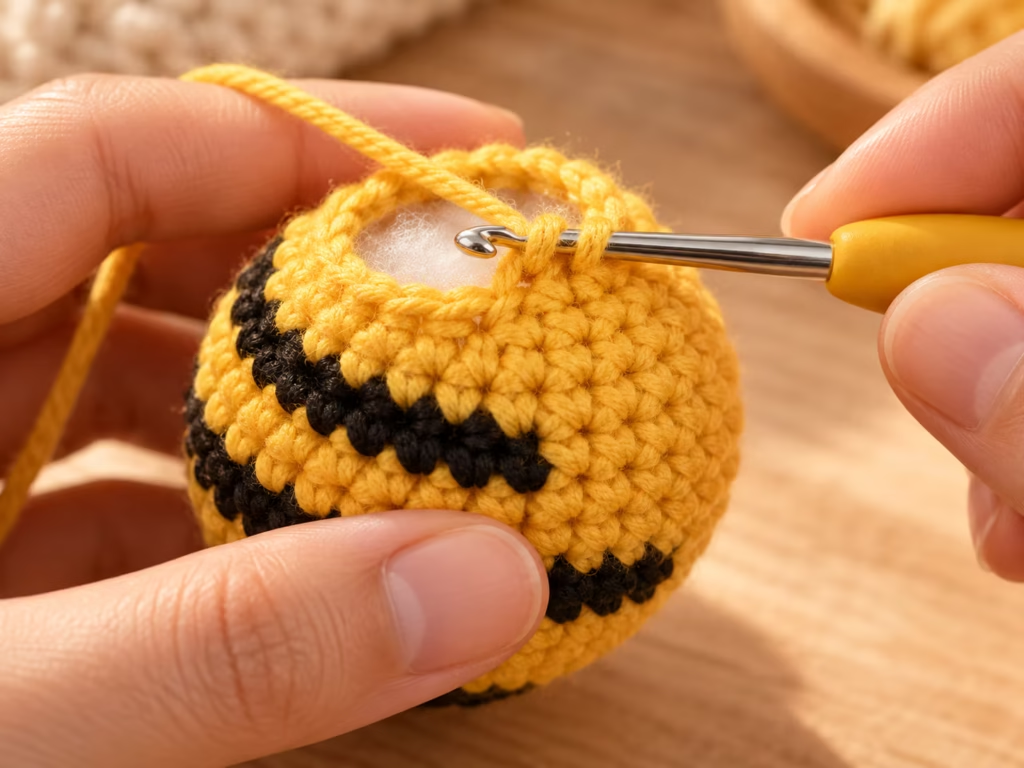
Round 13: (1 sc, inv dec) × 6. (12 sts)
Before closing the body, add stuffing in small portions. Use the blunt end of your crochet hook or tapestry needle to distribute stuffing toward the front. Do not force a large clump through the opening.
Visual check: The bee should have an oval, slightly rounded body without obvious dents.
Common error: Too much stuffing creates visible gaps between the stitches.
Solution: Remove a small amount and redistribute the remaining stuffing evenly.
Expert tip: Work the final decrease rounds slowly. Black or yellow stitches stretched around stuffing may expose the filling and reduce the professional appearance.
Step 7: Close the body securely
Round 14: Inv dec × 6. (6 sts)
Fasten off, leaving a tail approximately 6 inches long. Thread the tail through a tapestry needle and pass it under the front loop of each remaining stitch in sequence. Pull gently to close the opening. Secure the yarn inside the body and weave the tail through several internal stitches before trimming.
Visual check: The rear opening should be fully closed without a protruding knot.
Common error: Pulling a very tight closure around excessive stuffing produces a pointed or uneven rear.
Solution: Adjust the stuffing before completing the closure.
Expert tip: Roll the bee gently between your palms to redistribute the filling after closing it.
Step 8: Crochet two miniature wings
Use white yarn and make the following piece twice.
Round 1: Work 6 sc into a magic ring. (6 sts)
Round 2: Inc in every stitch. (12 sts)
Slip stitch into the first stitch of Round 2 to finish the wing. This joining slip stitch is used only for the wing, not the main spiral body. Fasten off, leaving a 7–8 inch sewing tail.
The wings are small circular crochet pieces. When lightly folded or attached along a short base, they develop the soft rounded appearance of bee wings.
Visual check: Both wings should contain 12 stitches and have approximately matching diameters.
Common error: One wing looks larger than the other.
Solution: Check the stitch count and remake the larger wing using the same tension as the smaller one.
Expert tip: If you prefer narrower wings, gently shape each circle into an oval before attaching. Do not stretch one wing more than the other.
Step 9: Attach the wings symmetrically
Place the wings on the upper portion of the body, near the boundary between the yellow front and first black stripe. Flatten a short edge of each wing against the body.
Using the sewing tails, attach each wing through approximately three or four adjacent stitches along its base. Do not sew the full circular perimeter flat. Leaving most of each wing free gives the bee its dimensional shape.
Visual check: Both wings should rise from the upper body at similar angles.
Common error: Wings rotate or flop because only one stitch holds them in place.
Solution: Use several small, secure stitches across each attachment point.
Expert tip: Pin the wings before sewing and inspect the bee from the front, top, and both sides. Symmetry is easier to correct before the sewing tails are secured.
Step 10: Embroider the face
Using black yarn or embroidery floss, create two small eyes on the yellow front section. Position the eyes at approximately the same height, leaving several stitches between them. For each eye, use two or three short embroidery passes through the same small area to create a compact oval. Optionally add a tiny curved smile using a single dark strand.
Visual check: The face should appear balanced when viewed directly from the front.
Common error: One eye is higher or farther from the center than the other.
Solution: Mark both intended eye positions with removable thread before embroidering.
Expert tip: Keep facial embroidery compact. Large black features can visually overwhelm a miniature crochet insect.
Step 11: Build the hanging loop
For a functional crochet keychain, the hanging loop must connect directly to the body rather than only to the decorative wings. Cut a length of matching sturdy yarn, approximately 12 inches long. Fold it in half and thread both ends onto a tapestry needle if the needle eye permits.
Pass the doubled strand through several strong stitches at the top center of the bee, preferably just behind the wing attachment area. Bring both free ends upward and adjust the loop to the desired length.
Tie a secure knot close to the fabric and weave the remaining ends separately into the body. For additional durability, repeat the attachment with a second strand of strong thread.
Visual check: The body should hang upright without rotating excessively or pulling the wings out of position.
Common error: The hanging loop is connected to a single loose stitch.
Solution: Anchor the loop across multiple body stitches so the pulling force is distributed.
Expert tip: For a charm used frequently on a key ring, an additional sewn reinforcement using strong polyester thread can reduce stress on the yarn attachment.
Step 12: Install the key ring and complete the charm
Slide the completed hanging loop onto the split key ring. Ensure the loop sits fully inside the ring rather than between the split ends. Inspect all connections and gently pull on the ring while holding the bee.
The attachment should remain secure under gentle manual tension. This is an informal inspection, not a certified load test. Trim any protruding yarn only after confirming that its ends have been thoroughly woven or secured.
Visual check: The finished bee should hang freely, retain its shape, and show no loose knots or exposed stuffing.
Common error: The key ring gradually works its way through an oversized or loose yarn loop.
Solution: Reduce the loop size or use more durable, tightly wrapped attachment material.
Expert tip: A small metal swivel clasp between the loop and key ring allows the bee to turn without twisting the yarn as much.
Visual Stitch and Assembly Diagrams
The following diagrams explain the construction rather than representing photographs or exact scale.
Bee body stitch-count chart
| Round | Color | Instruction | Stitch Count |
|---|---|---|---|
| 1 | Yellow | 6 sc in MR | 6 |
| 2 | Yellow | Inc × 6 | 12 |
| 3 | Yellow | (1 sc, inc) × 6 | 18 |
| 4 | Yellow | (2 sc, inc) × 6 | 24 |
| 5 | Yellow | Sc around | 24 |
| 6 | Yellow | Sc around | 24 |
| 7 | Black | Sc around | 24 |
| 8 | Yellow | Sc around | 24 |
| 9 | Yellow | Sc around | 24 |
| 10 | Black | Sc around | 24 |
| 11 | Yellow | Sc around | 24 |
| 12 | Yellow | (2 sc, inv dec) × 6 | 18 |
| 13 | Yellow | (1 sc, inv dec) × 6 | 12 |
| 14 | Yellow | Inv dec × 6 | 6 |
Shaping sequence
FRONT OF BEE | v Round 1 6 sts Start | Round 2 12 sts Increase | Round 3 18 sts Increase | Round 4 24 sts Increase | Rounds 5–11 24 sts Body and stripes | Round 12 18 sts Decrease | Round 13 12 sts Decrease + stuff | Round 14 6 sts Decrease + close | v REAR OF BEE
Component assembly diagram
[LEFT WING] [RIGHT WING] \ / \ / [BEE BODY] | Reinforced loop | Split ring | Keys or bag
The wings are attached to the body first. The reinforced hanging loop is then positioned independently of the wings so that weight is not supported by decorative components.
Crochet increase logic
An increase means two stitches are made into one stitch of the previous round.
Previous round: [A] [B] [C] | At stitch A: sc + sc | Result: 2 new stitches
An invisible decrease reverses this principle by combining two adjacent stitches into one new stitch.
Beginner-to-Pro Crochet Techniques
The same bee keychain can be made at different levels of refinement.
Beginner: prioritize accurate counts
If you are new to small amigurumi, concentrate on three things: using the stitch marker correctly, keeping the fabric dense, and counting every round. Use a slightly larger hook only if the stitches are too difficult to work. If the resulting fabric shows large gaps, return to a smaller hook or adjust your tension. Keep wing placement simple and choose embroidered facial features over attached embellishments.
Intermediate: improve the shape and color transitions
As your control improves, pay closer attention to the final stitch before each color change. Make the new color change during the last pull-through of that stitch. Position the color jog toward the underside of the body.
You can also experiment with embroidery placement. Moving the eyes slightly higher creates a more playful appearance; moving them farther apart produces a wider-looking face. Test placements with temporary thread before sewing the final details.
Advanced: refine assembly and durability
For a more polished finish, use a consistent wing-sewing path and anchor each component without pulling its fabric out of shape. Consider reinforced attachment stitching with strong polyester thread and a hardware connection that reduces twisting.
You can also create a removable charm by adding a small swivel clasp. Select hardware appropriate to the thickness of your attachment loop. For multiple matching pieces, record the yarn brand, hook size, finished body length, wing diameter, and eye placement. These measurements help maintain consistency between projects.
Troubleshooting Common Problems
Even experienced crocheters occasionally encounter uneven shaping or difficult color transitions in miniature projects.
| Symptom | Likely Cause | Practical Fix | Prevention |
|---|---|---|---|
| Body has visible holes | Hook too large or loose tension | Use a smaller compatible hook | Check fabric density before stuffing |
| Bee looks pointed | Stuffing concentrated at one end | Redistribute before closing | Stuff gradually |
| Black stripe is uneven | Color-change jog or misplaced stitches | Check round start and color transition | Use a stitch marker |
| Stitch count is incorrect | Missed increase or extra stitch | Undo to the last correct round | Count after every round |
| Wings look mismatched | Unequal stitch counts or tension | Remake or reposition a wing | Compare before attaching |
| Face looks crooked | Eye positions are uneven | Remove and re-embroider | Mark positions first |
| Hanging loop loosens | Insufficient anchoring | Reattach with reinforced stitches | Use multiple attachment points |
| Stuffing escapes | Loose fabric or incomplete closure | Repair opening and adjust stuffing | Inspect before closing |
| Body twists under keys | Attachment orientation or hardware movement | Reposition loop or add swivel clasp | Test hanging direction |
| Yarn tails become visible | Ends not woven securely | Reweave through multiple stitches | Keep adequate finishing tails |
Do not cut a short yarn tail flush with the surface if it is carrying structural tension. Re-secure it properly before trimming.
Cute Crochet Keychain Design Ideas
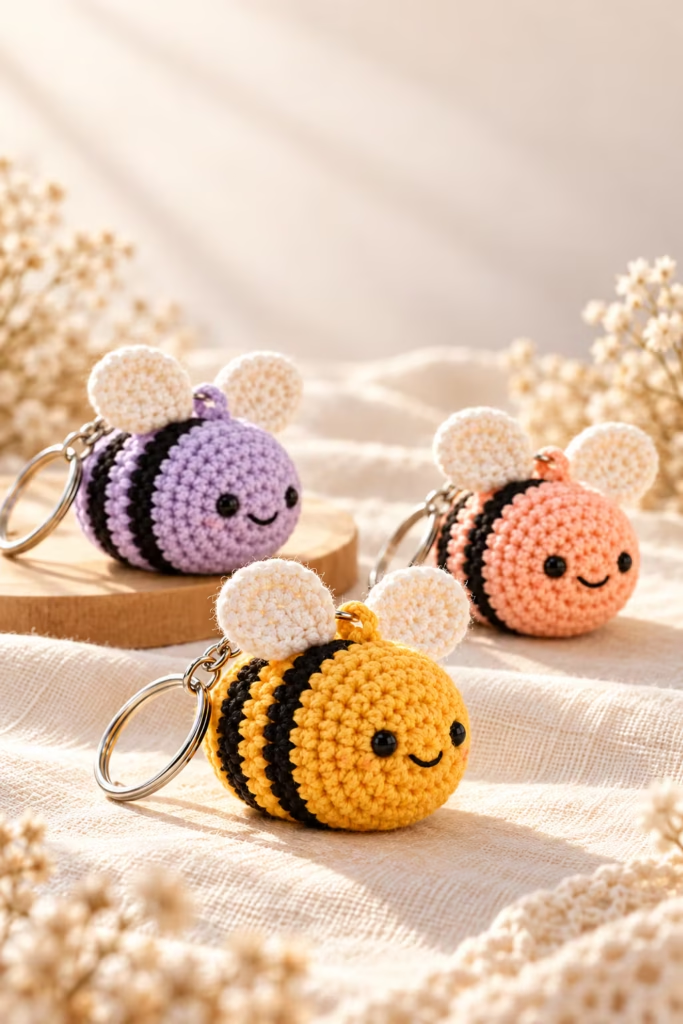
Once you understand the basic construction, you can make many cute crochet keychain tutorials designs from familiar shapes and color combinations.
These ideas also translate naturally into small bag charm patterns.
1. Classic honeybee
Use golden-yellow yarn, bold black stripes, white wings, and embroidered eyes. This version offers a recognizable design and good contrast in photographs.
2. Pastel bumblebee
Replace bright yellow with pale buttercream yarn and black with medium brown. The result feels softer while retaining the characteristic striped bee shape.
3. Lavender bee
Use lavender for the body and deeper purple for the stripes. White wings preserve the insect silhouette. This works well for coordinating pastel accessories.
4. Mini ladybug charm
Use a rounded red body with black embroidered spots. The bee’s general increase-and-decrease structure can serve as a starting point, but the ladybug’s flatter back and wing markings require their own design adjustments.
5. Butterfly bag charm
Create two pairs of shaped wings and a narrow central body. A butterfly is an excellent next project after practicing symmetrical bee wings, though it requires a separate pattern for correct shaping.
6. Mini sunflower keychain
Make a small circular brown center and crochet yellow petals around its edge.
Secure the hanging loop through the reinforced center rather than relying on a single petal.
7. Crochet strawberry charm
Work a red tapered body, add embroidered seed details, and attach a small green leaf crown. The tapered shaping differs from the bee, so use a dedicated strawberry stitch sequence.
8. Tiny mushroom keychain
Combine a rounded cap with a short stem.
Cream and warm red yarn create a woodland look, while brown and beige produce a more subtle autumn version.
9. Mini pumpkin charm
Use orange yarn and add surface shaping or stitched ridges. A tiny green stem can become a decorative feature, but the hanging loop should still anchor securely into the main body.
10. Daisy bag charm
Crochet a compact circular center with individually defined petals. Use tightly woven tails and reinforced connections because narrow petal bases can loosen under repeated handling.
Which crochet charm should you make next?
| Design | Best For | Main Advantage | Limitation | Recommendation |
|---|---|---|---|---|
| Bee | First amigurumi keychain | Simple rounded body | Requires color changes | Start here |
| Ladybug | Bold color contrast | Easy-to-recognize appearance | Spot placement matters | Try after mastering embroidery |
| Butterfly | Decorative bag charm | Attractive silhouette | More shaped pieces | Choose for wing practice |
| Strawberry | Fruit-themed gifts | Compact recognizable shape | Needs tapered shaping | Good next beginner project |
| Mushroom | Autumn accessories | Interesting two-part construction | Assembly needs care | Try after the bee |
| Daisy | Flat decorative charm | Lightweight and colorful | Petals need securing | Good for small yarn scraps |
These are design concepts, not complete additional patterns. Use separately verified stitch instructions when changing the structure.
Choosing Yarn and Hardware for a Crochet Keychain
The best materials depend on how the finished charm will be used.
Cotton is useful for defined stitches, while acrylic offers softness and a broad range of colors. Cotton blends can provide a balance between shape and flexibility.
| Material | Best Use | Advantages | Limitations |
|---|---|---|---|
| Cotton yarn | Frequently handled keychains | Defined stitches and firm structure | Can feel stiffer |
| Acrylic yarn | Soft decorative charms | Lightweight and flexible | May fuzz with abrasion |
| Cotton-acrylic blend | Everyday bag charms | Balanced softness and structure | Results vary by blend |
| Embroidery floss | Facial details | Fine, controlled stitching | Not ideal for the main body |
| Split key ring | Keys and bags | Familiar attachment mechanism | Can catch loose strands |
| Swivel clasp | Removable accessories | Reduces twisting | Adds size and metal weight |
For a small charm, avoid unnecessarily heavy hardware. A large key ring can overpower the miniature bee and place extra force on the attachment loop.
Professional Finishing: Three Details That Matter
<!– gap –>
1. Verify your finished size before adding hardware
A miniature charm may look balanced in your hand but appear too bulky when attached to a small key ring. Measure the body from front to rear and check the total height after adding the hanging loop. Before final assembly, temporarily hold the key ring in place and examine the proportions.
If the charm is larger than intended, switching to a thinner yarn and compatible smaller hook on the next version will usually reduce its size. Do not assume that changing the hook alone will produce predictable dimensions; yarn thickness and tension also affect the result.
<!– gap –>
2. Reinforce stress points without distorting the crochet
Keychains experience pulling, rubbing, and twisting. The strongest practical attachment places the hanging force across several body stitches rather than concentrating it on a wing, embroidery detail, or individual loop. After sewing, inspect the fabric around the anchor. It should remain smooth without visibly stretched stitches.
If a small gap opens when you gently pull the loop, redo the attachment before using the charm. For gifts intended for everyday use, explain that handmade yarn accessories should not be used as weight-bearing handles or safety equipment.
<!– gap –>
3. Clean and store miniature crochet charms correctly
Surface dust can usually be removed with a soft, dry brush or a lint roller used gently. For spot cleaning, follow the care requirements of the actual yarn and avoid soaking metal hardware unnecessarily. If washing is appropriate for the yarn, use a gentle method, remove excess moisture without twisting the fabric, reshape the body, and allow the charm to dry completely.
Inspect the attachment loop after cleaning. Store finished charms away from sharp objects or rough surfaces that can snag stitches.
Making Crochet Keychains for Gifts or Craft Displays
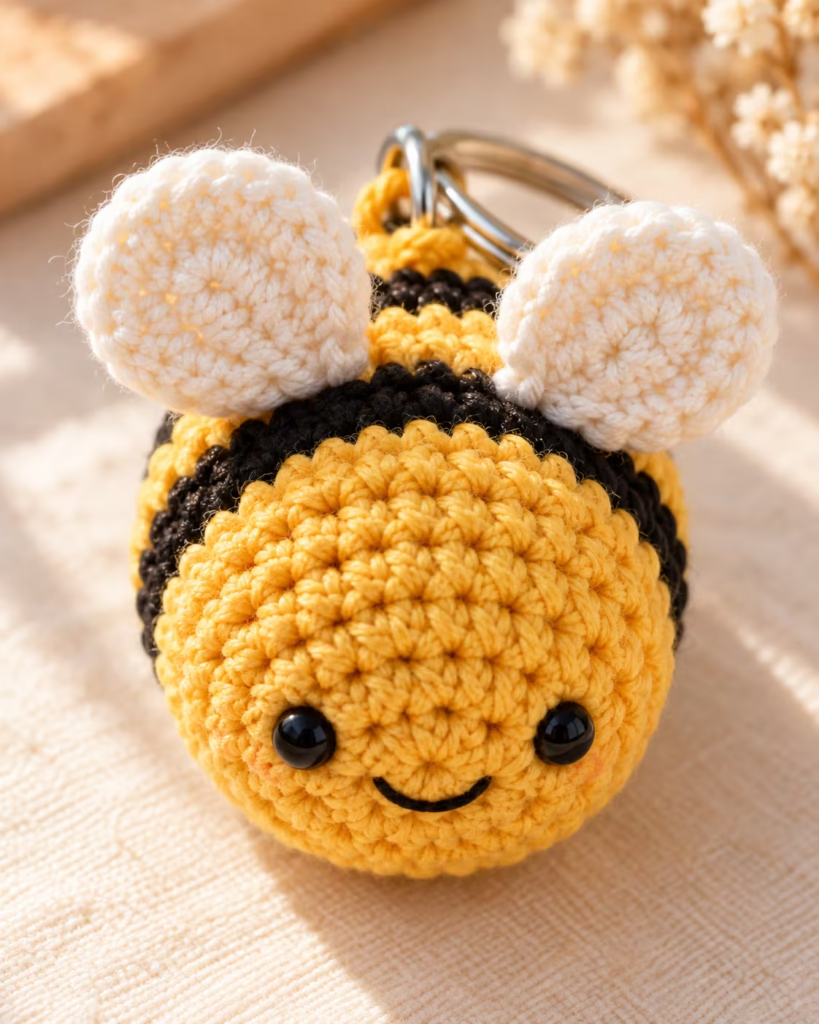
Crochet keychains make practical small gifts because they can be personalized through color, expression, and hardware choice. A bee in cheerful yellow can feel playful, while a cream-and-brown version looks more understated.
For coordinated gift sets, repeat the same pattern with different expressions or wing colors. A small cardstock backing can keep the charm organized while protecting its hanging loop during packaging.
If you plan to display several charms together, group them by color or theme. Bees, butterflies, and ladybugs create a cute crochet insect collection, while pumpkins and mushrooms are natural choices for autumn.
If making items to sell, track your actual yarn use, hardware cost, packaging, labor, and selling fees rather than assuming small finished dimensions automatically mean low costs.
Helpful next step: Keep this bee pattern saved beside your materials checklist so you can repeat the project without recounting the shaping sequence.
Crochet Keychain Quality-Control Checklist
Before calling the charm finished, inspect every component.
- [ ] Body has the intended rounded shape.
- [ ] All 14 body rounds match the written stitch counts.
- [ ] Stuffing is distributed evenly.
- [ ] No filling is escaping.
- [ ] Black stripes are visually distinct.
- [ ] Both wings contain the correct number of stitches.
- [ ] Wings are attached securely and appear symmetrical.
- [ ] Facial embroidery is balanced.
- [ ] All yarn tails are secured.
- [ ] Hanging loop is reinforced across multiple stitches.
- [ ] Key ring is fully installed.
- [ ] Charm hangs naturally without pulling the decorative pieces.
Small variations in body width, eye position, or wing angle are normal handmade characteristics. An uneven stripe edge caused by continuous-round color changes is also generally acceptable. Loose hardware, exposed stuffing, unraveling stitches, or a hanging loop that pulls free are structural failures. Repair them before using or gifting the keychain.
Frequently asked questions
What is the easiest crochet keychain for beginners?
A flat crochet heart, small flower, or simple circular charm is often easier than three-dimensional amigurumi because it requires little or no stuffing. If you already know single crochet, increases, and decreases, a small bee is a manageable next project. Work slowly and check the stitch count after every round.
What yarn is best for crochet keychains?
Cotton and cotton-blend yarns are useful choices because they produce defined stitches and can hold small shapes well. Lightweight yarn creates finer details, while thicker yarn produces a larger charm. The best choice depends on your hook size, tension, intended use, and preferred finished appearance.
How do you attach a key ring to crochet securely?
Create a strong attachment loop anchored through several stitches of the main crochet body. Secure the strands and reinforce the connection if necessary. Slide the loop fully onto a split ring or suitable clasp. Inspect the finished connection and gently test it for obvious movement or loosening before use.
How long does it take to crochet a small keychain?
A crocheter familiar with basic amigurumi may complete this bee in approximately 60–90 minutes. Beginners can need considerably longer, particularly when learning magic rings, color changes, invisible decreases, or embroidery. Working carefully is more valuable than following a fixed time target.
Can I make crochet keychains without stuffing?
Yes. Flat hearts, flowers, leaves, stars, and similar motifs can be made without stuffing. A three-dimensional bee will usually look better with a modest amount of filling, although you can experiment with a softer, less structured result. Avoid overstuffing, which can stretch the fabric and expose the filling.
How can I stop crochet keychains from losing their shape?
Use a hook that creates dense stitches, avoid excessive stuffing, and finish each component securely. Cotton or another relatively firm yarn may help maintain structure. Repeated stretching, abrasion, moisture, and heavy hardware can affect the finished shape. Inspect frequently handled charms and repair loose areas early.
Are crochet keychains suitable for children?
Small charms can contain components that pose choking, entanglement, or other hazards. Metal rings, clasps, loose stuffing, and detachable decorations are especially concerning for young children. Do not treat an ordinary decorative keychain as an infant toy. For child-oriented projects, use age-appropriate designs and follow applicable product-safety requirements.
How can I make matching crochet insect bag charms?
Start with one consistent yarn weight and a coordinated palette. Make several bees with different stripe or wing colors, then add complementary ladybugs, butterflies, or other insects using patterns suited to their shapes. Keep attachment hardware consistent to create a cohesive collection and inspect every finished charm individually.
Save This Crochet Keychain Pattern for Your Next Project
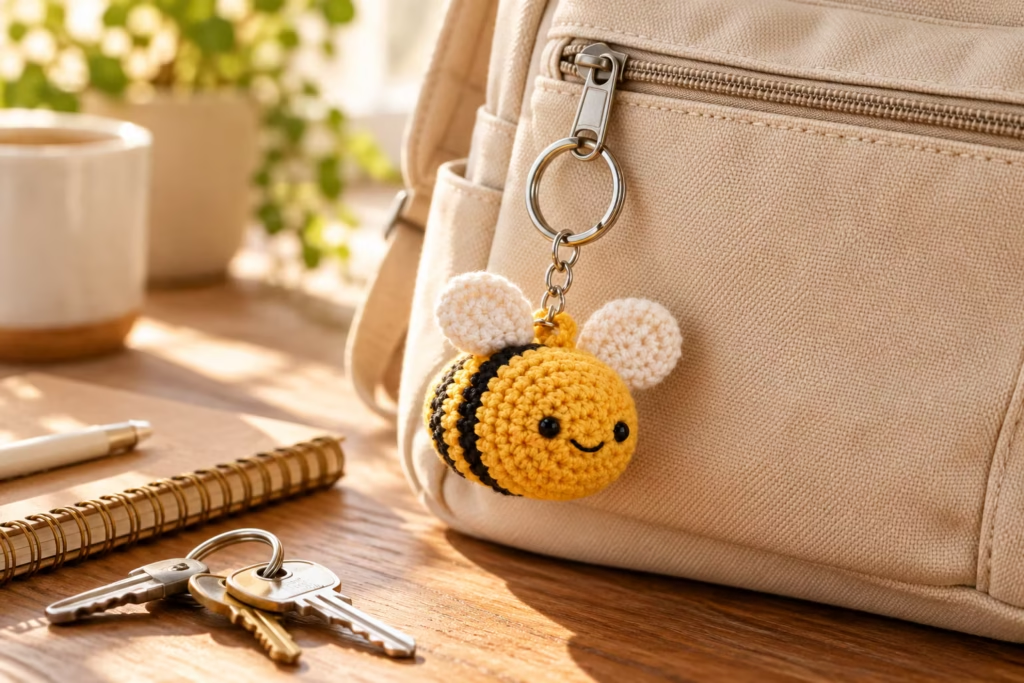
You now have a complete miniature bee crochet keychain pattern, from the first magic ring to the final reinforced attachment. Before attaching it to your bag or keys, confirm the stitches are secure, the wings are balanced, and the ring is properly installed.
Save this tutorial so you can revisit the stitch chart and make additional bees in your favorite colors. Once you feel comfortable with the shaping, try a strawberry, mushroom, or butterfly charm to develop your crochet skills and build a collection of handmade accessories.
A small finished project offers a useful opportunity to practice precise stitching, thoughtful assembly, and the finishing details that make handmade crochet look polished.
Pin “Crochet Keychain Tutorial: Make a Cute Mini Bee Bag Charm” so you can find it when the yarn arrives.
Get the next free pattern first
One email a week. New patterns, no noise.
Yarn weights and hook sizes in this guide follow the Craft Yarn Council standards.
Keep going: In Treble Afghan Square Pattern by Julie Yeager: Complete Crochet Guide · How to Crochet Moss Stitch or Linen Stitch: Complete Beginner Guide · Crochet Phone Charm Tutorial: Make a Cute Mini Flower Charm





