
Crochet Granny Square Crop Top Patterns You Need to Try 🧶
These crochet granny square crop top patterns you need to try include eight wearable design ideas and a complete beginner-friendly construction tutorial.

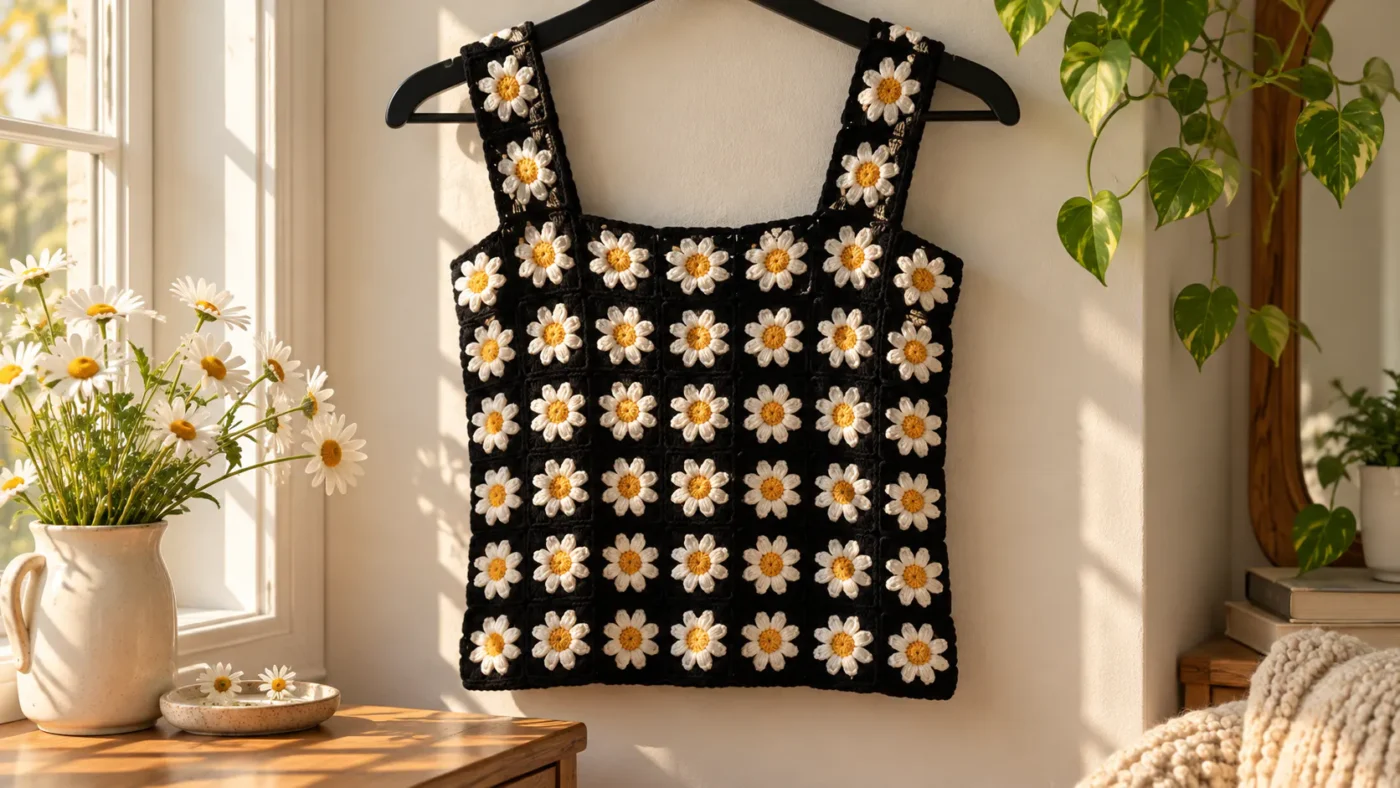
These crochet granny square crop top patterns you need to try include eight wearable design ideas and a complete beginner-friendly construction tutorial. You’ll learn how to crochet consistent squares, calculate your size, assemble a flattering top, and finish the edges neatly. The best part? Once you understand the basic construction, you can experiment with completely different styles without learning an entirely new pattern.
Project Overview
This tutorial focuses on a modular crop top made with classic three-double-crochet granny squares. Rather than relying on a fixed clothing size, the pattern uses your actual square measurements and desired garment dimensions.
| Project Detail | Description |
|---|---|
| Skill level | Confident beginner |
| Main technique | Granny squares joined into garment panels |
| Crochet terminology | US terms |
| Recommended yarn | DK or light worsted cotton blend |
| Hook | Size appropriate for yarn and desired fabric |
| Main stitches | Chain, slip stitch, double crochet |
| Construction | Front panel, back panel, shoulder straps |
| Fit | Adjustable, with optional side openings |
| Estimated time | Varies by size, square count, and experience |
| Finished size | Calculated from your measurements |
Pattern note: The stitch instructions below describe a logically checked construction method, not a physically tested garment sample. Make a gauge square and verify the fit before completing your top.
8 Granny Square Crop Top Patterns to Try
The following styles are original design concepts built around familiar granny square techniques. The complete tutorial later in this article teaches the classic panel construction you can adapt to several of them.
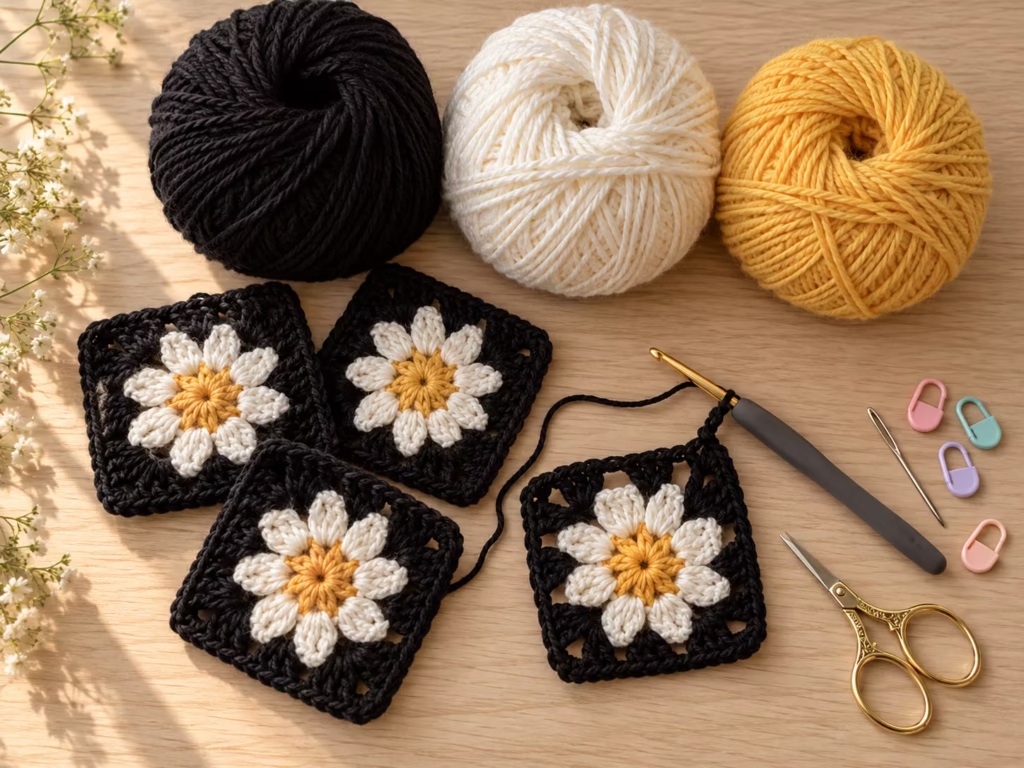
1. Classic Retro Granny Square Crop Top
Think cheerful orange, pink, mustard, and cream squares arranged in a playful patchwork.
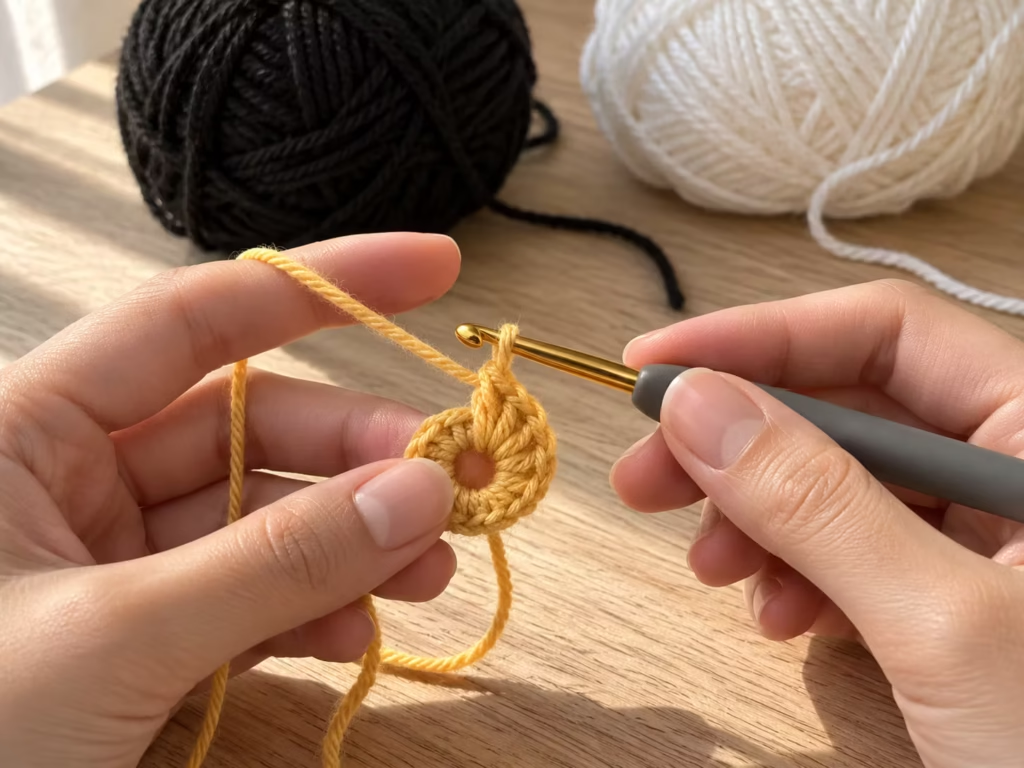
This style uses traditional granny squares for the front and back, with solid-colored edging that visually connects the different motifs.
Best for: Beginners who want an approachable first garment.
Try repeating two or three color combinations rather than making every square completely different. This gives the finished top a more intentional appearance.
2. Minimalist Cream Granny Square Tank
A single neutral color makes the geometric granny square structure the main feature. Use cream, oatmeal, or soft beige cotton yarn and finish the neckline with a smooth border.
Best for: Everyday layering and understated summer outfits.
Choose a square layout with fewer open spaces if you want more coverage. A matching camisole underneath is another practical option.
3. Sunflower Granny Square Crop Top
Sunflower motifs add a bold floral center to each square.
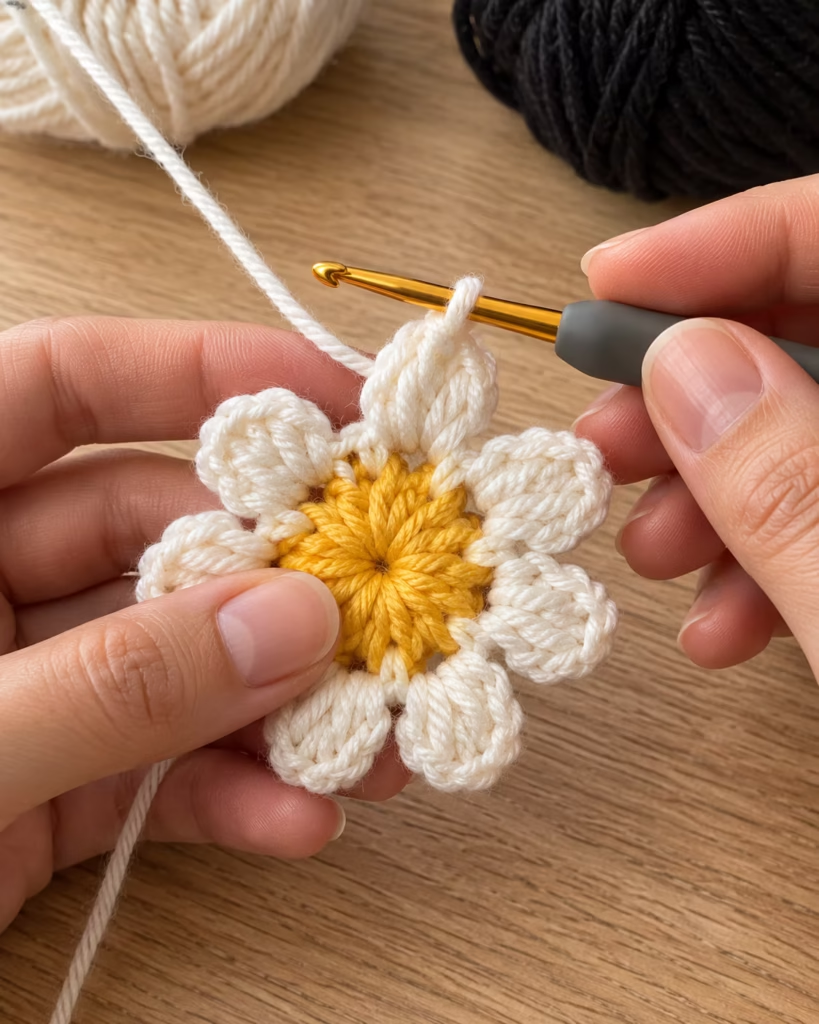
Golden petals, deep brown centers, and leafy green outer rounds create a botanical effect.
Best for: Garden-inspired outfits and statement crochet projects.
Unlike a traditional granny square, a sunflower square needs its own verified motif instructions. Make every floral square the same finished size before joining.
4. Boho Fringe Granny Square Top
A simple granny square crop becomes a dramatic festival piece with fringe along the lower edge.
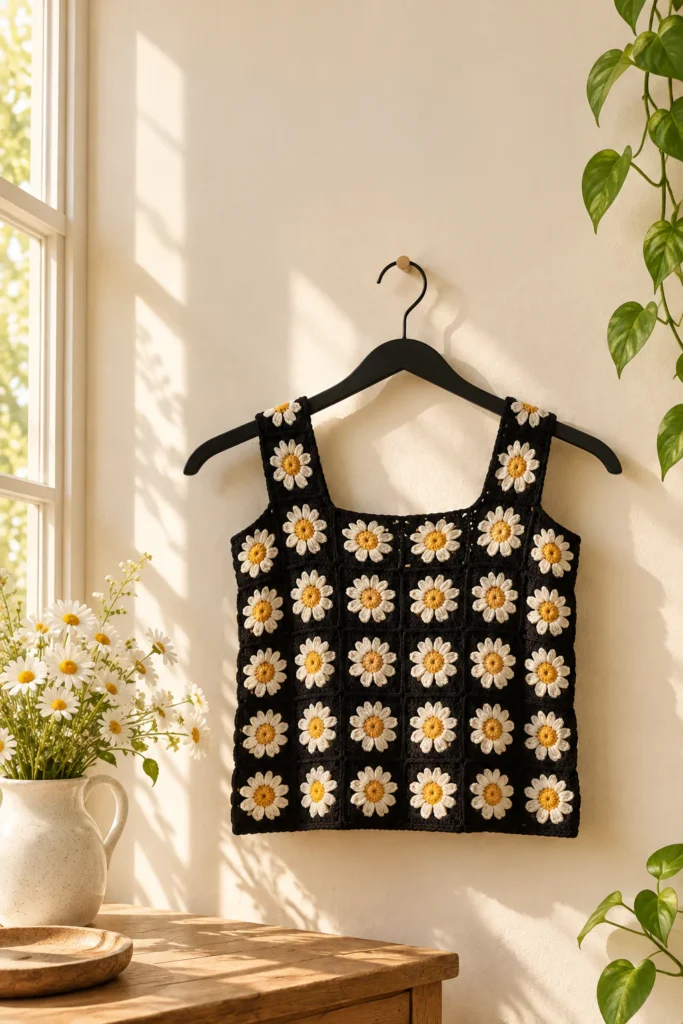
Earthy terracotta, rust, olive, and ivory make an especially cohesive palette.
Best for: Decorative outfits and experienced beginners interested in finishing details.
Cut fringe strands consistently, attach them after the main garment is complete, and trim them only after the top has been hung briefly so the strands can settle.
5. Pastel Patchwork Square Crop Top
Combine lavender, mint, pale yellow, peach, and powder blue in an irregular but balanced arrangement. The key is controlling the distribution of color.
Best for: Soft, playful styling.
Lay out all the completed squares before sewing. Avoid putting every bright center in one area or the finished top may look visually unbalanced.
6. Halter-Neck Granny Square Crop Top
A halter design uses a shaped front panel and straps that secure at the neck.
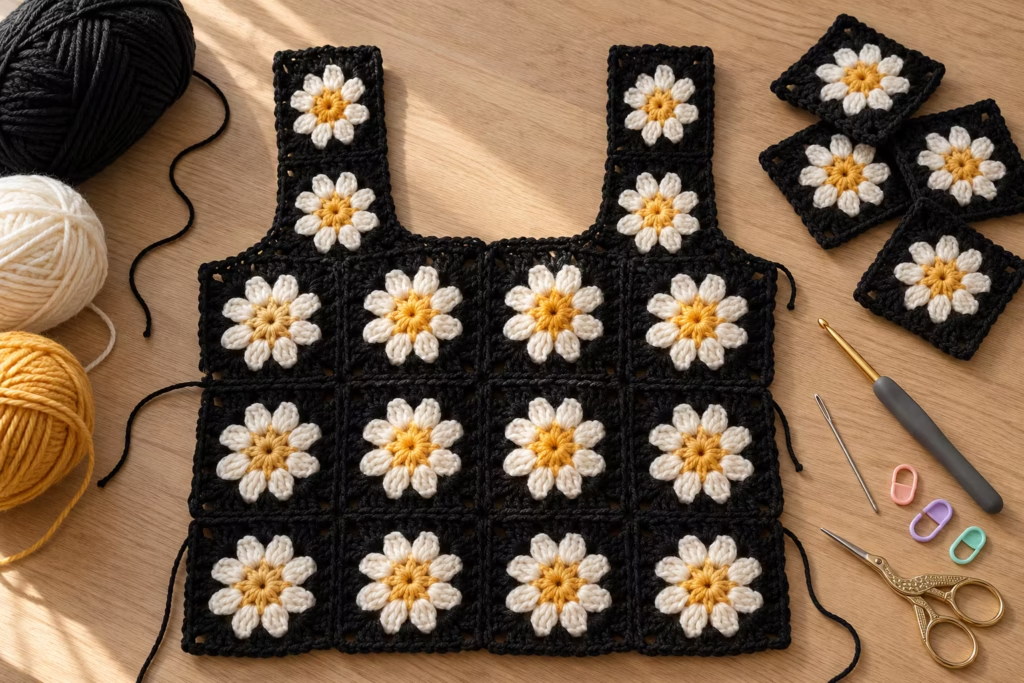
It can showcase a striking central granny square motif.
Best for: Crocheters comfortable adjusting garment construction.
A halter is not assembled exactly like a standard shoulder-strap tank. The upper-edge shape and neck ties need to be designed for secure coverage, especially if the back is open.
7. Solid-and-Lace Granny Square Crop Top
Alternate traditional open granny squares with denser motifs for a mixture of texture and coverage.
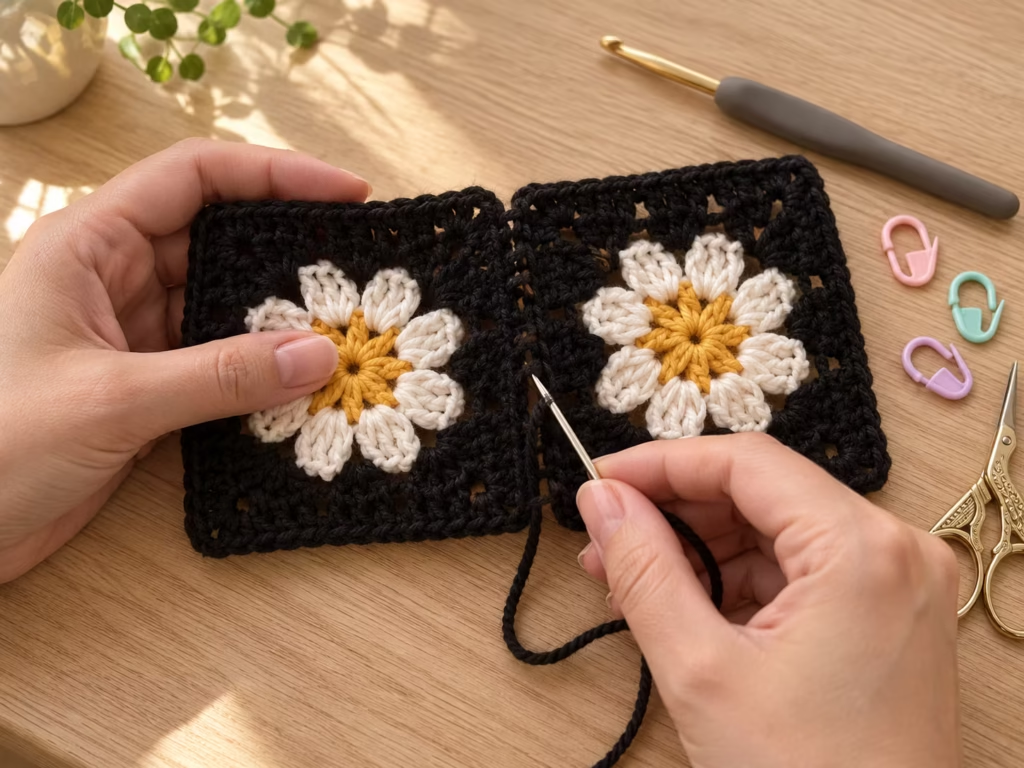
This style looks especially attractive in a coordinated two-color palette.
Best for: Intermediate crocheters who enjoy experimenting with stitch structures.
Different motifs may have different gauges. Match their blocked dimensions before assembly rather than assuming an identical round count will produce identical squares.
8. Longline Granny Square Crop Top
Extend the main body by adding another row of squares.
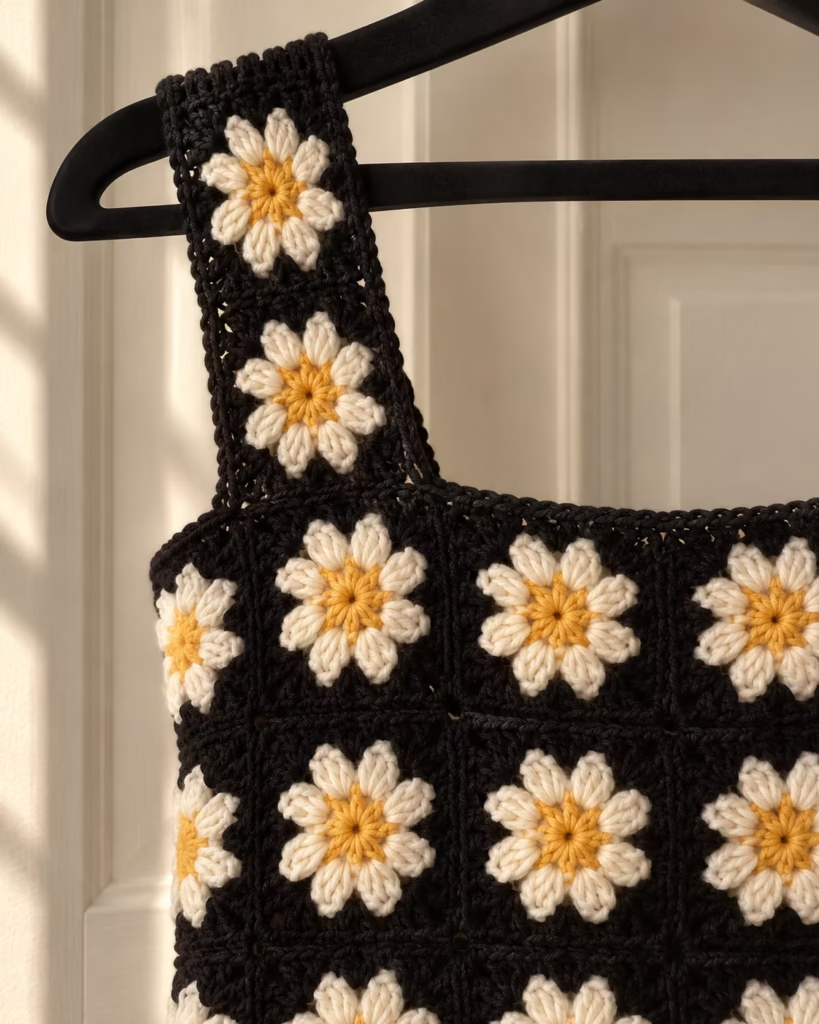
The result sits closer to the natural waist while maintaining the characteristic patchwork appearance.
Best for: Anyone who prefers additional torso coverage.
Before making the extra row, compare your target length with the height of one blocked square. If one full square is too much, a partial row or extended edging may be more effective.
You do not need an elaborate tool collection for this project. Consistent yarn, an appropriate hook, and accurate measurements matter much more.
| Item | Quantity or Specification | Purpose | Alternative |
|---|---|---|---|
| Yarn | Enough matching-weight yarn for your calculated square count | Main garment fabric | Another yarn of similar weight after gauge testing |
| Crochet hook | Suitable for your yarn and fabric density | Forming stitches | Different hook size after swatching |
| Measuring tape | Flexible, marked in inches and centimeters | Body and square measurements | Sewing tape |
| Tapestry needle | Blunt tip suitable for yarn | Joining and hiding ends | Crochet hook for certain joins |
| Stitch markers | Several removable markers | Identifying corners and joins | Contrasting scrap yarn |
| Scissors | Sharp craft scissors | Cutting yarn | Thread snips |
| Notebook | One page for measurements | Recording gauge and layout | Notes app |
Avoid combining substantially different yarn weights unless you are willing to adjust every motif to match.
Essential Stitches and Preparation
Before beginning your crop top, make sure you understand these US crochet abbreviations.
| Abbreviation | Meaning |
|---|---|
| ch | Chain |
| sl st | Slip stitch |
| dc | Double crochet |
| st | Stitch |
| sp | Space |
| RS | Right side |
| WS | Wrong side |
A granny cluster consists of three double crochet stitches worked into the same chain space. Traditional granny squares usually build outward from a central ring, with clusters separated by chain spaces.
For this tutorial, each corner contains:
3 dc, ch 2, 3 dc
That chain-two space allows the next round to turn the corner while maintaining the square shape.
Understanding Gauge
Gauge describes the finished dimensions of your stitches.
For a modular garment, the most useful measurement is the width and height of one completed, blocked granny square. For example, if your square measures 4 inches across, a row of four squares has a nominal width of 16 inches before any joining-related changes.
This is a calculation example, not a guaranteed finished measurement. Create one square, block it, and measure it before committing to the full garment.
Crochet Granny Square Crop Top Patterns You Need to Try: Full Tutorial
This complete construction method creates a simple cropped tank using matching granny squares.
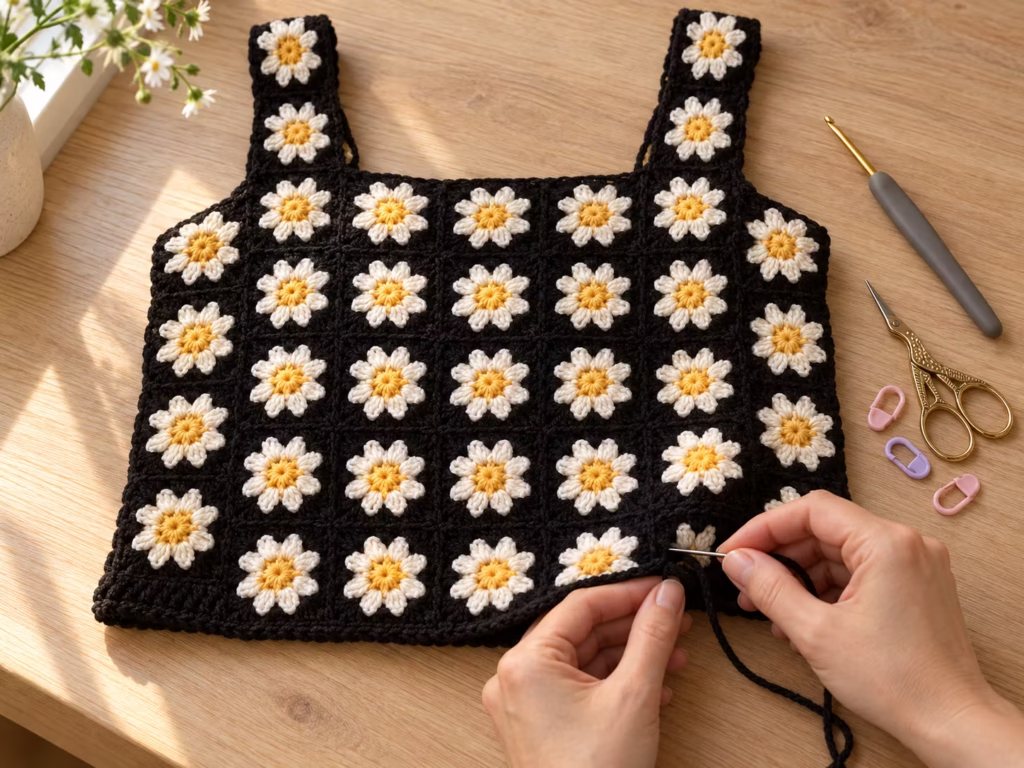
The body consists of two rectangular panels joined at the sides. Separate crocheted straps connect the upper front and back edges.
Step 1: Make the Center Ring
Begin with your chosen hook and yarn.
- Make a slip knot.
- Chain 4.
- Slip stitch into the first chain to form a ring.
- Chain 3. This counts as your first double crochet.
- Work 2 dc into the ring.
- Chain 2.
- Work 3 dc into the ring, then chain 2.
- Repeat the previous step twice more.
- Slip stitch into the top of the beginning chain-3.
You should now have four groups of three double crochet stitches and four chain-two corner spaces.
Visual check: The center should resemble a small square with four distinct corners.
Common error: Making only three corner spaces produces a triangular center.
Solution: Count four complete three-dc clusters and four chain-two spaces before closing the round.
Expert tip: The center ring can be made with a magic ring instead, but it must be tightened securely and the tail woven in carefully to prevent loosening.
Step 2: Crochet the Second Round
Start in the corner space where you ended the previous round.
- Chain 3, counting as the first dc.
- Work 2 dc into the same corner.
- Chain 2.
- Work 3 dc into the same corner.
- Chain 1.
- In each remaining corner space, work (3 dc, ch 2, 3 dc), followed by ch 1.
- Slip stitch into the top of the beginning chain-3.
Every old corner becomes a larger corner containing two three-dc clusters.
Visual check: Your square should have eight three-dc clusters, grouped into four pairs around the corners.
Common error: Working the entire corner into individual stitches instead of the corner chain space.
Solution: Insert your hook under the corner chain arch, not through the tops of the nearby double crochet stitches.
Expert tip: Keep corner chains relaxed enough to accommodate the next round without stretching.
Step 3: Expand the Granny Square
From round three onward, the square grows using the same repeat.
At the start of round three, work the first half of the corner:
- Ch 3, 2 dc, ch 2, 3 dc in the starting corner space.
- Ch 1.
- Work 3 dc in the side chain-one space.
- Ch 1.
- Work (3 dc, ch 2, 3 dc) in the next corner.
- Continue around all four sides.
- Slip stitch to close the round.
For later rounds, put one three-dc cluster in every side chain-one space, with ch 1 between clusters. Continue to place (3 dc, ch 2, 3 dc) in each corner.
Visual check: Every added round creates four new side clusters overall, one per side, while preserving four corners.
Common error: Skipping a side chain space causes the edges to pull inward.
Solution: Count the spaces between corners before beginning the next round.
Expert tip: Check the diagonal shape every couple of rounds. Twisting or cupping may indicate uneven tension, missed spaces, or a hook that is too small.
Granny Square Stitch-Count Check
| Completed Round | Total 3-dc Clusters | Corner Spaces |
|---|---|---|
| 1 | 4 | 4 |
| 2 | 8 | 4 |
| 3 | 12 | 4 |
| 4 | 16 | 4 |
| 5 | 20 | 4 |
This count applies specifically to the traditional granny square described here. Make additional rounds until the square reaches your chosen dimensions. Finish every garment square with the same number of rounds unless you have deliberately adjusted your gauge.
Step 4: Measure and Block Your Sample
Place the finished square on a flat surface and measure its width. If the edges are uneven, lightly block the square according to the yarn care instructions. Let it dry completely, then measure again.
Record:
- Finished width
- Finished height
- Yarn and hook used
- Number of rounds
- Overall fabric feel
Visual check: Opposite sides should be reasonably parallel, and the square should lie flat without significant curling.
Common error: Measuring a stretched square gives an inaccurate garment plan.
Solution: Measure the relaxed, fully dry square without pulling the corners.
Expert tip: Work a second sample if your stitch tension varies noticeably. Your first square may not reflect the tension you maintain throughout the project.
Step 5: Calculate and Crochet Your Body Panels
Determine the finished circumference you want at the bust or fullest area the top must pass over. Include your desired ease, which is the difference between your body measurement and the garment measurement. A relaxed top generally needs some extra room, but the exact amount depends on the fabric’s stretch, the intended silhouette, and the support provided by any closures.
Use this calculation:
Target panel width = desired finished circumference ÷ 2
Then:
Approximate squares per row = target panel width ÷ blocked square width
For example:
- Desired finished circumference: 36 inches
- Target panel width: 18 inches
- Blocked square width: 4.5 inches
- Squares per row: 18 ÷ 4.5 = 4
If your desired body length is approximately 13.5 inches, three rows of 4.5-inch squares give a nominal panel height of 13.5 inches.
This means:
- 4 columns × 3 rows = 12 squares per panel
- Two panels = 24 squares
These figures are illustrative. Joining methods and borders can change the final measurements.
Visual check: Both garment panels should have identical square counts and approximately matching dimensions.
Common error: Choosing your square count from a clothing size label rather than finished dimensions.
Solution: Base the layout on actual measurements and test the panels against your body before assembly.
Expert tip: If the calculated width falls between two square counts, consider adding narrow side bands instead of accepting a poor fit.
Step 6: Arrange Your Squares Before Joining
Lay the squares on a large flat surface. Decide where each color or motif belongs.
For a balanced layout:
- Spread the strongest colors across both panels.
- Distribute bright centers rather than clustering them together.
- Keep the squares facing the same direction.
- Photograph the layout for reference.
- Mark the upper-left square of each panel.
For a beginner-friendly join, use a whipstitch seam. Place two squares with their right sides facing each other. Thread a tapestry needle with matching yarn and sew through corresponding edge loops, working from corner to corner. Avoid pulling so tightly that the seam gathers.
Visual check: The squares should sit edge to edge without overlapping or rippling.
Common error: Joining squares with different blocked dimensions causes distorted panel edges.
Solution: Correct your inconsistent squares before sewing, or remake any that differ substantially.
Expert tip: Join squares into horizontal rows first, then sew the rows together. This makes alignment easier to control.
Step 7: Assemble the Body and Add Straps
Place the completed front and back panels with their right sides together. Align the side edges and stitch upward from the hem. Stop wherever you want the armhole opening to begin.
Repeat on the other side, then turn the garment right side out. Try on the body before adding straps.
Making Simple Crochet Straps
- Attach yarn at your chosen front strap position.
- Chain to the required strap length, checking the route over your shoulder to the back attachment point.
- Work a row of single crochet into the chain, beginning in the second chain from the hook.
- Turn and add further single-crochet rows until the strap reaches the desired width.
- Sew the free end securely to the back panel.
- Repeat for the second strap.
Use identical strap placement on both sides.
Visual check: The neckline should sit comfortably without pulling, and the straps should lie flat across the shoulders.
Common error: Long, narrow straps may stretch during wear.
Solution: Shorten them during fitting or make them wider with additional rows.
Expert tip: Straps made with a firmer stitch tension generally hold their shape better than loose chains alone.
Step 8: Finish the Neckline, Armholes, and Hem
A simple border gives the crop top a cleaner outline and helps stabilize the joined squares. Work a round of single crochet along each opening.
Distribute stitches evenly without forcing the same number into every section. Granny square edges contain different stitch structures, so the correct spacing should follow the fabric rather than an arbitrary stitch ratio.
At corners, adjust the stitch placement to keep the edging flat. Complete the neckline, armholes, and lower hem. Weave loose yarn ends through several stitches on the wrong side, changing direction to help secure them.
Visual check: The edges should lie flat, and there should be no visible gaps at joins or strap attachment points.
Common error: Too many edging stitches create waves; too few make the border pucker.
Solution: Remove the problem section and redistribute the stitches.
Expert tip: Perform a final fitting before trimming short any remaining yarn tails.
Granny Square Construction Diagram
The following layout illustrates a rectangular two-panel crop top. It is a construction diagram, not a scaled garment template.
FRONT PANEL BACK PANEL
+—-+—-+—-+—-+ +—-+—-+—-+—-+
| A1 | A2 | A3 | A4 | B1 | B2 | B3 | B4 |
|---|
+—-+—-+—-+—-+ +—-+—-+—-+—-+
| A5 | A6 | A7 | A8 | B5 | B6 | B7 | B8 |
|---|
+—-+—-+—-+—-+ +—-+—-+—-+—-+
| A9 | A10 | A11 | A12 | B9 | B10 | B11 | B12 |
|---|
+—-+—-+—-+—-+ +—-+—-+—-+—-+
A = front granny squares B = back granny squares
ASSEMBLY ORDER
- Crochet individual squares
| v
- Join squares into rows
| v
- Join rows into panels
| v
- Seam lower side edges
| v
- Add and fit shoulder straps
| v
- Crochet finishing borders
The upper edge of each rectangular panel remains straight. Shoulder straps are positioned separately, leaving the neckline open between them. This basic layout works best as a tank-style top. A fitted sweetheart neckline, angled halter, or structured bust requires a different shaping plan.
Sizing and Fit Guide
<!– gap –>
Measure for the Top You Actually Want
A crochet top can have the correct bust circumference yet still feel uncomfortable because the armholes, neckline, or shoulder straps are incorrectly positioned.
Take these measurements before beginning:
| Measurement | How to Measure | Why It Matters |
|---|---|---|
| Bust | Around the fullest part of the bust | Determines body circumference |
| Underbust | Around the rib cage below the bust | Helps assess lower-body fit |
| Crop length | From desired upper-edge position to hem | Determines square rows |
| Armhole depth | From the shoulder area to the intended underarm opening | Controls movement |
| Strap route | From front attachment over shoulder to back attachment | Determines strap length |
Understanding Ease
Positive ease means the garment is larger than the body measurement. Negative ease means the garment is smaller and relies on fabric stretch.
Open granny square crochet fabric may stretch differently from knitted jersey fabric. It can also change shape under the weight of the finished garment. For a first project, a slightly relaxed fit is usually more forgiving than a close-fitting, negative-ease design.
What If Your Square Size Doesn’t Divide Evenly?
Suppose you need a panel approximately 17 inches wide, but your squares measure 4 inches. Four squares create approximately 16 inches before joining.
You have several options:
- Add a narrow crocheted side band.
- Increase the number of rounds and remeasure the squares.
- Adjust the hook size and make a new gauge sample.
- Choose a different motif size.
Do not rely on aggressive blocking to gain significant permanent width.
Beginner-to-Pro Techniques
Once you can make a consistent classic granny square, small construction changes can make your finished tops more polished.
| Level | Technique | Main Benefit |
|---|---|---|
| Beginner | Traditional granny squares with sewn seams | Simple construction and easy repairs |
| Intermediate | Join-as-you-go squares | Fewer separate joining steps |
| Intermediate | Color-planned motif placement | More cohesive finished design |
| Advanced | Custom side bands and neckline shaping | More precise garment fit |
| Advanced | Reinforced straps and controlled edging | Better durability |
Beginner: Perfect the Basic Square
Focus on four corners, consistent cluster placement, and a stable gauge. Matching squares are more important than elaborate stitch patterns.
Intermediate: Learn Join-as-You-Go
Join-as-you-go techniques connect motifs while working their final rounds. This can create a visually continuous pattern and reduce finishing work. However, the stitch sequence depends on the chosen joining method. Follow a verified join-as-you-go technique rather than substituting it directly for the sewn seams above.
Advanced: Build a Custom Garment Shape
For a more fitted crop top, treat your granny square panel as the starting structure. Add narrower crocheted sections along the sides, neckline, or lower edge. Shape these areas with controlled increases, decreases, or short rows based on a fitting sample. This approach offers more flexibility than trying to force whole squares into every section.
Troubleshooting Common Problems
Even attractive granny squares can create an uncomfortable garment if construction issues are ignored.
| Symptom | Likely Cause | Practical Fix | Prevention |
|---|---|---|---|
| Squares curl upward | Tight tension or insufficient corner space | Check stitch counts and remake if necessary | Use relaxed, consistent corner chains |
| Square edges ripple | Loose tension or excessive stitches | Review spaces and hook size | Count clusters after each round |
| Panels differ in size | Changing gauge | Reblock and compare; remake large outliers | Work with consistent yarn and tension |
| Side seams pucker | Seams pulled too tightly | Remove and resew with relaxed tension | Align stitches before joining |
| Armholes feel tight | Side seams extend too high | Open more of the upper side seam | Try on before securing seams |
| Neckline stretches | Loose border or heavy yarn | Replace edging with firmer stitches | Test neckline structure before finishing |
| Straps fall off shoulders | Poor placement or excessive length | Move attachment points or shorten straps | Fit both straps before final sewing |
| Hem looks uneven | Mismatched squares or join distortion | Correct the affected motifs or edging | Block and measure before assembly |
When Should You Remake a Square?
Minor variation can often be corrected by blocking. A missing granny cluster, incorrect corner structure, or noticeably smaller square usually deserves a proper repair. For garment pieces, consistent construction is worth the extra effort because one distorted motif can affect several adjacent seams.
Yarn and Construction Comparisons
Choosing the right materials changes the feel of your finished garment.
| Option | Best For | Advantages | Limitations | Recommendation |
|---|---|---|---|---|
| Cotton yarn | Warm-weather tops | Breathable, defined stitches | Can become heavy | Choose for structured summer tops |
| Cotton-acrylic blend | Everyday garments | Often lighter and more resilient | Performance varies by blend | Useful for a comfortable first garment |
| Acrylic yarn | Colorful practice pieces | Many color options | May feel warmer than cotton | Good for learning and sampling |
| Traditional granny squares | Classic openwork | Familiar and customizable | Larger openings | Ideal for layering |
| Solid granny squares | More coverage | Denser fabric | Uses more yarn | Choose when opacity matters |
| Sewn joining | Precise motif placement | Easy to adjust and repair | Additional finishing | Best for first-time garment makers |
| Join-as-you-go | Efficient motif assembly | Integrates joining with crocheting | Harder to rearrange | Try after mastering separate squares |
Which Style Should You Make First?
For your very first granny square crop top, start with a straightforward two-panel tank made from classic motifs. If you want more coverage, use a denser square design after verifying its instructions and gauge. If your priority is a decorative statement piece, start with a simple fitted base and add floral squares, coordinated colors, or fringe after the essential construction is secure.
Professional Finishing and Care
<!– gap –>
Strengthen Areas That Carry Weight
The highest-stress locations on a granny square crop top are often the strap attachments, upper side seams, and neckline. Check these areas before wearing. Use secure seams and weave yarn tails through multiple directions of the fabric.
For especially heavy cotton garments, consider a second reinforcing pass along strap attachment areas with matching yarn. Avoid reinforcing a seam so tightly that it loses all flexibility.
Block the Finished Garment
Blocking helps settle the stitches and can improve the alignment of your granny squares. Always follow the yarn manufacturer’s care instructions.
For suitable cotton yarn:
- Gently wet the garment.
- Remove excess water without twisting.
- Lay it flat on a clean towel.
- Arrange the squares and seams into their intended shape.
- Allow the garment to dry completely.
Do not hang a wet cotton crop top, since the weight of the water can encourage unwanted stretching.
Washing and Storage
Hand washing is a cautious choice for a delicate openwork garment, unless its yarn and construction are confirmed suitable for machine washing. Use mild detergent and cool water according to the yarn care label.
Lay flat to dry.
Store the crop top folded rather than hanging it for extended periods, especially when it contains heavy yarn or narrow straps.
Customization Ideas That Make Each Top Unique
<!– gap –>
Plan a Color Story Before Crocheting
A thoughtful palette can transform basic granny squares into a cohesive garment.
Try one of these combinations:
| Style | Suggested Colors | Visual Effect |
|---|---|---|
| Vintage sunset | Rust, mustard, cream, peach | Warm retro |
| Coastal neutral | Sand, ivory, pale blue | Relaxed and minimal |
| Cottage garden | Sage, lavender, blush | Soft floral |
| Moody autumn | Forest green, burgundy, chocolate | Rich seasonal |
| Modern contrast | Black, cream, cobalt | Graphic and bold |
For an October-inspired project, forest green and warm burgundy make a seasonal palette without turning the top into a costume.
Add Fringe Without Distorting the Hem
Fringe can pull an otherwise lightweight top downward. Before adding it across the entire hem, attach a few sample strands and check the effect on the fabric. Keep the fringe removable during experimentation if possible. Trim only when the garment is dry and resting naturally.
Turn Leftover Squares Into Accessories
A coordinated headband, small pouch, or bag charm can use extra motifs left over from the main project. This is especially useful when you make more squares than your final fit requires.
Final Quality Checklist
Before calling your granny square crop top finished, check the actual garment rather than relying only on measurements.
Construction Checks
- [ ] Every square contains the intended number of rounds.
- [ ] Corners and stitch clusters are complete.
- [ ] Front and back panels match the planned dimensions.
- [ ] Seams are secure and reasonably flexible.
- [ ] Shoulder straps have matching placement.
- [ ] Neckline and armhole edges lie flat.
- [ ] All yarn ends are securely woven in.
- [ ] The garment has been tried on after assembly.
- [ ] The final fabric is comfortable against the skin.
Acceptable Variation
Small differences in stitch tension and minor irregularities in handmade motifs are normal when they do not affect appearance, structural integrity, or comfort.
Correctable Mistakes
Slightly uneven borders, loose yarn tails, and minor seam puckering can usually be corrected without remaking the full top.
Problems That Require Reworking
A weak strap connection, incorrect garment circumference, major stitch-count error, or severely distorted panel should be corrected before regular wear.
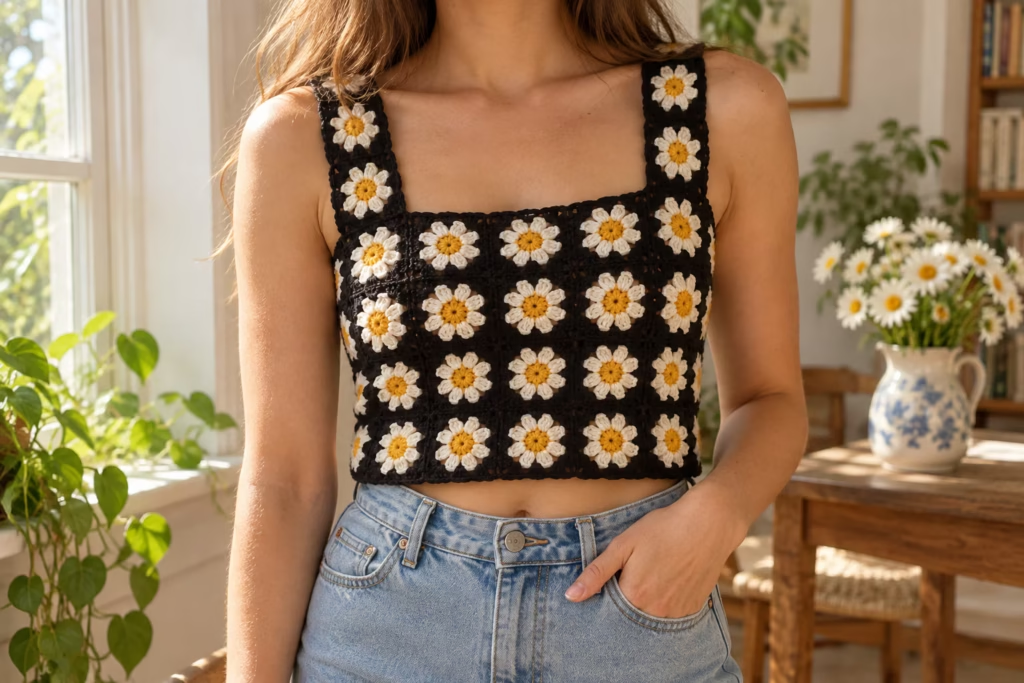
See How the Finished Top Should Fit
A successful granny square crop top should look intentional from the front, back, and sides. The motifs should align cleanly, the straps should remain in place, and the neckline should feel comfortable when you move.
Try reaching forward and lifting your arms gently during the final fitting. If the crop top shifts more than you want, examine the armhole depth, strap placement, and overall circumference.
Save These Crochet Granny Square Crop Top Ideas for Later
Keep a record of your yarn, hook size, square measurements, and final panel layout.
Those details make a second top much easier to create and allow you to repeat a successful fit with a new color palette.
Frequently asked questions
1. How many granny squares do I need for a crop top?
The number depends on your square dimensions, intended circumference, and garment length. For example, a layout containing four columns and three rows per panel requires 24 squares across the front and back. Measure a blocked sample square first, then divide your target panel dimensions by that measurement. Adjust for seams, borders, and fit.
2. What is the best yarn for a granny square crop top?
Cotton and cotton-blend yarns are practical options for warm-weather garments. Cotton produces clear stitch definition and breathable fabric, but larger pieces may feel heavy. A cotton-acrylic blend can offer a lighter feel depending on its composition. Choose a yarn with suitable care instructions and make a sample before starting.
3. Can beginners crochet a granny square crop top?
Yes. A rectangular granny square tank is a manageable first garment for someone who already understands basic chains, double crochet stitches, and slip stitches. Begin by practicing several identical squares. Once you can control the corners and gauge, the assembly process becomes much easier. Avoid complex neckline shaping on your first attempt.
4. How do I make a granny square crop top less see-through?
Choose a denser granny square motif, reduce oversized gaps by selecting a suitable hook and yarn combination, or wear a fitted layer underneath. A lining is another possibility, but it requires additional construction and careful consideration of fabric stretch. Traditional open granny squares are decorative openwork, so they should not be expected to provide opaque coverage.
5. How do I stop my granny square top from stretching?
Start with a stable yarn and avoid unusually loose stitch tension. Make secure seams, fit the straps carefully, and reinforce their attachment points when necessary. Blocking and washing should follow the yarn label. Store the finished garment folded, especially if it is made from heavier cotton yarn that may lengthen under its own weight.
6. Can I make a granny square crop top without sewing?
Yes, some join-as-you-go and crochet-joining methods reduce or eliminate sewn motif seams. However, you will still need to secure yarn ends and make reliable garment connections. Beginners often find separate squares easier to organize and adjust, while experienced crocheters may prefer joining motifs during their final rounds.
7. How do I make my granny square crop top longer?
The simplest approach is to add another horizontal row of squares to both body panels. Measure the additional length before committing because a full row may make the garment longer than intended. You can also extend the hem with crocheted bands or edging. Always check how the extra fabric weight affects the fit.
8. Are granny square crop tops suitable for fall?
Absolutely. In October, a granny square crop top can work as a layering piece over a fitted long-sleeve shirt or under a cardigan. Choose deeper seasonal colors such as burgundy, olive, chocolate, or cream. A denser motif or longer body can also make the design more practical for cooler weather.
Your Next Granny Square Project Starts Here
Start with one traditional granny square and turn it into a reliable gauge sample. Once you know its finished size, calculate your panel layout, crochet the required motifs, and join them into a crop top that fits your measurements.
For your first version, choose the classic two-panel tank construction. After checking the seams, neckline, straps, and finished fit, experiment with a pastel patchwork design, bold floral motifs, or an autumn-inspired palette.
Save this tutorial to your crochet inspiration board so you can return to the stitch counts, sizing formula, construction diagram, and troubleshooting guide whenever you need them.
A well-made granny square crop top is more than a collection of attractive motifs. It is a thoughtfully assembled garment where accurate sizing, consistent stitches, and careful finishing turn a simple crochet technique into something genuinely wearable.
Pin “Crochet Granny Square Crop Top Patterns You Need to Try 🧶” so you can find it when the yarn arrives.
Get the next free pattern first
One email a week. New patterns, no noise.
Yarn weights and hook sizes in this guide follow the Craft Yarn Council standards.
Keep going: Crochet Puppy: Cute Amigurumi Pattern and Easy Tips · Halloween Crochet: Easy Ghost, Pumpkin & Bat Patterns · Crochet Fingerless Gloves: Easy Ribbed Pattern for Beginners





