
Crochet Fingerless Gloves: Easy Ribbed Pattern for Beginners
You'll learn how to make a matching pair of fingerless gloves using two flat rectangles, customize the fit for different hand sizes, leave a comfortable…

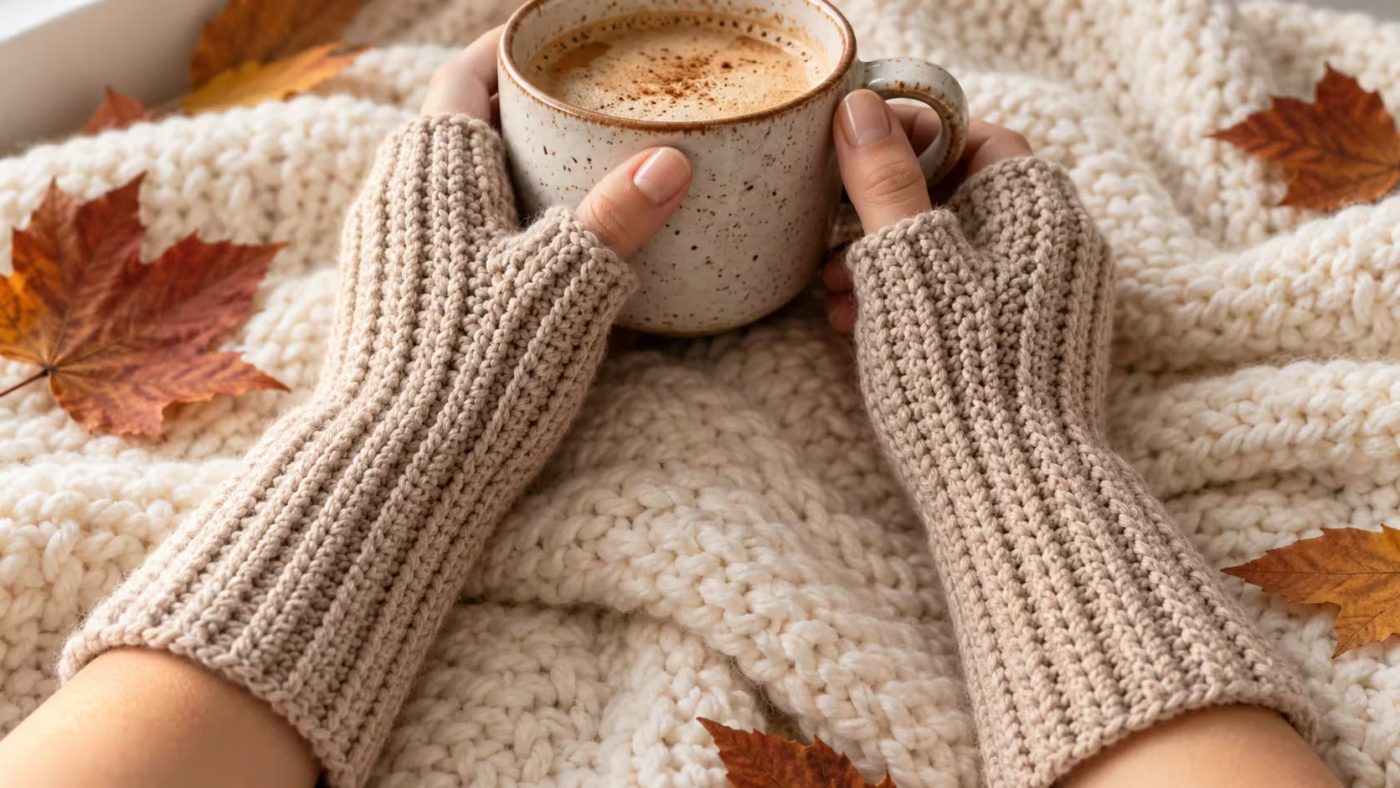
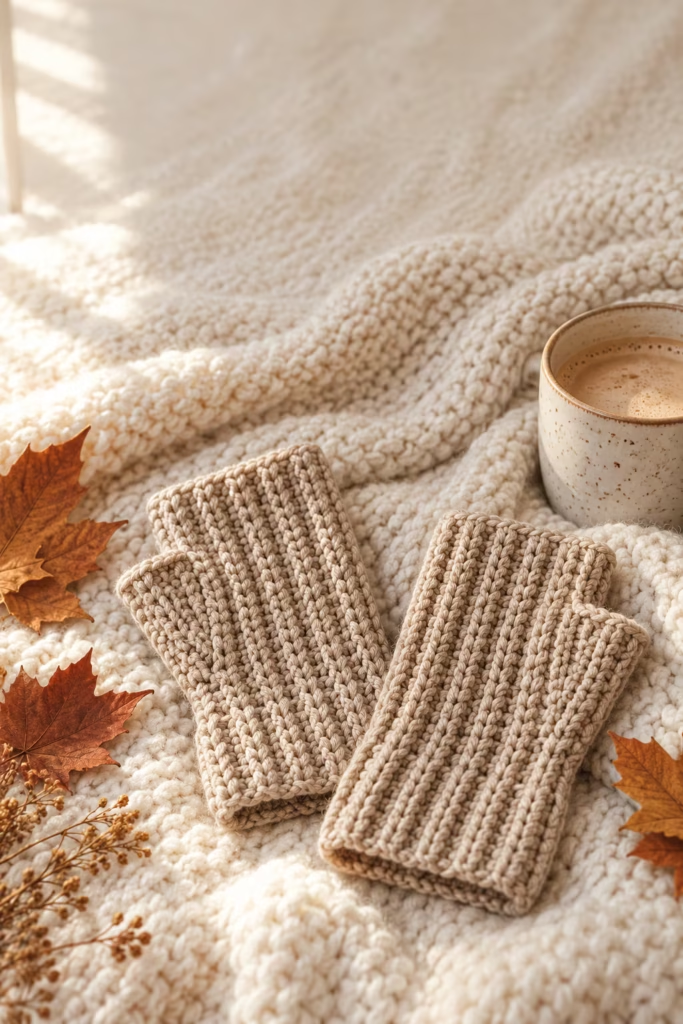
You’ll learn how to make a matching pair of fingerless gloves using two flat rectangles, customize the fit for different hand sizes, leave a comfortable thumb opening, and finish the seams neatly. No complicated increases, decreases, or working in the round are required.
Crochet Fingerless Gloves: Project Overview
These ribbed fingerless gloves are constructed from two matching rectangles. Each rectangle is folded into a tube, and its long edges are joined while leaving an opening for the thumb.
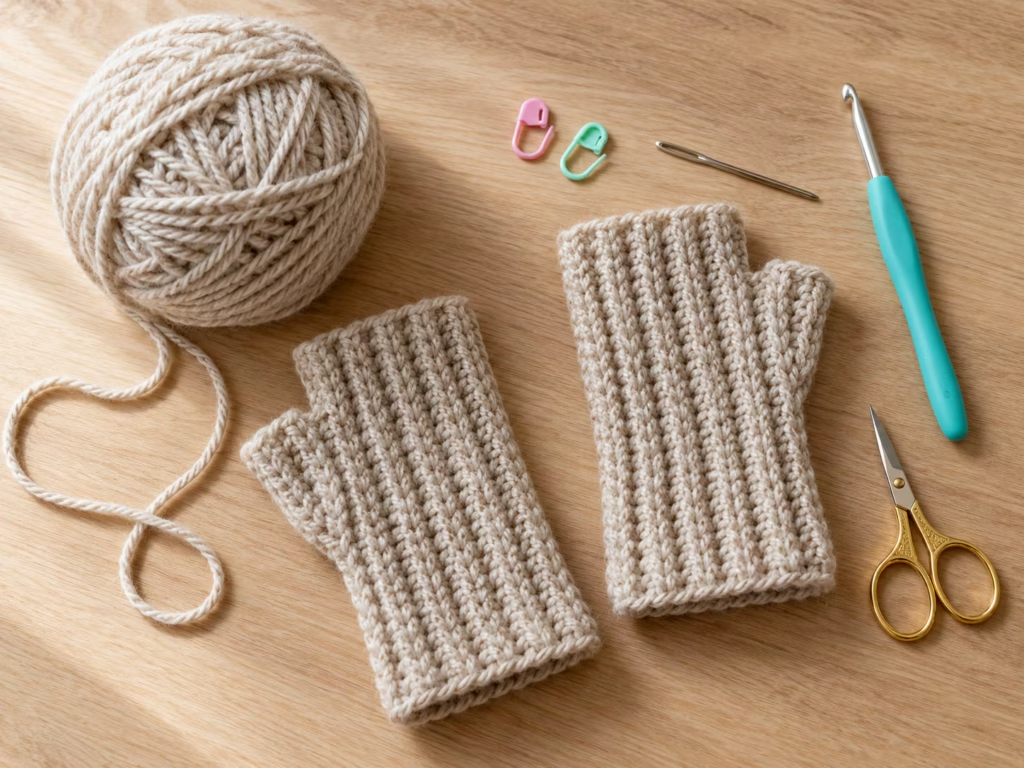
This simple construction makes the pattern approachable for beginners and easy to customize without calculating complicated shaping.
| Project Detail | Description |
|---|---|
| Skill level | Confident beginner |
| Crochet terminology | US terms |
| Main stitch | Single crochet through the back loop |
| Construction | Two flat rectangles with seamed sides |
| Yarn | Worsted weight, category 4 |
| Suggested hook | 5.0 mm (H/8), adjusted for gauge |
| Finished pieces | Two fingerless gloves |
| Fit | Adjustable to your measurements |
| Shaping | No increases or decreases |
| Most important skill | Consistent stitch count and even seaming |
The design works especially well for fall accessories, handmade gifts, and coordinating winter sets. Unlike fitted gloves with individual fingers, this pattern offers flexibility because the hand circumference, wrist-to-knuckle length, and thumb opening can be adjusted independently.
Choose a yarn that feels comfortable against your skin. A smooth, medium-weight yarn makes the stitches easy to see and helps beginners maintain even tension.
| Item | Quantity or Specification | Purpose | Alternative |
|---|---|---|---|
| Worsted-weight yarn | Enough for two measured rectangles | Main fabric | Another yarn weight with adjusted gauge |
| Crochet hook | 5.0 mm starting point | Forms stitches | Different size to achieve desired fabric |
| Measuring tape | 1 | Checks hand and fabric measurements | Flexible ruler |
| Tapestry needle | 1 | Joins seams and hides ends | Blunt yarn needle |
| Scissors | 1 pair | Cuts yarn | Yarn snips |
| Stitch markers | 2–4 | Marks thumb-opening positions | Contrasting yarn |
A row counter can help you make both gloves identical. Blocking mats and rustproof pins are useful if your finished rectangles need gentle shaping. Avoid very fuzzy yarn for your first pair. Fuzzy fibers make it harder to identify the back loop and may complicate corrections.
How to Measure Your Hands
<!– gap –>
Proper measurements are the difference between a pair of gloves that looks attractive on a table and one that feels comfortable throughout the day. Before making your foundation chain, take three measurements.
Step 1 — 1. Measure Your Hand Circumference
Wrap a flexible measuring tape around the widest part of your palm, just below the knuckles and excluding your thumb. Keep the tape comfortably snug without compressing your hand. Record this as measurement A.
Step 2 — 2. Measure the Glove Length
Measure from the wrist position where you want the glove to end to the point below your fingers where you want the top edge to sit. Record this as measurement B. If you prefer a longer wrist cuff, extend the measurement down your wrist.
Step 3 — 3. Determine Your Thumb-Opening Position
Place a measuring tape along the outside edge of your hand, from the finger-side edge of the planned glove toward the wrist.
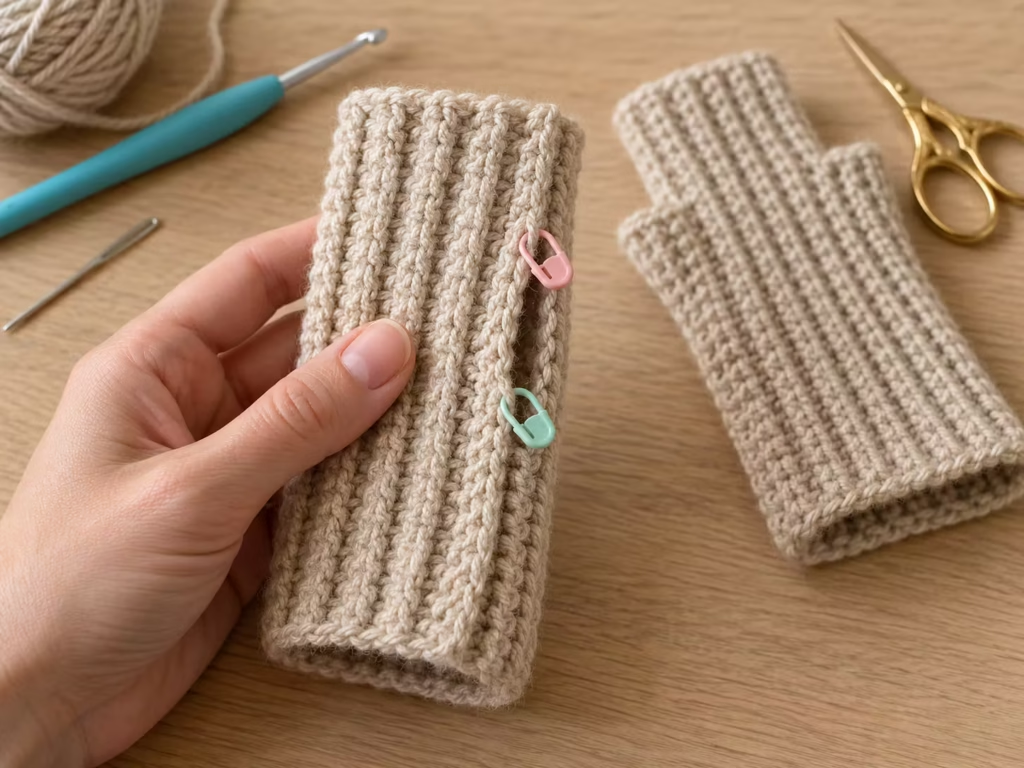
Identify where the thumb web begins and ends along that edge. Record these positions so you can reproduce them when seaming. For a first attempt, the opening should be checked against your hand rather than determined only from a standard size chart.
Step 4 — Understand the Direction of the Fabric
This pattern is crocheted side to side.
- The foundation chain determines the length from the wrist toward the fingers.
- The number of completed rows determines the circumference around the hand.
- The seam runs lengthwise along the side of the glove.
- A gap in the seam forms the thumb opening.
That relationship matters when making adjustments. If your glove is too short, add stitches to the foundation chain. If it is too tight around your hand, add rows.
Step 5 — Make a Gauge Swatch
Crochet a sample using the same yarn, hook, and back-loop single crochet pattern. Measure a central section without stretching it. Count how many stitches fit within a measured length and how many rows fit within a measured width.
For example, if your own swatch has 5 stitches per inch and your desired glove length is 7 inches:
5 × 7 = 35 stitches.
You would begin with 36 chains to create 35 single crochet stitches. This is a calculation example, not a verified gauge for the suggested hook and yarn.
For circumference, divide your desired finished circumference by the width of one row measured from your swatch. The ribbed fabric stretches across the rows, so aim for a comfortably snug fit without excessive tension.
Fit checkpoint: Your sample should stretch gently and return close to its original width when released. If it feels rigid, try a slightly larger hook or a more elastic yarn.
Essential Crochet Stitches
Only three fundamental skills are needed to create the main fabric.
Chain Stitch (ch)
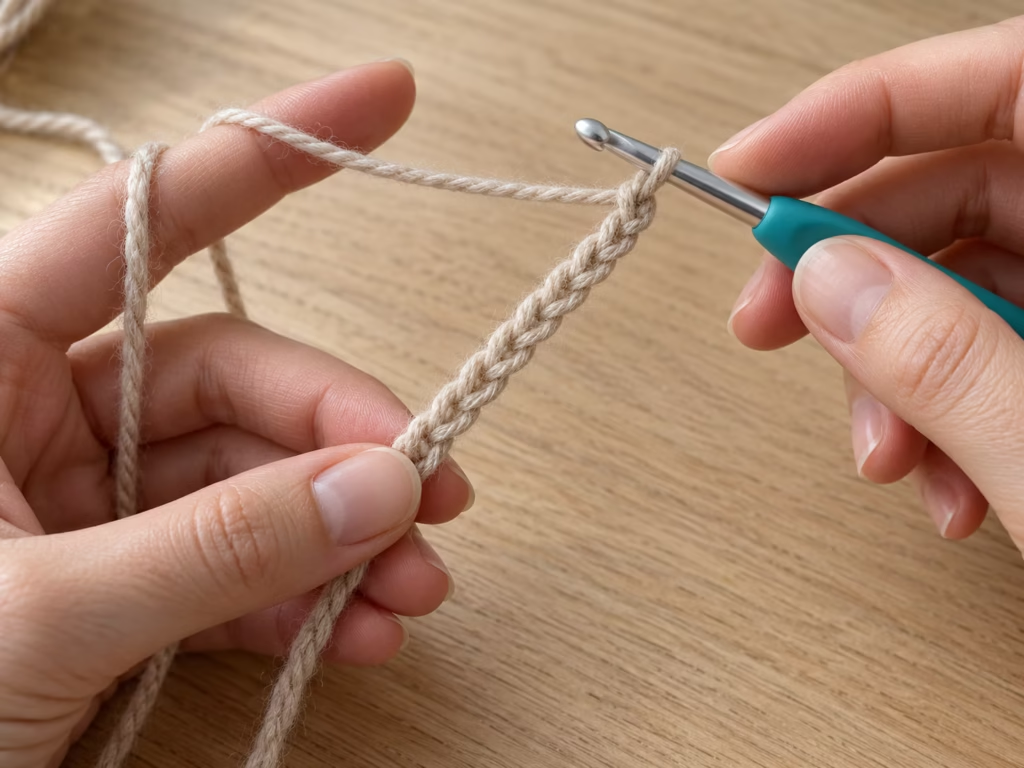
The chain stitch creates your foundation. Make a slip knot, yarn over, and pull the yarn through the loop on your hook. Repeat until you have enough chains for your desired glove length plus one turning chain.
Single Crochet (sc)
Insert your hook into the specified stitch, yarn over, and pull up a loop. You should have two loops on your hook.
Yarn over again and pull through both loops.
One single crochet is complete.
Back-Loop-Only Single Crochet (BLO sc)
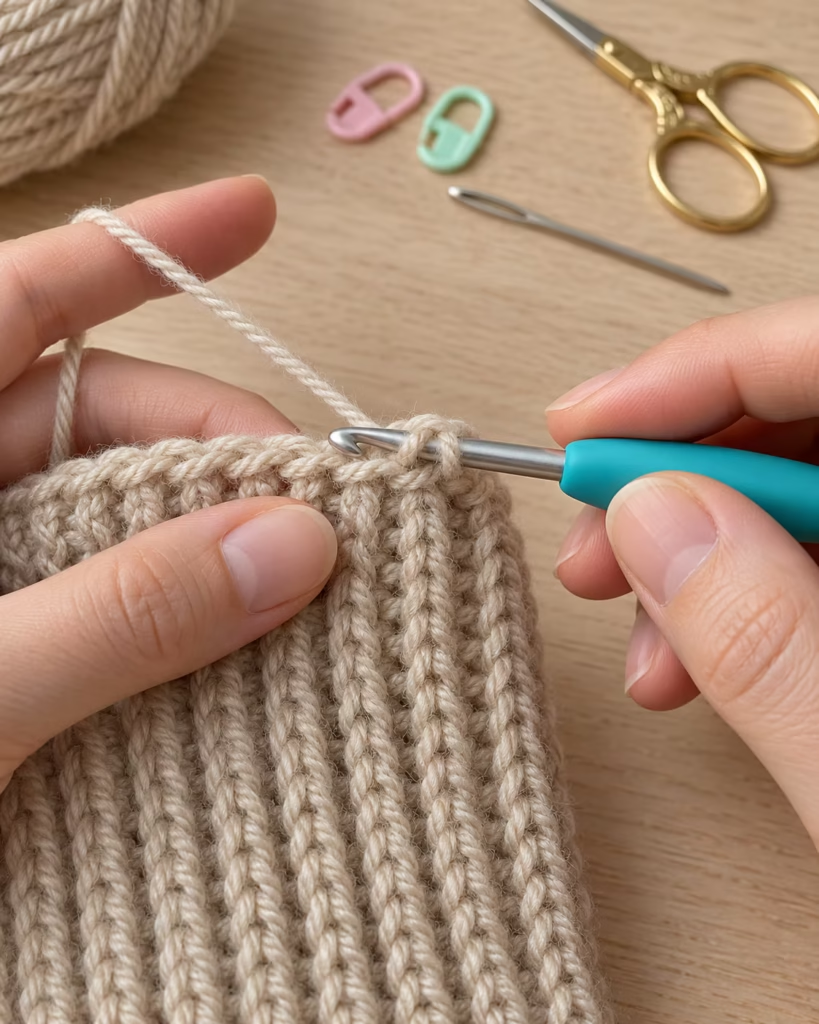
Look at the top of a standard crochet stitch. You will see a small V made from two loops. The loop nearest you is the front loop. The loop farther away is the back loop.
For this pattern, insert your hook beneath the back loop only. This leaves the unused front loops visible and creates raised ridges across the fabric.
Why Use Back-Loop Ribbing?
Traditional single crochet worked through both loops produces a relatively dense fabric. Working into the back loop creates hinged ridges that allow more movement across the rows.
This gives the glove a softer, more flexible fit without complicated stitch patterns. The fabric is still different from knitted ribbing, so it should be measured and tried on instead of assuming an identical amount of stretch.
Step-by-Step Fingerless Gloves Pattern
The following pattern uses custom measurements, making it suitable for multiple hand sizes.
Pattern notes:
- Work in US crochet terminology.
- The turning chain does not count as a stitch.
- Keep the same stitch count in every row.
- Make two matching rectangles.
- Do not join the fabric into a tube until you have checked its measurements.
Step 1: Crochet the Foundation Chain
Make a slip knot and place it on your hook.
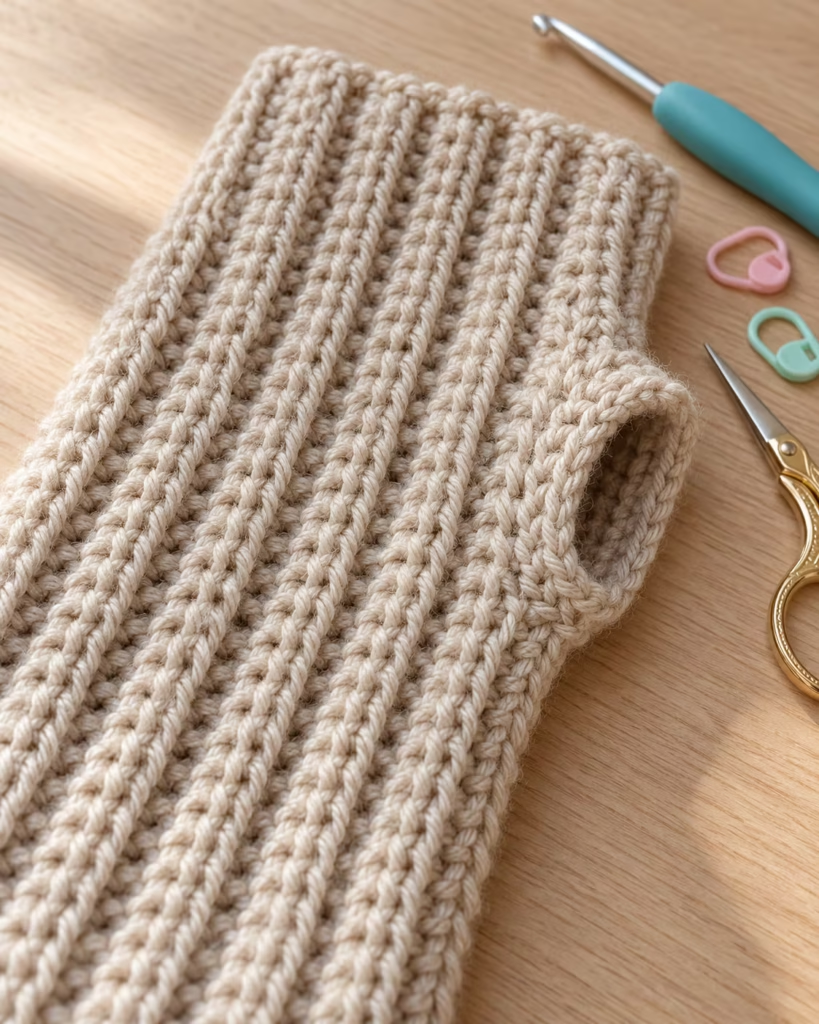
Chain enough stitches to match your desired glove length, then add one chain for turning. For an illustrative starting sample, you can chain 26. This produces a row of 25 single crochet stitches, but the finished length depends on your actual gauge.
Visual check: Your foundation chain should lie flat without twisting or curling tightly.
Common mistake: Making foundation chains much tighter than the following stitches.
Solution: Relax your tension or use a slightly larger hook for the foundation chain, then return to the main hook.
Expert tip: Measure the completed first row rather than relying on the unworked chain length.
Step 2: Work the First Row
Insert your hook into the second chain from the hook. Work one single crochet into that chain. Continue working one single crochet into every remaining chain.
For the 26-chain example, your completed row contains 25 single crochet stitches. Chain one and turn your work.
Visual check: You should have a straight, even row with no missing stitches at either end.
Common mistake: Accidentally crocheting into the turning chain.
Solution: Count the actual stitches after completing the row. Do not include the turning chain.
Expert tip: Place a removable stitch marker in the first and last actual stitches to make your row boundaries easier to identify.
Step 3: Create the Ribbed Texture
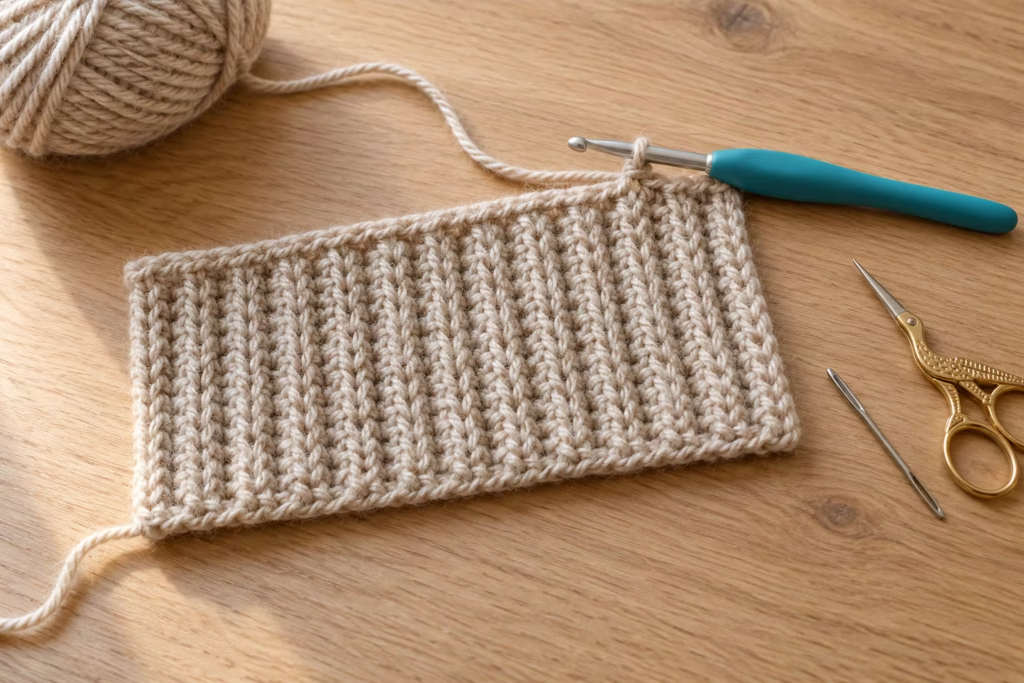
Insert your hook into the back loop of the first stitch. Work one single crochet. Continue making one back-loop-only single crochet in every stitch across the row.
Chain one and turn.
Repeat this row until your rectangle reaches the circumference needed for your hand. For the 25-stitch example, every completed row should still contain exactly 25 stitches.
Visual check: Distinct ridges should begin to appear across the rectangle. The two short edges should remain approximately parallel.
Common mistake: Switching between both-loop and back-loop stitches without noticing.
Solution: Check your hook placement at the start of each row.
Expert tip: Work the first and last stitches carefully. Uneven edge tension can make the finished seam bulky.
Step 4: Check the Rectangle’s Fit
Lay the rectangle flat without stretching it. Confirm that its length matches the glove length you measured earlier. Wrap the growing rectangle around your hand with its long edges meeting along the thumb side.
The top edge should sit below the fingers where you want the glove to finish. The lower edge should reach your planned wrist position. Continue adding rows until the rectangle wraps comfortably around your hand.
Visual check: The rectangle should surround the palm without a large gap or excessive compression.
Common mistake: Measuring the fabric while pulling it tightly.
Solution: Compare relaxed and gently stretched measurements. Judge the fit by how it feels around your hand.
Expert tip: Finish at a row count that you can reproduce exactly for the second glove. Record your final stitch and row counts.
Step 5: Finish the First Rectangle
Once your rectangle fits, cut the yarn, leaving a generous tail for seaming. Pull the yarn tail through the final loop to secure it. Lay the rectangle flat and check the dimensions again. Both long edges should be reasonably straight, and the ribbing should run across the width of the finished glove.
Visual check: You have one rectangular piece with even ridges and a consistent stitch count.
Common mistake: Fastening off before checking circumference.
Solution: Try the rectangle around your hand before cutting the working yarn. Add or remove rows as necessary.
Expert tip: Make a note of the yarn, hook size, total foundation chains, and final row count for future pairs.
Step 6: Mark the Thumb Opening
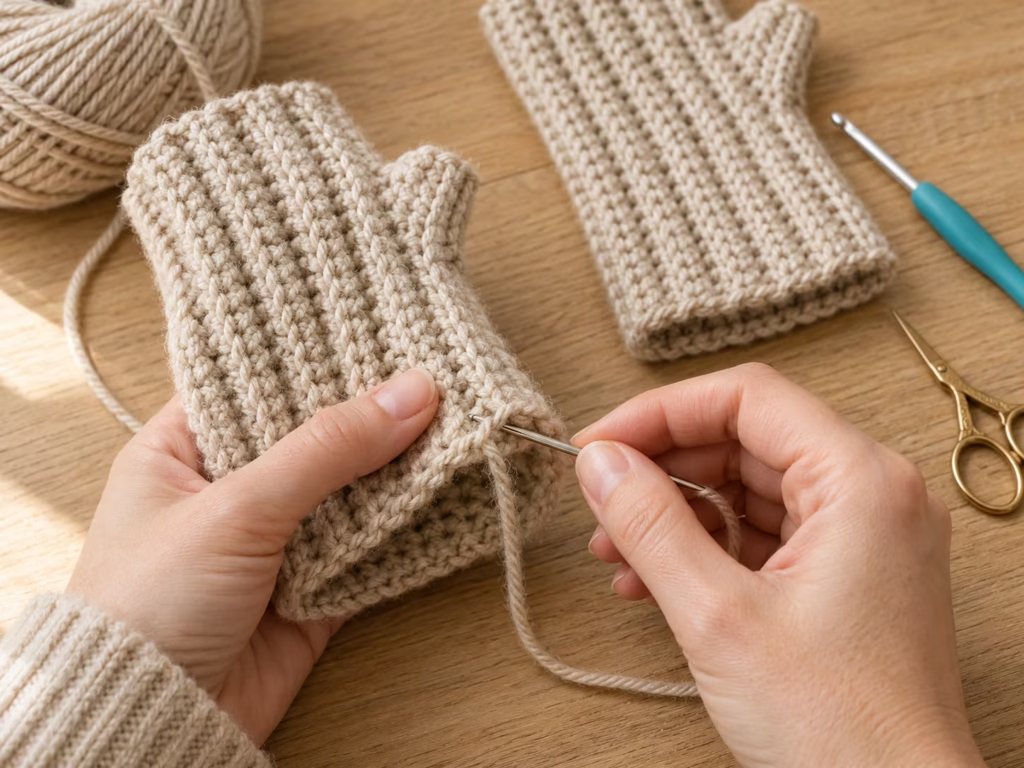
Fold the rectangle so its two long edges meet, forming a tube. Orient it so one short edge will sit at the fingers and the opposite short edge at the wrist. Place the folded piece around your hand temporarily.
Identify where your thumb needs to exit the glove. Mark the beginning and end of that opening along the seam.
Visual check: Your thumb should pass through the marked gap naturally without stretching the neighboring stitches excessively.
Common mistake: Positioning the opening too close to the top edge or making it too narrow.
Solution: Adjust the markers during a fitting before sewing. The opening should accommodate the thumb comfortably at its widest point.
Expert tip: Measure the position from the same top edge on both rectangles so the two gloves match.
Step 7: Sew the Side Seam
Thread the yarn tail through a tapestry needle. Hold the two long edges together. Begin joining the edges from the finger-side corner toward the first thumb-opening marker.
Use mattress stitch or small whipstitches, taking care to align the row ends evenly. Stop at the first marker and secure the yarn. Leave the section between the thumb markers open.
Attach yarn at the second marker and sew from there toward the wrist-side corner. Secure the seam and weave in the ends. Seaming in two separate sections is often simpler for beginners than carrying yarn invisibly across the opening.
Visual check: The glove should form a tube with one clean side seam interrupted by an open thumb gap.
Common mistake: Pulling the seam tighter than the crochet fabric.
Solution: Keep the joining yarn snug enough to hold the edges together but loose enough for the seam to stretch.
Expert tip: Match corresponding row ends rather than forcing one side to fit the other. This produces a neater and more durable seam.
Step 8: Make the Second Glove
Repeat the construction with the same foundation chain count, stitch pattern, and completed row count. Measure the second rectangle against the first before fastening off. Fold the second piece with the same designated top and bottom edges.
Position the thumb opening along the seam to match the first glove. Because the main design is symmetrical, this simple construction works for both hands without special left- and right-hand shaping. Check the direction of the seams and the appearance of the ribbing before completing the second seam.
Visual check: Both gloves should have matching lengths, circumferences, and thumb openings.
Common mistake: Finishing the second glove based only on appearance.
Solution: Count rows and measure. Small differences become more noticeable when the gloves are worn together.
Step 9: Finish and Shape the Gloves
Turn the gloves so your preferred side faces outward. Inspect every seam and yarn tail. Use your tapestry needle to weave each loose end through several stitches, changing direction where possible for security.
Trim the excess yarn without cutting into the actual stitches. If the yarn’s care instructions allow it, gently dampen and shape the finished gloves. Allow them to dry completely before wearing.
Visual check: The gloves should lie evenly, with no loose ends, puckered seams, or visibly stretched stitches.
Common mistake: Stretching the gloves aggressively during blocking.
Solution: Shape them gently to their intended measurements.
Expert tip: Try the gloves on one final time after blocking. Check that the seam remains comfortable as you open and close your hand.
Understanding the Glove Construction
A simple construction diagram can help you understand exactly how the flat fabric becomes a wearable accessory.
Flat Rectangle
Finger-side edge
| Ribbed Crochet Fabric |
|---|
| Rows build the hand circumference |
| Foundation stitches determine glove length |
| Long edges are joined to create the side seam |
Wrist-side edge
Seamed Glove
The two long edges meet to form a tube.
The seam is divided into three sections:
- Upper seam, from the finger edge to the thumb opening.
- Open gap for the thumb.
- Lower seam, from the thumb opening to the wrist edge.
The critical feature is the uninterrupted tube above and below the thumb opening. The thumb itself remains uncovered in this beginner version.
How Measurements Affect the Finished Glove
| Pattern Change | Finished Result |
|---|---|
| Add foundation stitches | Longer glove |
| Remove foundation stitches | Shorter glove |
| Add rows | Larger hand circumference |
| Remove rows | Smaller hand circumference |
| Enlarge thumb seam gap | More space for thumb |
| Reduce thumb seam gap | Closer fit around thumb |
This is one of the biggest advantages of rectangular fingerless glove construction: most sizing corrections do not require rewriting the stitch pattern.
Beginner-to-Advanced Crochet Techniques
Once you understand the construction, you can adjust the finish to match your skill level.
Beginner: Simple Ribbed Rectangle
Stick with back-loop single crochet and straightforward seams. Use smooth worsted-weight yarn and a hook that produces a flexible fabric. Prioritize consistent stitch counts and comfortable sizing over speed. This is the most reliable approach for a first pair.
Intermediate: Improve the Appearance of Your Seams
Instead of using large whipstitches, experiment with mattress stitch to join corresponding row edges. Mattress stitch can produce a less noticeable join when worked carefully. Keep your seam tension consistent so the ribbing remains flexible.
You can also add a simple round of single crochet around the top or wrist edge. If you do, work evenly and try the glove on before fastening off. Too many stitches may cause flaring, while too few can make the opening tight.
Advanced: Add a Fitted Thumb Border
After completing the main glove, join yarn at the thumb opening. Work a neat round of single crochet around the opening. Distribute the stitches evenly rather than crowding the corners.
For a raised thumb cuff, continue working additional rounds, checking the fit after every round. The exact stitch count depends on your thumb opening, yarn, and gauge. Stop if the fabric begins restricting thumb movement. This upgrade creates a more structured glove without requiring a separate thumb piece.
Troubleshooting Common Crochet Fingerless Gloves Problems
| Symptom | Likely Cause | Practical Fix | Prevention |
|---|---|---|---|
| Glove feels too tight | Too few rows or stiff fabric | Add rows or change hook size | Check fit before seaming |
| Glove is too loose | Too many rows | Remove excess rows | Measure relaxed and stretched fabric |
| Rectangle becomes narrower | Missed edge stitches | Undo affected rows and restore count | Count stitches every row |
| Ribbing looks inconsistent | Incorrect loop placement | Resume back-loop-only stitches | Inspect stitch orientation |
| Thumb opening feels tight | Gap too short or seam too close | Undo part of seam and enlarge gap | Test opening on your hand |
| Seam puckers | Joining yarn pulled too tightly | Reseam with gentler tension | Keep joining tension flexible |
| Gloves have different sizes | Different row counts or tension | Compare measurements and correct | Record exact counts |
| Top edge flares | Excessively loose stitches or edging | Rework loose sections | Maintain even edge tension |
Why Do My Gloves Twist?
A slightly twisted appearance can occur if the original rectangle was uneven or the edges were not aligned correctly during seaming.
Lay the glove flat and examine the join. If the seam travels diagonally rather than following corresponding row ends, undo it and realign the fabric.
Why Does the Glove Ride Up?
This usually indicates that the glove is too short, the wrist section is too loose, or the thumb opening is positioned poorly. Try the glove on and identify which part moves first. A longer cuff, corrected thumb opening, or slightly snugger circumference may improve the fit.
Which Yarn and Stitch Pattern Should You Choose?
| Option | Best For | Advantages | Limitations | Recommendation |
|---|---|---|---|---|
| Acrylic blend | Everyday gloves | Accessible, easy-care options | Some feel less breathable | Good beginner choice |
| Wool blend | Cold weather | Warm and often elastic | Care instructions vary | Good for cozy winter gloves |
| Cotton | Lightweight accessories | Breathable, defined stitches | Often less springy | Best for milder temperatures |
| Single crochet BLO | Ribbed beginner gloves | Simple, attractive texture | Slower than taller stitches | Best for this pattern |
| Half double crochet BLO | Softer, taller rows | Builds fabric more quickly | Requires a new gauge calculation | Good alternative project |
| Double crochet | Looser fabric | Fast fabric construction | May create larger gaps | Better for decorative gloves |
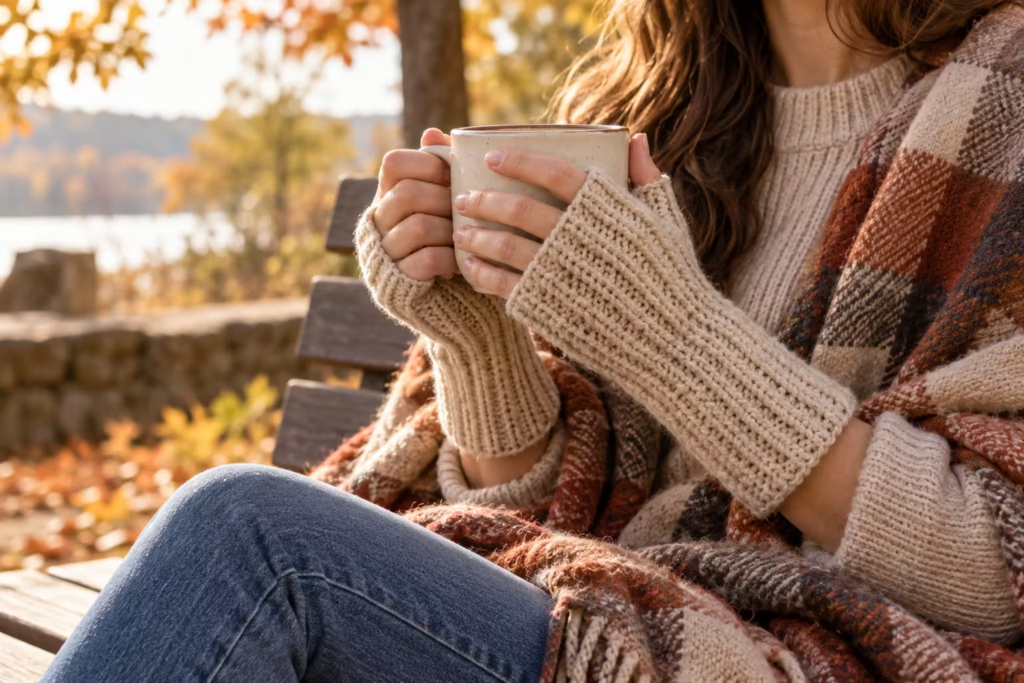
For an October craft project, a warm wool blend or soft acrylic in oatmeal, rust, olive, charcoal, or burgundy creates a classic autumn accessory. The best choice still depends on skin sensitivity, intended use, and laundering preferences.
Three Details That Make Handmade Gloves Better
1. Verify Sizing Before Making a Complete Pair
<!– gap –>
Crochet fabric can change shape when stretched around a hand. For that reason, a flat measurement alone is not enough to determine fit. After crocheting your first rectangle, wrap it around your palm with its long edges touching.
Move your fingers, bend your thumb, and gently make a fist. If the fabric restricts movement, adjust before seaming.
For gift-making, ask for the recipient’s hand circumference and desired wrist coverage when possible. A custom measurement is more reliable than assuming that everyone who normally buys the same clothing size needs the same gloves.
2. Protect Areas That Experience the Most Movement
<!– gap –>
The thumb opening and side seam are high-movement areas. A secure seam should flex when the hand moves. Avoid pulling the joining yarn so tightly that the seam becomes rigid.
At the top and bottom of the thumb opening, weave in the ends securely and inspect the stitches for gaps. If adding a thumb border, make sure the border supports the edge without pulling it inward. These small finishing decisions often matter more than decorative embellishments.
3. Care for the Finished Gloves Properly
<!– gap –>
Always follow the yarn manufacturer’s washing instructions. Some yarns tolerate machine washing, while others require gentle hand washing and flat drying. When hand washing, avoid aggressive rubbing or twisting.
Reshape the gloves while damp and allow them to dry fully. Store them flat or loosely folded in a clean, dry place. If the gloves become stretched after repeated use, gentle washing and reshaping may help, depending on the fiber. Avoid hanging wet gloves, which can place unnecessary tension on the stitches.
Creative Ways to Customize Your Gloves
A basic pattern becomes much more versatile when you change the color, cuff length, or finishing details.
Color-Blocked Gloves
Use one color for the first portion of the rows and another color for the remaining rows.
Because the rows determine the circumference, the color transition will form sections around the hand. Keep track of the number of rows in each color so both gloves match.
Two-Tone Edges
Use a contrasting yarn to work an optional round of single crochet around the finger and wrist openings. Choose colors with enough contrast to show the border. Test the fit before finishing, because additional edging can change the stretch of the openings.
Longer Wrist Warmers
Increase the foundation chain length to extend the glove farther down the wrist. This design is especially useful for wearing beneath coat sleeves. Maintain the same hand circumference while making the length adjustment.
Matching Handmade Gift Set
Use the same yarn to crochet a coordinated headband, ear warmer, or scarf. Matching the ribbing style and color creates a cohesive set without requiring an identical stitch pattern. For gift presentation, fold the gloves neatly and tie them together with a short piece of coordinating yarn.
Final Quality Checklist
Before calling your pair finished, check the following:
- Both gloves have matching foundation stitch counts.
- Both gloves contain the same number of completed rows.
- The overall lengths match.
- The hand circumferences feel comfortable.
- The thumb openings are positioned consistently.
- Both thumbs move freely.
- The seams are secure and flexible.
- No yarn tails remain loose.
- The top openings do not restrict your fingers.
- The gloves maintain their shape during normal hand movement.
Slight differences in ridge height or stitch appearance may be acceptable for handmade work. A loose seam, an opening that presses painfully against the thumb, or a fabric tube too tight to wear comfortably is not a cosmetic issue and should be corrected. The gloves should feel secure without making it difficult to bend your fingers or move your hands.
Frequently asked questions
1. Are Crochet Fingerless Gloves Easy for Beginners?
Yes. A rectangular fingerless glove pattern is an excellent project for beginners who already understand basic chains and single crochet stitches. The ribbed version adds one new technique: working through the back loop only. Because the construction does not require increases, decreases, or individual fingers, you can concentrate on stitch consistency, measuring, and learning simple seams.
2. How Much Yarn Do I Need for Crochet Fingerless Gloves?
Yarn requirements depend on glove size, cuff length, stitch tension, yarn thickness, and the pattern used. Small fingerless gloves generally require less yarn than full mittens, but a precise yardage cannot be established without a tested gauge and finished measurements. Check the yardage on your yarn label and keep enough matching yarn available to complete both gloves and their seams.
3. What Is the Best Crochet Stitch for Fingerless Gloves?
Back-loop-only single crochet is a strong choice for beginners because it produces defined ribbing with a straightforward repeat. Half double crochet through the back loop is another popular option for a softer fabric and faster progress. For gloves that need extra warmth, choose a stitch pattern with relatively small gaps rather than a loose, open lace design.
4. Can I Make Crochet Fingerless Gloves Without Sewing?
Yes. Some patterns are worked in continuous or joined rounds, creating a tubular fabric directly on the hook. These methods often require careful thumb-opening placement and sometimes additional shaping. The flat-rectangle approach in this tutorial uses a seam because it allows beginners to check the fabric dimensions before assembly and makes correcting the fit straightforward.
5. How Do I Make Fingerless Gloves for Different Hand Sizes?
Measure the hand circumference, desired wrist-to-finger length, and thumb-opening position. Use your actual stitch and row gauge to calculate the necessary dimensions. Adjust foundation stitches to change length and the number of rows to change circumference. Check the fabric around the hand before joining the seam, particularly when making gloves for children or people with smaller or larger hands.
6. Why Are My Crochet Fingerless Gloves Not Stretchy?
The yarn, hook size, stitch tension, and stitch pattern all influence elasticity. Tight single crochet can produce a firm fabric, even when worked through the back loop. Try a larger hook, relax your tension, or select a yarn with more natural spring. Always check how the swatch stretches across the rows, since that is the direction wrapping around the hand in this construction.
7. Can I Sell Fingerless Gloves Made From This Pattern?
Handmade fingerless gloves can be suitable products for craft fairs, seasonal markets, and handmade gift shops. Before selling, inspect the workmanship, calculate material and labor costs, and check any applicable product-labeling or consumer-safety requirements. If you adapt a pattern published by someone else, review its usage terms. For consistent results, keep detailed notes about your yarn, measurements, stitch counts, and finishing process.
8. How Do I Stop the Thumb Opening From Stretching Out?
Start with a comfortable opening rather than one that must be pulled tightly over the thumb. Secure the seam ends carefully and avoid using overly loose stitches around the gap. A simple single crochet border can help stabilize the opening, but it must remain flexible. If the yarn itself lacks elasticity, consider changing fibers or adjusting the construction for your next pair.
Save This Crochet Fingerless Gloves Pattern for Later
A well-fitting pair of crochet fingerless gloves starts with three simple decisions: choose a comfortable yarn, measure your hand carefully, and check your rectangle before sewing.
Once you’ve completed your first pair, record your stitch counts, row counts, and thumb-opening placement. Those notes will make future pairs easier to reproduce and customize. The same ribbed construction can be adapted into longer wrist warmers, color-blocked autumn accessories, or coordinating handmade gift sets.
Save this crochet fingerless gloves tutorial to your Pinterest crochet board so you can return to the sizing guide, stitch instructions, and finishing checklist whenever you start another pair.
Pin “Crochet Fingerless Gloves: Easy Ribbed Pattern for Beginners” so you can find it when the yarn arrives.
Get the next free pattern first
One email a week. New patterns, no noise.
Yarn weights and hook sizes in this guide follow the Craft Yarn Council standards.
Keep going: Cute Crochet Amigurumi Puppy Pattern Tutorial for Beginners · Crochet Keychain Tutorial: Make a Cute Mini Bee Bag Charm · In Treble Afghan Square Pattern by Julie Yeager: Complete Crochet Guide





