
Cozy Crochet Fingerless Gloves Pattern: Easy Winter Accessories
Fingerless gloves: Designed for beginners who already know a basic crochet stitch, this tutorial walks you through yarn selection, sizing, stitch counts…

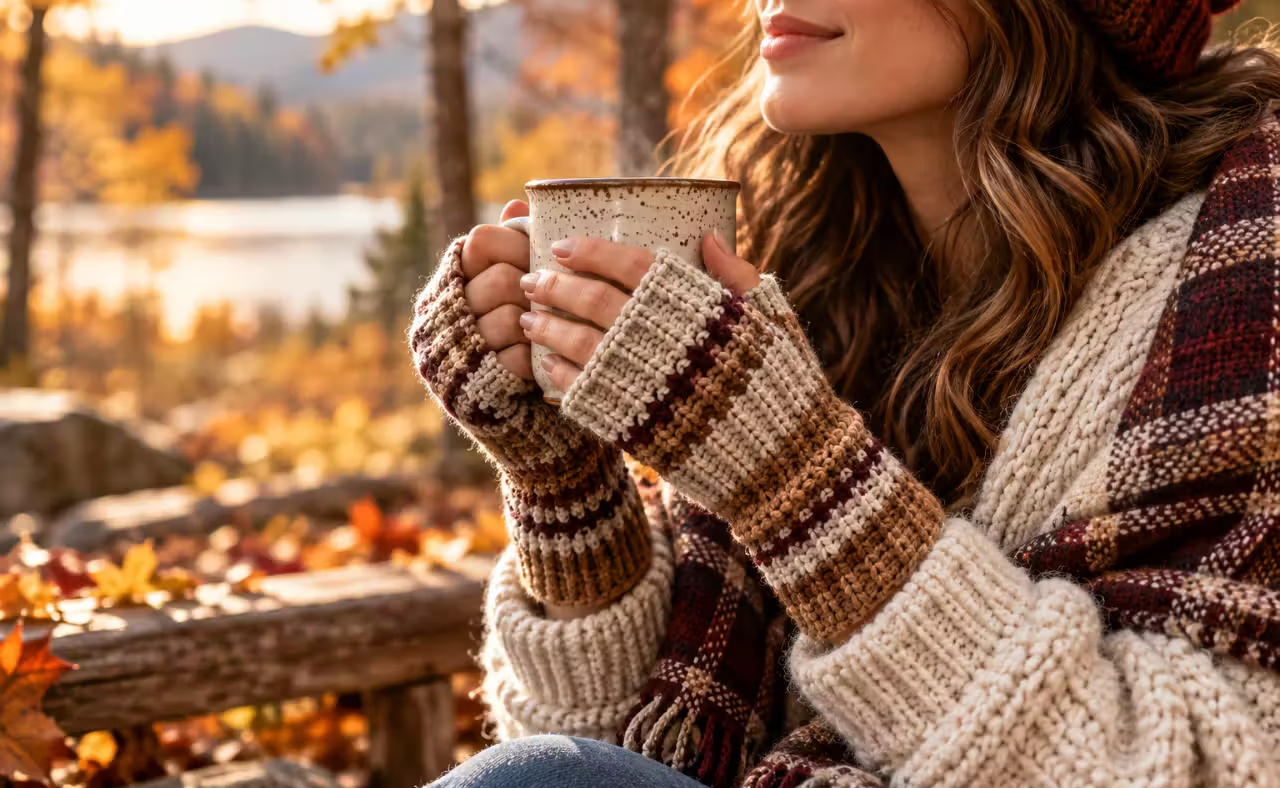
Designed for beginners who already know a basic crochet stitch, this tutorial walks you through yarn selection, sizing, stitch counts, assembly, finishing, and customization. The result is a practical handmade winter accessory that looks lovely with oversized sweaters, wool coats, and autumn outfits.
Project Overview
These gloves are made from two matching crochet rectangles. Each rectangle is folded so its short edges meet and is joined along one side, leaving a thumb opening. The ribbed texture is produced by working single crochet stitches through the back loops only.
| Project Detail | Description |
|---|---|
| Skill level | Confident beginner |
| Crochet terminology | US |
| Main stitch | Back-loop-only single crochet |
| Construction | Flat rectangles with side seams |
| Yarn weight | Medium weight, category 4 |
| Suggested hook | 5 mm (H/8), adjusted for gauge |
| Yarn quantity | Approximately 100–150 yards for an adult pair; actual use varies |
| Estimated time | Approximately 2–4 hours, depending on experience |
| Sample target size | Adult medium |
| Intended fit | Gently fitted with comfortable stretch |
| Thumb opening | Approximately 1.5–2 inches, adjusted to fit |
| Special techniques | Back-loop crochet, seaming, weaving ends |
Pattern status: The stitch calculations below are internally consistent, but the sample has not been physically tested. Make a gauge swatch and verify the dimensions before completing both gloves.
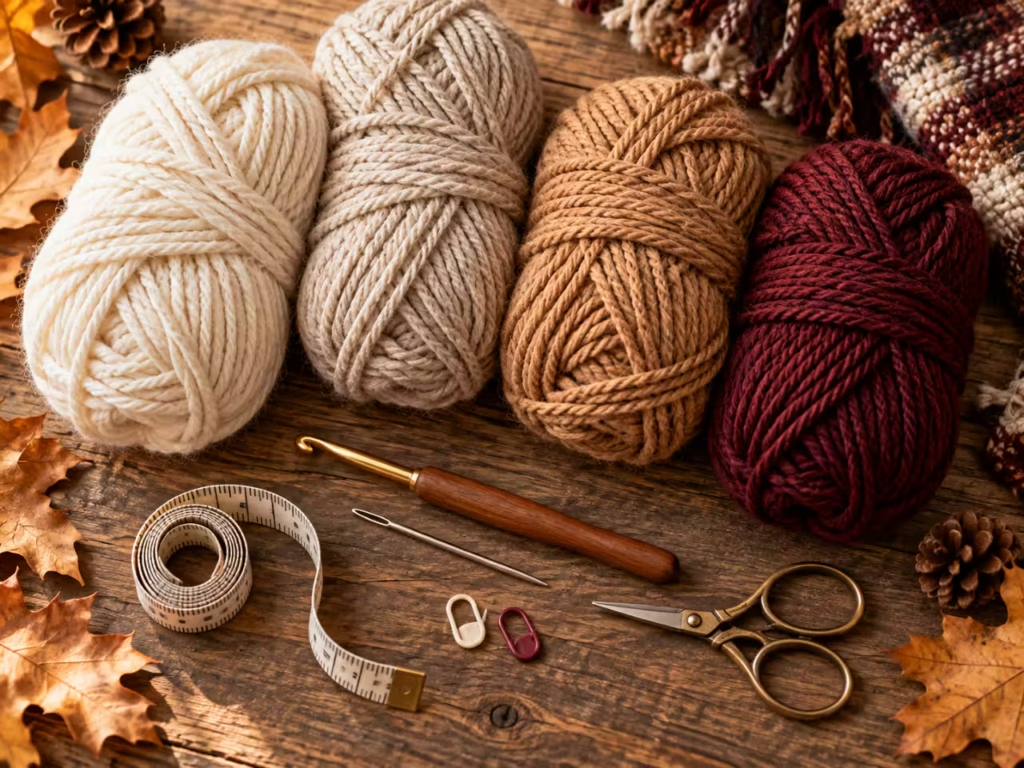
The right materials make these handmade winter accessories softer, more durable, and easier to wear.
| Material | Quantity or Specification | Purpose | Alternative |
|---|---|---|---|
| Medium-weight yarn | Approximately 100–150 yards | Main glove fabric | Soft acrylic, wool, or wool blend |
| Crochet hook | 5 mm | Forms the stitches | Adjust size to achieve gauge |
| Tapestry needle | One blunt needle | Sewing seams and hiding ends | Large-eye yarn needle |
| Measuring tape | One | Checking hand and glove dimensions | Flexible sewing ruler |
| Scissors | One pair | Cutting yarn | Yarn snips |
| Stitch markers | Two or more | Marking thumb openings | Contrasting scrap yarn |
For everyday fingerless gloves, choose yarn that feels soft against your skin and has enough elasticity to recover after stretching.
Wool blends are a good option for warmth and resilient ribbing. Acrylic yarn is often affordable, easy to maintain, and available in many colors. Cotton offers breathability but generally has less natural elasticity, which can make fitted gloves harder to size.
Avoid very stiff yarn for your first pair. It may create uncomfortable seams and restrict movement around the thumb.
For a classic autumn look, consider:
Choose smooth, evenly spun yarn while learning. Highly textured or fuzzy yarn can hide the back loop and make it difficult to identify individual stitches.
Understanding the Crochet Construction
Before beginning, it helps to understand how this pattern becomes a glove.
Instead of crocheting in continuous rounds, you make a rectangular piece of ribbed fabric. The foundation chain determines the glove’s length from wrist to knuckles.
The number of completed rows determines its circumference around your hand. Once the rectangle reaches the correct width, the two short edges are joined to form a tube, with an opening left for the thumb.
Crochet Abbreviations
| Abbreviation | Meaning |
|---|---|
| ch | Chain |
| sc | Single crochet |
| BLO | Back loop only |
| st | Stitch |
| sts | Stitches |
| sl st | Slip stitch |
| RS | Right side |
| WS | Wrong side |
| rep | Repeat |
| FO | Fasten off |
What Does Back Loop Only Mean?
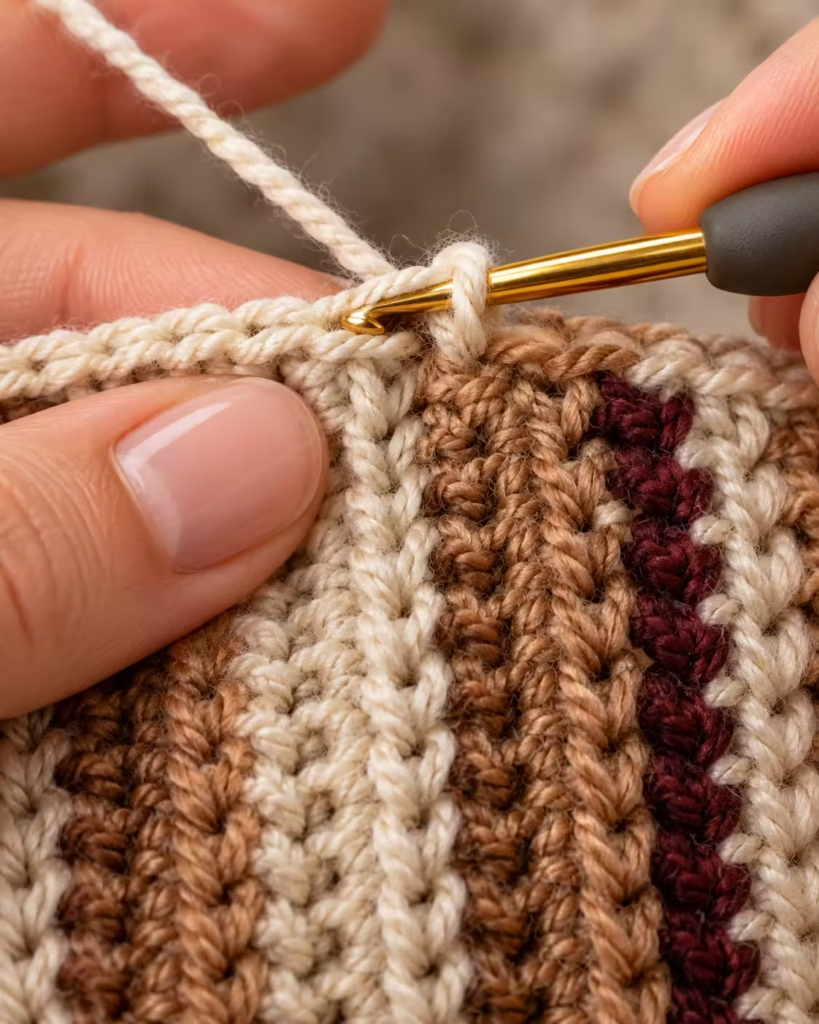
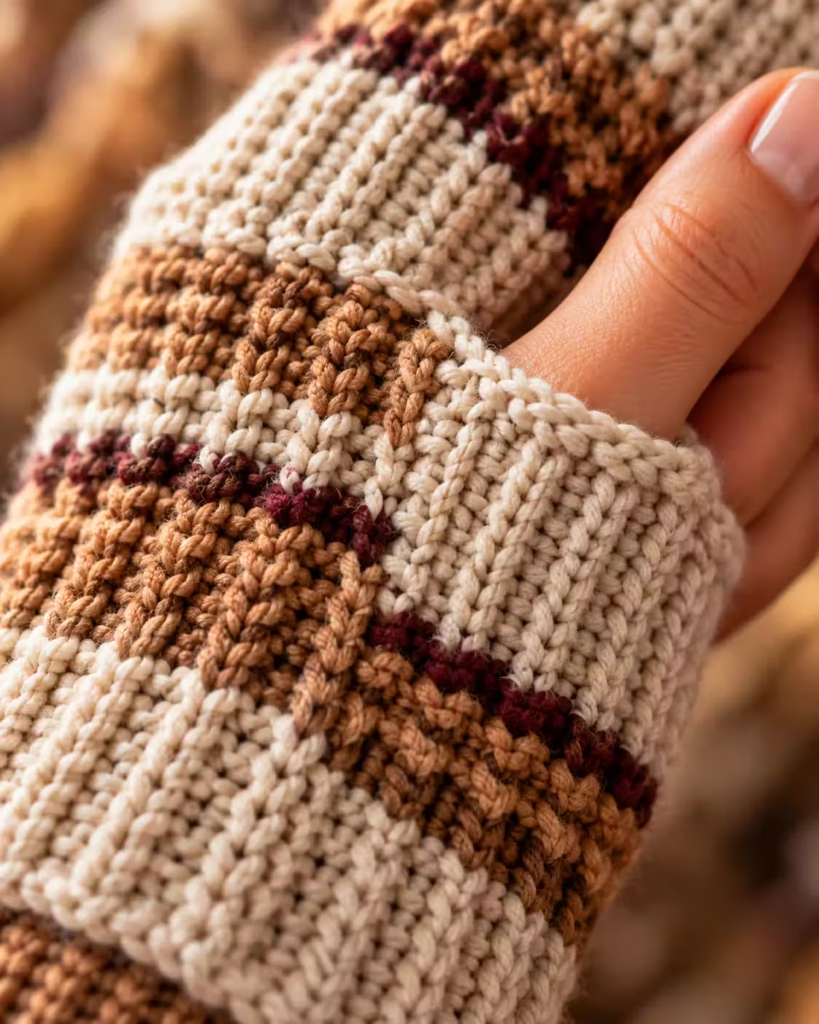
Look at the top of a regular crochet stitch. You will see two loops forming a small V. Normally, your hook goes underneath both loops. For back-loop-only crochet, insert the hook underneath only the loop farther away from you.
This creates a flexible ridge on the surface of the fabric. Repeated across multiple rows, these ridges produce a knitted-looking ribbed texture.
Gauge and Hand Measurements
Correct sizing is the difference between gloves that feel custom-made and gloves that constantly slip down.
Step 1: Measure Your Hand
Wrap a flexible measuring tape around the widest part of your palm, excluding your thumb. Keep the tape comfortably snug without compressing your hand.
Record three measurements:
- Palm circumference around the knuckles.
- Desired glove length from wrist to knuckles.
- Comfortable thumb-opening length.
For this pattern, an illustrative adult medium target is:
| Measurement | Target |
|---|---|
| Palm circumference | 8 inches |
| Glove length | 7 inches |
| Finished glove circumference | Approximately 7.5 inches |
| Thumb opening | Approximately 1.75 inches |
These values are construction targets, not universal hand-size standards.
Step 2: Make a Gauge Swatch
Using your chosen hook and yarn, chain 21. Work 20 single crochet stitches across the chain. Continue in back-loop-only single crochet until the swatch measures at least 4 inches along the row direction. Measure the central portion without stretching the fabric.
For the sample instructions below, the target gauge is:
14 stitches and 20 rows = 4 inches in back-loop-only single crochet.
The 14 stitches are measured along a row, while the 20 rows are measured perpendicular to the stitch direction. This target is a design assumption, not a verified measurement from a physically crocheted sample. If your gauge differs, use the sizing formula later in the article to adjust the pattern.
Step 3: Check the Stretch
Gently stretch the swatch in the direction that will wrap around your palm.
It should lengthen comfortably and return close to its original dimensions. If the swatch feels stiff, try a larger hook. If the fabric looks loose and has large gaps, try a smaller hook.
Beginner checkpoint: Your swatch should have clearly defined ribs, relatively straight sides, and fabric that bends easily around your hand.
Cozy Crochet Fingerless Gloves Pattern
This pattern creates two matching adult fingerless gloves with vertical ribbing and a simple thumb opening.
The sample uses a foundation of 25 chains, producing 24 stitches per row. At the stated gauge, 24 stitches produce a piece approximately 6.9 inches long, close to the intended 7-inch length. The row count is adjusted to achieve the correct palm circumference.
Step 1: Create the Foundation Chain
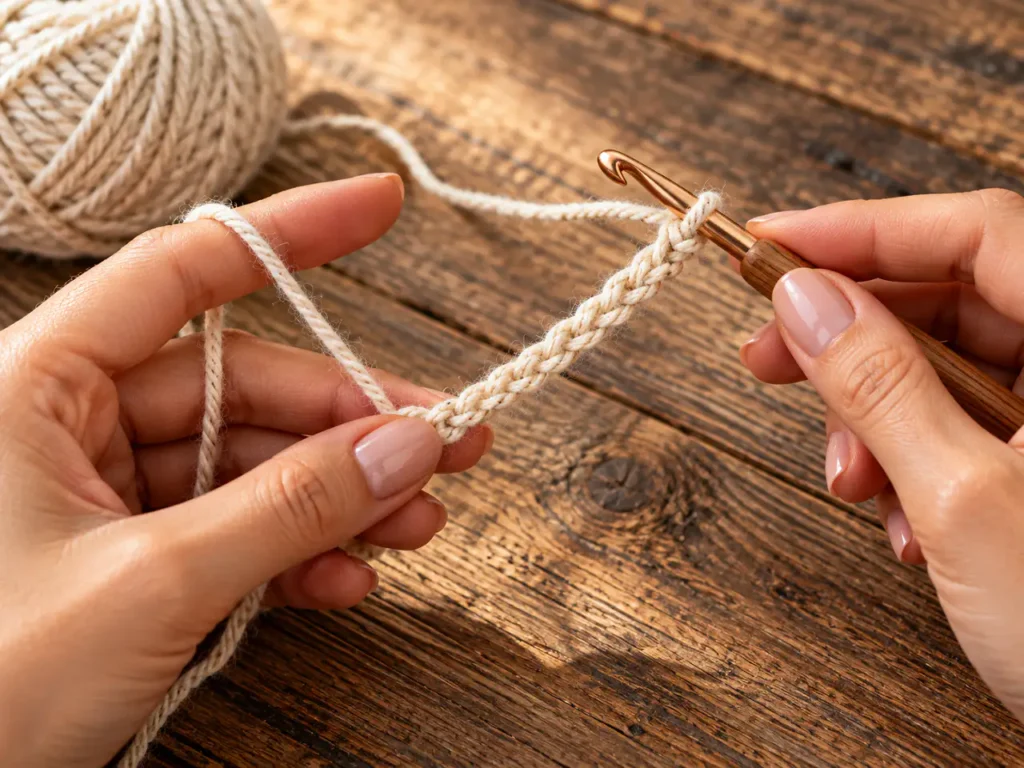
Make a slip knot and place it on your crochet hook.
Chain 25.
Keep the chains relaxed and consistent in size.
Row 1: Work one single crochet into the second chain from the hook. Continue working one single crochet into each chain across.
You should have 24 single crochet stitches.
Chain 1 and turn.
The turning chain does not count as a stitch throughout this pattern.
Visual check: The foundation should form a straight, slightly flexible strip without severe curling or bunching.
Common mistake: Crocheting the foundation chain too tightly.
Solution: Relax your tension or use a hook one size larger for the foundation chain before returning to your main hook.
Expert tip: Working into the back bumps of the foundation chain produces a cleaner lower edge, although beginners may find the traditional chain loops easier.
Step 2: Begin the Ribbed Texture
Row 2: Insert the hook into the back loop only of the first stitch.
Yarn over and pull up a loop.
Yarn over again and pull through both loops on the hook.
Continue working one single crochet through the back loop only of every stitch across. You should still have 24 stitches.
Chain 1 and turn.
Rows 3 onward: Repeat Row 2 until you have completed 38 rows total, including Row 1, for the sample size.
At the target gauge, 38 rows produce approximately 7.6 inches of unstretched fabric. This is designed to create a slightly snug circumference around an illustrative 8-inch palm.
Visual check: Raised ridges should develop across the fabric, running parallel to the foundation chain.
Common mistake: Accidentally working beneath both loops instead of the back loop.
Solution: Before inserting your hook, tilt the work slightly toward yourself so you can identify the top V of the stitch.
Expert tip: Count stitches at the end of every few rows. Maintaining 24 stitches is especially important for keeping both ends of the rectangle the same length.
Step 3: Build the Main Glove Panel
Continue repeating the back-loop-only single crochet row. After approximately 20 rows, compare the fabric against your hand. At this stage, the rectangle should be about halfway to its intended circumference at the sample gauge. Lay the fabric flat without stretching.
Check that:
- Each row contains 24 stitches.
- The upper and lower edges remain reasonably straight.
- The ribbing is consistent.
- The fabric stretches gently along the row-count direction.
If one side begins narrowing, you may be missing the final stitch of some rows. The final stitch is often harder to recognize because it sits close to the turning chain. Use a stitch marker to identify the final stitch if necessary.
Step 4: Complete and Check the Rectangle
Once you have completed 38 rows, lay the rectangle flat. Measure its circumference-direction width across all rows. The sample target is approximately 7.6 inches.
Wrap it gently around the widest part of your palm, excluding your thumb. The two short edges should meet without uncomfortable pressure. If the fabric feels excessively tight, add rows in pairs until the fit improves.
If it feels loose, remove rows in pairs. Adding two rows maintains a convenient even-row construction, although an odd final row count can also work if the seam is planned carefully.
Visual check: The rectangle should cover the intended wrist-to-knuckle distance and wrap securely around the hand.
Common mistake: Assuming the stated row count will fit every yarn and every hand.
Solution: Prioritize actual measurements and comfort over the sample row count.
Expert tip: Test the rectangle around your palm after allowing the fabric to relax for several minutes. Avoid stretching it aggressively while checking the fit.
Step 5: Prepare the Thumb Opening
Place the rectangle flat with its ribbing facing outward. Fold it so the two short edges meet. These are the edges containing the ends of your crochet rows.
Align the corners carefully. Choose which end will be the wrist and which will be the finger opening.
For the illustrative 7-inch glove, use this seam layout:
- Wrist edge to thumb opening: 3 inches.
- Thumb opening: 1.75 inches.
- Upper thumb opening to knuckle edge: approximately 2.1 inches.
Because the rectangle is approximately 6.9 inches long at the target gauge, these segments total about 6.85 inches, with rounding accounting for the small difference. Mark the beginning and end of the thumb opening.
Visual check: The thumb opening should sit naturally along the outer edge of your palm when the glove is wrapped around your hand.
Common mistake: Positioning the thumb hole too close to the knuckles.
Solution: Pin or temporarily baste the seam, try on the glove, and adjust the markers before permanent sewing.
Expert tip: Make the first glove using a removable basting seam. This allows you to confirm the thumb placement before committing to the final join.
Step 6: Sew the Side Seam
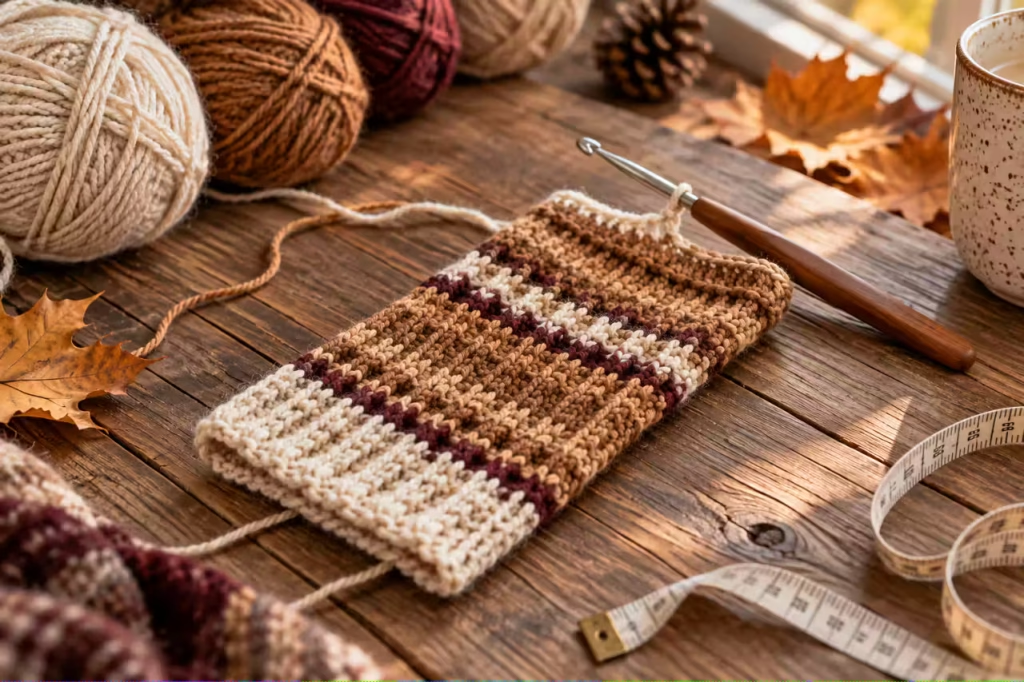
Cut the yarn, leaving a tail approximately 18–24 inches long for seaming. Thread the tail through a tapestry needle. With the panel folded and the short edges aligned, start sewing at the wrist.
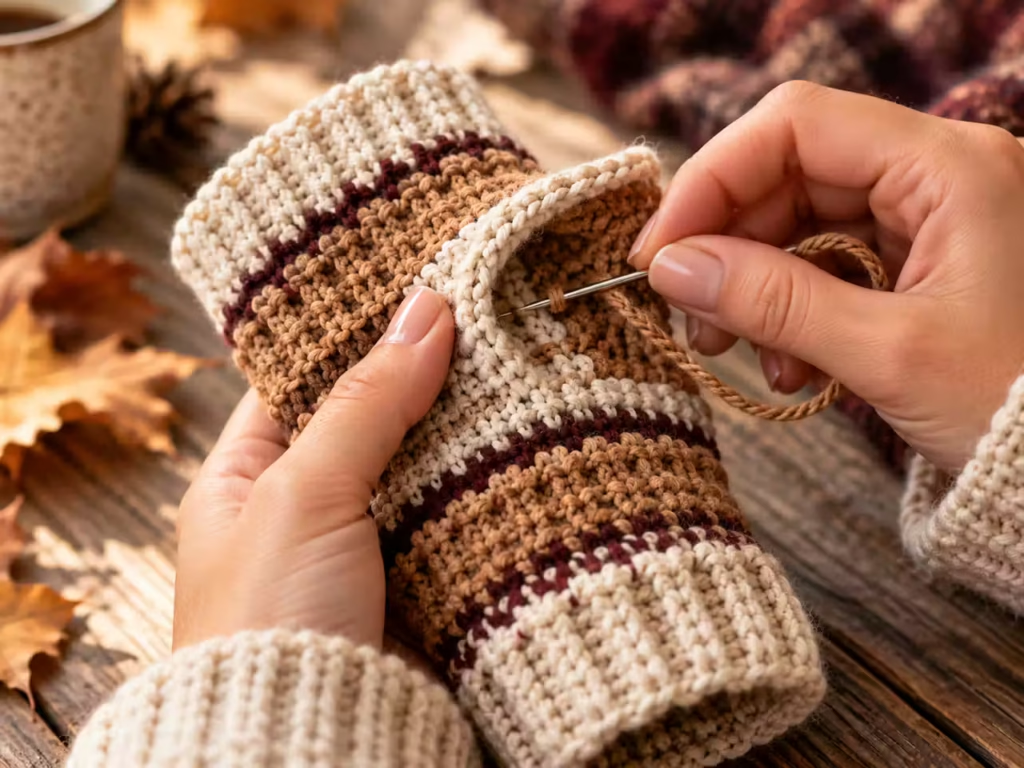
Join corresponding row ends using a mattress-style seam or a neat whipstitch. Sew approximately 3 inches upward from the wrist edge. Stop at the first thumb marker.
Do not sew across the marked 1.75-inch thumb-opening section. Move the yarn discreetly along the inside of the fabric to the upper marker, securing it without pulling the opening closed. Alternatively, use a separate yarn strand for the upper seam.
Sew the remaining section up to the knuckle edge. Fasten the yarn securely and weave in the loose ends.
Visual check: You should now have a soft fabric tube with three openings: wrist, fingers, and thumb.
Common mistake: Pulling seam stitches too tightly.
Solution: Keep the seam flexible and match the tension of the surrounding crochet fabric.
Expert tip: Try on the glove before weaving in all the yarn ends. A temporary seam is much easier to adjust than a fully finished one.
Step 7: Create the Second Glove
Repeat the entire pattern using the same yarn, hook, stitch count, and gauge.
For a consistent pair, record:
| Detail | First Glove | Second Glove |
|---|---|---|
| Foundation chains | 25 | 25 |
| Stitches per row | 24 | 24 |
| Total rows | 38 | 38 |
| Wrist-to-thumb seam | 3 inches | 3 inches |
| Thumb opening | 1.75 inches | 1.75 inches |
| Upper seam | Approximately 2.1 inches | Approximately 2.1 inches |
These gloves use symmetrical rectangular construction, so the same fabric can be positioned for either hand. However, thumb placement should be checked with each glove worn in its intended orientation.
The seams should sit along the thumb side of the hand. If you add asymmetrical embellishments, make one glove a mirrored version of the other.
Step 8: Finish the Edges
Try on both gloves.
If the wrist or finger opening feels uneven, consider adding a simple single crochet edging. Join yarn at a seam. Work single crochet stitches evenly around the chosen opening, placing stitches into accessible edge loops without crowding them.
Because edge tension varies, there is no universal stitch count for this optional edging. Stop periodically and check that the fabric remains flat rather than flaring or tightening. Join with a slip stitch, fasten off, and weave in the ends. Avoid adding tight edging to the thumb opening, where flexibility is especially important.
Visual check: The glove edges should lie smoothly against the skin without rolling excessively or cutting into the hand.
Common mistake: Adding too many stitches around an edge.
Solution: Remove the edging and space the stitches more evenly.
Expert tip: A reverse single crochet border can provide a decorative corded finish, but it is best reserved for a glove that already fits comfortably.
Construction and Thumb Opening Diagram
The following plain-text diagram shows how the flat panel is assembled. It is a construction guide, not a scale drawing.
Stage A: Flat Crochet Rectangle
FOUNDATION EDGE +—————————+
+—————————+
Horizontal dimension: Length of the glove, wrist to knuckles
Vertical dimension: Width that wraps around the palm
Ribbing: Runs along the glove length
Stage B: Join the Short Edges
Upper edge, toward fingers | | Sew approximately 2.1″ | O Upper thumb marker | | Leave approximately 1.75″ open | O Lower thumb marker | | Sew approximately 3″ | Lower edge, toward wrist
Stage C: Finished Glove
FINGER OPENING ___________ / \
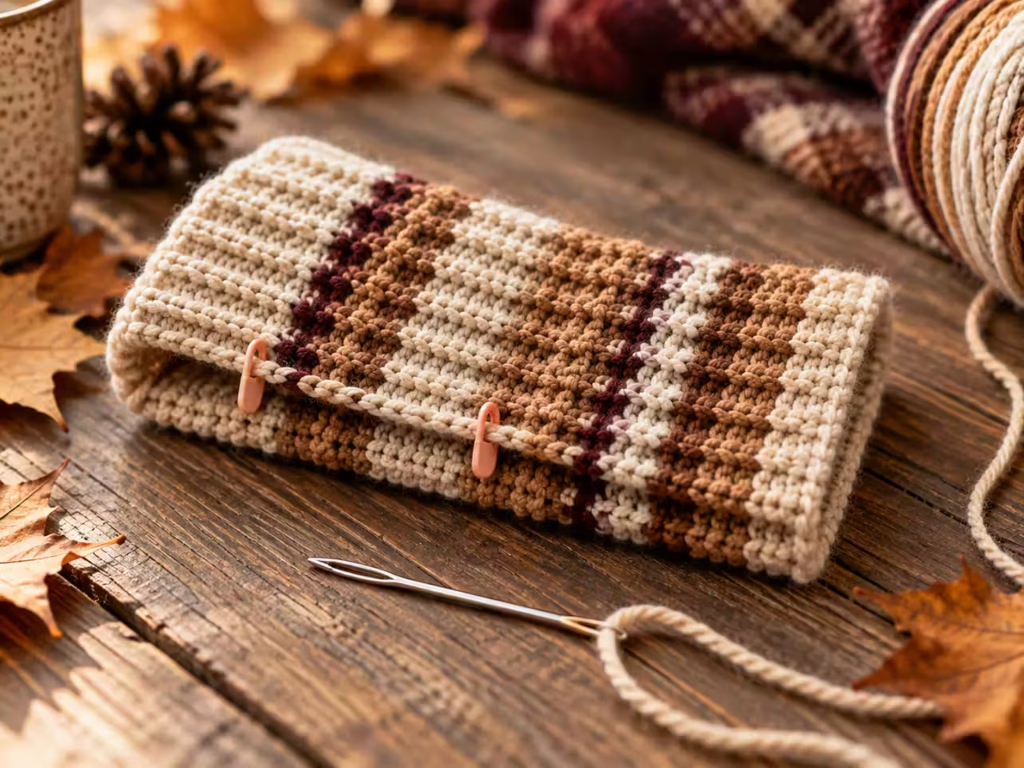
| || || || O— Thumb opening
\___________/ WRIST OPENING
The ribbing runs lengthwise along the glove, while stretch occurs primarily around the hand.
Construction checkpoint: If your ribs wrap horizontally around your wrist rather than running from wrist to knuckles, you have likely rotated the rectangle before seaming.
That orientation is not automatically unusable, but the fit and appearance will differ from the intended design.
Beginner-to-Advanced Crochet Techniques
Once you understand the basic construction, you can refine the finished gloves without changing the overall pattern.
| Skill Level | Technique | Benefit |
|---|---|---|
| Beginner | Standard back-loop-only single crochet | Easy-to-follow ribbed fabric |
| Intermediate | Controlled edge stitches and mattress-style joining | Straighter edges and cleaner seams |
| Intermediate | Custom gauge calculations | Better hand-specific sizing |
| Advanced | Invisible finishing and tension-matched borders | More polished handmade appearance |
Beginner: Focus on Consistent Rows
If you are still learning to identify the back loop, keep your attention on stitch placement and counting. Smooth yarn in a medium-light color makes the process much easier. Do not rush into decorative borders until the gloves fit properly.
Intermediate: Improve Seam Quality
A carefully worked mattress-style seam can make the joining line less noticeable. Place the two short edges together and catch corresponding strands from each edge with your needle. Work in small increments rather than pulling the entire seam tight at once. The finished seam should stretch with the fabric.
Advanced: Refine Fabric Recovery
Back-loop crochet creates mechanical stretch through its ridged structure, but yarn fiber and tension determine how well the fabric returns to shape. For fitted gloves, compare the relaxed and gently stretched width of your gauge swatch.
If the swatch becomes substantially wider after stretching and fails to recover, reconsider the yarn or hook size. A ribbed fabric that loses its shape quickly can make otherwise well-constructed gloves feel loose after wear.
Sizing and Customization
<!– gap –>
How to Calculate Your Own Stitch and Row Counts
The sample size is a starting point. Custom measurements will give you the most comfortable result.
For glove length:
Foundation stitches = Desired glove length × stitches per inch
For example:
7 inches × 3.5 stitches per inch = 24.5 stitches
You could choose approximately 24 or 25 working stitches, depending on your preferred finished length.
Because the first single crochet row begins in the second chain from the hook:
Foundation chains = working stitches + 1
For circumference:
Required rows = Desired finished circumference × rows per inch
For example:
7.5 inches × 5 rows per inch = 37.5 rows
Round to 38 rows.
These calculations assume your swatch matches the measured gauge and that the fabric behaves similarly after finishing.
Suggested Adjustments
| Desired Change | Adjustment |
|---|---|
| Longer wrist coverage | Add foundation chains |
| Shorter glove | Remove foundation chains |
| Wider palm | Add rows |
| Narrower palm | Remove rows |
| Larger thumb opening | Leave more of the side seam unjoined |
| Snugger wrist | Add a separately fitted cuff |
| Softer drape | Choose softer yarn or adjust hook size |
Do not reduce the glove circumference so much that it restricts finger movement. A useful fitting target is gentle negative ease, meaning the unstretched glove is slightly narrower than the hand. The appropriate amount depends on the stretch and recovery of the chosen yarn.
Customizing the Wrist
For extra warmth, make the panel slightly longer and fold the wrist edge back into a cuff. If you want the folded cuff to measure 1.5 inches, add approximately 3 inches to the overall panel length before crocheting.
That extra length allows the fabric to fold without shortening the final wrist coverage as much as a simple 1.5-inch addition would. Secure the cuff at the seam if necessary, while preserving stretch.
How to Make Your Gloves Last Longer
<!– gap –>
Fingerless gloves experience repeated friction around the palms, wrists, and thumb openings. Small finishing choices can greatly improve their durability.
Step 1 — Reinforce the Thumb Opening
The ends of the thumb opening experience tension every time you put the glove on. When sewing the side seam, secure the yarn carefully at both thumb-opening corners. Make a few small reinforcing stitches through the existing fabric without creating bulky knots. Do not pull the corners together.
Step 2 — Protect the Yarn Tails
Weave yarn ends through several neighboring stitches, change direction, and continue weaving. This helps prevent the ends from working loose during repeated wear. Avoid cutting the tail immediately beside the final knot.
Step 3 — Maintain the Ribbing
Wash according to the yarn manufacturer’s care label.
When appropriate for the fiber, gently reshape the gloves while damp and let them dry flat. Excessive heat can damage some synthetic fibers and cause natural-fiber garments to shrink or felt. Never assume a wool blend is machine washable.
Troubleshooting Common Crochet Glove Problems
A few common issues can be corrected before finishing.
| Symptom | Likely Cause | Practical Fix | Prevention |
|---|---|---|---|
| Glove too tight | Too few rows or tight gauge | Add rows or adjust hook size | Measure swatch and palm |
| Glove slips down | Excess circumference or poor recovery | Remove rows or choose springier yarn | Test stretch before seaming |
| Uneven side edges | Missed first or last stitches | Correct the affected rows | Count all 24 stitches |
| Thumb opening pinches | Opening too small | Undo and reposition seam | Try on before final sewing |
| Ribbing looks flat | Worked through both loops | Return to BLO technique | Identify the back loop |
| Gloves have different sizes | Inconsistent tension or row totals | Compare measurements before seaming | Record counts for both panels |
| Seam feels bulky | Tight or thick joining stitches | Use a flatter seam | Match seam tension to fabric |
| Wrist edge flares | Too many border stitches | Redo border with fewer stitches | Check edging as you work |
| Fabric feels scratchy | Unsuitable yarn | Use softer yarn for a replacement pair | Test yarn against skin |
| Gloves stretch out | Weak yarn recovery | Wash and reshape as permitted; remake if necessary | Test swatch recovery |
Why Is My Crochet Rectangle Curling?
Mild curling is common in crochet fabric, particularly along foundation edges. The tension differences between rows can cause the rectangle to curve. Try relaxing your tension, changing hook size, or gently blocking the fabric according to the yarn label. If the rectangle curls severely, check that you have not accidentally added or lost stitches.
Why Does One Glove Look Longer?
Even when both panels have identical stitch counts, their lengths can differ if your working tension changes. Measure both rectangles before assembly.
If one is noticeably longer, decide whether gentle fiber-appropriate blocking can correct it or whether the affected piece should be remade. Avoid relying on aggressive stretching to correct significant differences.
Choosing Between Crochet Glove Styles
Not all fingerless gloves are constructed in the same way. The best design depends on your skill level, preferred appearance, and desired fit.
| Construction | Best For | Advantages | Limitations | Recommendation |
|---|---|---|---|---|
| Flat ribbed rectangle | Beginners | Simple shaping and easy adjustments | Requires side seam | Best starting method |
| Crocheted in rounds | Seamless appearance | No main side seam | Requires circular stitch management | Good next project |
| Crochet wrist cuff with shaped hand | Tailored fit | Better control around wrist and palm | More shaping instructions | Suitable for intermediate crocheters |
| Textured stitch gloves | Decorative accessories | Rich surface patterns | Gauge may be less predictable | Best after learning basic sizing |
| Granny-square gloves | Colorful designs | Creative color combinations | More ends and joins | Great for using yarn scraps |
Yarn Fiber Comparison
| Yarn Type | Advantages | Limitations | Best Use |
|---|---|---|---|
| Wool | Warm and naturally resilient | May require careful washing | Cold-weather gloves |
| Wool blend | Balanced warmth and maintenance, depending on blend | Performance varies by composition | Everyday winter accessories |
| Acrylic | Widely available and often machine washable | Recovery and breathability vary | Affordable handmade gifts |
| Cotton | Breathable and smooth | Less naturally elastic | Mild-weather accessories |
| Cotton blend | Can offer improved softness or stretch | Depends on blend composition | Transitional-season gloves |
For this ribbed pattern, a soft wool blend or resilient acrylic yarn is a practical choice.
Professional Finishing and Quality Control
<!– gap –>
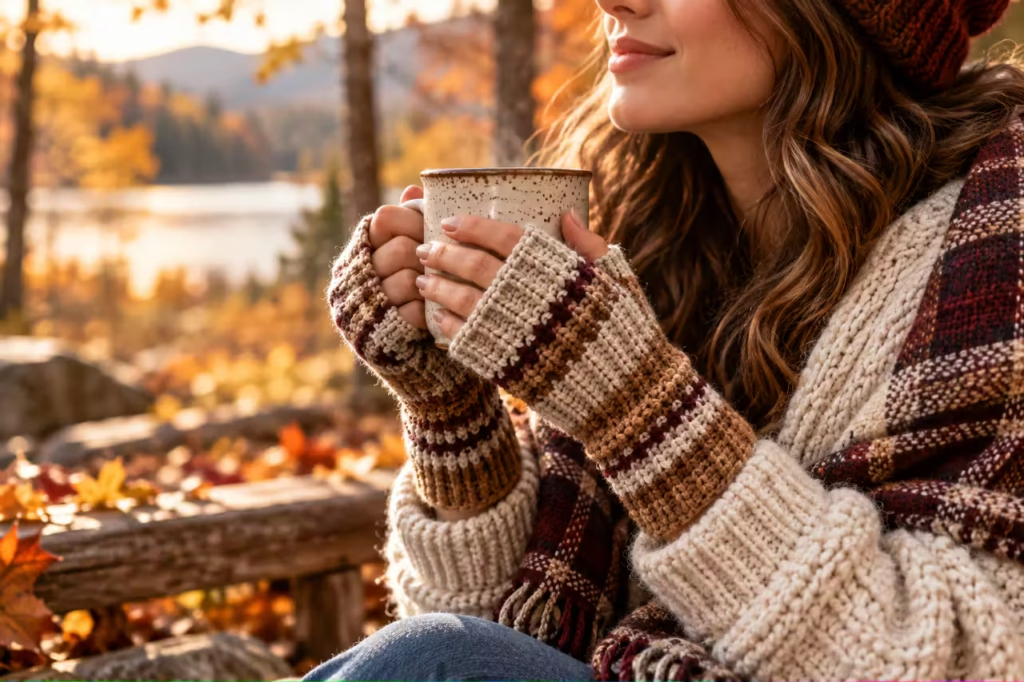
A finished glove should be evaluated as a wearable accessory, not just a successful crochet rectangle.
Check Comfort in Motion
Put on both gloves.
Open and close your hands several times. Make a gentle fist, spread your fingers, and move your thumbs. The gloves should remain comfortable throughout these movements.
Pay close attention to the thumb opening. If the fabric pulls sharply at either corner, the opening may be incorrectly positioned or too small.
Inspect the Ribbing
Place both gloves beside each other. Check that the ribbing runs in the same direction and that the rows appear consistently spaced. Small handmade differences are normal. However, large variations in row height may indicate changes in tension.
Compare the Finished Pair
Measure:
- Overall glove length.
- Relaxed palm circumference.
- Thumb-opening length.
- Distance from wrist edge to thumb opening.
- Distance from thumb opening to finger edge.
The two gloves should be close enough in dimension to feel balanced when worn.
Styling Your Handmade Winter Accessories
Fingerless gloves work especially well during the transition from autumn to winter. Their open fingertips allow more dexterity than full gloves, making them useful for tasks such as handling keys, turning pages, or briefly using a phone. They are not a substitute for insulated full-finger gloves in extreme cold.
Three Easy Color Combinations
Warm minimalist: Oatmeal fingerless gloves with a cream scarf and camel coat.
Woodland autumn: Rust gloves with olive-green outerwear and dark brown boots.
Modern winter: Charcoal gloves with a black jacket and soft gray scarf.
For a cohesive handmade gift set, use the same yarn to make a matching headband, ear warmer, or scarf.
Add a Simple Decorative Detail
A small wooden-look button, subtle leather-look tag, or embroidered initial can personalize the gloves.
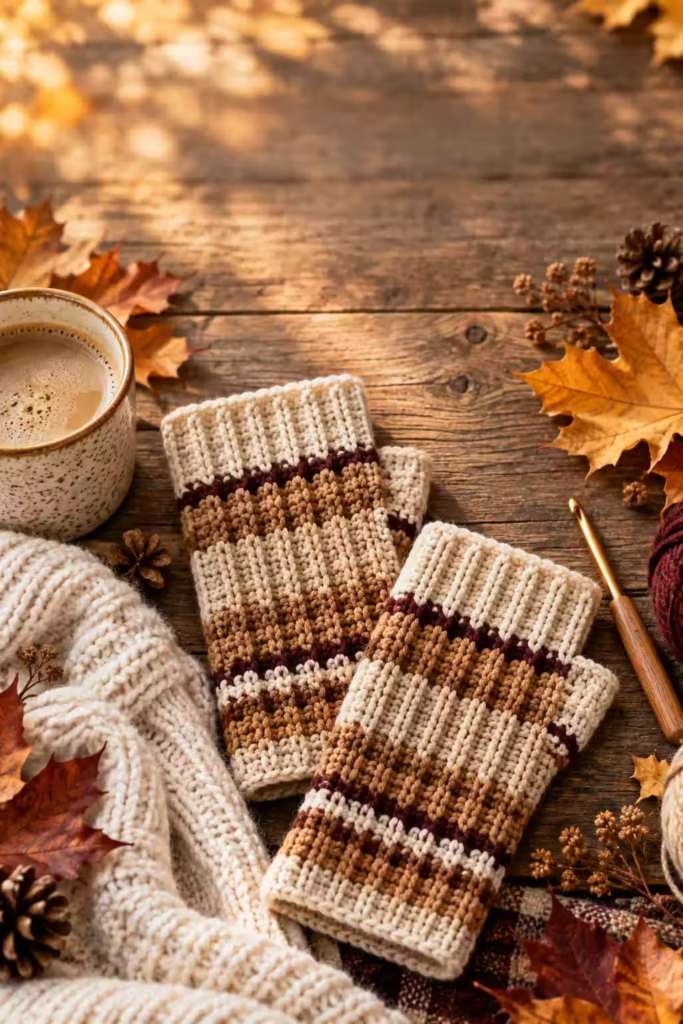
Keep decorations away from the palm and thumb opening to avoid discomfort. If the gloves are intended for young children, avoid loose buttons or other small detachable embellishments that could create a choking hazard.
Final Quality Checklist
Before calling the project finished, inspect the following details.
- [ ] Both gloves have the intended length.
- [ ] The ribbing is consistent and runs from wrist toward knuckles.
- [ ] Each glove fits without restricting hand movement.
- [ ] The thumb openings allow comfortable movement.
- [ ] Both seams are secure and flexible.
- [ ] No long yarn tails remain exposed.
- [ ] The wrist and finger edges feel comfortable.
- [ ] Any decorative edging lies flat.
- [ ] Both gloves match closely in size.
- [ ] The finished accessories have been cleaned or blocked only as appropriate for the selected yarn.
Acceptable variation: Minor differences in handmade stitch appearance, provided both gloves fit comfortably.
Correctable mistakes: Slightly uneven edging, visible loose ends, or a thumb opening that can be adjusted by resewing.
Mistakes requiring reworking: Severe size differences, a restrictive thumb opening that cannot be corrected at the seam, or a glove circumference that prevents comfortable movement.
Frequently asked questions
1. Are crochet fingerless gloves suitable for beginners?
Yes. A flat-rectangle design is one of the most approachable ways to crochet fingerless gloves because it avoids complex thumb shaping and continuous rounds. You only need to know how to make a chain, work single crochet stitches, turn your work, and sew a simple seam. Practice back-loop-only crochet on a small swatch before starting the full project.
2. How much yarn do I need for a pair of fingerless gloves?
For adult gloves made with medium-weight yarn, approximately 100–150 yards is a useful planning estimate. The exact amount depends on hand size, wrist length, stitch density, and yarn characteristics. Longer cuffs and decorative borders increase consumption. Check your project against a measured swatch if you need a more precise estimate.
3. What crochet stitch is best for warm fingerless gloves?
Back-loop-only single crochet is an excellent choice for a beginner-friendly ribbed fabric. It creates flexible ridges and a relatively dense surface. Half double crochet can produce a softer, taller stitch, while slip-stitch ribbing can create a compact knitted appearance. Each technique produces different gauge and stretch, so stitch substitutions require recalculating the pattern.
4. Can I make these gloves without sewing?
Yes, but you would need a different construction method. Fingerless gloves can be worked in joined or continuous rounds, with a thumb opening created using skipped stitches, chains, or separate shaping. The flat-rectangle method in this article uses a seam because it offers straightforward sizing and makes the thumb opening easy to reposition before final assembly.
5. How do I make crochet gloves fit smaller hands?
Measure the palm circumference and desired length rather than relying only on a standard size label. Reduce the number of rows to decrease circumference and shorten the foundation chain to reduce glove length. Always check gauge first. A small adjustment in stitch count can make a noticeable difference, especially when working with dense ribbed fabric.
6. Why are my crochet gloves stiff instead of stretchy?
Stiffness can come from tight stitches, a small hook, a firm yarn, or a combination of these factors. Try making a second swatch with a slightly larger hook. Compare its stretch, thickness, and ability to recover after stretching. Softer yarn may also improve comfort, but changing fibers can affect warmth and maintenance requirements.
7. How do I wash handmade crochet fingerless gloves?
Follow the care instructions on your yarn label. Some acrylic gloves can be machine washed on a gentle cycle, while many wool gloves require more careful handling. If handwashing is recommended, use cool water and a suitable mild detergent. Avoid wringing the fabric. Remove excess water gently, reshape the gloves, and lay them flat to dry.
8. Can I sell fingerless gloves made using this pattern?
Handmade fingerless gloves can be produced as items for sale, but you should first verify the fit, workmanship, durability, and material labeling of your finished products. If you adapt this pattern for commercial production, make a tested sample and document your measurements. Product labeling and other applicable requirements depend on where and how the items are sold.
Save This Cozy Crochet Project for Your Next Handmade Gift
A pair of handmade crochet fingerless gloves is a practical way to turn a simple stitch into something useful and beautiful.
Start with one gauge swatch, measure your hand, and make the first glove using the sample rectangle construction. Before completing the second glove, verify the thumb opening and seam placement so both pieces fit comfortably.
Once you have mastered the basic ribbed design, experiment with contrasting colors, longer wrist cuffs, or a different yarn fiber. For your next project, try a matching crochet ear warmer or a ribbed scarf using the same back-loop-only stitch.
Save this tutorial to your Crochet Patterns or Handmade Winter Accessories Pinterest board so you can return to the sizing chart, construction diagram, and finishing checklist whenever you need them.
Pin “Cozy Crochet Fingerless Gloves Pattern: Easy Winter Accessories” so you can find it when the yarn arrives.
Get the next free pattern first
One email a week. New patterns, no noise.
Yarn weights and hook sizes in this guide follow the Craft Yarn Council standards.
Keep going: Crochet Moss Stitch: Easy Step-by-Step Tutorial, Pattern & Blanket Ideas · 15 Cozy Autumn Crochet Coin Purse Ideas: Pumpkin, Acorn & Mushroom Pouches · Black and Red Crochet Blanket: Stunning Gothic Chevron Pattern





