Crochet Spiderweb Crop Top for Halloween: Step-by-Step Handmade Guide
Crop top: This guide explains how to plan the construction, select cotton yarn, understand spiderweb crochet techniques, adjust the fit, and finish the…

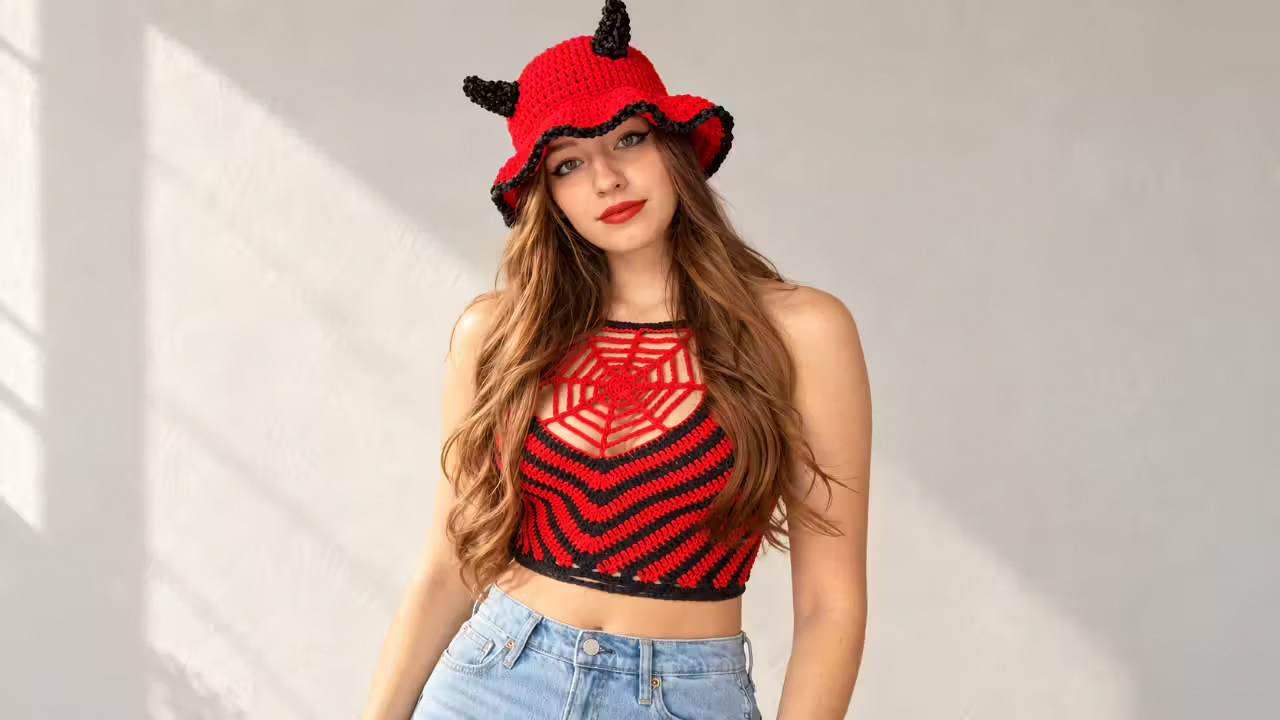
This guide explains how to plan the construction, select cotton yarn, understand spiderweb crochet techniques, adjust the fit, and finish the garment neatly. It also explores the matching devil-horn crochet hat shown in the Halloween outfit inspiration.
Pattern availability note: The reference provides the finished design and visual construction stages, but not a verified stitch-by-stitch pattern. Exact stitch counts, hook size, gauge, and shaping repeats must be supplied from the original pattern or a tested sample. The instructions below are a practical construction guide, not a tested reproduction of that specific garment.
1. Crochet Spiderweb Crop Top: Project Overview
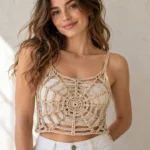
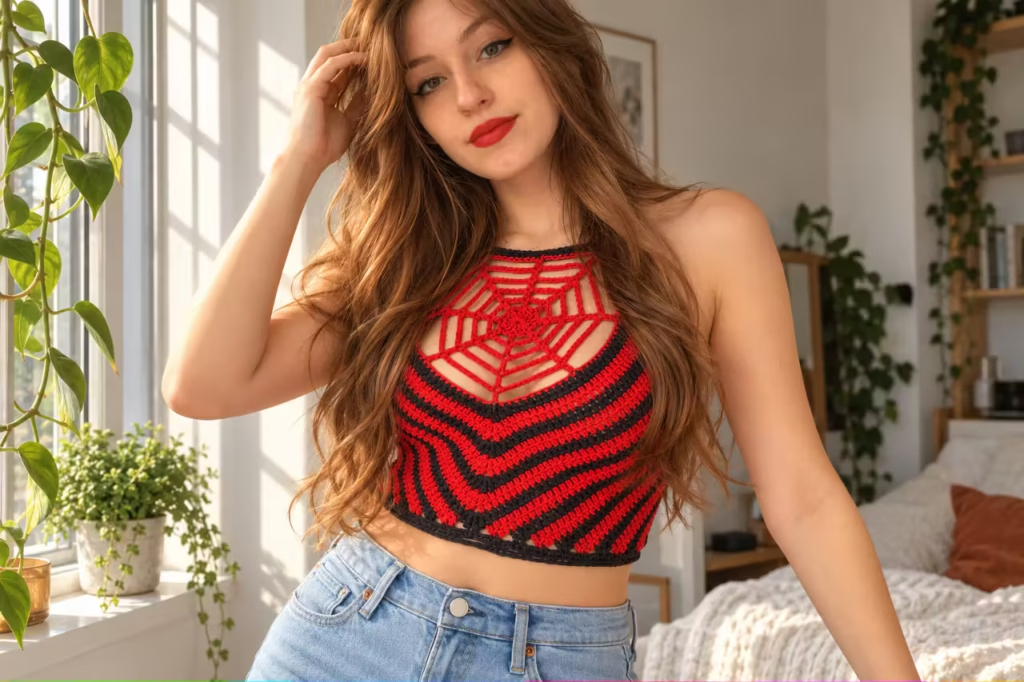
The main attraction of this Halloween crochet top is the combination of a decorative spiderweb and a structured cropped body.
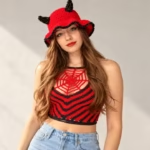
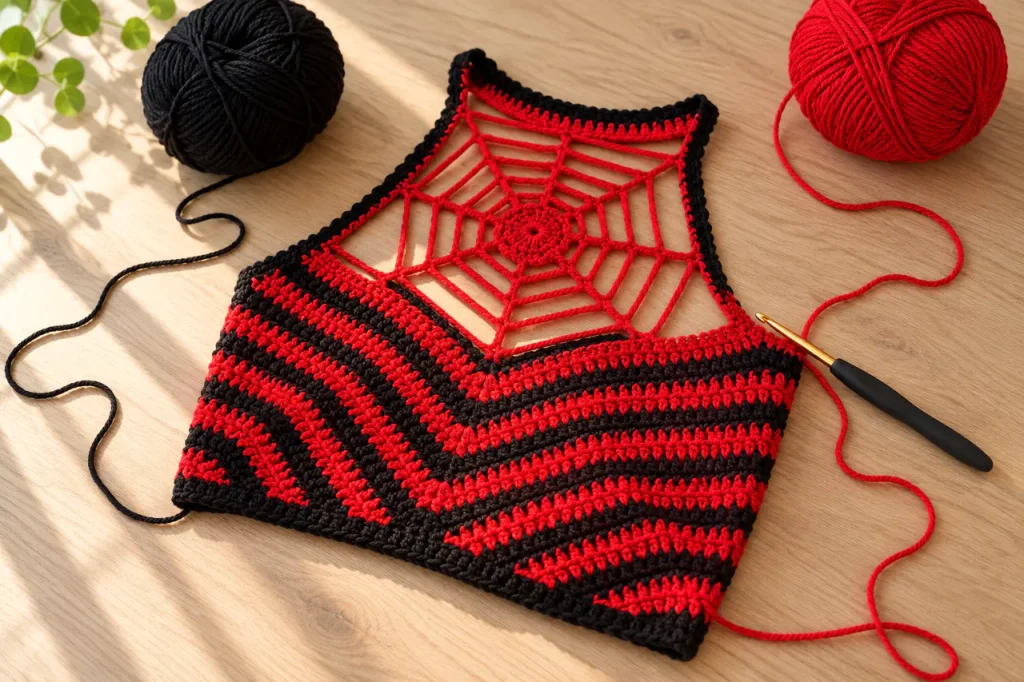
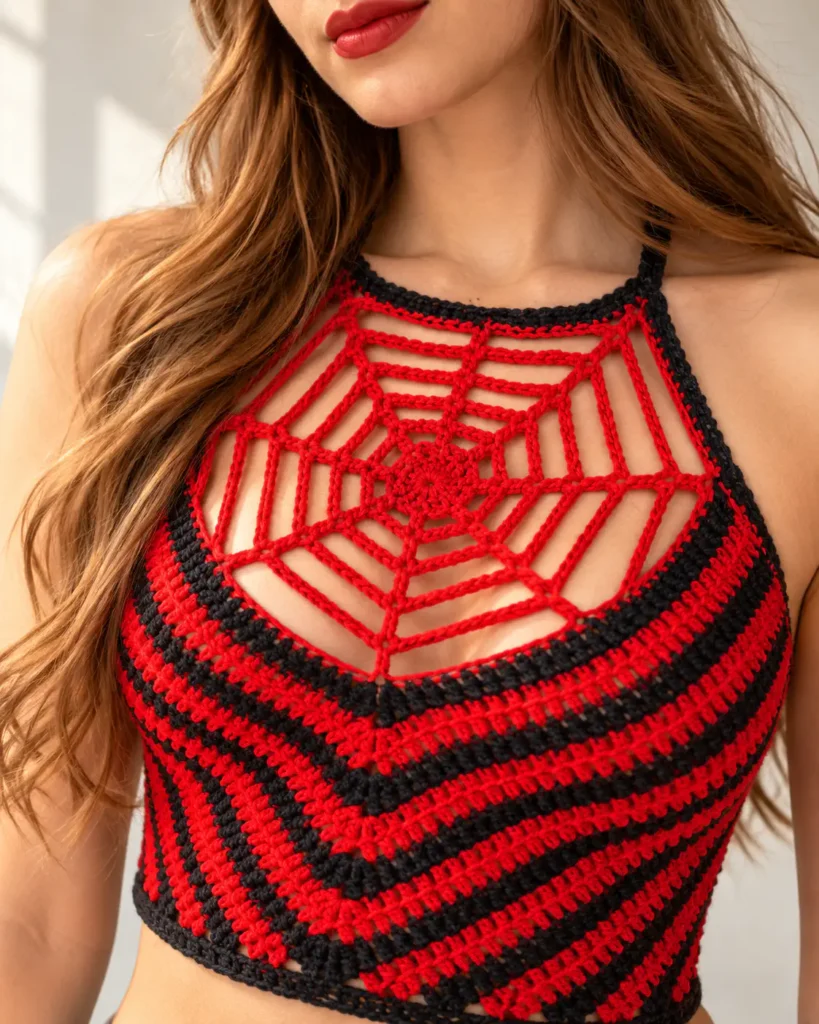
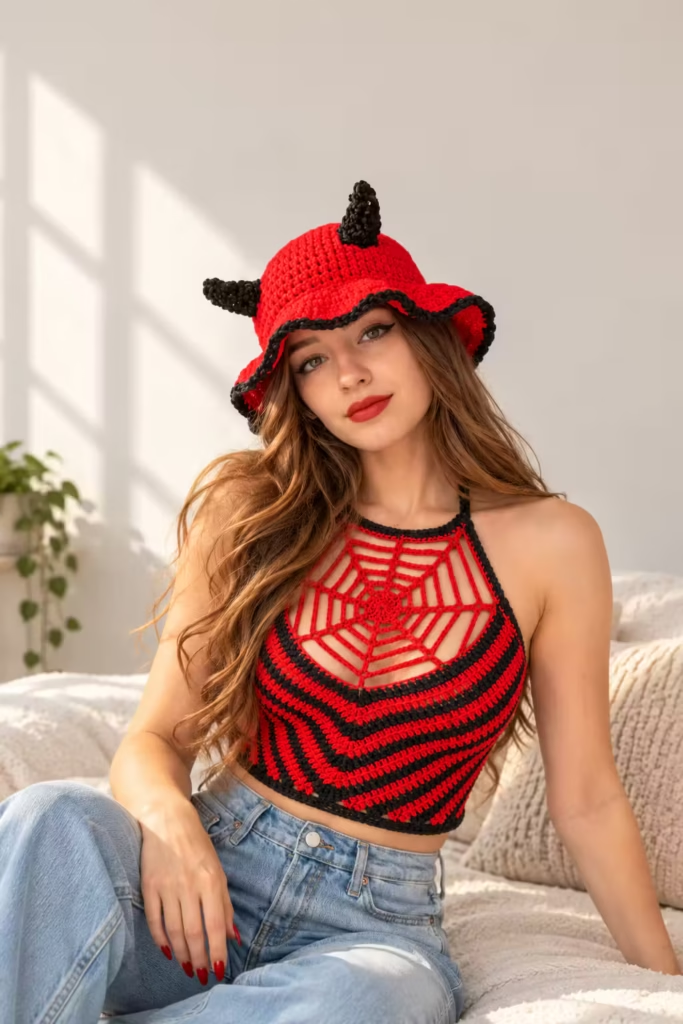
The web uses open spaces and radiating lines to create the familiar spiderweb shape. The lower portion uses closer stitches to provide coverage and a more stable fit. The reference outfit features red yarn with black stripes and edging. A matching red crochet hat has black horn details and a scalloped brim.
| Project Detail | Information |
|---|---|
| Project | Spiderweb crochet crop top |
| Style | Gothic, Halloween, alternative fashion |
| Construction | Openwork spiderweb combined with a cropped body |
| Main Material | Cotton yarn, subject to pattern requirements |
| Reference Colors | Red and black |
| Skill Level | Intermediate construction skills recommended |
| Hook Size | |
| Yarn Weight | |
| Gauge | |
| Finished Dimensions | |
| Estimated Time | Depends on size, yarn, and skill |
| Matching Accessory | Optional crochet devil-horn hat |
Who should make this?
The project suits crocheters who already understand chains, slip stitches, double crochet, and working into chain spaces. Beginners can learn these skills separately before assembling a fitted garment. The most challenging parts are maintaining the openwork web geometry and ensuring that the finished top fits comfortably without distorting the design.
Selecting suitable materials is one of the most important early decisions. Cotton yarn produces defined stitches and allows the open spaces of a spiderweb motif to remain visible. However, cotton generally has less natural elasticity than many wool or synthetic blends. This matters when making a close-fitting crop top.
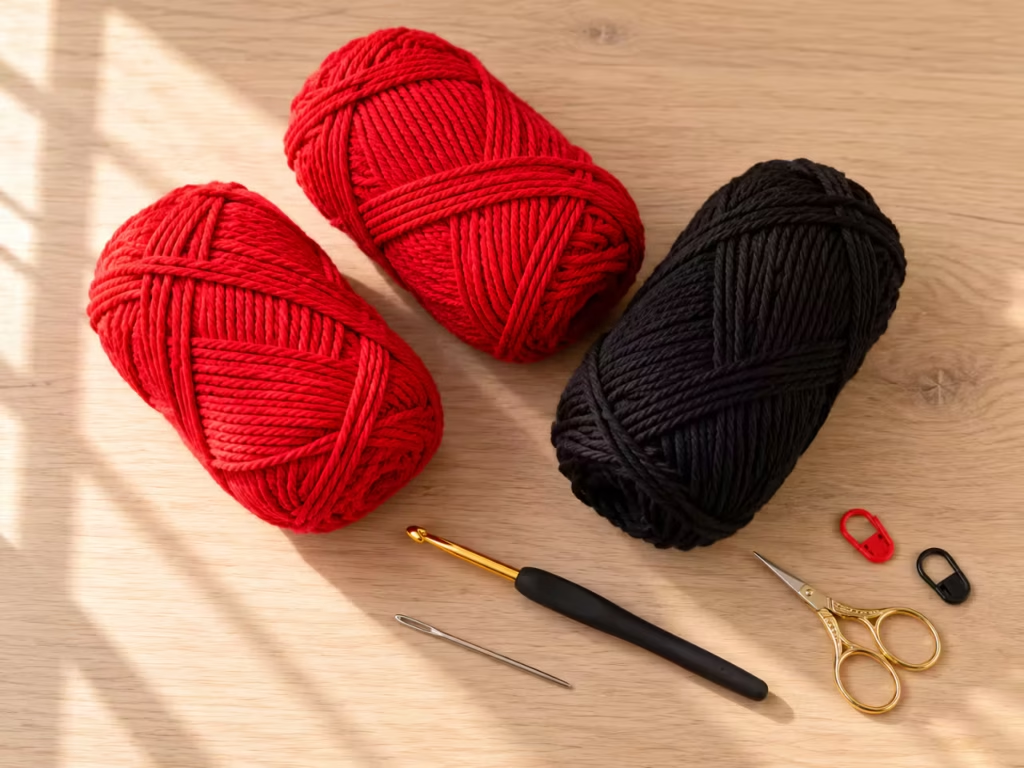
| Material | Specification | Purpose |
|---|---|---|
| Cotton yarn | Main garment | |
| Black yarn | Compatible with red yarn | Stripes and edging |
| Crochet hook | Forming stitches | |
| Stitch markers | As needed | Marking key construction points |
| Measuring tape | Flexible | Checking fit |
| Tapestry needle | Blunt tip | Weaving in ends |
| Scissors | Small and sharp | Cutting yarn |
| Original pattern | Verified instructions | Counts, shaping, and assembly |
A row counter can help track repeated sections, particularly when making matching left and right sides. A blocking mat and rust-resistant pins can help shape finished cotton crochet pieces, provided the yarn care instructions permit blocking. A notebook is also useful for recording gauge, finished measurements, and any fit modifications.
3. How the Crochet Spiderweb Design Works
Before starting, understand the relationship between the spiderweb motif and the supporting garment.
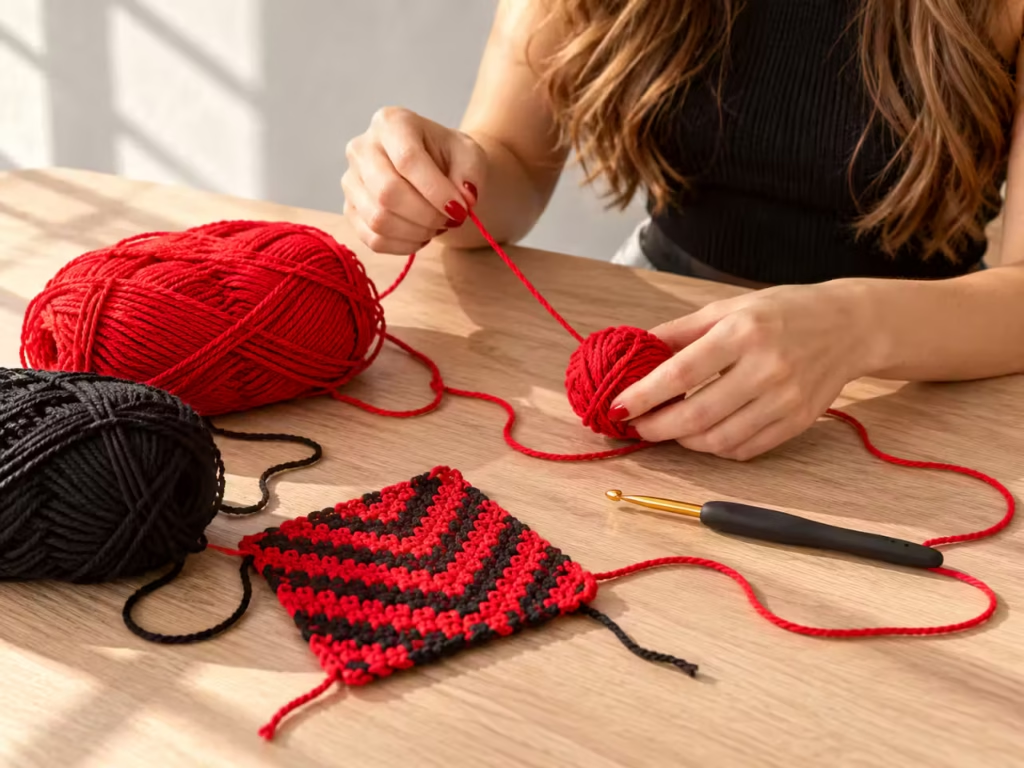
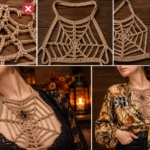
The finished top has two visually different areas. The spiderweb section forms an open decorative structure around the upper front. The design depends on connected radial lines and regularly spaced openings.
The cropped body uses closer crochet stitches for support and coverage. The body must be connected securely to the web and shaped to fit the wearer. The spiderweb should look decorative without carrying all of the garment’s tension.
Spiderweb construction diagram
A conceptual construction sequence is:
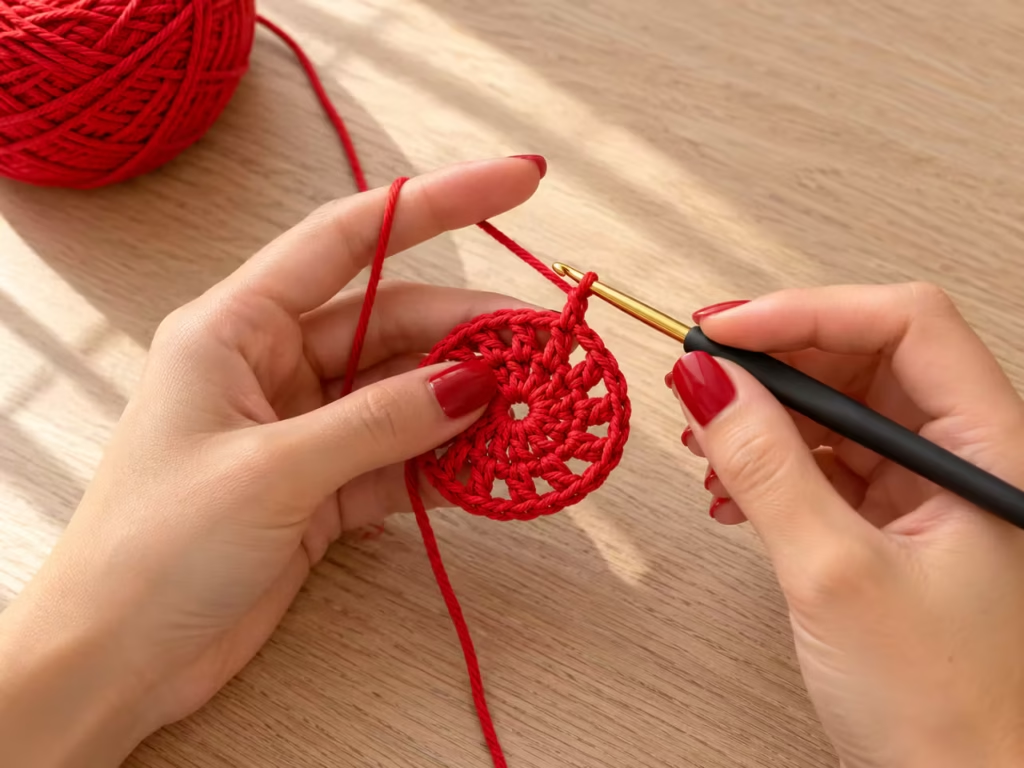
CENTER MOTIF | RADIAL SUPPORTS | OPEN CHAIN SPACES | OUTER WEB BORDER | BODY CONNECTION | CROPPED GARMENT | FINISHED EDGING
This is a construction map, not a stitch chart. Exact attachment points and stitch counts depend on the verified pattern.
Important crochet terminology
- Chain (ch): A foundational stitch used to create length and open spaces.
- Slip stitch (sl st): A joining stitch often used to connect rounds.
- Single crochet (sc): A short, relatively dense stitch.
- Double crochet (dc): A taller stitch often used in openwork.
- Chain space (ch-sp): The opening created beneath a series of chain stitches.
- Increase: Adding stitches to expand an area.
- Decrease: Combining stitches or otherwise reducing stitch count for shaping.
These are US crochet terms. UK stitch names differ, so confirm which terminology the original pattern uses.
4. Prepare Your Yarn, Measurements, and Gauge

Preparation helps prevent the most frustrating crochet problem: finishing a beautiful design that does not fit.
Measure before starting
Record the following measurements:
| Measurement | Why It Matters |
|---|---|
| Full Bust | Determines required body circumference |
| Underbust | Helps establish the lower garment fit |
| Desired Crop Length | Controls the final hem position |
| Neckline Width | Influences web placement |
| Shoulder or Strap Placement | Helps prevent slipping |
| Desired Coverage | Determines how much openwork is comfortable |
Use the measurement method required by your pattern. Do not assume a size label guarantees a particular fit.
Make a gauge swatch
Using the yarn and hook specified by the pattern, crochet a sample of the body stitch pattern. Measure the sample across its central stitches, avoiding distorted edges. Count stitches and rows over the measurement area specified by the pattern.
Then wash and dry the swatch according to the yarn’s care instructions and measure again. For cotton garments, post-wash measurements can be especially useful because the fabric may relax or change dimensions.
Checkpoint: Your washed gauge should match the pattern’s required gauge before you rely on its stitch counts.
Choose your color arrangement
For the red-and-black reference look, red acts as the dominant color while black defines the stripes and outer edges. You can make the spiderweb itself red for a bold effect or use black for stronger contrast against a lighter background. Keep the same yarn type and compatible weight across the main garment unless the pattern explicitly calls for a change.
5. Step-by-Step Crochet Spiderweb Crop Top Construction
The following construction sequence explains the main stages of building a spiderweb crop top.
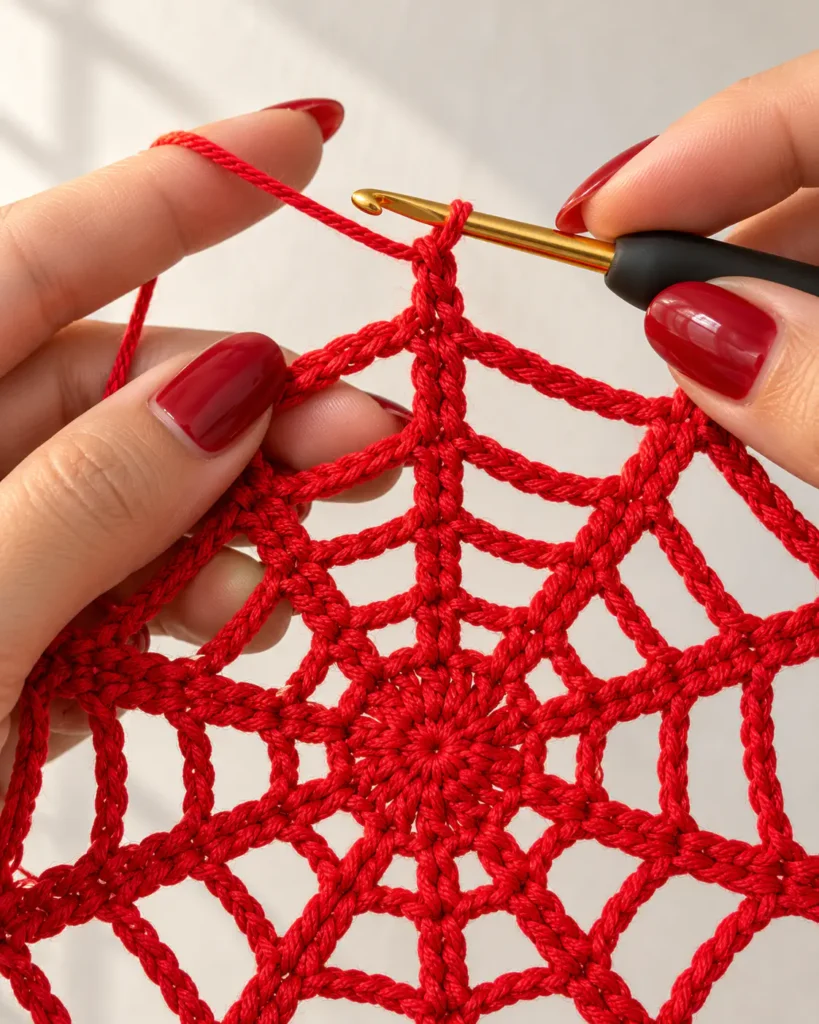
It does not replace the original pattern’s stitch counts, row repeats, increases, decreases, or assembly measurements.
Step 1: Create the foundation of the spiderweb

Begin with the center specified in your chosen spiderweb pattern. Depending on the design, a motif may begin with a joined chain ring or another center construction. Work the foundation stitches into or around this starting point as directed.
Visual check: The center should hold its shape without loose, disconnected strands.
Common mistake: Pulling the initial stitches too tightly can prevent the web from opening evenly.
Solution: Maintain consistent tension and check that your hook can enter the required spaces comfortably.
Experienced-maker tip: Place a removable marker near the starting point so you can identify round beginnings and joins later.
Step 2: Build the radial web structure
The radial supports give a spiderweb its recognizable shape. Follow the pattern’s sequence of stitches and chain spaces, maintaining the required attachment points.
Each new section must remain connected to the previous structure. Avoid improvising the number of spokes or chain spaces if you are following a fitted garment pattern. Changes can affect the web’s overall geometry and how it joins to the body.
Visual check: The spokes should extend outward in a balanced arrangement, with the intended spaces clearly visible.
Common mistake: Missing a chain-space attachment can create a distorted or unsupported section.
Solution: Count each repeat before moving to the next section.
Experienced-maker tip: Check the web flat on a table after each major repeat. Mild waviness may settle during blocking, but persistent cupping or severe ruffling often indicates a stitch-count or gauge issue.
Step 3: Expand the openwork motif
Continue the verified motif instructions until the web reaches its required size. Do not measure only the decorative center. Check the overall width and the intended placement on the upper garment. A motif can be technically correct yet still be unsuitable for the planned neckline.
Visual check: The openwork should appear consistent, with the web expanding according to the pattern.
Common mistake: Changing chain tension between rounds can make some openings much larger than others.
Solution: Keep your working rhythm consistent and compare corresponding sections before continuing.
Step 4: Crochet the cropped body
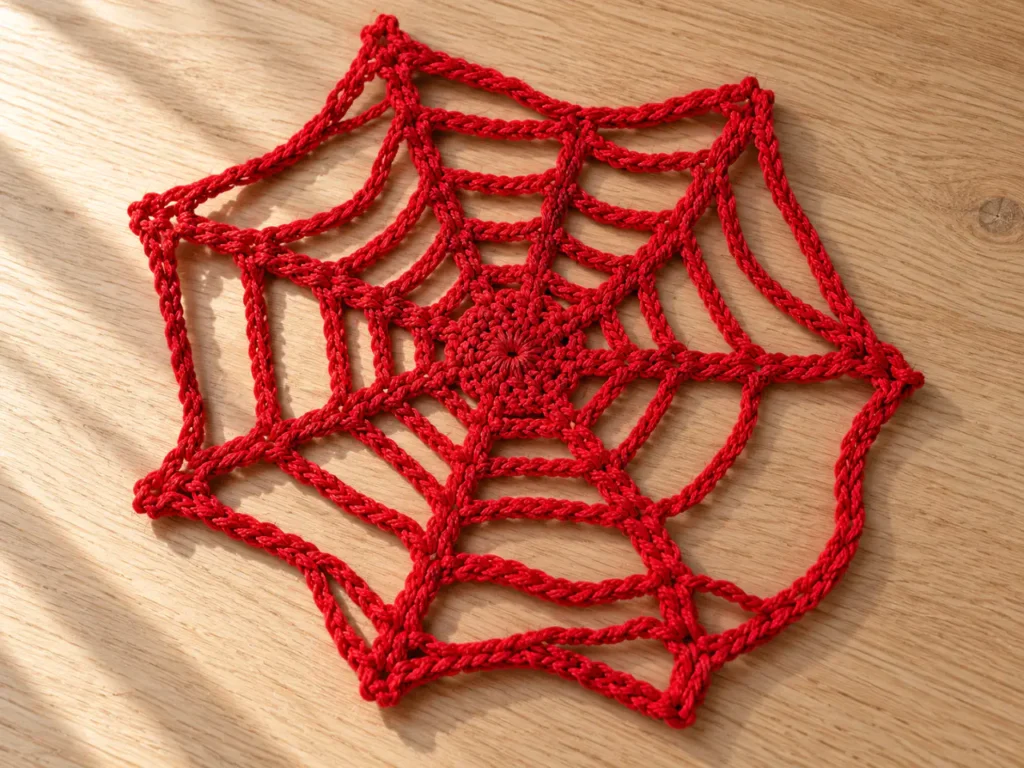
Work the body according to the original crop-top pattern. Depending on the construction, the body may be crocheted as separate shaped pieces, worked continuously, or assembled from multiple components.
The reference design uses a fitted striped section beneath the web. When changing colors, keep unused yarn managed neatly and avoid excessively tight color transitions.
Visual check: The body should remain flexible, and stripes should follow the intended shape without accidental puckering.
Common mistake: Tight stitches at color changes can cause the fabric to pull inward.
Solution: Maintain normal stitch tension and avoid tugging the inactive yarn excessively.
Experienced-maker tip: Measure the fabric periodically rather than relying only on the visual appearance of the stripes.
Step 5: Connect the spiderweb to the body
Joining is one of the most important construction stages. Position the completed web against the garment’s upper section. Confirm that its center is aligned with the intended neckline or upper-front placement.
Mark the joining points indicated by the pattern before stitching. Use the specified joining method, such as crochet joins or sewn seams, making sure the attachment is secure but not overly tight.
Visual check: The web should sit in its intended position without pulling the garment edge out of shape.
Common mistake: Attaching the outer web at unequal intervals can create bunching and uneven tension.
Solution: Mark corresponding attachment points and check alignment before fastening them permanently.
Experienced-maker tip: Try on the unfinished garment safely, or place it on a correctly sized dress form, before securing difficult-to-reverse joins.
Step 6: Finish the neckline and edges
The edging creates a clean visual border and may help stabilize the garment. Use the original pattern’s edging instructions around the relevant openings, straps, and hem. If your version includes contrasting black trim, check that the border lies flat without tightening the underlying fabric. A border that looks neat on a table may still feel restrictive when worn.
Visual check: Edges should be smooth, attached securely, and comfortable against the skin.
Common mistake: Working too few edging stitches can cause the fabric to gather or curl.
Solution: Recheck the border gauge and pattern spacing rather than forcing the fabric flat.
Step 7: Secure the ends and inspect the joins
Weave loose ends through appropriate stitches on the inside of the garment. Change direction where practical to reduce the chance of ends working loose. Avoid cutting an end close to the fabric immediately after a single pass. Inspect every joining point, paying particular attention to the outer web and any load-bearing straps or closures.
Visual check: Ends should be hidden and secure without creating noticeable lumps.
Common mistake: Cutting tails too short before securing them can leave insufficient yarn for reliable finishing.
Solution: Leave enough length for proper weaving according to the yarn and construction method.
Step 8: Block and test the finished fit
Wash or dampen the garment only as permitted by the yarn care instructions. Shape it gently to the intended measurements and allow it to dry completely. Never stretch a delicate spiderweb aggressively to force it to reach an unsupported size.
Try the garment on and inspect the neckline, body, hem, and joining points. Move your arms and torso naturally to check whether the web or edges pull uncomfortably.
Final checkpoint: The top should maintain its shape, provide the desired coverage, and feel secure during normal movement.
6. Learn the Key Spiderweb Crochet Skills
A web-shaped garment requires more control than a simple rectangular swatch.
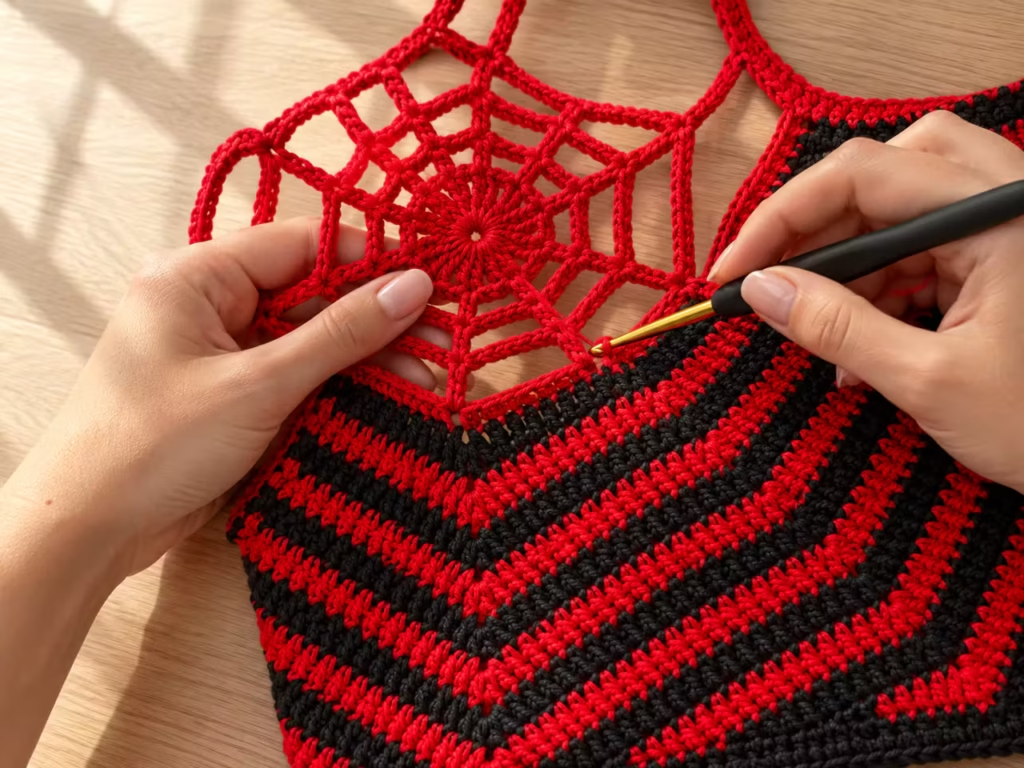
Skill A: Consistent chain tension
Chains form many of the visible openings. If some chains are tight and others are loose, the web can become distorted. Practice making small chain arches of the same specified length before attempting the full design. Check the arches without stretching them.
Skill B: Reliable chain-space placement
In openwork crochet, the placement of an anchor stitch matters as much as the stitch itself. Putting the correct stitch into the wrong opening can shift the geometry of the entire motif. Identify each target chain space before inserting your hook.
Skill C: Joining decorative and structural fabric
Openwork and dense crochet behave differently.
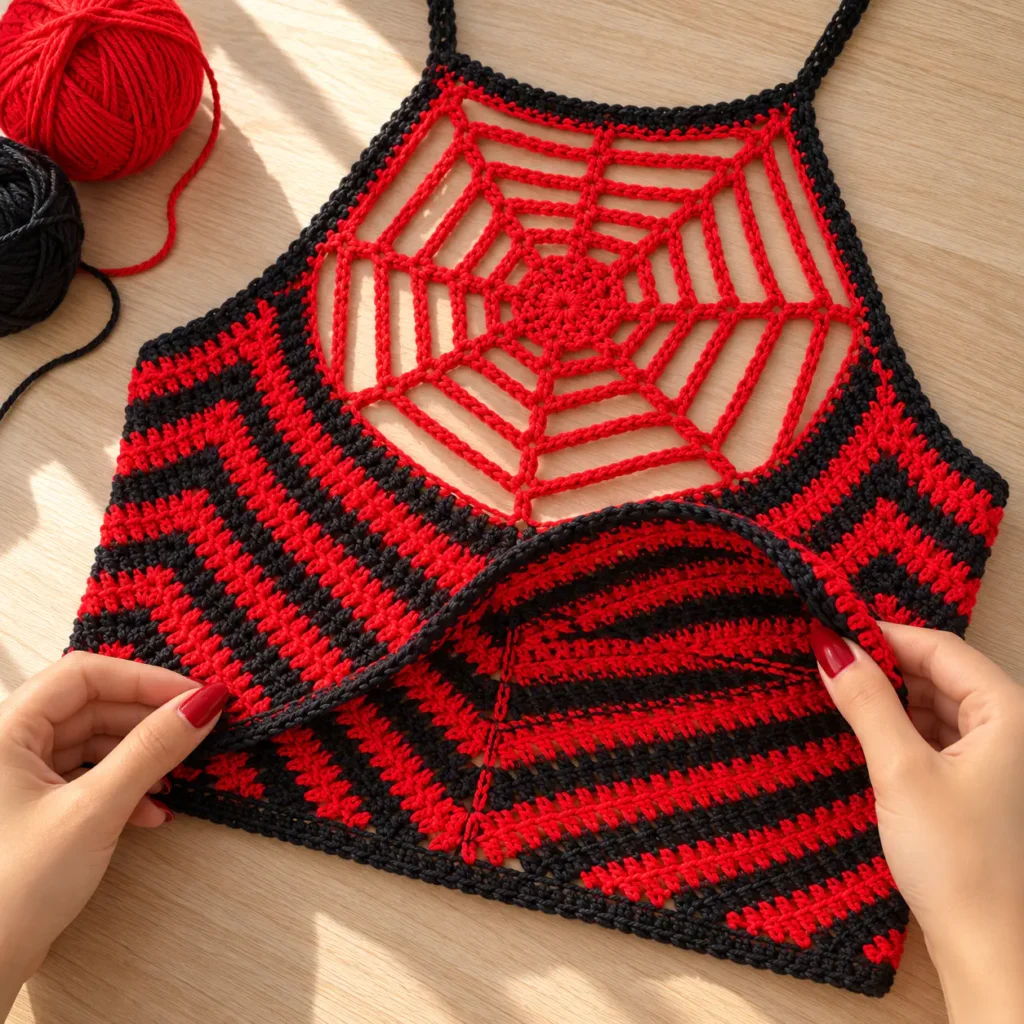
The decorative web may have more flexibility in some directions than the cropped body. A successful join accommodates this difference without making the neckline unstable.
Beginner-to-pro learning ladder
| Level | Focus | Practice Goal |
|---|---|---|
| Beginner | Chains, joins, and open spaces | Create a small flat web swatch |
| Intermediate | Consistent repeats and gauge | Maintain motif shape across sections |
| Advanced | Fit, shaping, and assembly | Join openwork to a wearable garment securely |
A small practice spiderweb makes a useful preparation project because errors are easier to see before the motif is attached to clothing.
7. Adjusting the Crochet Crop Top for a Better Fit
<!– gap –>
The most useful customization is not necessarily a different color. It is a better fit.
Adjusting length
For a shorter crop top, follow the pattern’s modification guidance and remove appropriate body rows only where the construction allows. For a longer version, add rows according to the stitch pattern and shaping requirements. Do not assume additional rows alone will preserve the intended waist or bust shaping.
Adjusting width
Compare the body’s finished measurements with your own measurements and desired ease. Ease is the difference between the garment measurement and the body measurement.
Positive ease provides additional room; negative ease means the garment is smaller and relies on fabric stretch. Cotton crochet may have limited recovery, so significant negative ease is not automatically appropriate.
Adjusting neckline placement
The neckline should balance the spiderweb’s decorative shape with reliable support. Before final assembly, pin or temporarily mark the intended placement and check the coverage.
If the web sits too high, too low, or too far toward one side, revisit the pattern’s alignment points. Avoid cutting or removing structural stitches to reshape the neckline without understanding how the motif is supported.
Keep a fit record
Write down the gauge, body measurements, actual finished measurements, and modifications used.
This creates a useful reference if you make the same project again.
8. Troubleshooting Common Crochet Problems
| Problem | Likely Cause | Practical Fix | Prevention |
|---|---|---|---|
| Spiderweb curls inward | Insufficient expansion or tight gauge | Recheck repeats and gauge | Check shape during construction |
| Web becomes ruffled | Excess expansion or loose sections | Correct the affected repeats | Verify counts and placement |
| Uneven web openings | Inconsistent chain tension | Rework the distorted section | Practice uniform chains |
| Crop top is too narrow | Gauge or sizing mismatch | Review garment measurements | Make and wash a gauge swatch |
| Stripes pucker | Tight color changes | Relax tension at transitions | Maintain consistent gauge |
| Neckline feels unstable | Incorrect join or support placement | Reassess the original assembly instructions | Mark joins before stitching |
| Edge rolls or tightens | Border gauge or stitch spacing | Rework edging | Check the border as you go |
| Ends become visible | Inadequate weaving | Secure and reweave ends | Leave sufficient finishing tails |
When should you unravel your work?
Unraveling is usually worthwhile when a construction error affects fit, stitch integrity, or the web’s geometry. A small difference in surface texture may be acceptable in handmade crochet, especially if it does not weaken the piece. An unsupported opening, broken yarn, or insecure join is more serious and should be repaired before wearing.
9. Compare Yarn and Design Alternatives
<!– gap –>
Changing the yarn can alter more than the appearance of your Halloween top.
| Yarn Choice | Best For | Advantages | Limitations |
|---|---|---|---|
| Cotton | Defined openwork | Clear stitch visibility | Limited natural elasticity |
| Cotton Blend | Softer or more flexible fabric | Properties vary by blend | Gauge may differ |
| Acrylic | Alternative lightweight garment construction | Broad range of colors | Drape and heat comfort vary |
| Wool Blend | More elastic fabric | May provide better recovery | Different care and warmth |
The safest substitute is one that produces the required gauge and an appropriate finished fabric. Never substitute solely because two yarn labels display similar weight categories.
Color variations
The original red-and-black combination gives the finished project a strong Halloween identity. Other coordinated color directions can create different effects.
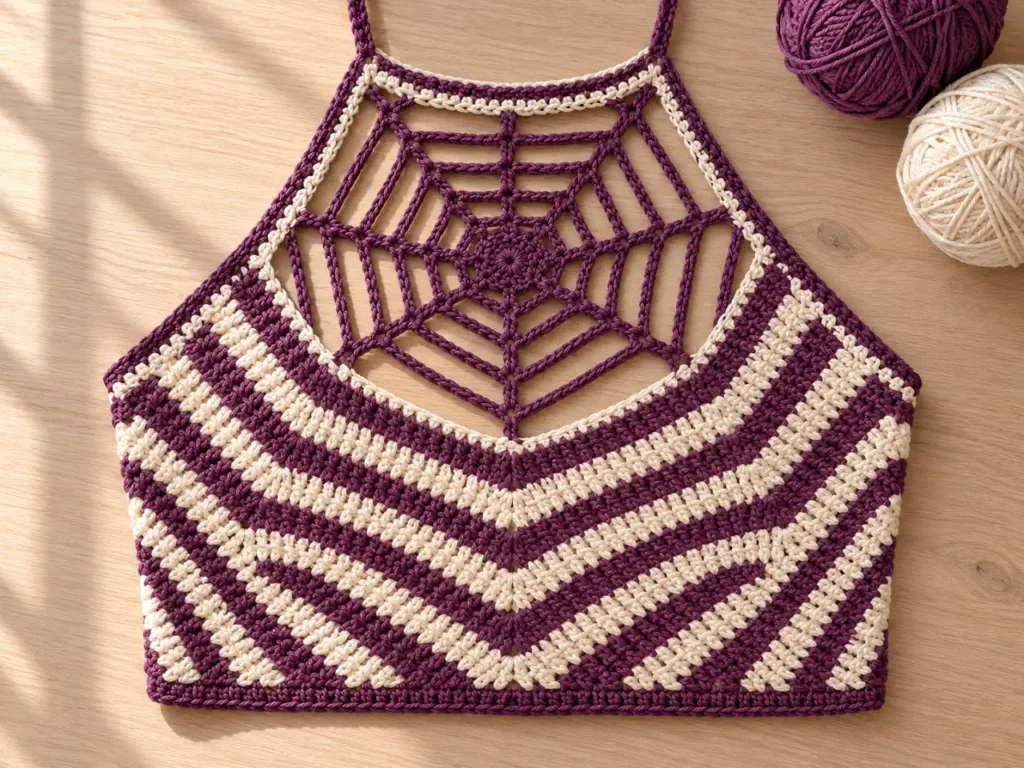
A plum-and-cream version emphasizes the spiderweb’s delicate openwork. A bone-white web against a charcoal body creates pronounced contrast. A monochrome design allows the shape and stitch texture to become the primary focus.
Keep the fiber and gauge requirements consistent when experimenting.
Styling the finished top
The red-and-black spiderweb top pairs naturally with black pants, a dark skirt, or denim. Because the crochet web is openwork, decide whether to wear a coordinating base layer underneath according to your comfort and desired coverage. A matching devil-horn crochet hat adds a playful Halloween element without changing the garment.
10. Finishing, Durability, and Care
<!– gap –>
A handmade crop top receives tension from movement, dressing, and repeated laundering. Its longevity depends heavily on finishing.
Inspect the weak points
Pay attention to areas where the garment changes direction or construction type. These may include the join between the web and body, strap connections, neckline edging, and seams. Inspect loose yarn tails and any areas where the stitches look stretched or unusually thin.
Wash carefully
Follow the care instructions for the actual yarn used. If suitable for hand washing, use gentle handling and avoid twisting or wringing the garment. Support the wet fabric when lifting it. Heavy wet cotton can stretch under its own weight, particularly around delicate openings.
Dry the garment flat
Lay the top on a suitable clean surface and gently reshape it. Avoid hanging a heavy wet crochet garment by narrow straps or delicate web sections. Store it folded once fully dry.
Simple repair approach
If an edge stitch loosens, secure the area before it spreads. If a structural join breaks, repair it using compatible yarn and a method appropriate to the original construction. Do not use adhesive as a substitute for a reliable garment join.
11. Make the Halloween Outfit Feel Complete
The spiderweb crop top can work as a standalone garment or as part of a coordinated Halloween crochet outfit. The reference styling combines three strong visual elements: a fitted striped crop top, a large red web, and a red bucket-style crochet hat with black horns.
The hat is a separate crochet project. Its crown, brim, horn shaping, and edging require their own tested instructions. For a matching set, choose yarn colors that coordinate, but do not assume both pieces use the same hook size or gauge.
Three ways to wear the spiderweb top
Casual Halloween styling: Pair the top with jeans and the matching horned hat.
Gothic outfit: Combine the crop top with dark bottoms and a coordinating underlayer if desired.
Costume-focused styling: Let the spiderweb design be the central feature and keep surrounding garments relatively simple.
The web’s open spaces give it much of its visual identity, so avoid covering them with bulky accessories.
Frequently asked questions
Is a crochet spiderweb crop top suitable for beginners?
The basic chains and openwork stitches can be learned by beginners. However, constructing a wearable crop top requires additional skills, including gauge control, shaping, joining, and fit assessment. Completing a small spiderweb swatch first is a practical way to build confidence before attempting the entire garment.
What yarn is best for a crochet spiderweb top?
Cotton can work well because its stitch definition makes openwork patterns easier to see. The correct yarn depends on the pattern’s required weight, gauge, and fabric behavior. A cotton blend may also be suitable if it produces compatible measurements and enough stability for the garment.
How much yarn do I need?
The amount depends on the finished size, garment length, yarn weight, gauge, and design. The reference does not include verified yardage. Consult the original pattern’s requirements and allow for swatching and potential adjustments rather than relying on an arbitrary estimate.
What hook size should I use for cotton yarn?
Use the hook size specified by the pattern as a starting point, then check your gauge. Different cotton yarns and crochet techniques produce different fabric densities. The reference does not provide a verified hook size, so assigning a specific millimeter measurement would be unreliable.
How do I keep my spiderweb crochet flat?
Count each pattern repeat, use consistent chain tension, and place stitches into the correct spaces. A web that cups or ruffles may indicate incorrect stitch placement or gauge. Blocking can improve minor irregularities but cannot reliably repair major construction errors.
Can I make the spiderweb crop top longer?
Yes, if the garment’s construction allows additional body length. Follow the pattern’s shaping instructions when adding rows. A longer top may require more yarn and extra attention to fit, particularly where the body changes width.
Can I use this spiderweb design for a Halloween costume?
Yes. The decorative openwork creates a recognizable spiderweb effect and pairs naturally with other Halloween pieces. For practical wear, check fit and coverage, secure all joins, and consider an underlayer if desired.
Is there a complete free crochet pattern for this exact top?
The supplied reference does not establish that a complete free pattern is available. It shows the finished design and broad making stages but lacks the verified stitch counts, repeats, gauge, and grading required for a reproducible pattern. A tested pattern is necessary to duplicate the garment accurately. —
13. Final Crochet Project Checklist
Before considering your handmade Halloween top complete, review the following:
- [ ] The yarn and hook produce the pattern’s required gauge.
- [ ] The spiderweb motif has the correct number of repeats and attachment points.
- [ ] The openwork lies as intended without major distortion.
- [ ] The body matches the required finished measurements.
- [ ] The neckline and supporting connections feel stable.
- [ ] Color changes do not pull the fabric out of shape.
- [ ] All yarn ends are woven in securely.
- [ ] The edges feel comfortable against the skin.
- [ ] The garment has been cared for and blocked appropriately.
- [ ] The finished fit has been checked during natural movement.
Save a Record of Your Project
Keep your gauge notes, yarn details, measurements, and any alterations alongside the original pattern. These records make it easier to reproduce the top, customize a second version, or correct a sizing issue.
Yarn weights and hook sizes in this guide follow the Craft Yarn Council standards.
Keep going: Cute Halloween Crochet Skeleton Crop Top Pattern | Step-by-Step Photos · Handmade Halloween Top Crochet: Spiderweb Design and Step-by-Step Guide · 12 Personalized Crochet Granny Square Crop Top Ideas: Which Style Wins?
Final Thoughts
A crochet spiderweb crop top is an opportunity to combine decorative openwork with wearable garment construction.
The most important skills are not simply making attractive chains or creating a recognizable web. They are maintaining consistent tension, following a reliable construction plan, joining the motif securely, and checking the garment’s fit.
Start with a small spiderweb practice motif, confirm your materials and gauge, and then follow a verified crop-top pattern through assembly and finishing. For the complete red-and-black Halloween outfit, the final creative step is coordinating the finished top with a separately crocheted devil-horn hat. With careful construction and thoughtful finishing, the result can be a distinctive handmade piece worth wearing beyond a single Halloween celebration.
Pin “Crochet Spiderweb Crop Top for Halloween: Step-by-Step Handmade Guide” so you can find it when the yarn arrives.
Get the next free pattern first
One email a week. New patterns, no noise.