
Crochet Fingerless Gloves: Easy Free Pattern for Beginners
Cold fingers can make everything from morning coffee runs to working at your desk a little less comfortable, but sometimes you still need the freedom to…

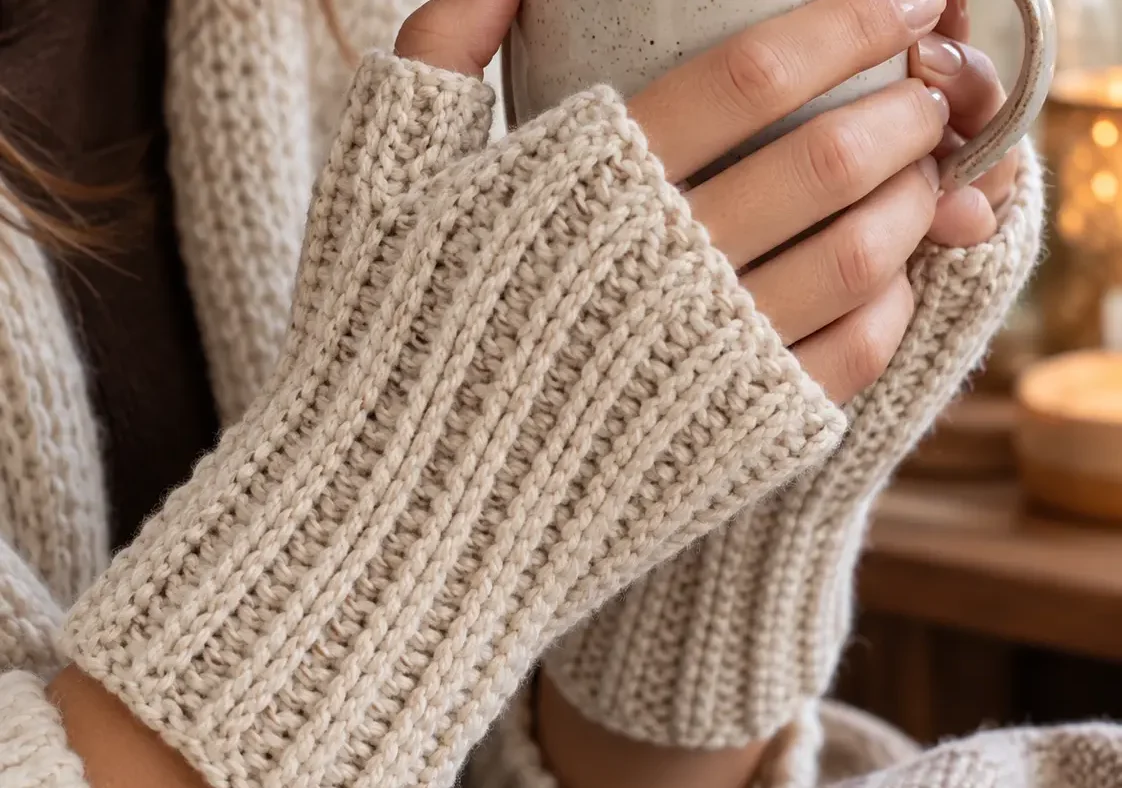
Cold fingers can make everything from morning coffee runs to working at your desk a little less comfortable, but sometimes you still need the freedom to use your hands. These crochet fingerless gloves are a practical little project that keeps your palms and wrists cozy while leaving your fingertips free. With soft yarn, a crochet hook, and a straightforward ribbed pattern, you can make a beautiful handmade pair without complicated shaping or advanced stitches.
The secret is surprisingly simple: each glove begins as a flat rectangle.
You’ll crochet rows of half double crochet through the back loops, creating soft vertical ridges that resemble knitted ribbing. Then you’ll join the edges, leaving an opening for your thumb.
No separate fingers to crochet. No complicated increases. No difficult thumb gusset.
And because the construction is adjustable, you can customize the gloves for your hands rather than relying entirely on a fixed row count.
Why You’ll Love These Crochet Fingerless Gloves
There’s a good reason fingerless gloves are such a satisfying crochet project.
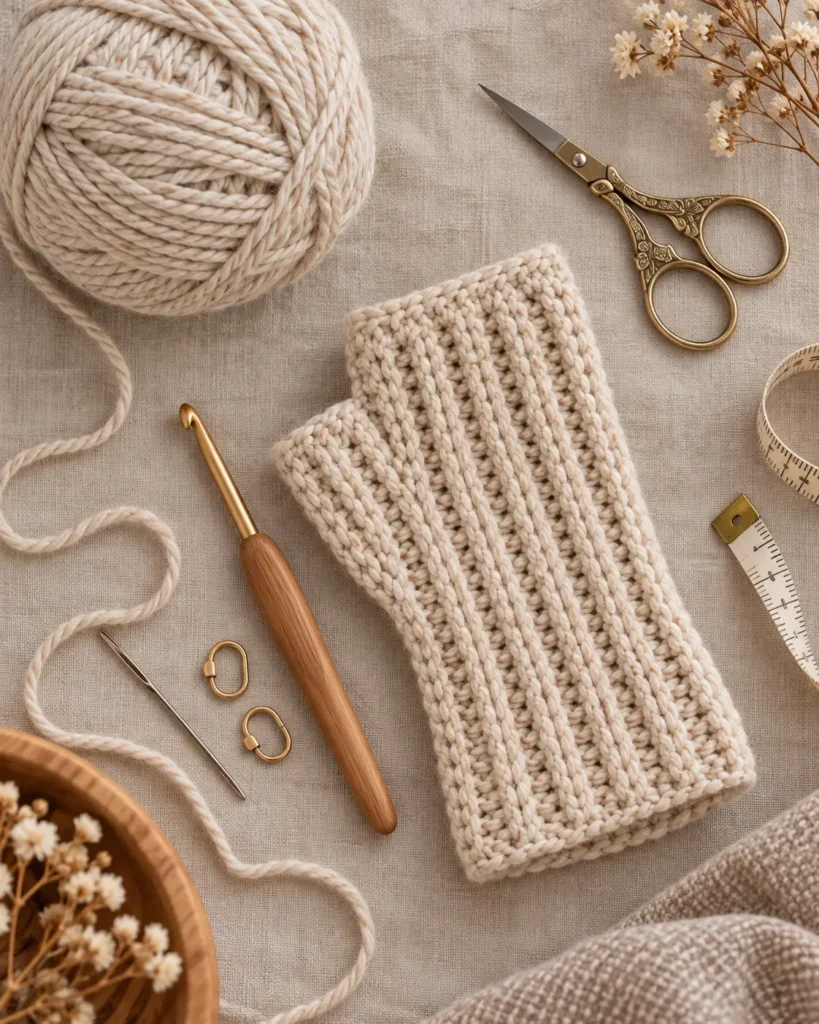
They’re small enough to finish without committing to a blanket-sized undertaking, yet useful enough to become part of your everyday wardrobe. These gloves are especially appealing because of their simple construction.
Beginner-friendly: You only need to know how to chain, half double crochet, and sew a basic seam.
Customizable fit: Instead of guessing your size, you’ll measure your hand and adjust the rectangle as you work.
Comfortable texture: Working through the back loops creates flexible ribbing that stretches across the hand.
Easy to personalize: Use one color, add contrasting cuffs, or make a matching scarf.
Thoughtful handmade gift: A pair of wrist warmers can make a lovely present for someone who enjoys cozy accessories.
The design is intentionally simple, but the finished texture gives it a polished appearance.
What Are Crochet Fingerless Gloves?
Fingerless gloves are hand coverings that keep the palms and wrists covered while leaving the fingertips exposed.
Unlike traditional mittens, they don’t enclose your fingers. That makes them useful for everyday activities where you need more freedom of movement, such as using your phone, writing, crafting, or handling small objects. Some designs reach just above the wrist, while others extend farther up the forearm.
You may also see them called:
- Crochet wrist warmers
- Fingerless mitts
- Crochet hand warmers
- Crochet texting gloves
Although these names are sometimes used interchangeably, individual patterns can have different lengths and constructions. The design in this tutorial is a ribbed, open-finger glove with a simple thumb opening. It uses a flat rectangle, which makes it easier for beginners to understand and adjust.
Are Crochet Fingerless Gloves Warm?
They can help keep your palms and wrists warm, depending on the yarn and fabric.
Wool blends often provide good warmth for cooler weather. Acrylic is another practical option for everyday accessories. Because the fingertips remain uncovered, fingerless gloves aren’t a substitute for fully enclosed winter gloves in freezing conditions. Their advantage is the balance between comfort and dexterity.
You don’t need many supplies to make these gloves. For your first pair, choose smooth yarn that feels comfortable against your skin.
| Material | Recommendation |
|---|---|
| Yarn | Worsted weight, category 4 |
| Hook | 5.0 mm / US H-8 as a starting point |
| Tapestry needle | For joining the side seams |
| Scissors | For cutting yarn |
| Stitch markers | For marking the thumb openings |
| Measuring tape | For checking hand size and glove length |
Best Yarn for Fingerless Gloves
The yarn you choose affects the warmth, softness, stretch, and overall appearance of the finished gloves.
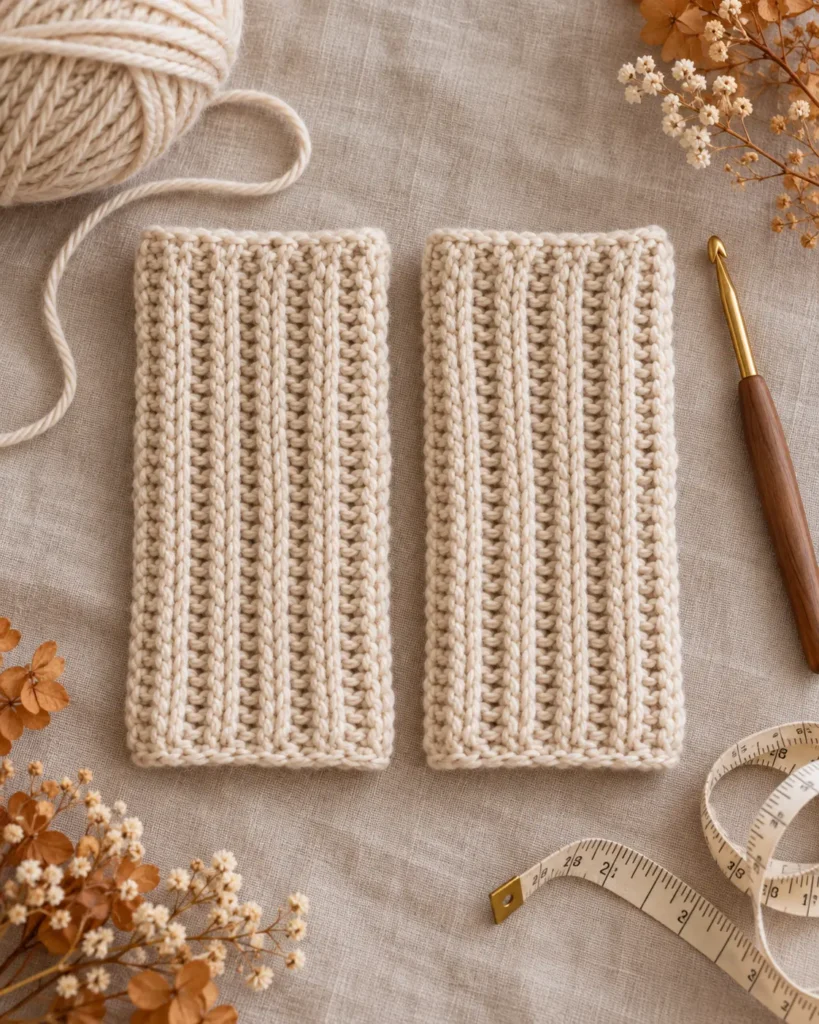
For this ribbed design, look for yarn that creates defined stitches without making the fabric too stiff.
Acrylic Yarn
Acrylic is an accessible choice for beginner projects. It’s available in plenty of colors, from soft neutrals to bright seasonal shades. Many acrylic yarns are easy to care for, although washing instructions vary between brands. A smooth, soft acrylic can work well for everyday fingerless gloves.
Wool and Wool Blends
Wool and wool blends can be excellent choices for cooler weather. They may offer warmth and resilience, making them suitable for accessories that need to move with your hands. Some wool yarns require gentle washing, so always check the label.
Cotton Yarn
Cotton produces clear, defined crochet stitches. It can be useful for lightweight accessories, especially when warmth isn’t the main priority. However, some cotton yarns have less elasticity than wool blends. For fitted ribbed gloves, test a cotton swatch carefully to make sure it stretches comfortably and recovers its shape.
Which Yarn Would I Choose for This Pattern?
For a first attempt, start with a smooth, soft worsted-weight yarn. Choose a light or medium color so you can easily see the back loops of your stitches.
Oatmeal, sage green, warm beige, dusty rose, and soft gray all complement the ribbed texture. Once you’re familiar with the pattern, experimenting with different fibers can create completely different styles.
How to Measure Your Hand for Crochet Fingerless Gloves
This is one of the most important parts of making gloves that actually feel comfortable.
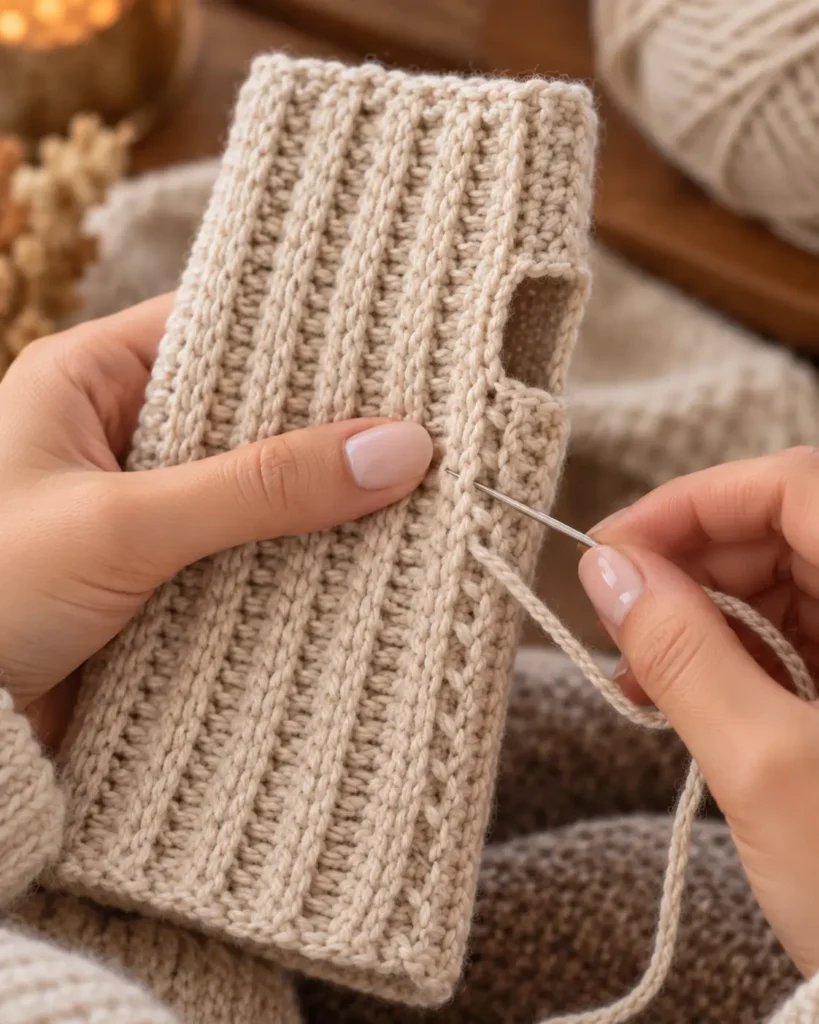
Before picking up your hook, measure the hand that will wear the gloves.
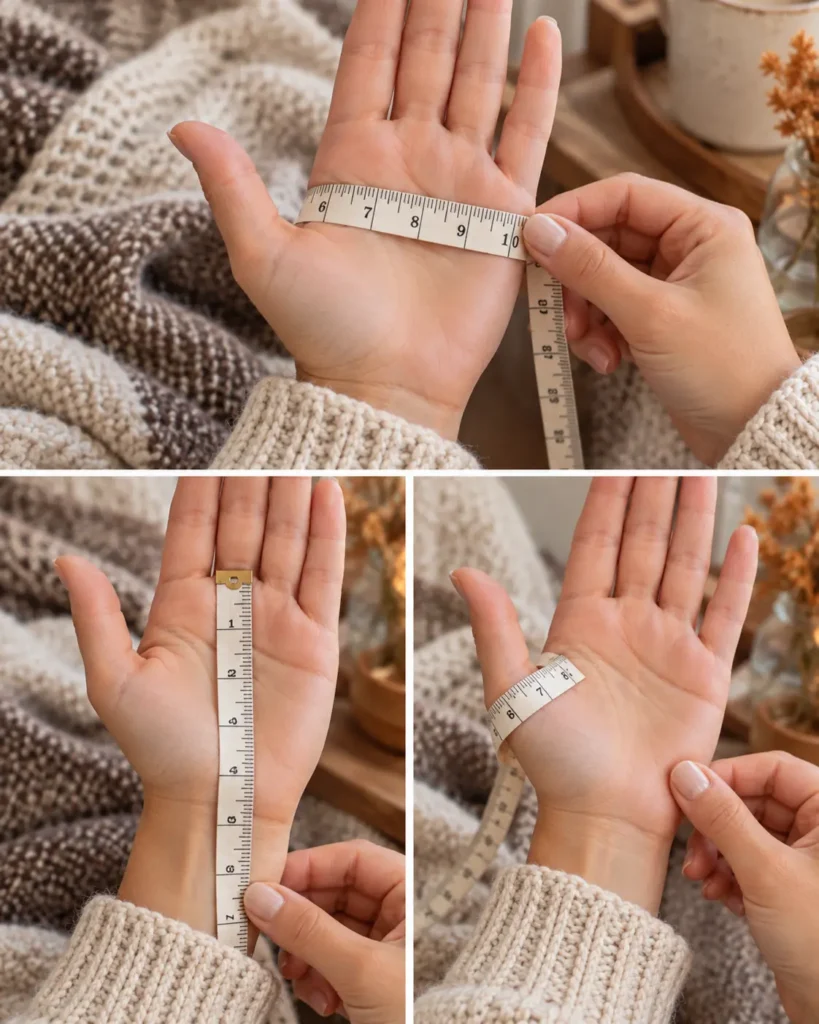
Step 1 — Measurement 1: Hand Circumference
Wrap a flexible measuring tape around the widest part of your palm, across the knuckles, without including the thumb. Keep the measuring tape comfortably snug. Don’t pull it tightly into the skin. Write down the measurement.
Step 2 — Measurement 2: Desired Glove Length
Measure from the point on your wrist or forearm where you want the glove to begin to the point on your hand where you want the finger opening. For this pattern, that measurement determines the length of your starting chain and crochet rows.
Step 3 — Measurement 3: Thumb Opening
Hold the measuring tape against the side of your hand. Notice where the base of your thumb begins and how much space your thumb needs to move comfortably. You’ll mark this area later, before sewing the glove.
Step 4 — General Adult Hand Size Reference
The following hand circumferences are based on the Craft Yarn Council’s sizing standards.
| Size | Hand circumference |
|---|---|
| Women’s Small | 7 in / 18 cm |
| Women’s Medium | 7.5 in / 19 cm |
| Women’s Large | 8 in / 20.5 cm |
| Men’s Small | 8 in / 20.5 cm |
| Men’s Medium | 8.5 in / 21.5 cm |
| Men’s Large | 9 in / 23.5 cm |
These are body-measurement references, not guaranteed finished glove sizes. The finished width must account for your fabric’s stretch and the fit you prefer. For this reason, measuring your own hand and testing the rectangle before sewing are more reliable than following a universal row count.
Crochet Stitches and Abbreviations
This pattern uses US crochet terminology.
| Abbreviation | Meaning |
|---|---|
| ch | Chain |
| hdc | Half double crochet |
| blo | Back loop only |
| st | Stitch |
| sts | Stitches |
| rep | Repeat |
| RS | Right side |
| WS | Wrong side |
How to Make a Half Double Crochet
The half double crochet is slightly taller than a single crochet but shorter than a double crochet.
To make one:
- Yarn over.
- Insert your hook into the designated stitch.
- Yarn over and pull up a loop.
- You should now have three loops on the hook.
- Yarn over and pull through all three loops.
That’s one half double crochet.
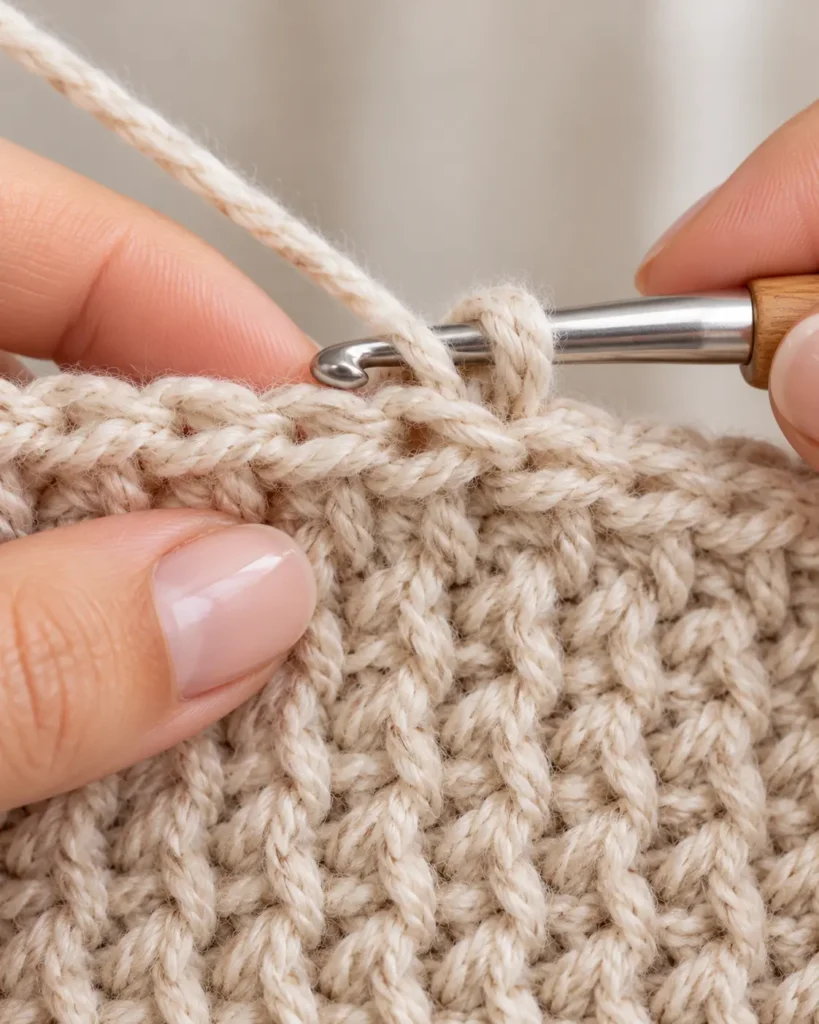
What Does Back Loop Only Mean?
Look at the top of a completed crochet stitch. You’ll see two loops forming a small V. The loop closest to you is the front loop.
The loop farther away is the back loop. Working back loop only (BLO) means inserting your hook beneath only the back loop instead of both loops. This leaves the front loop free and creates a raised ridge along the fabric. As the ridges build, the fabric develops a ribbed appearance that can stretch across your hand.
Free Crochet Fingerless Gloves Pattern
Now it’s time to make your gloves.
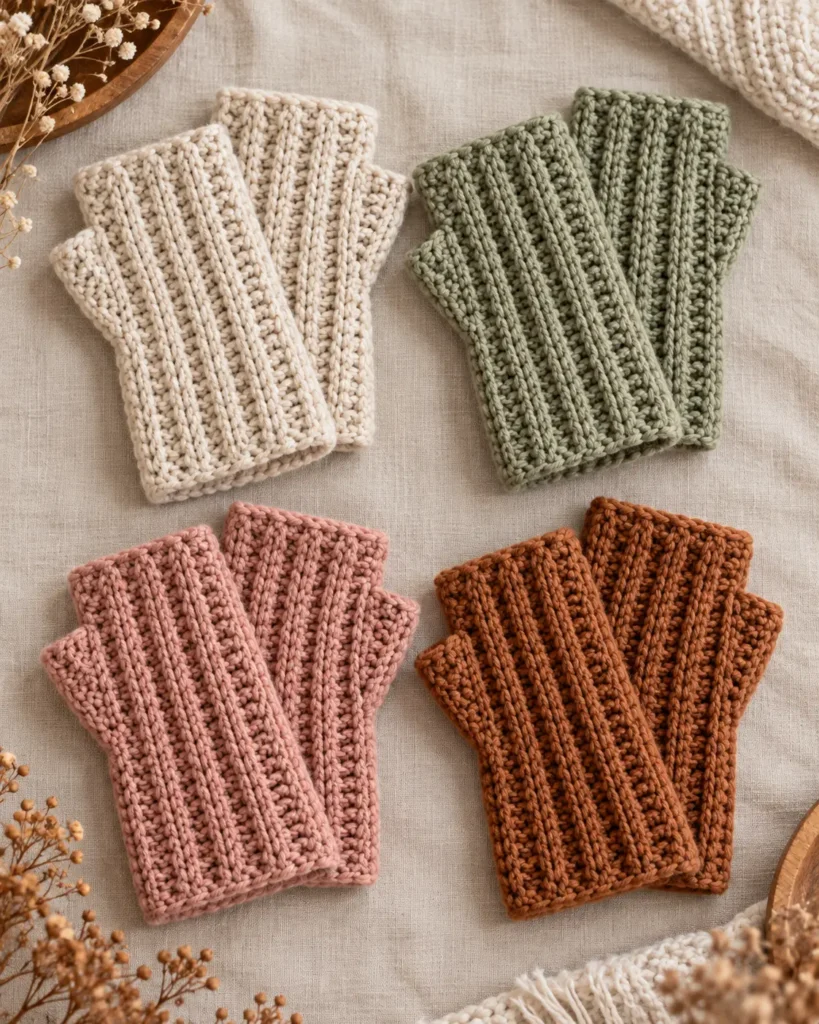
This pattern creates two matching rectangular panels that are joined to form a pair of fingerless mitts. We’ll work the rectangles sideways. The foundation chain determines the finished glove length. The number of rows determines how much fabric wraps around your hand.
Step 5 — Pattern Information
Project: Ribbed crochet fingerless gloves
Construction: Two flat rectangles, each seamed with a thumb opening
Stitch: Half double crochet in back loop only
Fit: Adjustable using hand measurements
Number of pieces: Two identical rectangles
Step 1: Make Your Foundation Chain
Begin with a slip knot.
Create a foundation chain that is long enough to match your preferred glove length. For an initial sample, you might begin with chain 26. This number is a starting example, not a guaranteed size.
The actual length of the chain depends on your yarn, hook, and tension. Hold the chain beside your wrist and hand to check whether it reaches the desired points. If it’s too short, add chains.
If it’s too long, remove a few. Make sure the foundation isn’t excessively tight.
Step 2: Crochet the First Row
Work one half double crochet into the third chain from the hook. Continue making one half double crochet in every remaining foundation chain. If you started with 26 chains, you’ll have 24 half double crochet stitches.
Chain two and turn your work. For this pattern, the turning chain does not count as a stitch.
Step 3: Work the Back Loop Only
Now you’ll begin creating the ribbed texture.
Yarn over.
Insert your hook into the back loop of the first half double crochet.
Pull up a loop.
Yarn over and pull through all three loops on your hook.
Continue working one half double crochet in the back loop of each stitch across the row. Make sure you don’t accidentally skip the first stitch. At the end of the row, chain two and turn.
Step 4: Repeat the Ribbed Pattern
Continue working one half double crochet into the back loop of every stitch. At the end of each row, chain two and turn. Repeat until your rectangle is wide enough to wrap around your hand.
Don’t worry if the fabric looks narrow when resting flat. The ribbed structure is designed to stretch across its width.
Step 5: Check the Width
Wrap the rectangle gently around your palm, with the ribbing running vertically from wrist to fingers. The two unfinished row edges should meet comfortably along the side of your hand. They should not overlap significantly.
The fabric should feel snug without squeezing your palm or restricting movement. If the rectangle is too narrow, add more rows. If it’s too loose, remove a few rows. Be sure to test the fit using the hand that will wear the finished glove.
Step 6: Fasten Off
Once your rectangle fits, cut the yarn. Leave a sufficiently long tail for sewing the seam, or use a separate length of matching yarn for joining. Pull the tail through the final loop.
Make a second rectangle using the same foundation stitch count, yarn, hook, and number of rows. You now have the two flat pieces needed to create your gloves.
How to Make the Thumb Opening
This is where the flat rectangle becomes a glove. Before sewing, make sure you understand which edge is the wrist and which edge is the finger opening. The raised ribbing should run lengthwise along your hand.
Step 1: Fold the Rectangle
Fold or wrap the rectangle so the two row-edge sides meet. The foundation-chain edge and final stitch-row edge form the wrist and finger ends of the glove. Adjust the placement so the raised ribs run vertically.
Step 2: Mark the Thumb Position
Hold the folded rectangle against your hand. Use stitch markers to identify where your thumb needs to pass through the side seam. The opening needs enough space for your thumb to move comfortably.
An opening around 1.5–2 inches may be a useful starting trial for some adult hands, but the correct size depends on the wearer. Check the fit before making a permanent seam.
Step 3: Sew the Wrist Section
Thread the sewing tail onto your tapestry needle. Beginning at the wrist edge, join the two sides of the rectangle using a simple mattress stitch or another neat, secure seam. Stop at the lower marker that identifies the thumb opening.
Avoid pulling the seam too tightly. You want the ribbed fabric to retain its flexibility.
Step 4: Leave the Thumb Opening
Do not sew the area between the two thumb markers. This gap forms the opening for your thumb. You can pass the yarn discreetly along the inside if appropriate, or secure it and start a separate length of yarn for the upper seam. Avoid leaving a loose strand stretched across the thumb opening.
Step 5: Sew Above the Thumb
Join the remaining upper section between the thumb opening and the finger edge. This keeps the glove comfortably positioned around the hand. Try it on before fastening off completely. Your fingers and thumb should move freely without the fabric pulling tightly.
Step 6: Finish the Second Glove
Repeat the process with the other rectangle. Position the seam and thumb opening so they sit comfortably on the opposite hand. Because this design uses a simple, symmetrical rectangle, you can adjust the fold and seam orientation for each hand. Weave in all remaining yarn ends securely.
Printable Crochet Fingerless Gloves Pattern
Here’s the entire pattern in a shorter format.
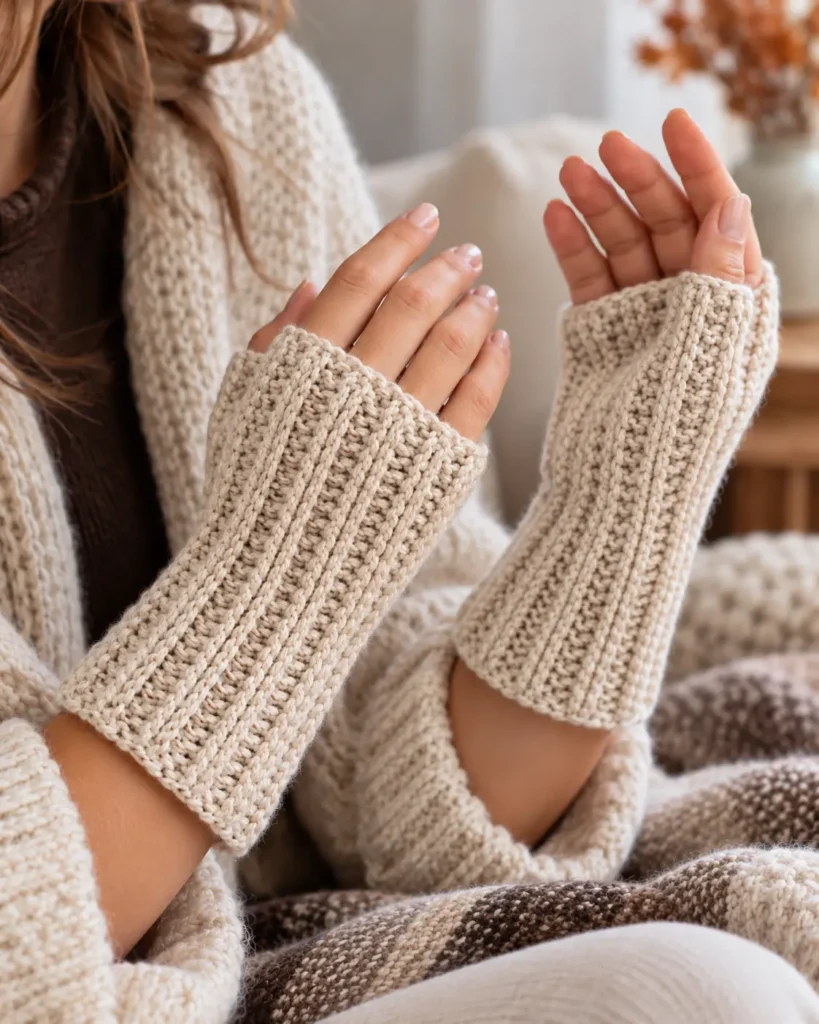
Step 6 — Ribbed Fingerless Gloves — Free Pattern
Materials: Worsted-weight yarn, 5.0 mm hook, tapestry needle, scissors, stitch markers.
Make 2 identical panels.
Foundation: Ch 26, or adjust the chain count to reach your desired glove length.
Row 1: Hdc in 3rd ch from hook and in each ch across. Ch 2, turn.
For ch 26: 24 hdc.
Row 2: Hdc blo in first st and in each st across. Ch 2, turn.
Row 3 onward: Repeat Row 2 until the rectangle wraps comfortably around your hand.
Finishing: Fasten off, leaving a tail for sewing.
Assembly: Bring the two row-edge sides together. Seam the wrist section, leave an appropriately sized opening for the thumb, then seam the upper hand section.
Repeat: Make and assemble the second glove.
Final step: Weave in yarn ends and shape the gloves gently.
Step 7 — Construction Diagram
FLAT CROCHET RECTANGLE
FINGER EDGE ┌─────────────────┐ │ ||||||||||||||| │ │ ||||||||||||||| │ │ ||||||||||||||| │ │ ||||||||||||||| │ │ ||||||||||||||| │ └─────────────────┘ WRIST EDGE
Vertical lines = ribbing
AFTER JOINING SIDE EDGES
FINGER OPENING ╭────────╮ │ │ │ ├── Upper seam │ │ │ ○ ← Thumb opening │ │ │ ├── Wrist seam │ │ ╰────────╯ WRIST OPENING
This is a construction sketch, not a stitch-by-stitch crochet symbol chart. Position the thumb opening using the wearer’s actual hand measurements.
How to Customize the Size
One of the nicest things about this construction is how easy it is to adjust. You don’t need to change complicated shaping instructions. You only need to adjust the rectangle.
Step 8 — For Smaller Hands
Begin with a shorter foundation chain if you want a shorter glove. Work fewer rows until the rectangle fits comfortably around the hand. Remember to check thumb placement before sewing.
Step 9 — For Larger Hands
Add foundation chains if you want more length from wrist to fingers. Continue working additional rows if you need more circumference. Don’t rely solely on the number of rows from another person’s pattern. Your gauge may be different.
Step 10 — For Longer Wrist Warmers
Increase the foundation chain length so the fabric extends farther up your wrist or forearm. Measure the forearm circumference as well as the hand circumference. If the two measurements differ significantly, a straight rectangle may not give the desired fit, and a shaped pattern could be more comfortable.
Step 11 — For a Snugger Fit
Choose a fabric that stretches comfortably and returns to its original size. Try the rectangle on before sewing. If it feels too loose, you may be able to remove a few rows. Avoid making the gloves so tight that they leave deep marks or interfere with circulation.
Ways to Personalize Your Crochet Fingerless Gloves
Once you’ve made the basic pair, you can start experimenting with color and small design details.
1. Make Classic Cream Gloves
A soft cream or oatmeal yarn highlights the ribbed texture. This neutral style works well with scarves, sweaters, and casual fall outfits.
2. Try a Two-Color Design
Use one yarn color for most of the rectangle and another for a few rows at the beginning or end. Depending on how the finished rectangle is joined, those contrast rows can create a decorative section near the side seam.
3. Choose Autumn Colors
Rust, olive green, mustard, taupe, and chocolate brown are beautiful choices for fall accessories. You can make matching gloves in one color or mix coordinating shades.
4. Add a Simple Border
If desired, work a round of single crochet around the wrist and finger openings after assembly. Keep the border flexible and avoid adding too many tight stitches. A decorative border can make the finish look more polished, but it isn’t required for the pattern.
5. Make a Matching Set
Pair the gloves with a scarf, headband, or cowl using a similar ribbed texture. Keeping the yarn and color palette consistent can make separate accessories feel like a coordinated collection.
Common Crochet Fingerless Gloves Mistakes
If your first glove doesn’t fit perfectly, check these common problems before starting again.
| Problem | Possible reason | Solution |
|---|---|---|
| Glove feels tight | Rectangle is too narrow | Add rows or use a more flexible fabric |
| Glove slips down | Too many rows or loose fabric | Reduce the width and test again |
| Thumb opening feels tight | Gap is too small or poorly positioned | Adjust markers before sewing |
| Glove twists | The seam is pulling or uneven | Rejoin the edges without excessive tension |
| Ribbing looks inconsistent | Back-loop stitches were missed | Check that every row uses BLO |
| Edges become narrower | Missed stitches at row ends | Count stitches regularly |
| Gloves are different sizes | Panels have different counts or tension | Compare both rectangles before assembly |
Why Are My Gloves Too Tight?
Check the rectangle’s width before sewing. If you can wrap it around your hand only by stretching it excessively, add more rows. Also consider the yarn. Some fibers stretch more comfortably than others.
Why Isn’t My Ribbing Stretchy?
Make sure you’re inserting the hook into the back loop only. Working through both loops on some rows will interrupt the ridged texture. A tight hook size can also create a stiff fabric. Try making a short swatch with a slightly larger hook to compare.
Why Does the Thumb Hole Feel Uncomfortable?
The opening may be positioned too high, too low, or too small. Before permanently securing the seams, put the glove on. Move your thumb through its normal range of motion. You should be able to grip a cup or phone without feeling pulling around the base of your thumb.
Why Are My Gloves Different Lengths?
Count the foundation stitches and rows in both panels. Use the same hook and yarn for each glove. Also compare the rectangles side by side before assembly. Minor differences in tension can affect the finished dimensions.
Washing and Caring for Your Crochet Gloves
Handmade gloves usually get more regular wear than purely decorative crochet pieces. Following the yarn manufacturer’s care instructions will help keep them in good condition.
Acrylic Gloves
Many acrylic yarns are machine washable, but always check the specific label. Avoid excessive heat unless the manufacturer allows it.
Wool Gloves
Some wool yarns require handwashing and flat drying. Others are specifically designed for machine washing. Check the label to avoid shrinkage or felting.
Cotton Gloves
Cotton gloves may tolerate regular washing, depending on the yarn. Keep in mind that some cotton fabrics can stretch or change shape after washing.
Drying Your Gloves
Lay the gloves flat and shape them gently. Don’t pull aggressively on the thumb openings or seams. Make sure they’re fully dry before storing them. If you’re giving them as a gift, consider including a small care label with the yarn’s washing instructions.
Frequently asked questions
Are Crochet Fingerless Gloves Easy for Beginners?
Yes. A rectangular glove pattern is a good beginner project because it requires only basic stitches, straight rows, and simple seaming.
How Much Yarn Do I Need for Fingerless Gloves?
The amount depends on yarn weight, hand size, glove length, and tension. For an accurate estimate, weigh or measure a completed sample rather than assuming all glove patterns use the same yardage.
What Is the Best Crochet Stitch for Fingerless Gloves?
Half double crochet through the back loop is a useful option because it creates a ribbed texture with some stretch. Other patterns may use single crochet ribbing, moss stitch, or textured stitch combinations.
Can I Crochet Fingerless Gloves Without Sewing?
Yes. Some designs are worked in continuous or joined rounds. However, rectangular gloves with a side seam are often easier for beginners to understand and adjust.
How Do You Make a Thumb Hole in Crochet Gloves?
For this flat-panel design, you leave a gap in the side seam between two marked positions. The opening should be large enough for the thumb to move comfortably.
Can I Make Fingerless Gloves With Moss Stitch?
Yes. Moss stitch creates an attractive woven-looking fabric, but it may behave differently from ribbed crochet. Measure your gauge and test the stretch before using it for fitted gloves.
Are Fingerless Gloves Good Handmade Gifts?
They can make thoughtful gifts, especially when you know the recipient’s preferred colors and approximate hand size. A comfortable fit and easy-care yarn make the finished pair more practical. —
Yarn weights and hook sizes in this guide follow the Craft Yarn Council standards.
Keep going: Crochet Moss Stitch: Easy Free Tutorial for Beginners · Crochet Moss Stitch: Easy Step-by-Step Tutorial for Beginners · How to Crochet the Moss Stitch
Final Thoughts
A pair of handmade crochet fingerless gloves is proof that a simple pattern can become something genuinely useful. By working a basic ribbed rectangle and leaving space for the thumb, you can create cozy accessories without complicated shaping. Start with a smooth worsted-weight yarn, take your hand measurements, and focus on making two matching rectangles.
The most important part isn’t following an exact number of rows. It’s creating fabric that feels comfortable on the wearer’s hands. Once you’ve finished your first pair, try a new yarn color, a longer wrist section, or a matching crochet accessory.
Save this free crochet fingerless gloves pattern to Pinterest so you can come back to the instructions whenever you’re ready to make another pair.
The Crochet Side, Handmade crochet patterns, beginner-friendly tutorials, and cozy creative inspiration.
Pin “Crochet Fingerless Gloves: Easy Free Pattern for Beginners” so you can find it when the yarn arrives.
Get the next free pattern first
One email a week. New patterns, no noise.





