
Cute Crochet Baby Booties: Easy Free Pattern for Beginners
Tiny baby shoes have a way of turning a few yards of yarn into something incredibly special. These cute crochet baby booties are designed with soft rounded…

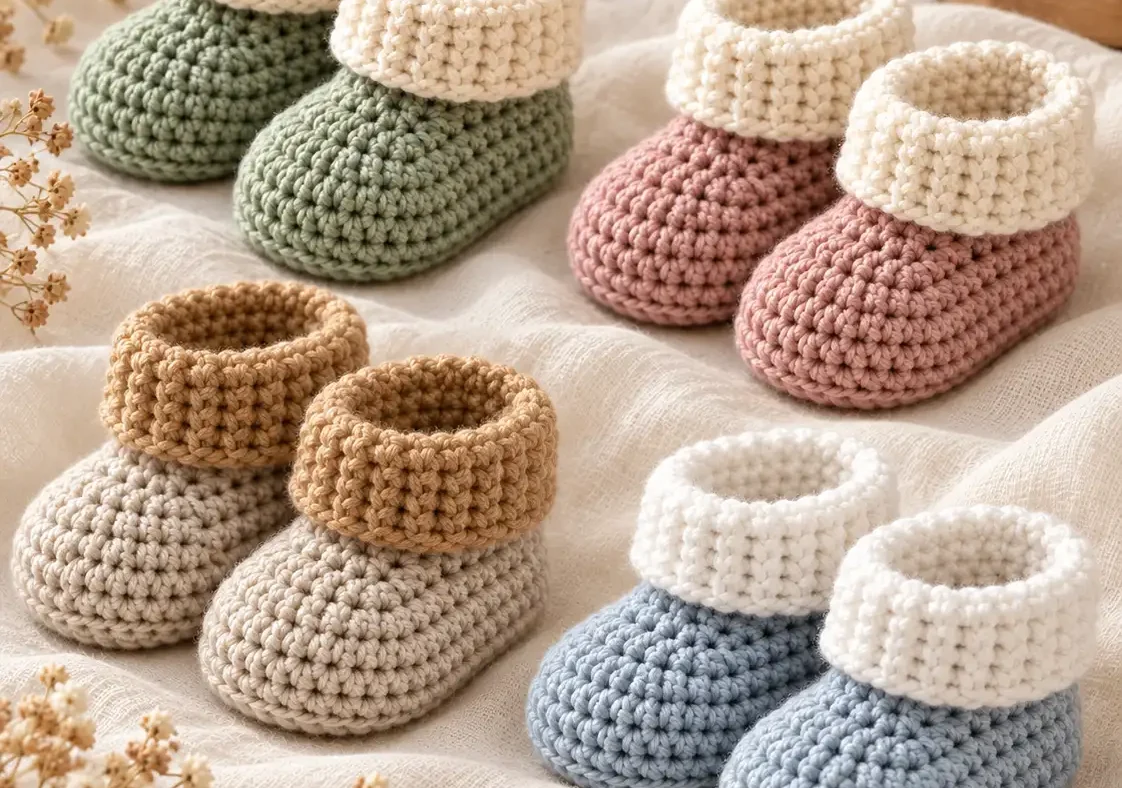
Materials list
- Skill level: Adventurous beginner
- Construction: Worked in joined rounds, beginning with an oval sole
- Terminology: US crochet terms
- Finished size: Determined by your gauge and actual sole measurement, not by the hook size alone
- Yarn quantity: [MY INPUT: Measure and record the yardage used by the completed test pair.]
- *Image alt: Supplies for an easy crochet baby booties free pattern.*
Tiny baby shoes have a way of turning a few yards of yarn into something incredibly special. These cute crochet baby booties are designed with soft rounded toes, a comfortable ankle opening, and a classic handmade look that makes them a lovely baby shower gift. If you know how to chain, single crochet, and half double crochet, this free pattern will guide you through the construction one step at a time.
The design is simple enough to approach as an early wearable project, while the finished booties have a polished look that’s perfect for gifting. You’ll begin by crocheting an oval sole. Next, you’ll build the sides, shape the toe, and finish with a short cuff that can be gently folded down.
There’s no need to attach separate soles or sew several complicated pieces together. And because baby feet come in different sizes, we’ll also cover how to measure a sole and adjust your work before completing the pair.
Why You’ll Love These Baby Booties
A handmade pair of baby booties is a small project with plenty of personality.
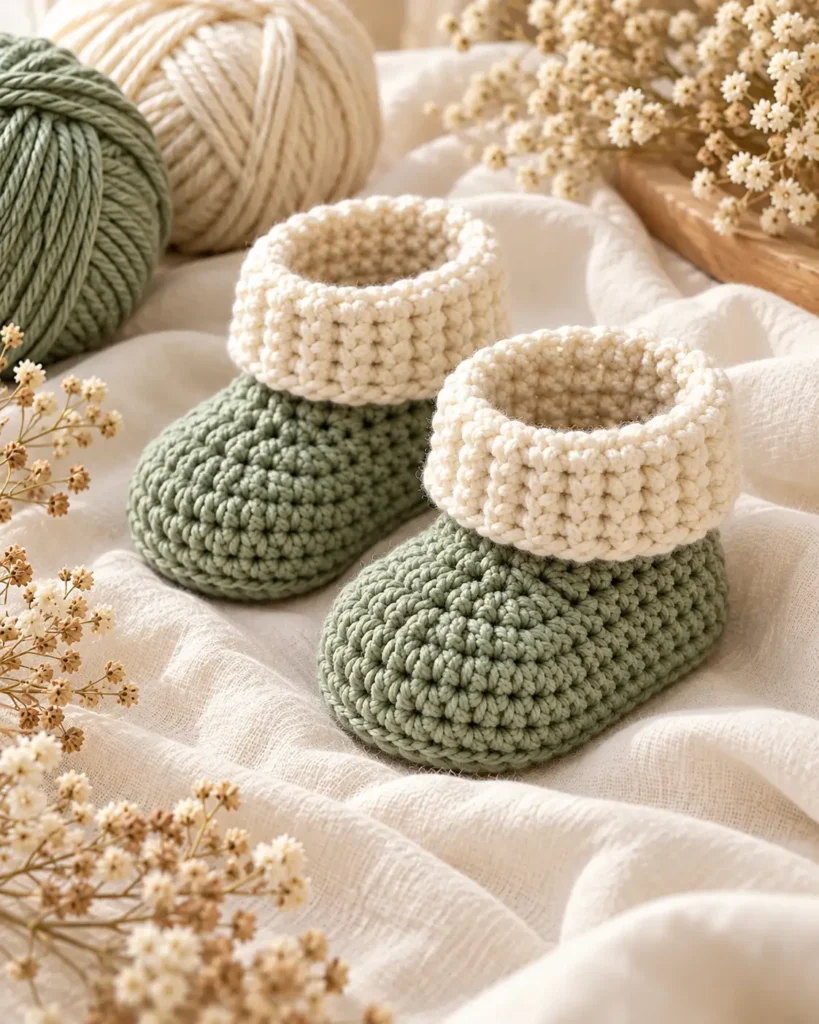
Unlike a large blanket or sweater, baby booties let you practice several useful crochet techniques without committing to a substantial amount of yarn. This pattern has a few features that make it particularly appealing.
A Classic, Rounded Shape
The booties have softly curved toes and a simple slipper-like silhouette. They look lovely in solid colors, especially when paired with a contrasting cuff.
No Separate Sole to Sew On
The sole is crocheted first, then the sides are worked directly into it. This makes the construction easier to follow and avoids the need to attach a separate base.
A Simple Folded Cuff
The short ankle cuff adds a finished look. You can keep it in the same color as the bootie or switch to cream, oatmeal, or another coordinating shade.
Great for Handmade Gifts
A pair of booties can be part of a thoughtful baby shower present. Pair them with a handmade hat, a small blanket, or a simple gift tag. For baby items, keep the design free from loose decorative pieces, long ties, and detachable embellishments.
Easy to Personalize
You can experiment with color combinations or adjust the height of the cuff. Once you’ve learned the construction, you can use the same basic techniques as a starting point for other bootie designs.
You only need a few crochet essentials. For the sample design, choose a smooth, soft yarn that’s comfortable against delicate skin.
| Material | Recommendation |
|---|---|
| Yarn | Soft DK or light worsted-weight yarn |
| Crochet hook | 3.75 mm (US F-5) as a trial starting point |
| Tapestry needle | For securing yarn ends |
| Scissors | Small craft scissors |
| Stitch markers | At least three removable markers |
| Measuring tape | For checking sole length |
| Optional second color | Cream yarn for contrasting cuffs |
This pattern is a draft design intended to be crocheted and checked against its written stitch counts. The recommended hook and yarn are starting suggestions, not a verified gauge combination.
Make one sole first and measure it before completing the upper. If it doesn’t match the size you want, change your yarn or hook and make another sample.
Best Yarn for Crochet Baby Booties
The best yarn for baby booties should feel soft, be easy to care for, and produce a comfortable fabric.
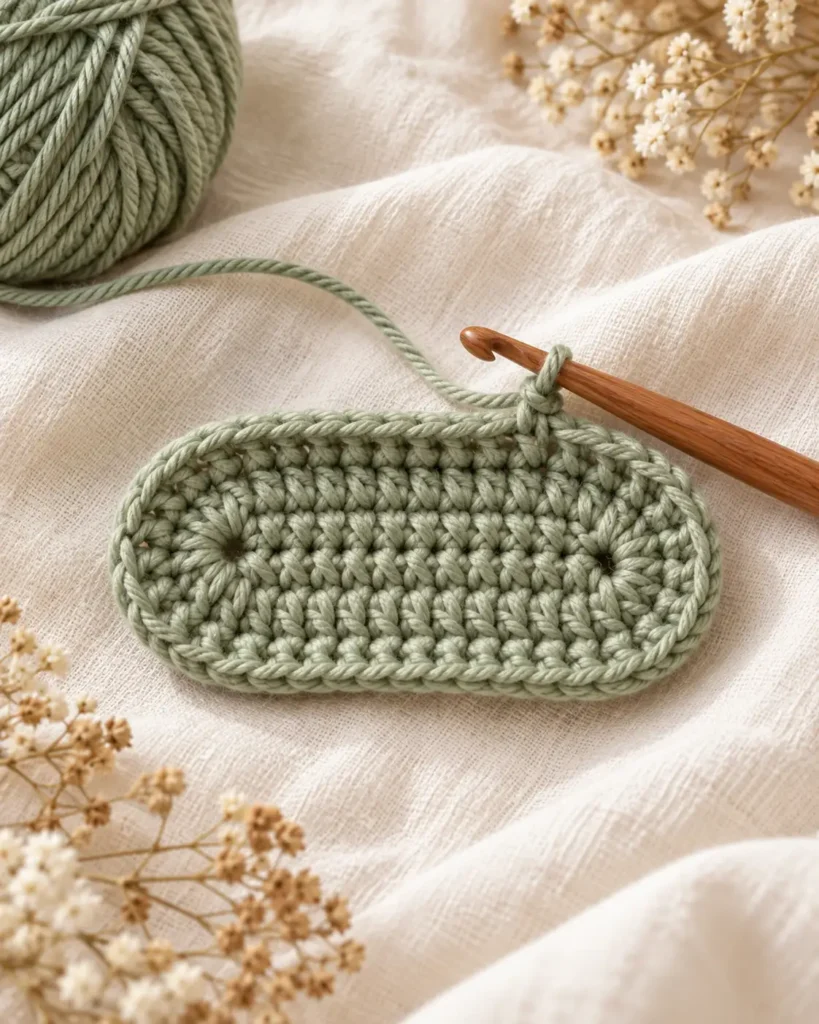
A yarn that looks beautiful in a skein isn’t necessarily the best choice for baby shoes. Always feel the finished crochet fabric before choosing it for a baby item.
Soft Acrylic Yarn
Soft acrylic yarn is widely available in many colors. Many varieties are machine washable, making them convenient for everyday baby accessories. Choose a smooth, comfortable acrylic rather than a scratchy or heavily textured option.
Cotton and Cotton Blends
Cotton creates clearly defined stitches and can work well for lightweight baby accessories. However, cotton yarns vary in firmness and elasticity. Some may feel too stiff when crocheted tightly. A cotton blend can sometimes provide a softer drape.
Soft Wool Blends
Some wool blends make warm, comfortable baby booties. If choosing wool, pay attention to softness, care requirements, and the family’s fiber preferences. Avoid yarn that feels scratchy or sheds heavily.
Yarn I Would Avoid for This Design
Very fuzzy novelty yarn can make stitches difficult to see and may shed fibers. Extremely bulky yarn can make the finished booties unnecessarily stiff.
Yarns with sequins or other attached decorations are also poor choices for baby accessories.
For a first pair, a smooth, washable DK-weight yarn is a sensible option.
Crochet Baby Booties Size Guide
Baby shoe sizes can be confusing because babies grow at different rates.
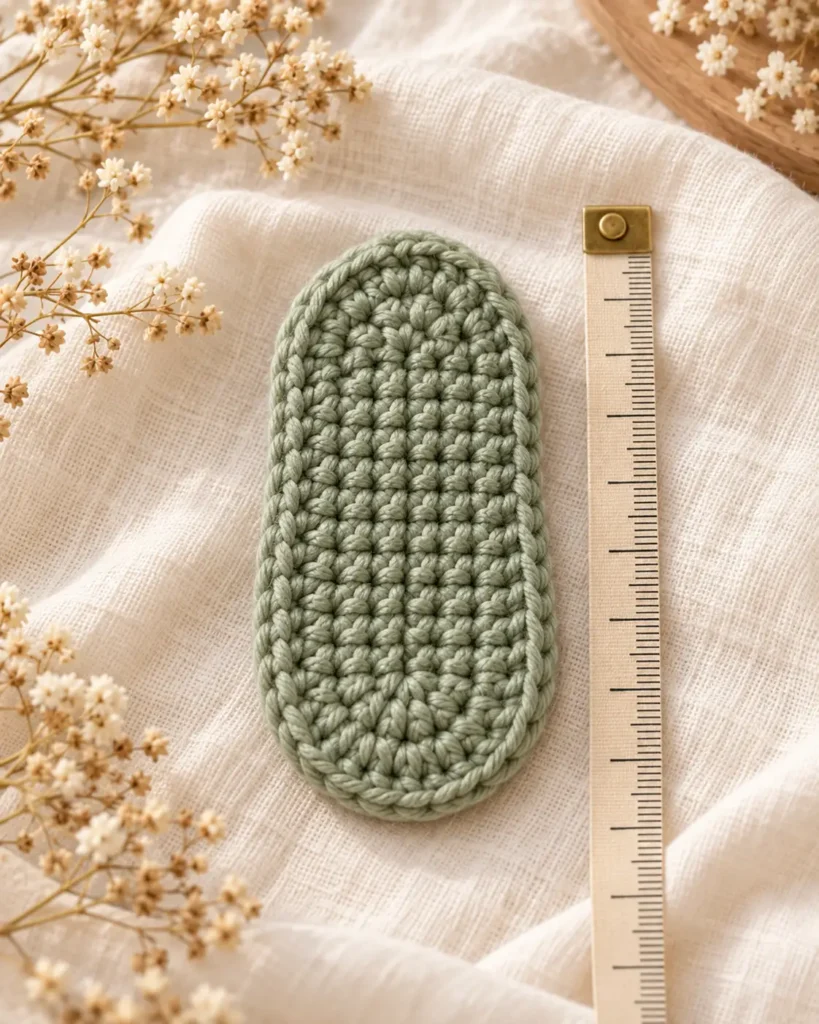
Age-based sizing should always be treated as a rough reference. The most useful measurement is the baby’s actual foot length.
How to Measure a Baby’s Foot
If you’re making the booties for a specific baby, measure from the back of the heel to the tip of the longest toe. Use a soft measuring tape or carefully mark the length on paper.
Don’t squeeze or straighten the baby’s toes forcibly. The finished bootie should allow a little room for comfortable movement.
Suggested Starting Size Ranges
| Approximate age | Illustrative sole-length target |
|---|---|
| Newborn | 3.25–3.5 in (8.3–8.9 cm) |
| 0–3 months | 3.5–3.75 in (8.9–9.5 cm) |
| 3–6 months | 3.75–4 in (9.5–10.2 cm) |
| 6–12 months | 4–4.5 in (10.2–11.4 cm) |
These ranges are planning examples, not guaranteed foot measurements or verified sizes of this pattern. Measure the wearer whenever possible, and remember that the baby’s foot needs room inside the finished bootie.
How to Check Your Sole Size
After completing the oval sole, lay it on a flat surface. Measure from the furthest heel point to the furthest toe point. Do not stretch the crochet fabric while measuring.
Record the sole length before building the upper. If you’re making a matching pair, both soles should have the same length and width.
Stitches and Abbreviations
This pattern uses standard US crochet terms.
| Abbreviation | Meaning |
|---|---|
| ch | Chain |
| sc | Single crochet |
| hdc | Half double crochet |
| sl st | Slip stitch |
| st | Stitch |
| sts | Stitches |
| blo | Back loop only |
| hdc2tog | Half double crochet two together |
| sc2tog | Single crochet two together |
| rnd | Round |
| rep | Repeat |
How to Make a Half Double Crochet
- Yarn over.
- Insert your hook into the next stitch.
- Yarn over and pull up a loop.
- Yarn over again.
- Pull through all three loops on your hook.
You’ve made one half double crochet.
How to Make a Half Double Crochet Decrease
A half double crochet decrease joins two stitches into one.
- Yarn over and insert your hook into the next stitch.
- Pull up a loop.
- Yarn over and insert your hook into the following stitch.
- Pull up another loop.
- Yarn over and pull through all five loops.
This decreases your stitch count by one.
How to Make a Single Crochet Decrease
- Insert your hook into the next stitch and pull up a loop.
- Insert your hook into the following stitch and pull up another loop.
- Yarn over and pull through all three loops.
The two stitches become one.
How to Crochet Baby Booties Step by Step
Now we’ll begin the actual pattern.
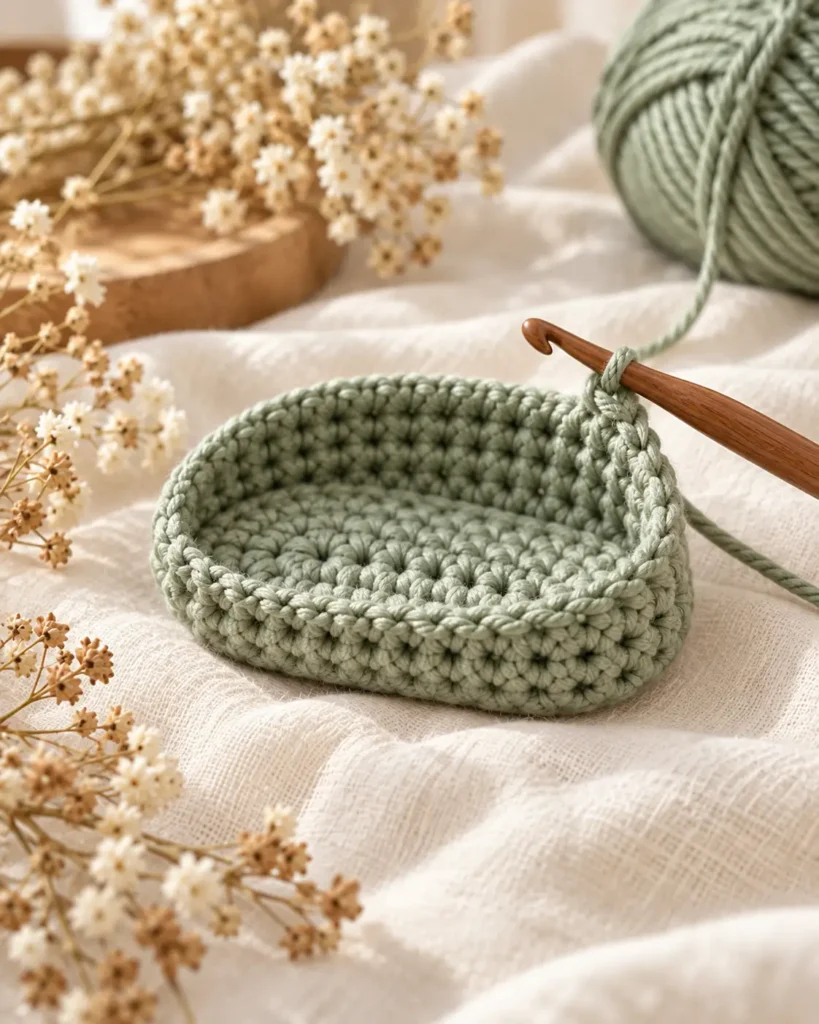
The booties are worked from the sole upward.
Our construction has four main stages:
- Make an oval sole.
- Build the side walls.
- Shape the front toe.
- Crochet the ankle cuff.
You’ll make two matching booties.
Step 1: Make the Foundation Chain
Begin with a slip knot.
Chain 10.
Keep the chains relaxed enough that you can work into both sides of the foundation. You’ll begin in the second chain from your hook. Unlike a flat crochet rectangle, this sole will be worked around both sides of the foundation chain to create an oval.
Step 2: Crochet the First Sole Round
Work two half double crochets into the second chain from the hook. Make one half double crochet in each of the next seven chains. You should now reach the last chain.
Work five half double crochets into that last chain. This creates the rounded toe end of the sole. Turn your work so you can crochet along the unused opposite side of the foundation chain.
Work one half double crochet into each of the next seven available chain loops. Then work three half double crochets into the same starting-chain position where the first two half double crochets were made. Slip stitch into the first half double crochet to join.
Round 1 stitch count: 24 hdc.
The result should look like a small, narrow oval.
Step 3: Increase the Oval Sole
In Round 2, we’ll add stitches around the curved ends while keeping the straight sides consistent. Chain one. The turning or starting chain does not count as a stitch. Work two half double crochets into each of the first two stitches.
Make one half double crochet in each of the next seven stitches. Work two half double crochets into each of the next five stitches. Make one half double crochet into each of the next seven stitches.
Finally, work two half double crochets into each of the last three stitches. Join with a slip stitch into the first half double crochet.
Round 2 stitch count: 34 hdc.
Your oval should now be wider and more clearly defined.
Step 4: Check the Sole
Lay the sole flat.
Make sure the shape is reasonably symmetrical. You should have two rounded ends joined by straighter sides.
Measure its length.
This is the best point to make any necessary sizing adjustments. If the sole is too large or too small, it is better to correct the foundation sizing before continuing. Don’t add random increases to the next round to compensate for an incorrect size.
Step 5: Build the Side Walls
The next round creates the transition between the flat sole and the sides of the bootie.
Chain one.
Working in the back loops only, make one single crochet in each stitch around.
Join with a slip stitch.
Round 3 stitch count: 34 sc.
Working in the back loops produces a visible ridge around the edge of the sole. This ridge helps define the base of the baby shoe. For Round 4, chain one and work one single crochet in every stitch around, using both loops normally.
Join with a slip stitch.
Round 4 stitch count: 34 sc.
Your work should begin curving upward.
Step 6: Locate the Front Toe
Before shaping the toe, identify the front and back of your bootie. The front is the rounded end that will cover the baby’s toes. Place stitch markers around the 12 stitches that form the center of this rounded section.
Position six stitches on each side of the toe’s center line. The markers should be centered symmetrically. Take care not to place them around the heel by mistake.
Step 7: Shape the Toe
For the next round, continue working single crochet stitches until you reach the marked toe section. Across the 12 toe stitches, work six single crochet decreases. Each decrease combines two stitches into one. Then continue making one single crochet in each remaining stitch around.
Join with a slip stitch.
Round 5 stitch count: 28 stitches.
The toe should now begin curving inward. This is how the front of the bootie develops its rounded shape.
Step 8: Continue Shaping
For Round 6, locate the center front again. Mark the central eight stitches around the toe. Make one single crochet in every stitch until you reach that section.
Work four single crochet decreases across the eight marked stitches. Continue with one single crochet in every remaining stitch around.
Join with a slip stitch.
Round 6 stitch count: 24 stitches.
Your bootie should now have a distinct rounded toe and a smaller ankle opening.
Step 9: Crochet the Ankle Cuff
Now we’ll add the finishing cuff.
Chain one.
Work one single crochet into each stitch around the ankle opening.
Join with a slip stitch.
Round 7: 24 sc.
Repeat for Rounds 8 and 9. Each round should contain 24 single crochets. For a slightly taller cuff, add one or two more rounds, keeping the same stitch count.
The cuff can be left upright or folded gently. If you want a contrasting cuff, change to cream yarn before beginning Round 7.
Step 10: Fasten Off and Finish
Cut the yarn, leaving a tail long enough to weave in securely. Pull the tail through the final loop. Use a tapestry needle to weave the tail through several stitches on the inside of the bootie.
Change direction to secure it. Trim the excess after checking that the end is firmly woven in. Avoid knots or bulky yarn ends that might create uncomfortable pressure against the baby’s foot.
Step 11: Make the Second Bootie
Repeat the same instructions to make a second bootie. Use the same yarn, hook, foundation chain, and stitch counts. Compare the two soles before completing the uppers.
If the first bootie fits the intended size, use its measured dimensions as a reference for the second. Your handmade pair is complete.
Free Crochet Baby Booties Written Pattern
For crocheters who prefer compact instructions, here’s the pattern in a quick-reference format.
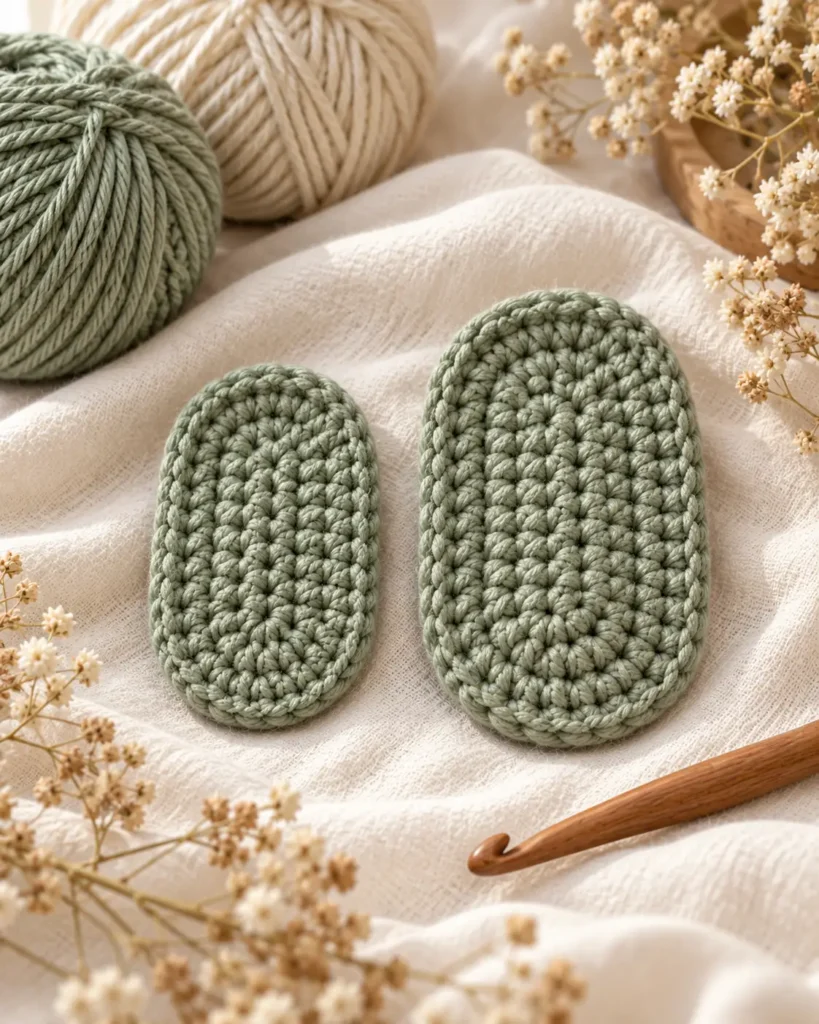
Step 1 — Pattern Overview
Make: 2 identical booties
Foundation: Ch 10
Round 1: 2 hdc in second ch from hook, hdc in next 7 ch, 5 hdc in last ch. Working along opposite side, hdc in next 7 available loops, 3 hdc in starting chain. Join. (24)
Round 2: Ch 1, 2 hdc in each of first 2 sts, hdc in next 7 sts, 2 hdc in each of next 5 sts, hdc in next 7 sts, 2 hdc in each of last 3 sts. Join. (34)
Round 3: Ch 1, sc blo in each st around. Join. (34)
Round 4: Ch 1, sc in each st around. Join. (34)
Round 5: Mark the centered 12 toe sts. Sc to first marker, sc2tog 6 times across marked toe section, sc in remaining sts around. Join. (28)
Round 6: Mark the centered 8 toe sts. Sc to first marker, sc2tog 4 times across marked section, sc in remaining sts around. Join. (24)
Rounds 7–9: Ch 1, sc in each st around. Join. (24)
Finish: Fasten off and weave in all ends securely.
The starting chains do not count as stitches. Join each round to its first actual stitch, not the starting chain.
Step 2 — Stitch Count Chart
| Round | Stitches | Purpose |
|---|---|---|
| 1 | 24 | Foundation oval |
| 2 | 34 | Expanded sole |
| 3 | 34 | Sole-to-side transition |
| 4 | 34 | Side wall |
| 5 | 28 | First toe shaping |
| 6 | 24 | Second toe shaping |
| 7 | 24 | Cuff |
| 8 | 24 | Cuff |
| 9 | 24 | Final cuff round |
Pattern testing note: These written counts are mathematically consistent, but the pattern needs to be physically crocheted and checked for shape, fit, and comfort before being labeled fully tested.
How to Make Both Booties Match
One of the most common frustrations when crocheting baby shoes is finishing the second bootie and discovering that it looks slightly different from the first. A few simple habits help.
Step 3 — Use the Same Hook and Yarn
Even a small change in yarn thickness can affect the result. Use the same materials for both shoes.
Step 4 — Count Every Round
Baby booties involve several increases and decreases. If you miss just one stitch, the difference may be visible in the finished shape. Check the stitch count at the end of every round.
Step 5 — Compare the Soles
Complete both soles before starting the uppers.
Lay them side by side.
Check that the heel and toe curves are approximately identical.
Step 6 — Mark the Toe Centers Carefully
The toe-decrease sections should be centered in the same way on both booties. Use stitch markers to avoid guessing.
Step 7 — Keep the Cuff Height Consistent
Count the number of cuff rounds on each shoe. If you add extra rounds to one bootie, repeat them on the other.
Cute Color and Style Ideas
One of the nicest things about this baby booties design is how different it can look with a simple color change.
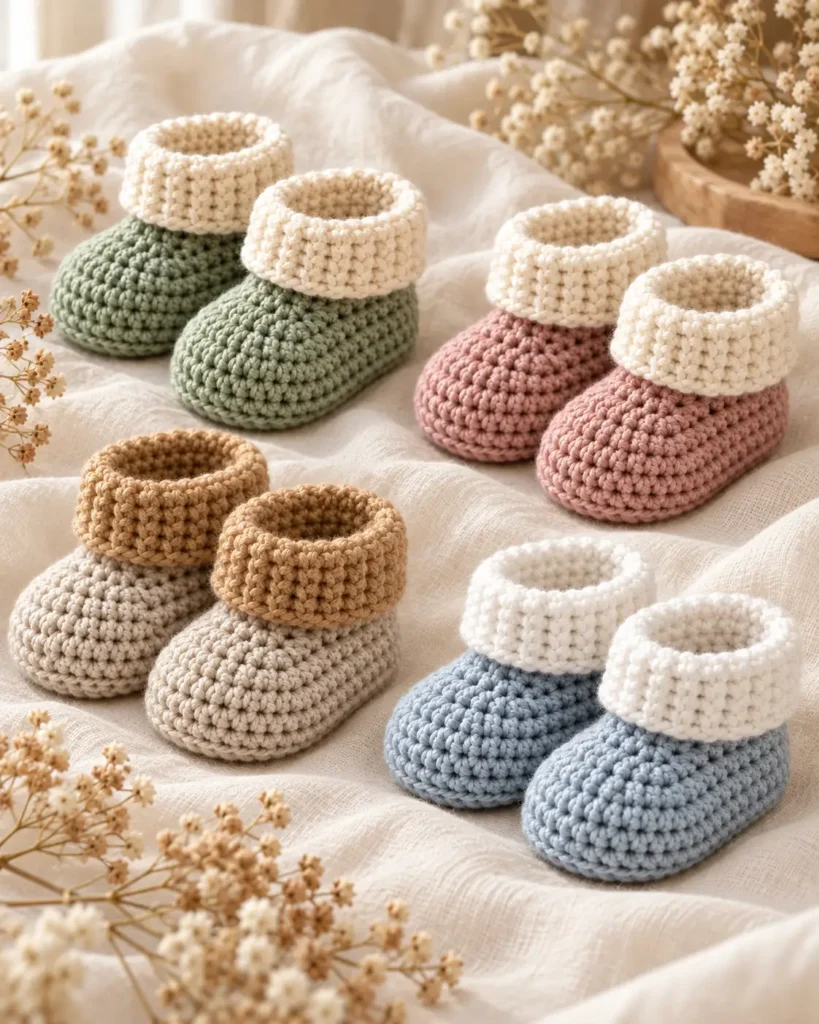
Sage Green and Cream
This combination creates a calm, modern look. A sage-green body with a cream cuff is a lovely option for a neutral baby shower gift.
Soft Pink and Ivory
Dusty rose and warm ivory create a gentle, classic palette. Keep the decoration minimal so the simple shape remains the focus.
Oatmeal and Caramel
These warm neutrals work beautifully for autumn and winter gifts. A solid oatmeal bootie is also easy to match with other baby accessories.
Powder Blue and White
A soft blue body with a white cuff gives the design a traditional baby-shoe appearance.
Terracotta and Beige
Muted terracotta creates an earthy, handmade look, especially when paired with beige. It’s a good choice when you want something different from pastel shades.
Should You Add Bows or Buttons?
For baby footwear, simple is better. Buttons, beads, pom-poms, detachable flowers, and loosely attached bows can become choking hazards if they come loose. Long cords and ties can create additional risks.
This pattern intentionally uses no separate decorative attachments. If you want a more detailed appearance, change yarn colors or add securely worked-in crochet texture instead.
Common Mistakes and Easy Fixes
Baby booties are small, so a minor mistake can affect their shape noticeably. Here’s how to recognize some common problems.
| Problem | Likely cause | What to do |
|---|---|---|
| Sole curls or ripples | Tension or increase placement | Check counts and hook size |
| Sole is too large | Gauge too loose | Try a smaller hook or finer yarn |
| Sole is too small | Gauge too tight | Try a larger hook or suitable yarn |
| Side walls look flat | Back-loop round omitted | Check Round 3 |
| Toe looks crooked | Decreases aren’t centered | Reposition toe markers |
| Opening is too tight | Upper tension too firm | Test cuff stretch and fit |
| Cuff flares outward | Loose tension or extra stitches | Count cuff stitches |
| Booties don’t match | Different gauge or skipped stitch | Compare round counts and dimensions |
Why Is My Crochet Baby Bootie Sole Curling?
A slight curve can occur as the fabric changes from the sole into the sides.
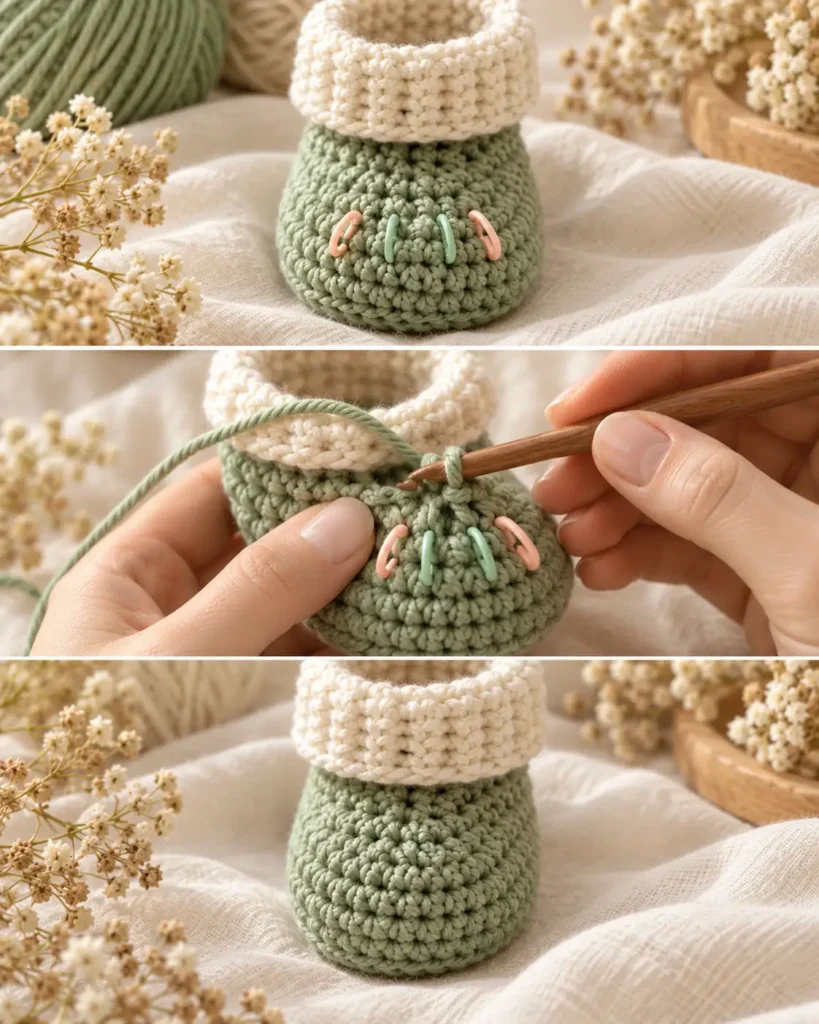
However, the completed sole should be reasonably flat before starting the upper. If it curls significantly, check that you’ve worked all the increases correctly. Compare the stitch count with the pattern. If the count is correct, tension may be the issue.
Why Is the Toe Shape Uneven?
The decreases may not be centered. Mark the middle of the rounded toe before working Round 5. Try to keep the decrease stitches evenly spaced across the marked section.
Why Is the Ankle Opening Too Small?
Check your hook size and tension. Also confirm that you haven’t worked extra decreases. The opening should allow the baby’s foot to enter comfortably without excessive stretching. If it feels restrictive, the bootie needs adjustment rather than force.
Why Are My Booties Different Sizes?
Count all the stitches in each round. Then compare the dimensions of both soles.
If the counts match but the sizes differ, your tension may have changed. It’s often easiest to remake the smaller or less consistent piece while the construction is still fresh in your mind.
How to Wash Handmade Baby Booties
Baby accessories need to be practical as well as cute.
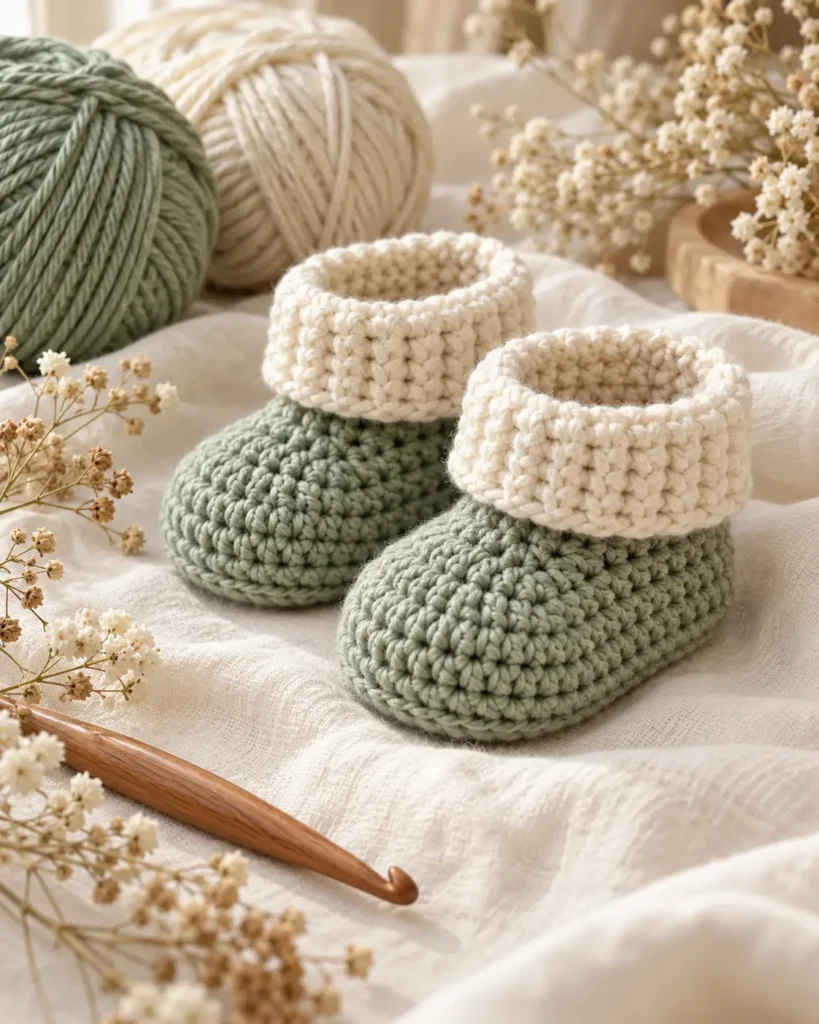
Choose yarn that’s easy for the recipient to care for.
Step 8 — Washing Acrylic Booties
Many acrylic yarns can be machine washed. Follow the care label for the exact yarn used.
Avoid excessive heat.
Step 9 — Washing Cotton Booties
Cotton yarn may be machine washable, depending on the fiber blend and manufacturer. Use a suitable wash setting and reshape the booties after washing if necessary.
Step 10 — Washing Wool Booties
Some wool yarns need gentle handwashing. Others are designed to be machine washable.
Always check the label.
Step 11 — Drying and Storage
Lay the booties flat and allow them to dry thoroughly. Avoid hanging them while wet, as this may distort their shape. Store them in a clean, dry place. Before each use, check for loose yarn ends or damaged seams.
Baby Booties Safety Tips
Handmade baby items deserve extra attention to comfort and safety.
These booties are designed as soft accessories, not supportive outdoor shoes. They should not be used as footwear for a baby who is walking on slippery surfaces. Make sure the finished fabric doesn’t restrict the foot or toes.
Keep the booties free from:
- Loose buttons and beads
- Detachable decorations
- Long ties or cords
- Bulky interior knots
- Loose yarn ends
Remove them if they become too tight, slip off easily, or develop damaged stitching. Use only under appropriate adult supervision.
Safe-sleep reminder: Remove accessories that are unnecessary for sleep, including these booties. Follow established infant safe-sleep recommendations and choose suitable sleep clothing instead of loose items.
Frequently asked questions
Are Crochet Baby Booties Easy for Beginners?
A simple baby booties pattern is manageable for crocheters who understand basic stitches. This design uses chains, single crochet, half double crochet, and decreases, so some practice with shaping is helpful.
How Much Yarn Do I Need for Baby Booties?
The amount depends on the yarn weight, sole size, cuff height, and stitch tension. A small pair often requires relatively little yarn, but the exact yardage should be measured from a completed test pair.
What Is the Best Crochet Hook for Baby Booties?
There isn’t one universal hook size. A 3.75 mm hook can be a useful starting point with suitable DK-weight yarn, but the correct size depends on your gauge and desired fabric.
How Do You Make Crochet Baby Booties Bigger?
To make substantial size changes, use a pattern graded for the desired size. A different yarn or hook may help with small adjustments, but it can also change the fabric’s feel and shape.
Can I Make These Booties With Cotton Yarn?
Yes, if the finished fabric is soft and comfortable. Cotton may behave differently from acrylic or wool, so make a sample and check the fit.
Can Crochet Baby Booties Be Washed?
That depends on the yarn. Follow the manufacturer’s washing instructions and reshape the booties after laundering if needed.
Are Crochet Baby Booties Good Baby Shower Gifts?
They can make lovely handmade gifts, especially when paired with practical baby items. Choose soft yarn, avoid small decorations, and provide simple care instructions. —
Yarn weights and hook sizes in this guide follow the Craft Yarn Council standards.
Keep going: Crochet Moss Stitch: Easy Free Tutorial for Beginners · Crochet Fingerless Gloves: Easy Free Pattern for Beginners · Crochet Moss Stitch: Easy Step-by-Step Tutorial for Beginners
Final Thoughts
Cute crochet baby booties are a lovely example of how a small handmade project can become a meaningful gift. With a simple oval sole, carefully shaped toes, and a soft cuff, you can create a classic pair of baby shoes using familiar crochet stitches. Begin with the sole and measure it before moving on to the upper.
Take your time with the toe shaping, use stitch markers to keep everything centered, and compare the two booties as you work. For your first pair, a solid color is an excellent choice. Once you’re comfortable with the construction, experiment with contrasting cuffs and gentle color combinations.
Save this cute crochet baby booties pattern to Pinterest so you can return to the instructions whenever you’re ready to make a handmade gift.
The Crochet Side, Beautiful crochet patterns, thoughtful handmade gifts, and beginner-friendly tutorials.
Save this for later
Pin “Cute Crochet Baby Booties: Easy Free Pattern for Beginners” so you can find it when the yarn arrives.
Get the next free pattern first
One email a week. New patterns, no noise.
Gauge & sizing
Sizes: Determined by your gauge and actual sole measurement, not by the hook size alone





