
Crochet Moss Stitch: Easy Step-by-Step Tutorial, Pattern & Blanket Ideas
The crochet moss stitch is a simple two-stitch combination: single crochet (sc) and chain one (ch 1). Free pattern with step-by-step photos.

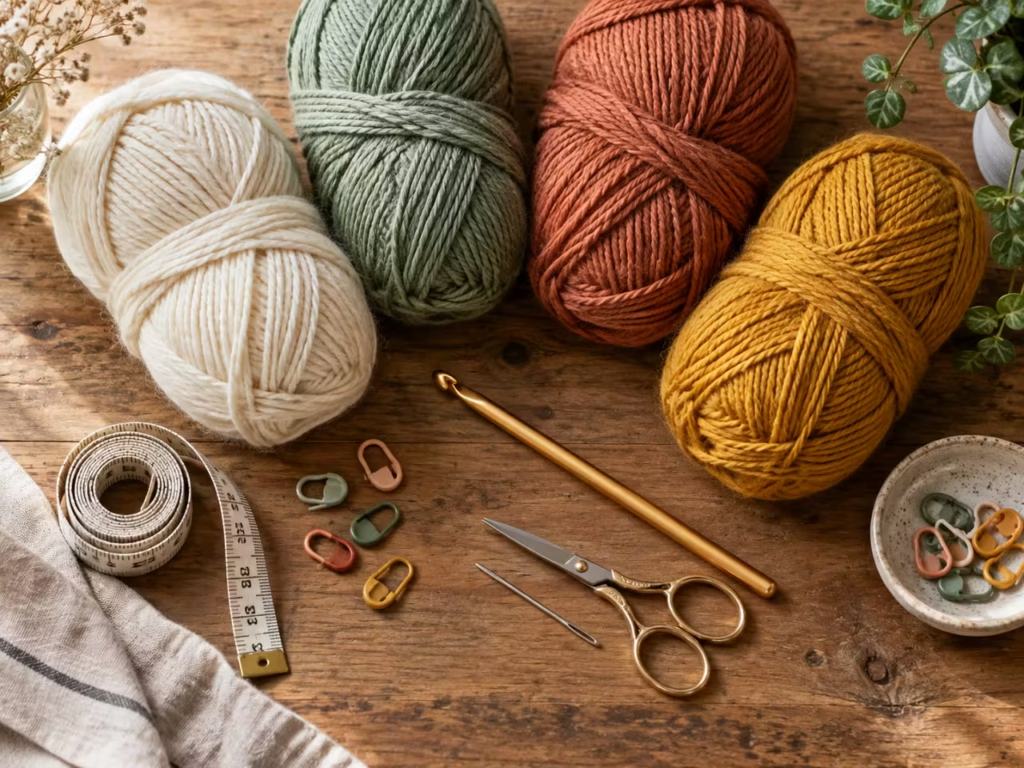
Materials list
- Beginner recommendation: Use one solid color until you can identify the chain-one spaces without counting every stitch.
What Is the Crochet Moss Stitch?
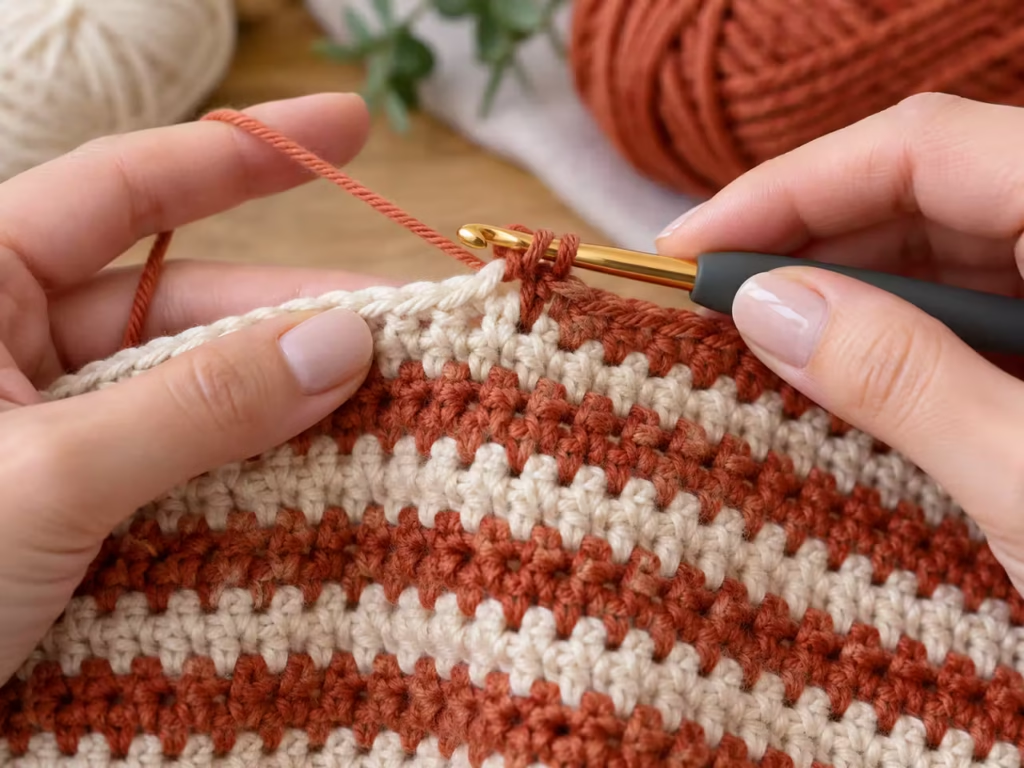
The crochet moss stitch is a simple two-stitch combination: single crochet (sc) and chain one (ch 1).
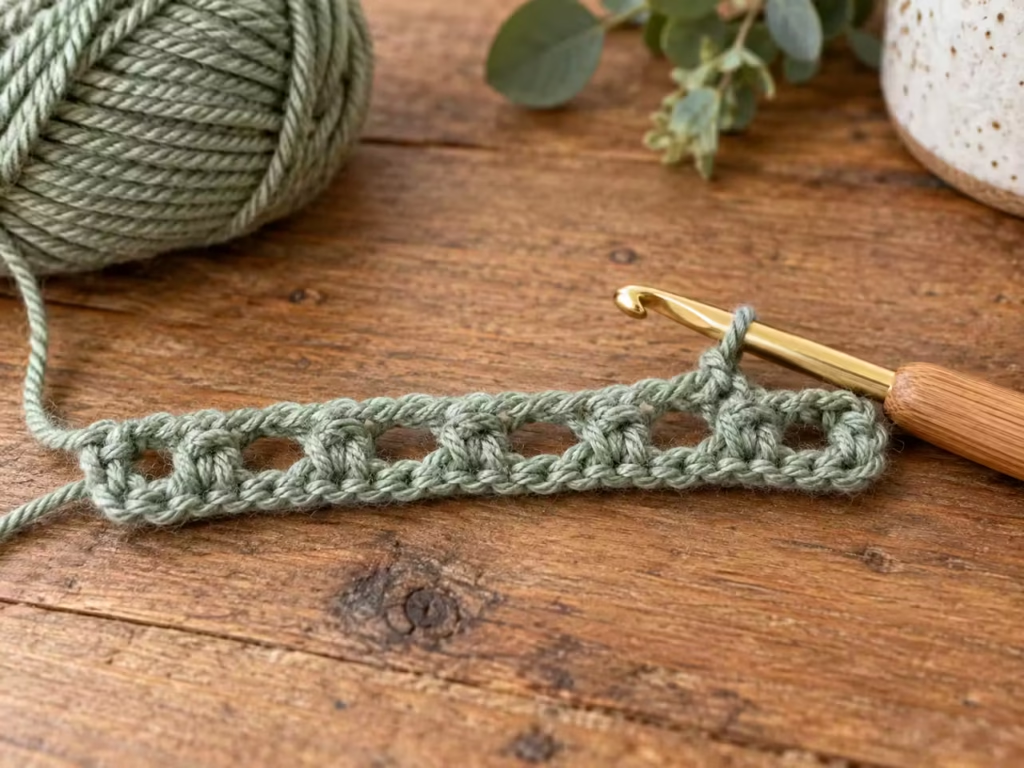
Instead of crocheting into every stitch, you’ll alternate single crochet stitches with chain spaces. On the following row, each single crochet goes into the chain-one space underneath. The result is a lightly textured fabric with a flat surface and tiny, staggered openings.
Unlike taller crochet stitches, moss stitch has a relatively compact structure. It works especially well for projects that need texture without excessive bulk.
Why Crocheters Love Moss Stitch
- Beginner-friendly: You only need to know chains and single crochet.
- Modern texture: The stitches resemble a fine woven fabric.
- Color versatility: Alternating colors creates subtle stripes and interesting patterns.
- Comfortable drape: Proper hook size and relaxed tension produce a flexible fabric.
- Reversible appearance: Both faces have a similar attractive texture.
- Versatile uses: Suitable for blankets, scarves, washcloths, bags, and home accessories.
Moss stitch is one of those cool crochet stitches that looks more complicated than its actual construction. Its simplicity makes it an excellent choice for learning consistent tension while still producing a polished finished project.
Quick Pattern Overview
| Feature | Details |
|---|---|
| Skill level | Confident beginner |
| US terminology | Used throughout |
| Main stitches | Chain, single crochet |
| Row repeat | One repeating row after setup |
| Construction | Worked flat, turning after every row |
| Foundation | Odd number of chains in this tutorial |
| Suggested practice yarn | Smooth medium-weight (#4) yarn |
| Suggested practice hook | 5.0 mm (H/8), adjusted for yarn and tension |
| Practice goal | A swatch approximately 6 inches wide |
| Appearance | Flat, woven-looking texture |
| Suitable projects | Blankets, scarves, dishcloths, accessories |
The starting chain and turning-chain conventions vary between moss stitch tutorials. This guide uses one consistent method throughout, including the blanket instructions and stitch diagram.
You don’t need specialized equipment to learn moss stitch. A comfortable hook and yarn with good stitch definition are enough.
| Item | Quantity or specification | Purpose | Alternative |
|---|---|---|---|
| Yarn | Medium-weight (#4), smooth texture | Reveals stitch placement clearly | DK (#3) yarn |
| Crochet hook | 5.0 mm as a starting point | Forms consistent stitches | Size recommended by yarn label |
| Scissors | One pair | Cuts yarn neatly | Thread snips |
| Tapestry needle | One | Weaves in loose ends | Blunt yarn needle |
| Stitch markers | Two, optional | Identify first and last stitch areas | Contrasting scrap yarn |
| Measuring tape | One | Measures gauge and finished dimensions | Ruler for small swatches |
Start with a light or medium-colored yarn. Cream, dusty blue, sage, or soft beige makes the chain spaces easier to identify. Very dark yarn can hide the small gaps where you’ll insert your hook. Fuzzy yarn can also blur the stitch structure.
For your first swatch, choose a smooth yarn that does not split easily.
Cotton provides crisp stitch definition. Acrylic is lightweight and generally easy to care for. Wool can produce beautiful elasticity and warmth.
Understanding the Stitch
Before starting, learn four essential crochet abbreviations.
| Abbreviation | Meaning |
|---|---|
| ch | Chain |
| sc | Single crochet |
| ch-1 sp | Chain-one space |
| rep | Repeat |
A chain-one space is the small opening created when you chain one and skip a foundation chain or the space formed between single crochet stitches on subsequent rows. You will work into the space, rather than inserting your hook through the top two loops of a single crochet stitch. This distinction is the key to producing the characteristic moss stitch texture.
How the Stitch Pattern Works
The basic fabric alternates:
Single crochet → Chain one → Single crochet → Chain one
Each new row places single crochet stitches into the chain spaces from the previous row. The stitches become slightly staggered, creating the woven appearance.
How to Crochet Moss Stitch Step by Step
This method produces straight edges and a repeatable stitch count.
Begin with a small practice swatch before attempting a full blanket.
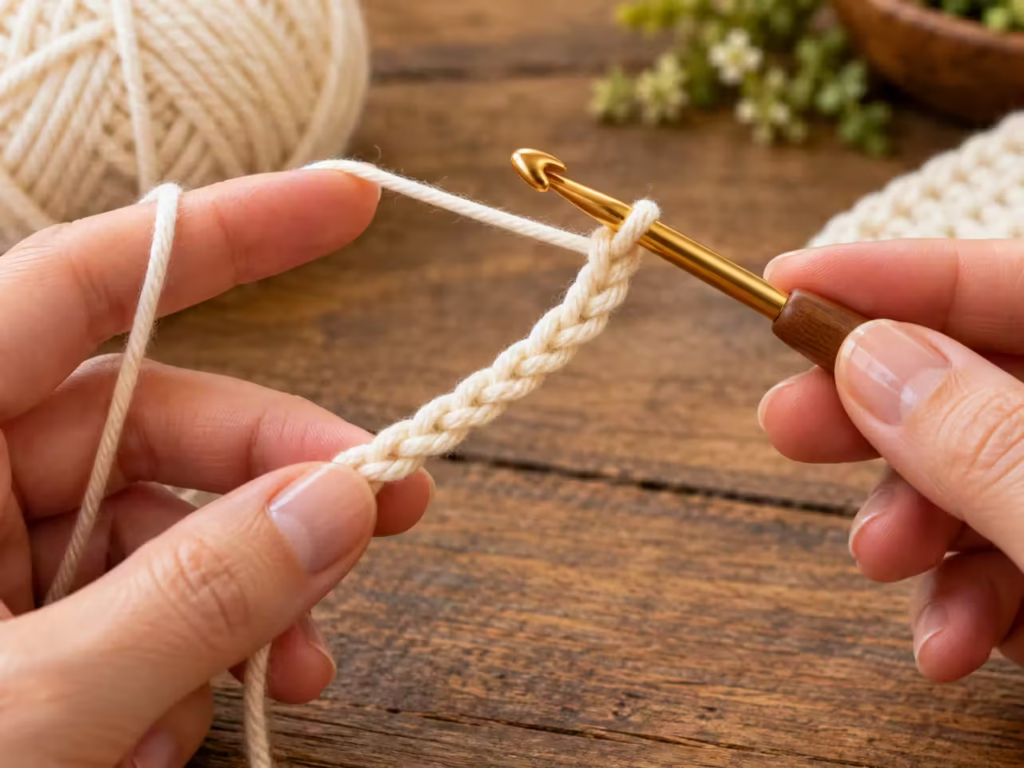
Step 1: Make Your Foundation Chain
Make a slip knot and place it on your hook.
Chain 21.
This is your starting foundation. For this particular method, use an odd number of chains.
Action: Make 21 chains with relaxed, even tension.
Visual check: The chain resembles a flexible braided cord with 21 clear V-shaped links.
Common mistake: Making the foundation chain too tightly.
Solution: Relax your grip or use a slightly larger hook for the foundation before switching back to your main hook.
Expert tip: Count the chain stitches before beginning Row 1. Do not count the slip knot or the loop currently on your hook.
Step 2: Crochet the First Row
Insert your hook into the third chain from the hook. Make one single crochet.
Chain one.
Skip the next foundation chain. Work one single crochet into the following chain.
Continue repeating:
Ch 1, skip 1 chain, sc in next chain.
Your final single crochet should land in the last foundation chain.
Row 1 written pattern:
Sc in 3rd ch from hook, ch 1, skip next ch, sc in next ch; repeat from across.
With 21 starting chains, you finish with:
- 10 single crochet stitches
- 9 internal chain-one spaces
- One starting turning-chain space at the edge
Visual check: The row contains evenly spaced single crochet stitches separated by small gaps.
Common mistake: Skipping two foundation chains instead of one.
Solution: Check that each single crochet lands in every other available foundation chain.
Expert tip: The unused first two chains form the initial edge turning space. Keep them relaxed so the edge does not pull inward.
Step 3: Turn and Begin Row 2
Chain two.
Turn your work.
Skip the first single crochet. Find the first chain-one space between the single crochet stitches in the previous row. Insert your hook directly into that space and make one single crochet.
Row 2 written pattern:
Ch 2, turn. Sc in first ch-1 sp, ch 1, sc in next ch-1 sp; repeat from across, ending with ch 1 and sc in the beginning turning-chain space at the far edge.
The final single crochet is worked into the space created by the beginning skipped chains of Row 1.
Visual check: Each new single crochet sits inside an opening from the previous row.
Common mistake: Inserting the hook into the top of a single crochet instead of the chain space.
Solution: Gently spread the fabric and locate the actual opening between stitches.
Expert tip: Place a stitch marker in the final edge space while learning. This makes the last stitch easier to locate after turning.
Step 4: Repeat the Moss Stitch Row
Chain two and turn again.
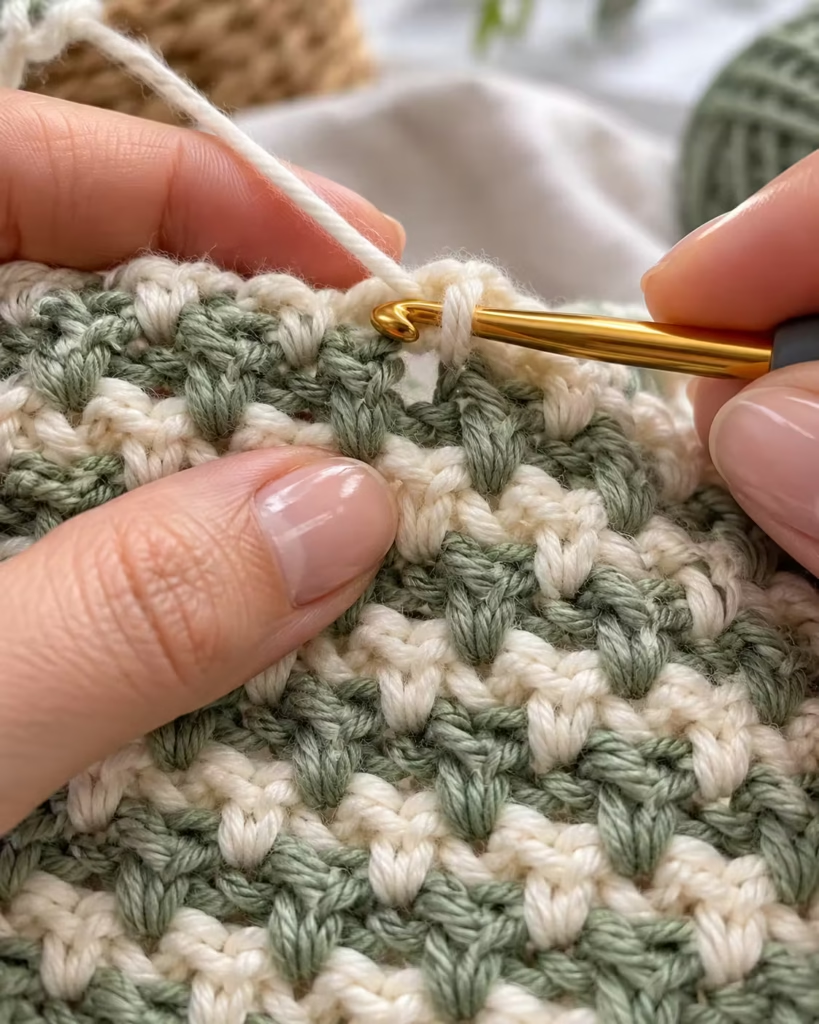
Work one single crochet into the first chain-one space.
Continue with the established sequence:
Ch 1, sc in next ch-1 sp.
At the end, chain one and place the final single crochet into the turning-chain space along the opposite edge. Repeat this same method for every additional row.
Visual check: Your fabric begins developing a consistent, pebbled texture.
Common mistake: Missing the final turning-chain space.
Solution: Count the spaces and inspect both edges before starting the next row.
Expert tip: When using the same starting count, each completed row should maintain the same number of single crochet stitches and internal chain-one spaces.
Step 5: Check Your Stitch Count
For the 21-chain practice swatch, Rows 1 and onward should contain 10 single crochet stitches. After the first row, there are nine internal chain-one spaces between them, plus the turning-chain space at the beginning edge. The edge turning-chain space is used for the last single crochet on the following row.
This is why identifying the turning-chain space matters. If one row contains fewer stitches than the previous row, you’ve probably missed an edge space.
Visual check: Both edges remain reasonably straight, with no progressive decrease in width.
Common mistake: Assuming that the turning chain replaces the first single crochet.
Solution: Follow the same established row repeat without adding an extra single crochet at the beginning.
Expert tip: Check the stitch count every few rows rather than waiting until the entire swatch is complete.
Step 6: Continue Until Your Swatch Is Square
Work additional rows until the height is approximately equal to its width.
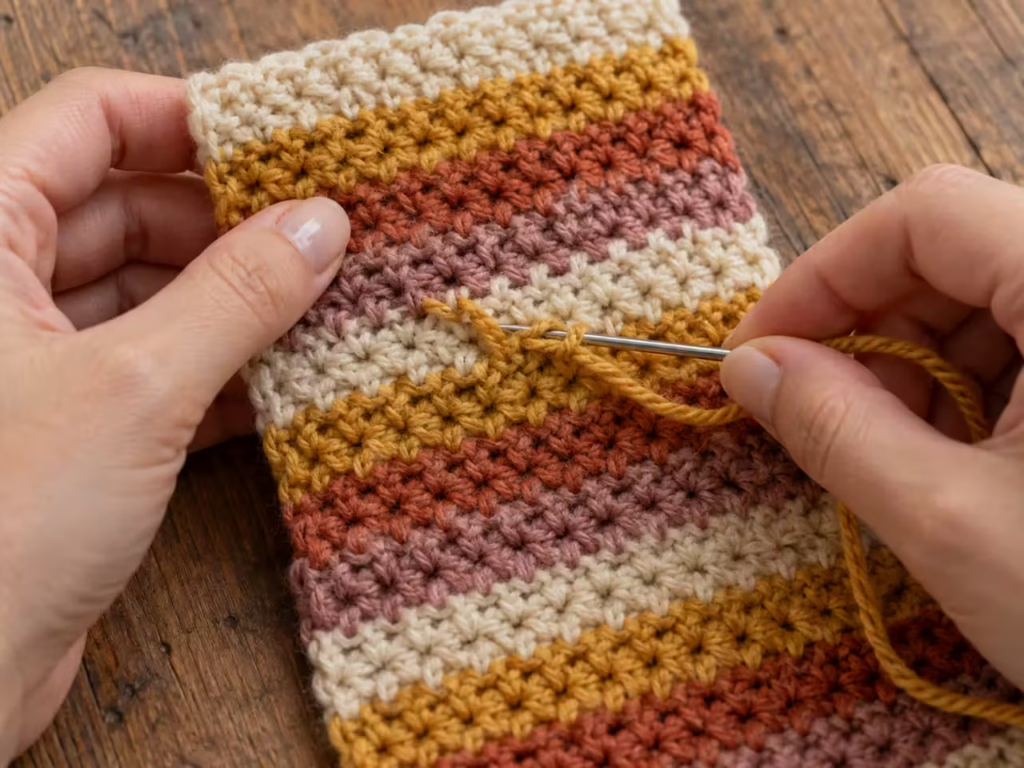
Don’t rely on a predetermined row count. Yarn thickness, hook size, and individual tension all affect row height. Lay your fabric flat without stretching.
Measure it across the middle and vertically through the center. If the square looks distorted, review your tension and stitch placement.
Visual check: The swatch looks balanced, flat, and evenly textured.
Common mistake: Pulling the yarn tightly after every single crochet.
Solution: Allow each stitch to rest comfortably on the hook shaft before moving to the next stitch.
Expert tip: Make a second swatch with a hook one size larger to compare drape. The better fabric is the one suited to your project, not necessarily the tightest one.
Step 7: Fasten Off and Weave In Ends
When your swatch reaches the desired height, cut the yarn, leaving a tail long enough to secure neatly. Pull the tail through the final loop and tighten gently.
Thread the yarn tail into your tapestry needle. Weave the tail through several stitches on the wrong side or within the textured fabric, reversing direction to secure it without distorting the surface.
Visual check: The tail is hidden, and the fabric lies flat.
Common mistake: Cutting the tail immediately next to the final stitch.
Solution: Leave enough yarn for a secure woven finish.
Expert tip: Avoid weaving the tail in one perfectly straight direction for its entire length. Changing direction helps resist movement during use and washing.
Visual Stitch Diagram
The following diagram explains the placement of the stitches rather than showing the exact physical proportions of the yarn.
SYMBOL KEY
X = single crochet o = chain one | = foundation chain [ ] = turning-chain space
ROW 3: [ ] X o X o X o X o X o X o X o X o X o X ↑ ↑ ↑ Work each X into a ch-1 space below
ROW 2: [ ] X o X o X o X o X o X o X o X o X o X
ROW 1: [ ] X o X o X o X o X o X o X o X o X o X
FOUNDATION: 21 chains
Each row: 10 single crochet stitches 9 internal ch-1 spaces 1 beginning turning-chain edge space
TURNING RULE: Chain 2 → Turn → Skip first sc → Sc into first ch-1 space → Repeat ch 1, sc into next space → Finish in edge turning-chain space
The diagram is schematic: the X marks identify stitch sequence, not a vertical alignment of actual stitch posts. In the fabric, each new single crochet is positioned in a space from the row below.
Remember: Do not work your single crochet into the top loops of the preceding row’s single crochet.
That would create a different fabric structure.
How to Crochet a Striped Moss Stitch Blanket
Once you understand the basic row repeat, you can make a crochet striped moss stitch blanket by changing yarn colors at selected row boundaries.
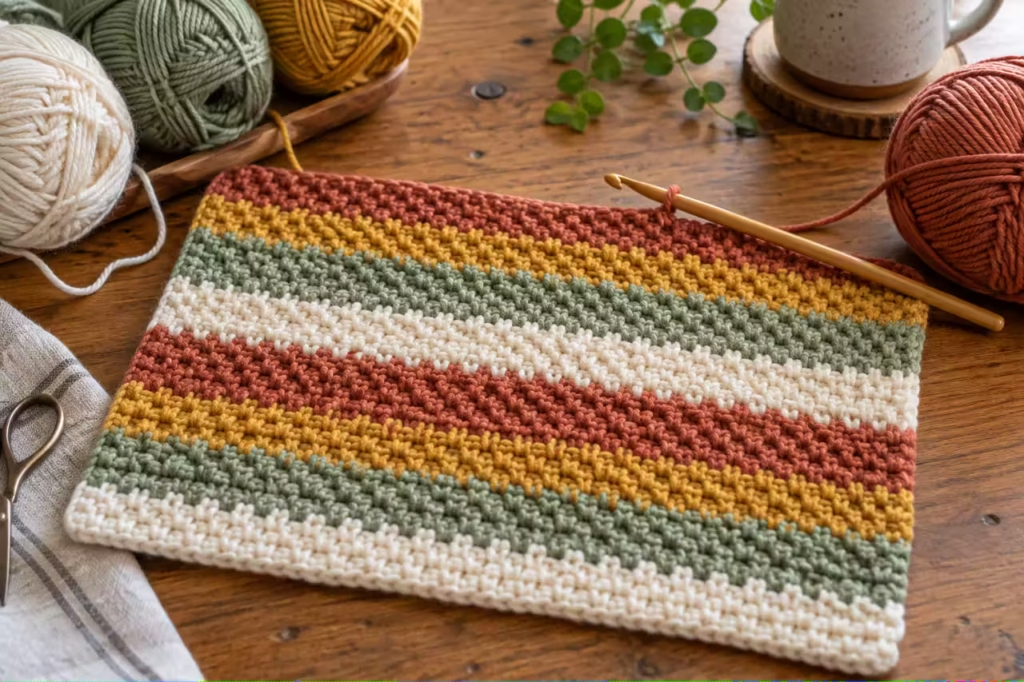
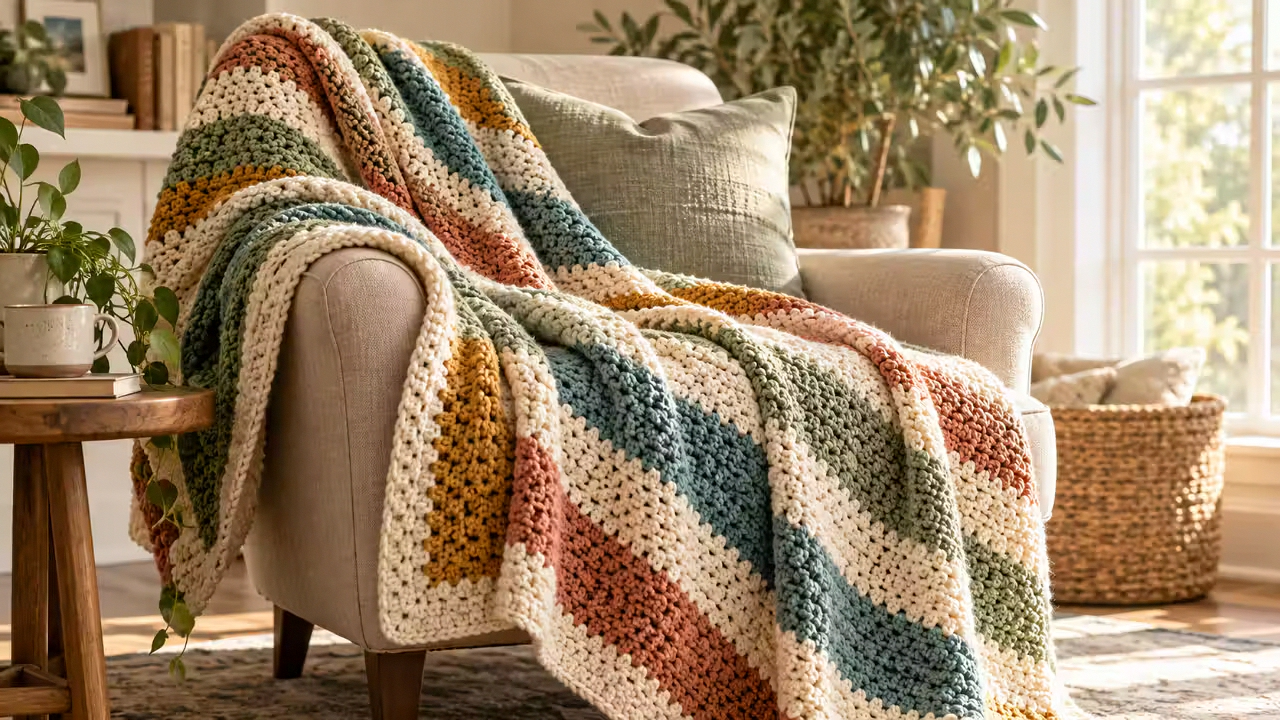
The stitch texture makes narrow or wide stripes look soft and sophisticated. For an autumn-inspired blanket, consider a palette of cream, terracotta, mustard, olive, and warm brown.
Step 1: Decide Your Blanket Width
Start by measuring the stitch gauge of your finished practice swatch. For example, suppose your measured gauge is 14 single crochet stitches across 4 inches, counting the single crochet positions in the moss stitch fabric. That is 3.5 single crochet positions per inch.
For a hypothetical 40-inch-wide blanket:
40 × 3.5 = 140 single crochet positions.
Using this guide’s foundation method, the required chain count is:
Foundation chains = (2 × desired single crochet positions) + 1
140 × 2 + 1 = 281 chains. This example is a mathematical illustration, not a verified gauge for a particular yarn-and-hook combination. Use the gauge from your own swatch before committing to the foundation count.
Step 1 — How to Calculate Your Own Foundation Chain
You can use this formula for a project of almost any width:
STEP 1: Make a moss stitch swatch.
STEP 2: Count the single crochet positions across a measured interior width.
STEP 3: Divide the stitch-position count by the measured width in inches.
STEP 4: Multiply that number by your target width.
STEP 5: Round to a practical whole number of single crochet positions.
STEP 6: Multiply by 2 and add 1 for the foundation chain.
For a blanket, a generous gauge swatch is more dependable than a tiny sample because it better represents your natural tension. Check measurements after laundering the sample if you plan to wash the finished blanket.
Step 2: Plan Your Stripes
You can organize stripes by row count or by measured height.
| Stripe style | Color changes | Visual effect |
|---|---|---|
| Narrow stripes | Every 2 rows | Fine, repeated color lines |
| Medium stripes | Every 4–6 rows | Balanced modern pattern |
| Wide stripes | Every 10–14 rows | Bold color blocks |
| Uneven stripes | Different row groups | Relaxed, organic appearance |
If you want symmetrical color placement, write down the sequence before beginning.
For example:
A = Cream B = Terracotta C = Sage D = Mustard
8 rows A 4 rows B 8 rows A 6 rows C 8 rows A 4 rows D
Repeat or adapt to reach the desired blanket length. This sample stripe sequence can be extended, mirrored, or rearranged. Measure the actual height rather than assuming a fixed number of rows will produce a particular blanket length.
Step 3: Change Colors Neatly
Work until the final single crochet of the old-color row. Begin that last single crochet normally. Before completing its final yarn-over and pull-through, introduce the new yarn color.
Pull the new color through the remaining two loops. Chain two and turn using the new color. This method places the new color at the edge of the previous row so the following turning chain and stitches begin cleanly.
Common mistake: Changing colors after completing the stitch and making the turning chain in the old color.
Solution: Finish the final pull-through of the previous row with the new yarn.
Expert tip: For widely spaced color changes, cut and secure the previous color. For closely spaced stripes, carrying yarn up the side may reduce the number of ends, but the carried strands can remain visible unless covered by a border.
Step 4: Check the Blanket as It Grows
After several stripe repeats, lay the work flat.
Check for:
- Straight edges
- Consistent width
- Even stitch texture
- Smooth color transitions
- No unusually tight rows
The blanket should flex comfortably without feeling stiff. If the fabric becomes noticeably narrower after a color change, check that both yarns are the same weight and that your tension hasn’t tightened.
Add Fringe and Professional Finishing
Fringe gives a moss stitch crochet blanket a relaxed, cozy appearance. It’s especially attractive on scarves, throws, and decorative blankets.
How to Add Simple Fringe
- Cut multiple pieces of yarn to twice the desired fringe length, plus a little extra for trimming.
- Fold a small bundle of strands in half.
- Insert your hook through a suitable edge opening.
- Pull the folded center of the strands through the edge, forming a loop.
- Pass the loose ends through that loop.
- Tighten gently and repeat at regular intervals.
- Trim the fringe evenly after attaching all bundles.
Should You Add a Border?
A border is optional. If your blanket has neatly maintained moss stitch edges, you can leave them exposed for a minimal appearance. If the sides look uneven, a carefully worked border of single crochet can improve the outline.
Work an even number of stitches along the edges without crowding the corners. Because row height varies with yarn and tension, do not assume that one single crochet per row will always lie flat. At corners, work enough stitches to turn smoothly without curling or flaring. Inspect the fabric and adjust spacing before proceeding.
Finishing Without Fringe
For baby blankets, frequently washed throws, or projects that need a simpler finish, skip decorative fringe. Loose strands may tangle during laundering and are inappropriate where they could create an entanglement risk for infants. A smooth, securely finished edge is a practical alternative.
Common Mistakes and Troubleshooting
| Symptom | Likely cause | Practical fix | Prevention |
|---|---|---|---|
| Blanket becomes narrower | Missed turning-chain space | Unravel to the missing stitch and replace it | Mark both edge spaces |
| Fabric becomes wider | Extra stitch at the row edge | Identify accidental additional sc | Count stitch positions regularly |
| Moss texture looks uneven | Working into stitch tops | Use the ch-1 spaces instead | Spread fabric to locate openings |
| Fabric feels stiff | Tight tension or small hook | Try a larger hook | Make a drape swatch |
| Large irregular holes | Inconsistent chain tension | Relax or standardize chain movements | Keep yarn tension steady |
| Edges ripple | Additional edge stitches or loose turning chains | Correct stitch count and adjust tension | Inspect each completed row |
| Color transition looks messy | New yarn joined in wrong place | Change on final pull-through | Plan changes at row ends |
| Blanket curls | Tight foundation or uneven tension | Retry foundation with larger hook | Compare foundation and upper-row width |
| Fringe looks uneven | Different cutting lengths | Trim after attachment | Use a cardboard length guide |
| Fabric twists | Tight foundation or distorted handling | Relax tension and flatten swatch | Avoid pulling work while measuring |
A Useful Edge-Counting Habit
The most effective beginner habit is to inspect the first and last moss stitch spaces at the end of each row. Losing just one edge stitch occasionally can gradually create a sloping side. Repairing the problem immediately is much easier than unraveling dozens of rows.
Beginner-to-Pro Techniques
Moss stitch can remain extremely simple, but small refinements make a noticeable difference.
Level 1: Beginner — Master the Spaces
Practice with one color and smooth yarn. Focus on recognizing each chain-one space and maintaining the same single crochet count. Work slowly enough to identify the insertion point visually.
Level 2: Intermediate — Improve Fabric Drape
Experiment with different hook sizes. A larger hook can open the fabric and improve flexibility, while a smaller hook may produce a firmer texture. Measure both samples and compare how they hang when held from one corner. The best choice depends on whether you’re making a blanket, bag, scarf, or washcloth.
Level 3: Advanced — Control Color and Edge Finishing
Try intentionally designed stripe sequences and neatly managed color transitions. Keep careful records of row counts and yarn changes.
For projects needing polished edges, experiment with a suitable border on a practice sample before adding it to a full-size blanket. For large projects, measure periodically to detect changes in tension before they become obvious.
Choosing Yarn and Comparing Stitches
Not every project needs the same yarn or crochet texture.
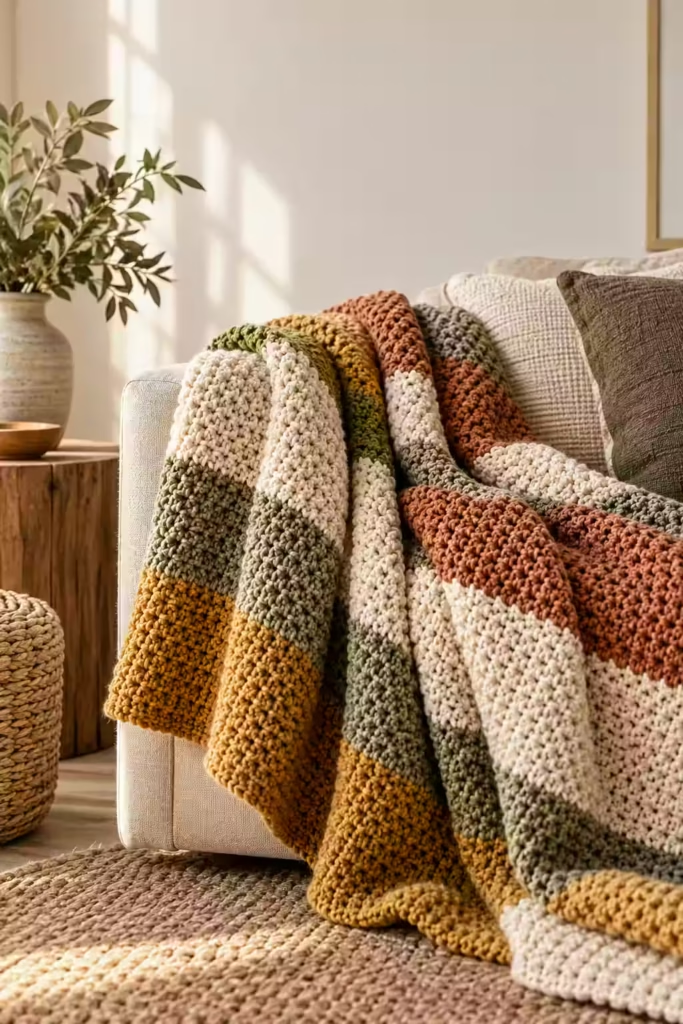
Yarn Comparison
| Yarn type | Best for | Advantages | Limitations | Recommendation |
|---|---|---|---|---|
| Cotton | Dishcloths, lightweight accessories | Clear definition, absorbent | Can feel heavier and less stretchy | Choose for practical household items |
| Acrylic | Everyday blankets | Lightweight, easy-care options | Texture and heat tolerance vary | Good for washable throws |
| Wool | Warm scarves and blankets | Elasticity and warmth | May require delicate care | Choose for cold-weather accessories |
| Cotton-acrylic blend | Baby blankets and throws | Balances some properties of both fibers | Performance varies by blend | Check label for care instructions |
| Bulky yarn | Chunky accessories | Creates larger stitches quickly | Uses more yarn by volume | Choose when visible texture matters |
Moss Stitch vs. Other Crochet Stitches
| Stitch | Best for | Advantages | Limitations | Recommendation |
|---|---|---|---|---|
| Moss stitch | Blankets, scarves, home décor | Fine texture, attractive drape | Stitch placement needs attention | Best for woven-looking fabric |
| Single crochet | Dense projects | Simple, compact | Can become stiff | Best when firmness is desirable |
| Half double crochet | Quick cozy fabric | Taller rows, moderate density | Different texture | Best for faster-growing panels |
| Double crochet | Airier blankets | Builds height quickly | Larger openings | Best for lightweight open fabric |
| Lemon peel stitch | Raised surface texture | Alternating stitch heights | Less uniform woven appearance | Best for visibly textured projects |
Moss stitch is particularly effective when you want surface interest without large decorative holes. Its structure also makes striped blankets attractive because the stitch pattern doesn’t compete with the color layout.
How to Check Gauge, Durability, and Finished Size
A beautiful blanket is only successful if it reaches the size you intended and holds its shape during ordinary use.
Step 2 — Make a Meaningful Gauge Swatch
For a full-size blanket, make a swatch large enough to measure across an interior section without including distorted edge stitches. Measure the fabric while it lies flat. Record both horizontal and vertical gauge.
For example, write:
Yarn: Hook size: Stitch positions in 4 inches: Rows in 4 inches: Swatch width: Swatch height: Appearance after washing: Notes about drape:
Don’t stretch the swatch while measuring.
Step 3 — Calculate Blanket Length
If your gauge is 16 rows over 4 inches, that equals four rows per inch.
For a hypothetical 50-inch length:
50 × 4 = 200 rows.
Again, this is an example rather than a guaranteed measurement. Your particular yarn, hook, tension, and laundering method determine the actual row gauge. Recheck your blanket after the first several inches, especially if you changed yarn types or hooks.
Step 4 — How Much Yarn Will You Need?
An exact yarn estimate cannot be reliably calculated from blanket dimensions alone. Different yarns have different yardage per ounce, and individual stitch tension changes consumption. A practical method is to weigh or measure the yarn used for a gauge swatch.
Estimate the number of times that swatch’s area fits into the intended blanket area, then multiply by its yarn use. Allow an additional margin for swatches, borders, fringe, and variations in tension. Keep all measurements in consistent units.
Step 5 — Durability Matters
For a blanket intended for frequent washing, choose yarn with suitable care instructions and weave in all tails securely. Check striped sections for loose color-change ends. Avoid leaving long, unsecured strands along an exposed edge. If you’re making a gift, include the washing instructions from the yarn label.
Final Quality-Control Checklist
Before calling your moss stitch project complete, inspect the entire fabric.
Essential Checks
- [ ] The foundation chain is not noticeably tighter than the finished fabric.
- [ ] Single crochet stitches consistently enter chain-one spaces.
- [ ] The number of stitches remains consistent between rows.
- [ ] Both side edges remain reasonably straight.
- [ ] The fabric lies flat without major rippling or cupping.
- [ ] The finished width and length suit the intended project.
- [ ] Color changes are neatly completed.
- [ ] All yarn tails are securely woven in.
- [ ] Any fringe is evenly attached and trimmed.
- [ ] The finished piece has a comfortable, appropriate drape.
Acceptable variation: Small differences in handmade tension or slight irregularities that do not distort the fabric.
Correctable issue: A loose yarn tail, uneven fringe, or minor finishing inconsistency.
Issue requiring reworking: A major stitch-count error, repeated missed edges, or a severely tight foundation that prevents the fabric from lying flat.
Frequently asked questions
1. Is crochet moss stitch good for beginners?
Yes. Crochet moss stitch uses only chain stitches and single crochet, making it accessible once you’ve learned those two basic techniques. The main challenge is recognizing the chain-one spaces and the edge turning spaces. Starting with smooth, light-colored yarn makes those openings easier to see. A small square is an ideal first project before moving on to a full blanket.
2. Is moss stitch the same as linen stitch?
In crochet, moss stitch, linen stitch, and granite stitch are commonly used as names for the same basic alternating single crochet and chain-one fabric. Individual patterns may use different starting chains, turning chains, or edge methods. Always follow the exact instructions supplied with a pattern rather than combining rows from different tutorials without checking the stitch counts.
3. Does moss stitch use more yarn than double crochet?
Yarn consumption depends on gauge, stitch height, hook size, tension, and the finished fabric’s density. Moss stitch may require more rows to reach the same length because it creates shorter rows than double crochet. However, that alone does not establish the total yardage difference. The reliable method is to compare equal-size swatches made with the same yarn.
4. Can I use moss stitch for a baby blanket?
Yes. Moss stitch makes a relatively flat, flexible fabric that can work well for baby blankets. Choose soft yarn with suitable care instructions and check that the fabric isn’t stiff. Avoid loose embellishments or long fringe. For sleep safety, keep loose blankets out of an infant’s sleep space and follow current safe-sleep recommendations.
5. Why are my moss stitch edges uneven?
Uneven edges most often come from missing the final turning-chain space or adding an extra stitch at the beginning of a row. Both errors change the width of your fabric over time. Use stitch markers to identify edge spaces, count your single crochet positions, and inspect each side before continuing. If the count changes, correct the affected row immediately.
6. What hook size is best for moss stitch?
There is no universal best hook size. A 5.0 mm hook is a reasonable starting point for many medium-weight yarns, but the final choice depends on the label recommendation and the fabric you want. A larger hook generally creates a more open texture, while a smaller hook creates a firmer fabric. Make a swatch and judge both gauge and drape.
7. Can I make a moss stitch blanket without fringe?
Absolutely. A blanket without fringe can look clean, modern, and beautifully finished. If the edges are straight, simply weave in the ends securely. You can also add a narrow single crochet border for extra definition. Skipping fringe reduces finishing time, removes loose decorative strands, and can simplify laundering.
8. How do I keep stripes even in a moss stitch blanket?
Plan each stripe by row count and record every completed color section. Row-count stripes are easy to repeat, but their physical height depends on your gauge. For precise dimensions, periodically measure the actual fabric. Change colors during the last pull-through of the final single crochet in a row, and maintain the same tension when switching yarns.
Save This Crochet Moss Stitch Tutorial for Your Next Project
Once you complete a small moss stitch practice square, you’ll understand the foundation, stitch placement, turning method, and edge control needed for larger projects.
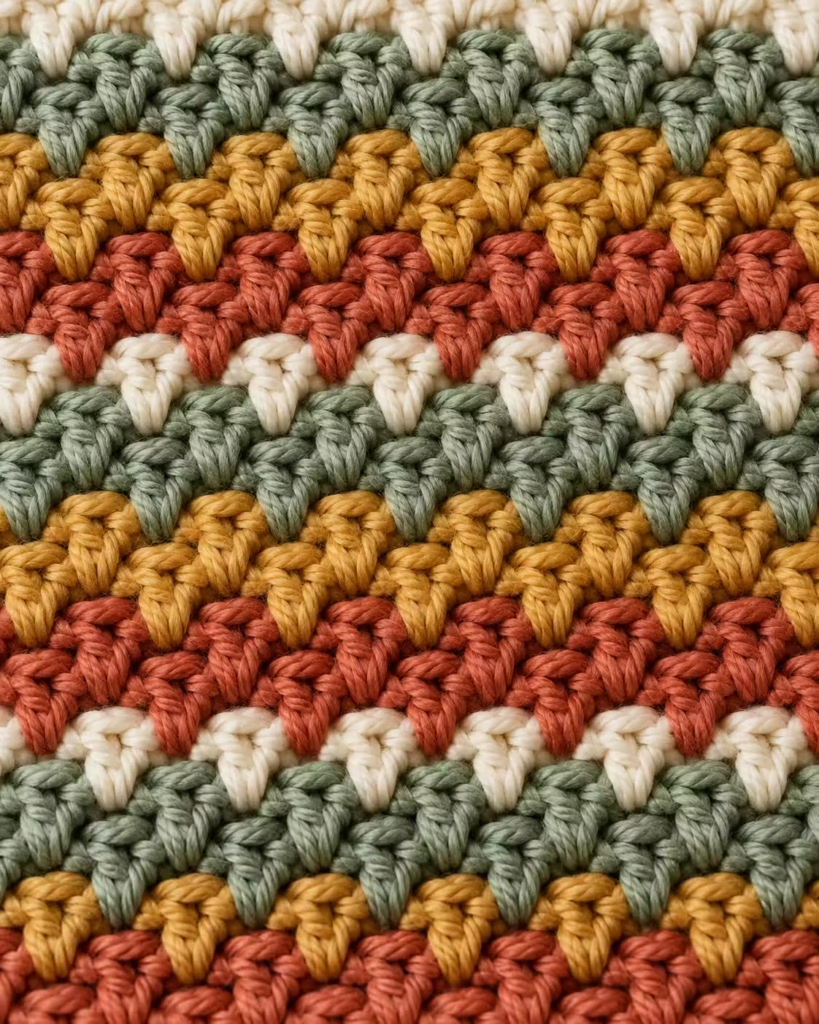
Your next step can be as simple as making a matching dishcloth, a textured scarf, or a modern striped throw. For a cozy seasonal project, combine warm cream, muted green, terracotta, and golden mustard into a soft blanket that displays the distinctive woven texture of this stitch.
Save this crochet moss stitch tutorial to your favorite Pinterest crochet board so you can return to the stitch diagram, foundation formula, color-change instructions, and troubleshooting guide whenever you need them.
Save this for later
Pin “Crochet Moss Stitch: Easy Step-by-Step Tutorial, Pattern & Blanket Ideas” so you can find it when the yarn arrives.
Get the next free pattern first
One email a week. New patterns, no noise.
Yarn weights and hook sizes in this guide follow the Craft Yarn Council standards.
Keep going: Crochet Moss Stitch: Easy Free Tutorial for Beginners · Crochet Fingerless Gloves: Easy Free Pattern for Beginners · Crochet Moss Stitch: Easy Step-by-Step Tutorial for Beginners





