
Crochet Phone Charm Tutorial: Make a Cute Mini Flower Charm
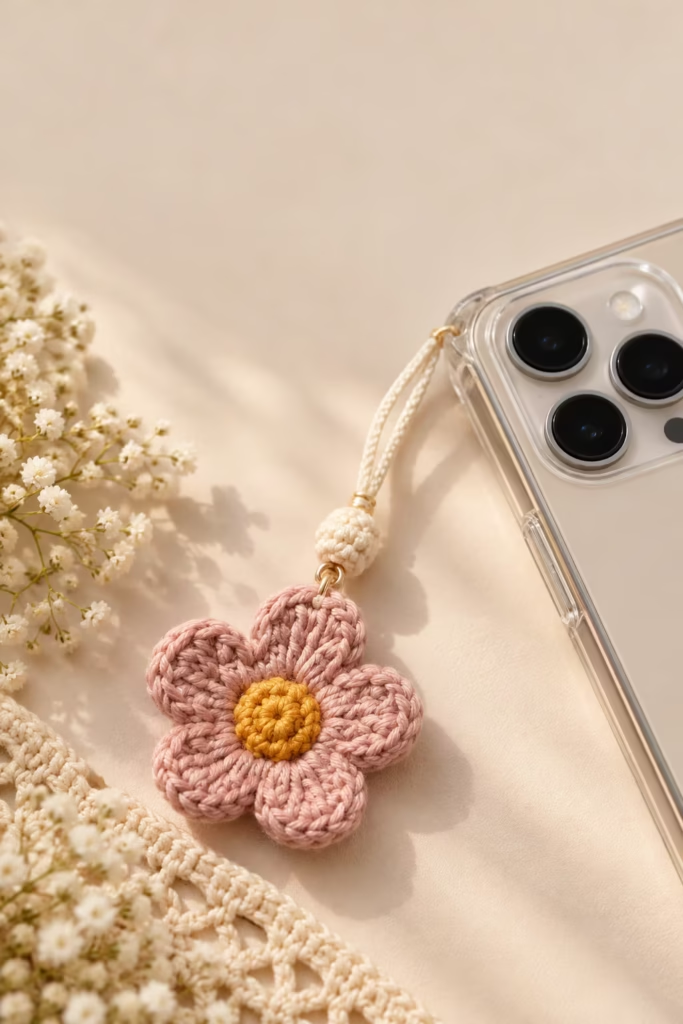
Phone charm: The project uses basic crochet stitches, a small amount of cotton yarn, and simple finishing techniques.

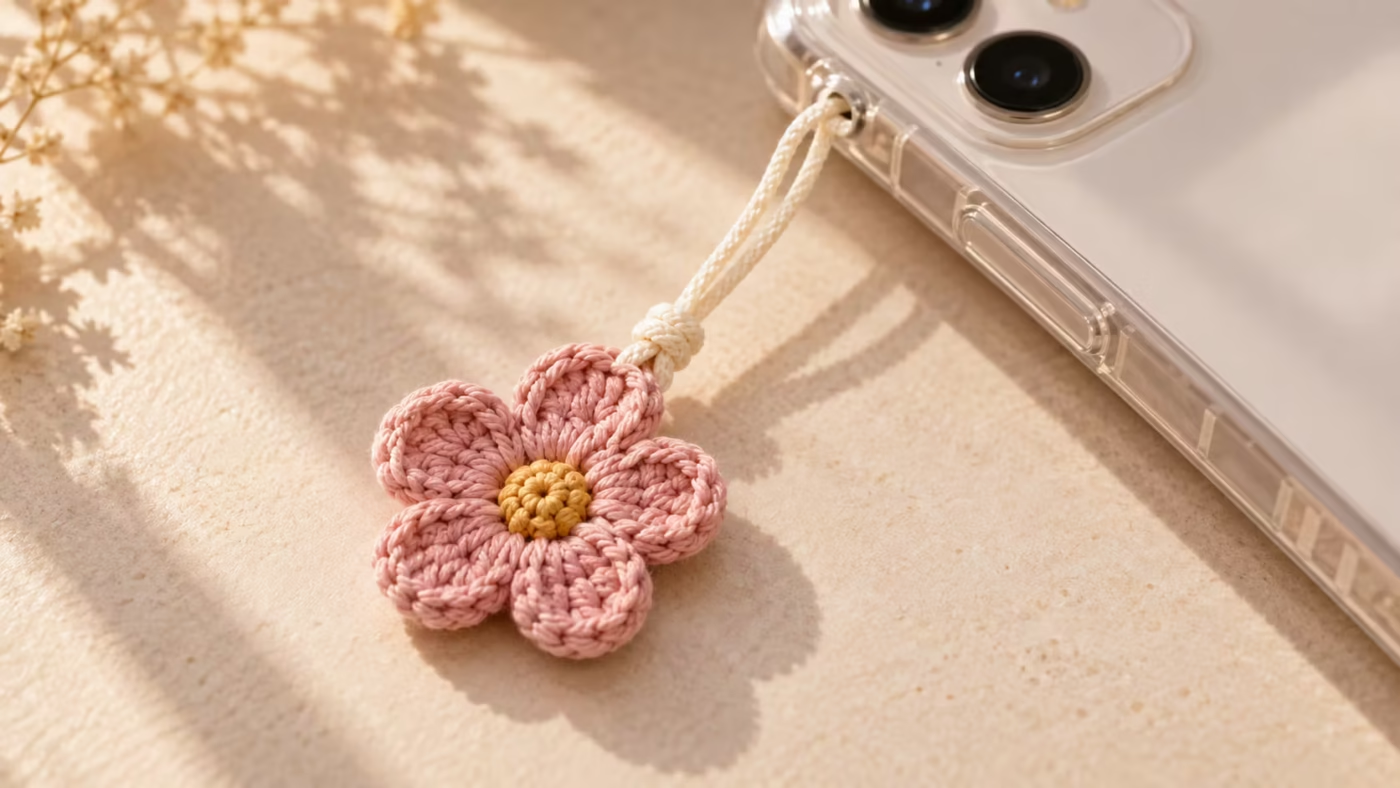
The project uses basic crochet stitches, a small amount of cotton yarn, and simple finishing techniques. You’ll also learn how to customize the flower with different colors, create a sturdier attachment, and avoid the loose ends and uneven petals that can make miniature crochet accessories look unfinished.
Project Overview
This tutorial makes one miniature crochet flower with five rounded petals and an optional contrasting center. The flower can be used alone as a phone charm or combined with a securely attached cord and decorative beads.
| Project Detail | Description |
|---|---|
| Project | Mini crochet flower phone charm |
| Skill level | Confident beginner |
| Main techniques | Magic ring, chain, slip stitch, single crochet, half double crochet, double crochet |
| Yarn | Lightweight cotton yarn |
| Crochet hook | Size suitable for the selected yarn |
| Construction | One-round flower with embroidered or sewn center |
| Petals | Five |
| Finishing | Yarn-end weaving and hanging-loop attachment |
| Estimated time | Approximately 20–45 minutes, depending on experience |
| Finished size | Depends on yarn weight, hook size, and tension |
| Best use | Decorative accessory for a compatible phone case |
The time range is a planning estimate, not the result of a timed product test. The pattern’s finished dimensions will vary with your materials.
Why Choose Cotton Yarn?
Cotton yarn is particularly useful for miniature accessories because it produces clear stitch definition and has less fuzzy surface texture than many soft acrylic yarns. Mercerized cotton provides a slightly smoother, more polished appearance. Matte cotton produces a softer handmade aesthetic. For a compact phone charm, choose yarn that can be crocheted into a reasonably dense fabric without excessively stiff stitches.
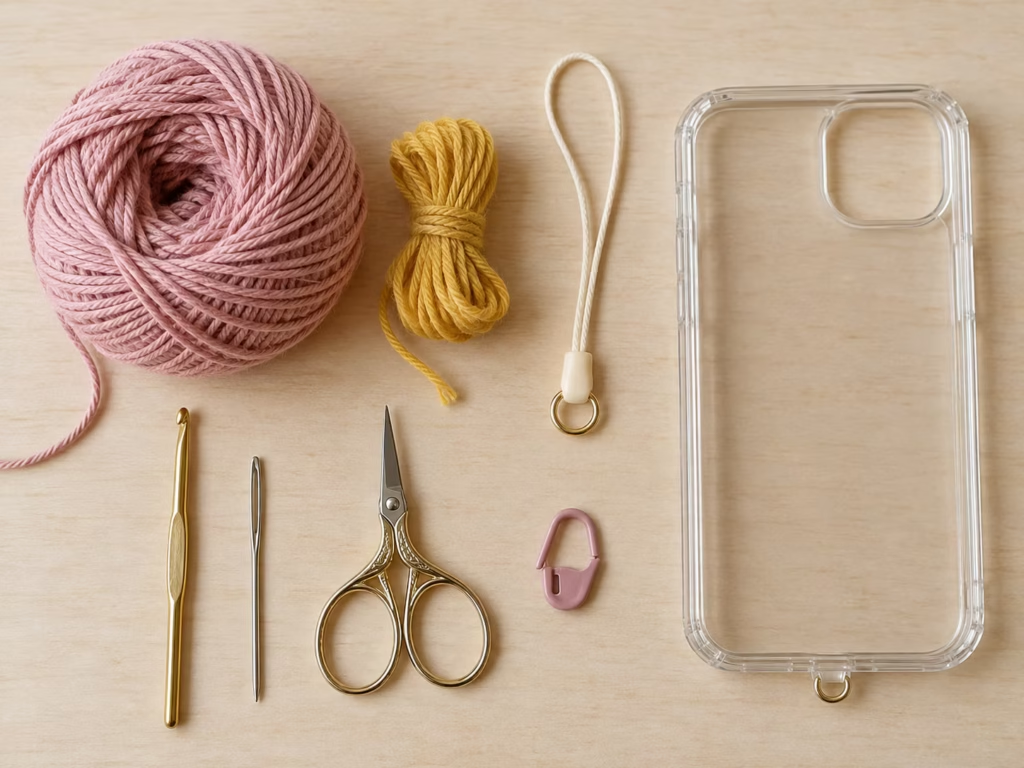
| Material | Quantity or Specification | Purpose | Alternative |
|---|---|---|---|
| Cotton yarn | Small amount in flower color | Crocheted petals | Smooth acrylic or cotton-blend yarn |
| Contrast yarn | Small amount | Flower center | Embroidery floss |
| Crochet hook | Appropriate for yarn thickness | Forms stitches | Slightly smaller hook for denser fabric |
| Yarn needle | Blunt tip, eye large enough for yarn | Secure finishing | Suitable tapestry needle |
| Scissors | Small, sharp pair | Clean yarn trimming | Precision craft scissors |
| Hanging cord | One cord loop suitable for phone charms | Connects flower to case | Strong braided cord |
| Compatible phone case | Case with secure charm attachment point | Holds finished accessory | Case with manufacturer-approved attachment |
Avoid attaching beads that have sharp edges or openings that could cut the hanging thread. Beads are also a choking hazard for young children, so this project is intended as an adult or older crafter’s accessory rather than a toy.
Crochet Skills and Preparation
Before starting, familiarize yourself with the stitch abbreviations used in this pattern.
| Abbreviation | Stitch | Meaning |
|---|---|---|
| MR | Magic ring | Adjustable yarn loop |
| ch | Chain | Basic linking stitch |
| sl st | Slip stitch | Short stitch used to join |
| sc | Single crochet | Compact stitch |
| hdc | Half double crochet | Medium-height stitch |
| dc | Double crochet | Taller stitch |
| st | Stitch | Individual crochet stitch |
| sp | Space | Opening between stitches or chains |
| FO | Fasten off | Securely finish the working yarn |
All instructions use US crochet terminology.
Understanding the Flower Construction
Each of the five petals is made from a small group of stitches worked into a central ring. The shorter stitches form the edges of each petal, while the taller double crochet stitches build its rounded middle.
The sequence for one petal is:
sc → hdc → dc → dc → hdc → sc
All six stitches are worked into the same central ring opening. Repeating the sequence five times produces five petals. An adjustable ring lets you tighten the flower center after the petals have been formed.
Preparation Checklist
- Choose a smooth yarn that does not split excessively.
- Select a hook that creates tidy, defined stitches.
- Prepare a contrasting yarn for the flower center.
- Cut a separate length of strong cord for hanging.
- Inspect your phone case’s attachment point.
- Decide whether the charm will be used alone or with decorative elements.
For beginners, use two contrasting yarn colors so that the flower center is clearly visible.
Step-by-Step Crochet Phone Charm Pattern
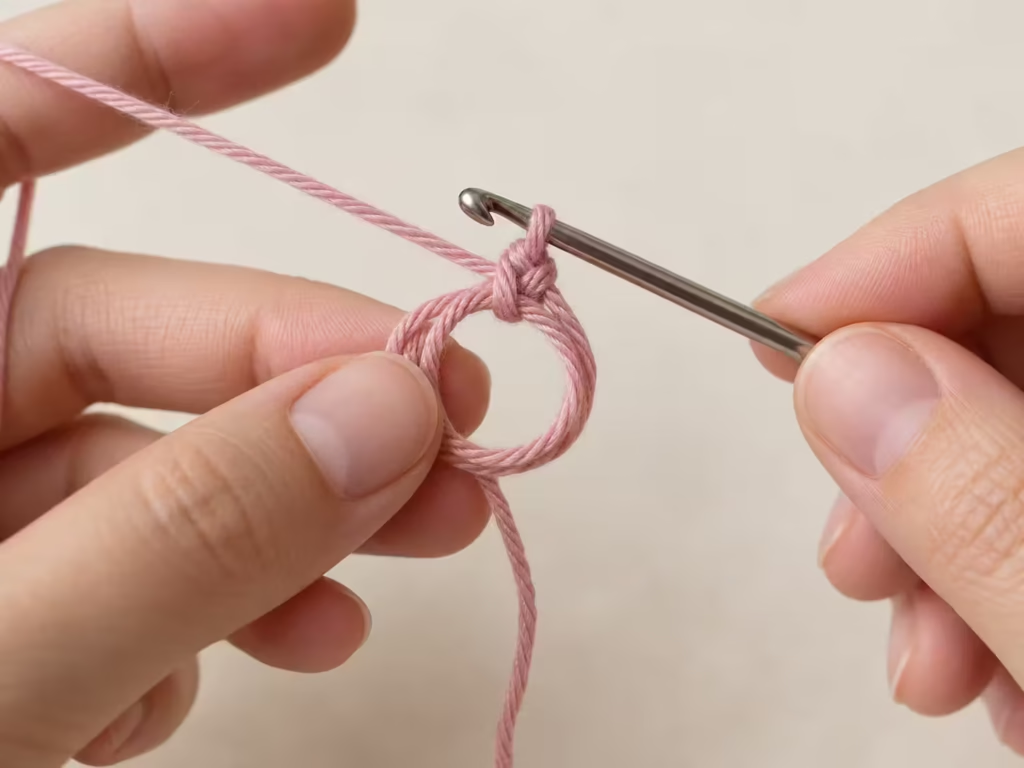
Step 1: Create the Magic Ring
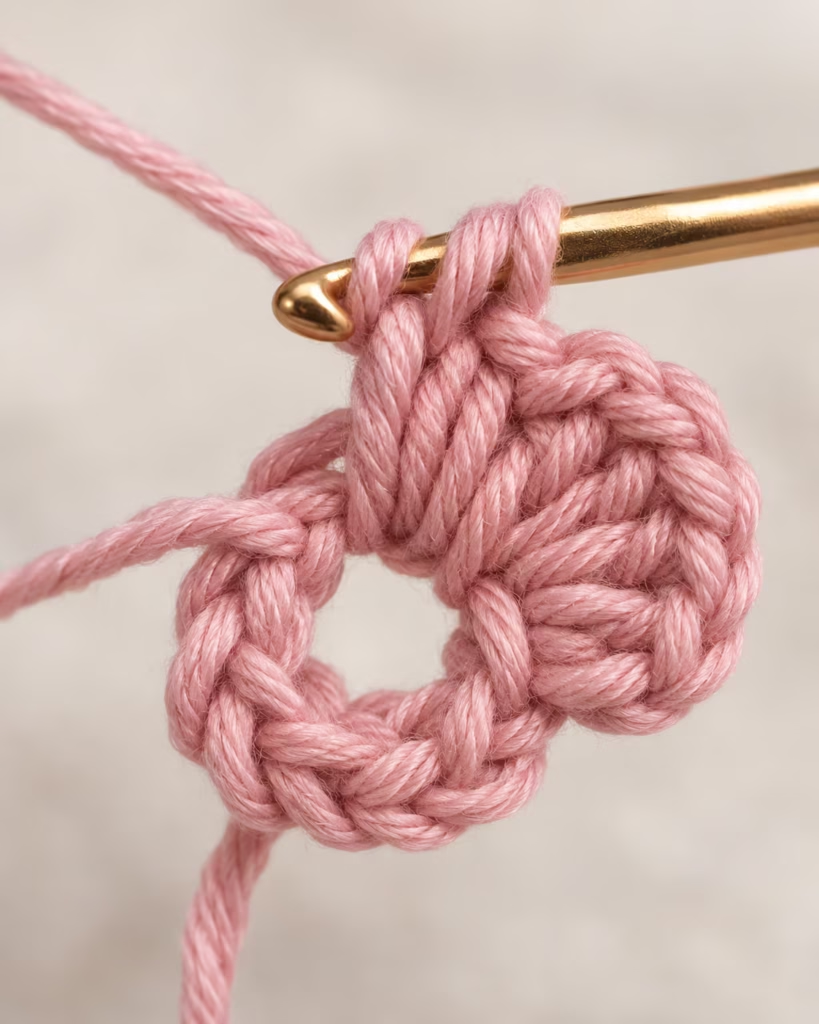
Action: Wrap the working yarn around your fingers to form an adjustable loop. Insert the hook into the loop, catch the working yarn, and pull it through. Chain one to secure the loop.
Do not close the ring yet. The adjustable opening needs enough space to accommodate all five petals.
Visual check: You should have a loop of yarn with a secure working loop on the hook. Pulling the loose yarn tail should make the central ring smaller.
Common error: Tightening the ring before adding the petal stitches.
Solution: Leave the loop loose enough to work into comfortably. Tighten only after the petals are completed.
Expert tip: Keep the tail accessible throughout the round. If you accidentally trap it between stitches, the ring may become difficult to close evenly.
Step 2: Crochet the First Flower Petal
Action: Work the following six stitches directly into the center of the magic ring:
- Single crochet.
- Half double crochet.
- Double crochet.
- Double crochet.
- Half double crochet.
- Single crochet.
This forms the first petal. Do not work these stitches into the top of the previous stitches. Each stitch must enter the original ring opening.
Visual check: The stitches should form a rounded fan. The two double crochet stitches create the tallest portion near the middle, while the shorter stitches bring the petal back down toward the ring.
Common error: Placing the second stitch into the first stitch instead of the central opening.
Solution: Find the open center of the magic ring and insert your hook through that same opening for every stitch.
Expert tip: Maintain consistent yarn tension throughout the six-stitch sequence. This helps prevent one side of the petal from appearing taller than the other.
Step 3: Complete All Five Petals
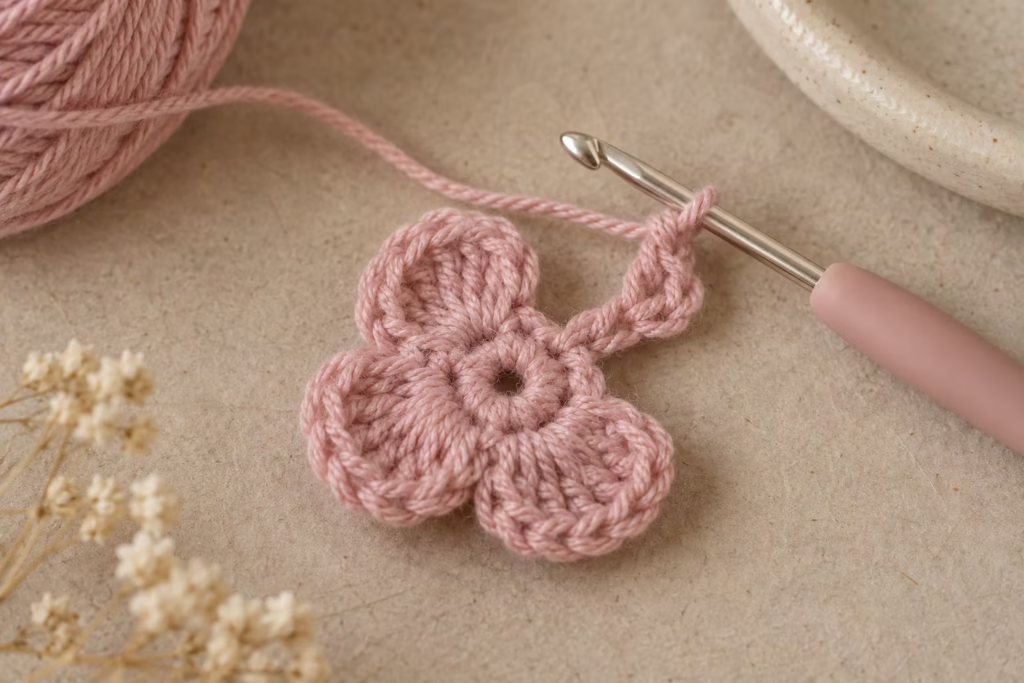
Action: Repeat the six-stitch sequence four more times directly into the same magic ring.
Each petal uses:
1 sc 1 hdc 2 dc 1 hdc 1 sc
After five complete repetitions, you will have worked 30 stitches into the ring. Finish with a slip stitch into the top of the first single crochet of the round. The chain made when setting up the magic ring does not count as one of these 30 stitches.
Visual check: The flower should show five distinct rounded groups of stitches radiating from a shared center.
Common error: Losing track of where one petal ends and the next begins.
Solution: Count in groups of six stitches. If necessary, use a small removable marker to identify the beginning of the round.
Expert tip: Gently spread the petals with your fingers before tightening the ring. This makes it easier to locate any missed stitches.
Step 4: Tighten and Secure the Flower Center
Action: Carefully pull the magic-ring tail until the central opening becomes small.
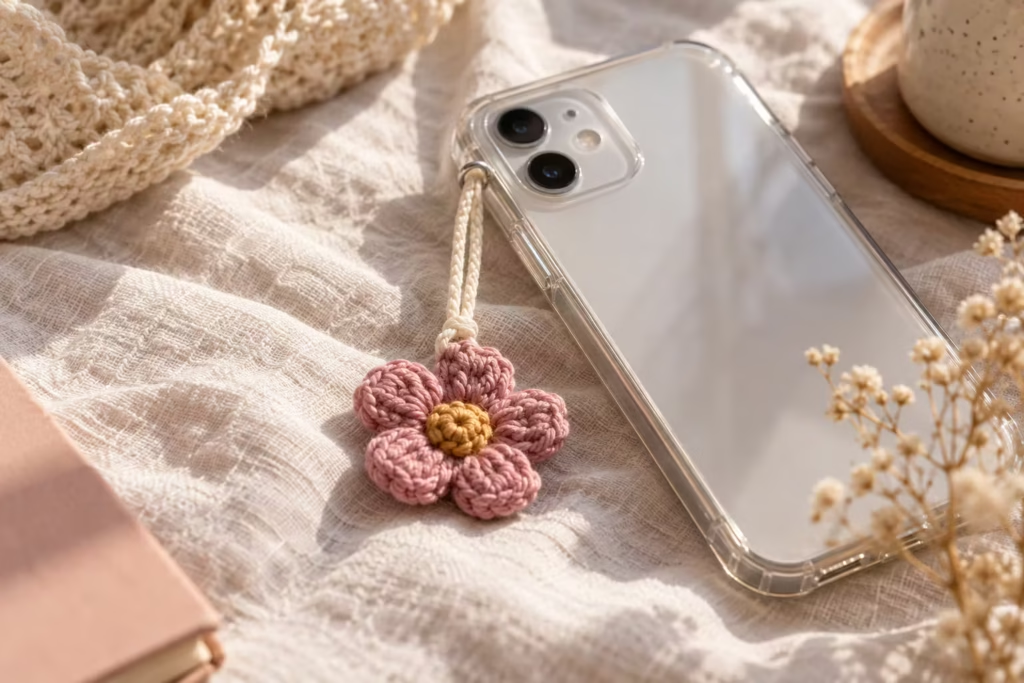
Watch the stitches as you pull. Stop if the yarn begins to strain, twist, or resist. Fasten off the working yarn, leaving a tail suitable for securing with a yarn needle.
Use the yarn needle to weave the magic-ring tail through the backs of several nearby stitches. Reverse direction and weave through another short section to reduce the chance of loosening. Repeat with the working-yarn tail.
Visual check: The flower center should be compact, and the petals should radiate outward without an obvious gap.
Common error: Cutting the magic-ring tail immediately after tightening.
Solution: Always secure the ring tail before trimming. An unsecured adjustable ring can gradually loosen with handling.
Expert tip: Avoid pulling so aggressively that the petals bunch into a cone. A flat flower is easier to attach and usually sits more attractively beside a phone.
Step 5: Add the Contrasting Flower Center
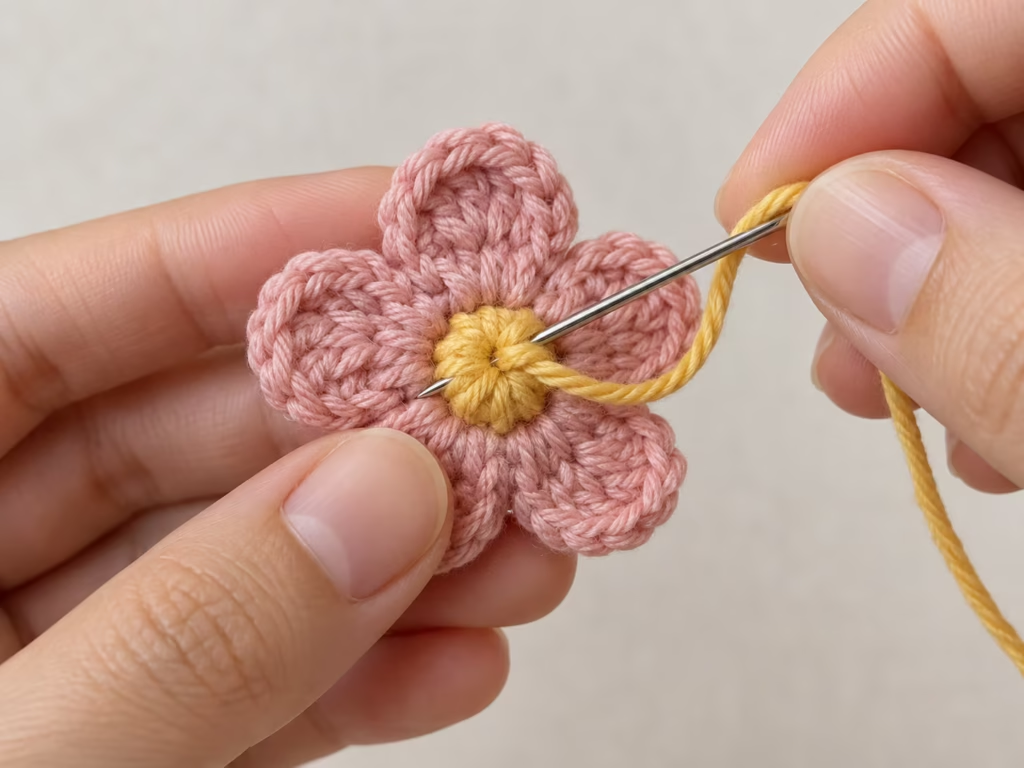
Action: Thread your yarn needle with contrasting yarn. Bring the needle from the back of the flower to the front near the center.
Make several short straight stitches crossing the center opening. Rotate the direction slightly for each stitch until the center looks evenly covered. Alternatively, form a small French knot or sew a separately crocheted miniature circle over the middle. Secure the contrasting yarn on the back by weaving it under existing stitches in more than one direction.
Visual check: The center should be visually balanced, with no large gap exposing the magic ring.
Common error: Pulling the decorative stitches too tightly.
Solution: Keep the stitches snug but not stretched. They should cover the middle without dragging the petals inward.
Expert tip: Embroider the center using thinner yarn or embroidery floss if you want a flatter result.
Step 6: Prepare the Hanging Loop
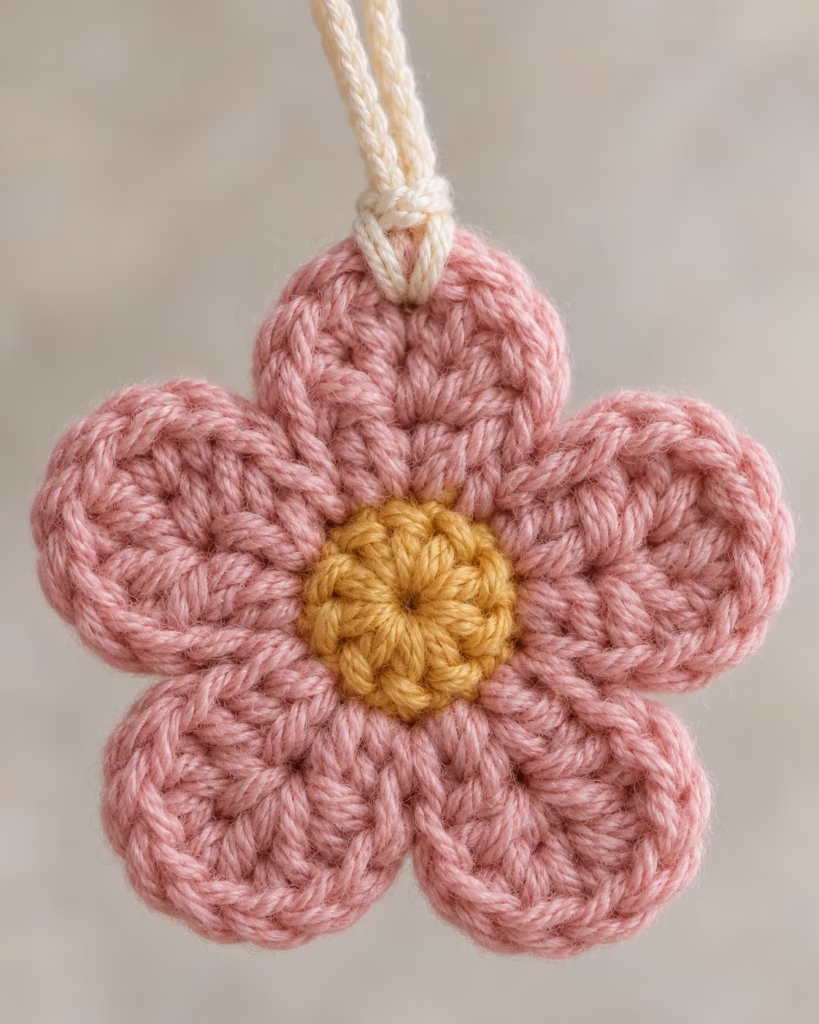
Action: Choose one petal as the top of your flower.
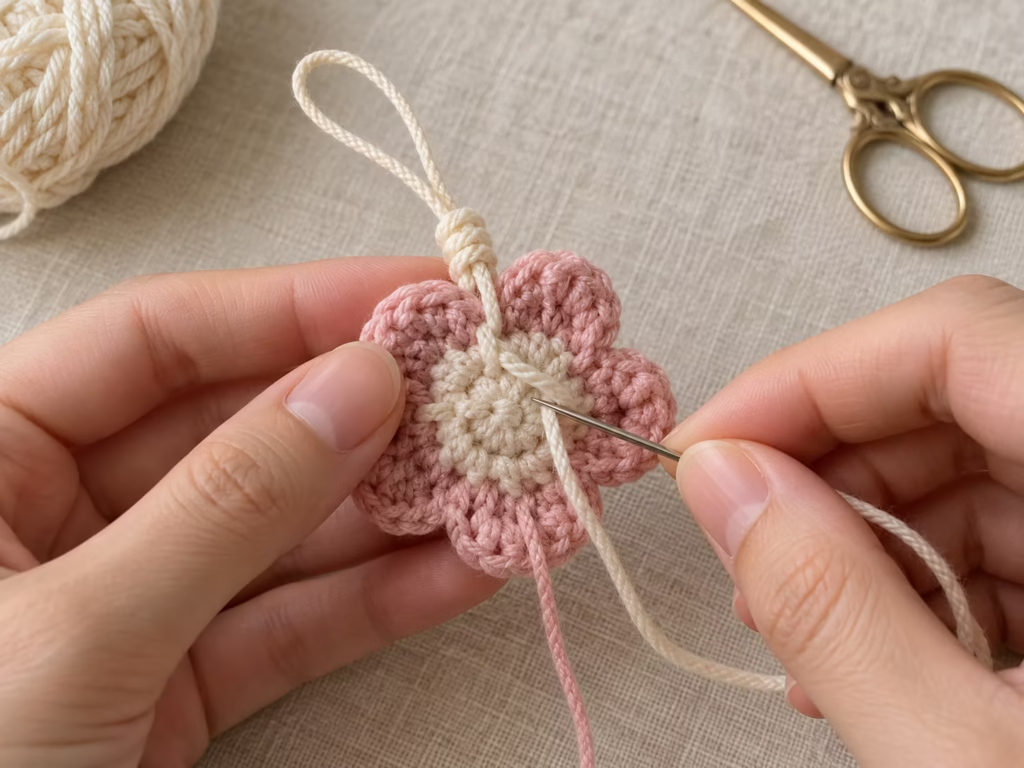
Using a strong, flexible hanging cord, pass a folded section through a reinforced stitch area near the base of that petal, rather than through a loose decorative loop. Pass the cord ends or attachment connector through the folded loop to form a lark’s head attachment, if your cord design supports this method. Pull gently to seat the attachment.
If using a premade phone charm strap, connect its lower loop to the flower using a secure sewn connection or suitable closed connector. For a sewn attachment, make several passes through the sturdy base stitches with matching strong thread, secure the thread by weaving it back through the crochet, and inspect both sides.
Visual check: When the cord is lifted, the flower should hang upright without one petal stretching significantly.
Common error: Fastening the loop through only one loose strand of yarn.
Solution: Anchor the attachment around a stable group of stitches. If the attachment distorts the petal, move the connection closer to the flower’s center.
Expert tip: For a charm that receives frequent movement, use a separate load-bearing cord rather than relying on a long crocheted chain made from delicate yarn.
Step 7: Finish the Back of the Charm
Action: Turn the flower over and inspect the back.
Weave in any remaining yarn tails with a blunt needle. Change direction at least once while weaving to help prevent the yarn from slipping out. Trim only after the ends feel secure.
Gently shape each petal with your fingertips. If your yarn label permits it, you may lightly dampen the flower and let it dry flat to encourage a more even shape.
Visual check: The flower should lie relatively flat, and no loose yarn ends should protrude from the back.
Common error: Trimming tails too close to the last stitch before they are woven in.
Solution: Leave enough yarn to weave securely through the crocheted fabric. Avoid relying on a single knot as the only finishing method.
Expert tip: Photograph both sides of the finished flower before attaching it to the case. Magnified images can reveal loose fibers and uneven finishing that are easy to overlook.
Step 8: Attach the Charm to Your Phone Case
Action: Identify the phone case’s designated charm attachment point.
Depending on the case design, thread the cord through its attachment hole and pass the flower through the exposed loop to secure it. If your case uses a connector, attach the charm according to the connector manufacturer’s instructions.
Do not improvise an attachment through a charging port, speaker opening, button cutout, or other phone opening. Gently pull the charm to check that the cord does not slip or detach.
Visual check: The flower should hang freely without obstructing buttons, the charging port, or the camera.
Common error: Using an unsuitable attachment opening or cord too bulky for the case.
Solution: Use a compatible charm-ready case and a cord sized for its attachment point.
Expert tip: Keep the hanging length short enough that the flower does not frequently drag across rough surfaces when the phone is placed on a desk.
Crochet Stitch Diagram
This text diagram shows the construction order for the five-petal flower. It is a sequence guide rather than a scale drawing.
START | v MAGIC RING | v CHAIN 1 | v PETAL 1 SC, HDC, DC, DC, HDC, SC | v PETAL 2 SC, HDC, DC, DC, HDC, SC | v PETAL 3 SC, HDC, DC, DC, HDC, SC | v PETAL 4 SC, HDC, DC, DC, HDC, SC | v PETAL 5 SC, HDC, DC, DC, HDC, SC | v SLIP STITCH TO FIRST SC | v TIGHTEN MAGIC RING | v WEAVE IN ENDS | v ADD FLOWER CENTER | v ATTACH HANGING CORD | v FINAL INSPECTION
Petal Stitch Count
| Petal | Single Crochet | Half Double Crochet | Double Crochet | Total |
|---|---|---|---|---|
| 1 | 2 | 2 | 2 | 6 |
| 2 | 2 | 2 | 2 | 6 |
| 3 | 2 | 2 | 2 | 6 |
| 4 | 2 | 2 | 2 | 6 |
| 5 | 2 | 2 | 2 | 6 |
| Total | 10 | 10 | 10 | 30 |
The setup chain and final slip-stitch join are excluded from the 30-stitch total.
How the Petal Shape Works
A petal gradually rises from a single crochet to a half double crochet and then to the two double crochets. The stitch heights then decrease in reverse order. This symmetrical arrangement creates the rounded shape without turning the work or adding a separate row for each petal.
Because 30 stitches are placed into one adjustable ring, your yarn thickness and stitch tension influence how tightly the petals cluster. If the center becomes too crowded to work comfortably, choose a finer yarn or adjust your hook size instead of forcing the hook through tightly packed fibers.
Beginner-to-Pro Techniques
A miniature crochet charm is an excellent practice project because even small improvements in tension, shaping, and finishing become visible.
Beginner Level: Master Consistent Stitches
Start with the simplest version:
- One yarn color.
- Five basic petals.
- No decorative beads.
- A straightforward cord attachment.
Focus on identifying the central ring and placing every stitch correctly. Complete one practice flower before making the version you plan to use. A finished practice piece is useful even if the petals are uneven. It helps you determine whether the yarn and hook combination produces the appearance you want.
Intermediate Level: Improve Shape and Symmetry
Once the pattern feels comfortable, begin refining your tension. Keep the two double crochet stitches in each petal approximately equal in height. Avoid accidentally shortening one stitch by pulling the working yarn too tightly.
After joining the round, arrange the petals before securing the center. Try making two flowers from the same yarn and compare their shapes. Look for differences in petal width, curvature, and center tightness. You can also experiment with subtle color combinations, such as cream petals with a terracotta center or pale blue petals with a buttery yellow center.
Advanced Level: Create a Double-Layer Flower
For a more substantial charm, crochet two matching flowers. Place them back-to-back with their wrong sides facing inward. Use a yarn needle and matching yarn to sew the layers together around the petal edges, working through stable parts of the stitches.
Leave the top attachment area accessible until the hanging loop is installed. Then close the remaining opening and weave in the yarn securely.
This double-layer method can make the charm look attractive from both sides, although it also increases thickness and weight. Avoid adding excessive stuffing. A compact, relatively flat flower is less likely to catch on clothing or become awkward beside the phone.
Creative Crochet Phone Charm Variations
The flower pattern is a foundation rather than the only possible design.
You can turn it into several distinctive accessories while reusing the same basic skills.
1. Pastel Daisy Phone Charm
Use white or ivory petals with a soft yellow center.
Choose a pale pink or beige hanging cord for a gentle, coordinated look. This style works especially well with transparent or pastel-colored phone cases.
2. Autumn Sunflower Charm
Use golden yellow or mustard yarn for the petals and dark brown yarn for the center. For a more sunflower-like look, add a larger textured center using a small crocheted circle instead of embroidery. The compact version is particularly suitable for fall-themed accessories and handmade gift sets.
3. Romantic Pink Flower Charm
Pair blush-pink petals with a cream center. A small pearl-look bead can be added to the middle if it is securely stitched and the finished accessory will be kept away from young children. For a softer finish, use matte cotton yarn rather than highly glossy thread.
4. Strawberry-Inspired Flower Charm
Use a light pink flower with a red center and a green hanging cord. You can also attach the flower to a separately crocheted miniature strawberry. Keep the additional motif lightweight and ensure that every part has a strong connection.
5. Minimalist Monochrome Charm
Use one color for both petals and center. Cream, charcoal, olive, and muted lavender work well for understated designs. To keep the center visible, use a textured embroidered stitch instead of a contrasting color.
6. Beaded Flower Charm
Add a small number of smooth beads along the hanging cord, if the cord and fittings are designed for beads. Use a secure stopper or closed connector that prevents the beads from sliding off. Beads add weight and can strike the phone case, so keep the arrangement simple.
7. Mushroom-Themed Autumn Charm
Replace the flower motif with a miniature crocheted mushroom using separate cap and stem components. A rounded red or rust-colored cap with a cream stem suits an autumn accessory collection. This requires its own mushroom pattern; the five-petal flower instructions should not be used to construct the mushroom body.
8. Mini Heart Phone Charm
Crochet a small heart motif and attach it using the same general cord and finishing principles.
The heart shape may require taller stitches, increases, and a shaped central dip depending on the selected pattern. Choose a compact design to avoid excessive swinging while the phone is carried.
Choosing a Color Palette
| Style | Main Color | Accent Color | Overall Look |
|---|---|---|---|
| Soft romantic | Dusty pink | Ivory | Delicate and feminine |
| Autumn cozy | Rust orange | Dark brown | Warm and seasonal |
| Cottagecore | Cream | Sage green | Natural and relaxed |
| Playful pastel | Lavender | Lemon yellow | Cheerful and colorful |
| Minimalist | Charcoal | Soft gray | Simple and modern |
| Retro floral | Mustard | Burnt orange | Bold and nostalgic |
Troubleshooting Common Crochet Phone Charm Problems
Small crochet projects are particularly sensitive to uneven tension. The following problems are common when learning to make miniature motifs.
| Symptom | Likely Cause | Practical Fix | Prevention |
|---|---|---|---|
| Uneven petals | Inconsistent tension | Gently reshape; remake highly uneven sections | Maintain similar stitch height |
| Large hole in center | Magic ring not tightened | Securely pull and weave the ring tail | Leave the tail accessible |
| Flower curls excessively | Dense stitches crowded together | Try finer yarn or a different hook size | Make a small practice sample |
| Yarn splits | Hook catches individual strands | Remove hook and reinsert through full yarn strands | Use smoother yarn |
| Flower looks loose | Hook too large for chosen yarn | Remake using a smaller hook | Check stitch density early |
| Petals are hard to distinguish | Stitch groups are compressed | Separate groups gently before finishing | Count each group of six |
| Hanging loop stretches petal | Attachment is too concentrated | Reinforce the connection | Anchor around stable stitches |
| Charm twists while hanging | Cord attachment is off-center | Reposition the connection | Test hanging balance before securing |
| Yarn ends appear | Tails were not fully woven | Reweave them through several stitches | Inspect both sides before trimming |
Why Does My Crochet Flower Curl?
A small amount of curling can happen when many stitches share one central ring. Mild curling may be improved by gently shaping the flower or blocking it in a manner appropriate for the yarn.
Severe curling or bunching can indicate a mismatch between yarn weight, hook size, and tension. If the flower repeatedly folds into a cup shape, try another combination of materials. Do not stretch the yarn aggressively to force the flower flat.
Why Are My Petals Different Sizes?
Check that every petal contains the same stitch sequence. It is easy to accidentally work one double crochet instead of two, particularly when using fine yarn. If the stitch counts match, compare your tension. Consistent stitch height is often more important than pulling every stitch extremely tightly.
What If the Magic Ring Keeps Opening?
The ring tail may not be secured adequately.
Carefully tighten the center, then use a yarn needle to weave the tail through nearby stitches in more than one direction. For an accessory that will be handled frequently, make sure the central ring is reinforced before adding the hanging cord. A simple knot alone is not an ideal substitute for thoroughly secured yarn ends.
Durability and Professional Finishing
<!– gap –>
1. How to Choose a Reliable Attachment
The cord attachment deserves as much attention as the crocheted flower. A beautiful flower can still become an unreliable accessory if the cord is attached through a weak stitch or an unsuitable phone-case opening.
For regular decorative use, inspect the following elements:
- The strength and condition of the hanging cord.
- The number of stable stitches supporting the attachment.
- The security of any sewn connection.
- The condition of rings, clasps, and other fittings.
- Compatibility with the phone case.
A phone charm should be treated as a decorative accessory, not as a safety tether or a reliable way to carry the weight of a phone. Never use the crochet flower itself as a handle for lifting the phone.
2. Sizing and Hanging-Length Verification
<!– gap –>
The ideal charm size depends on the phone case and personal preference. Rather than selecting an arbitrary length, test the arrangement against your actual phone. Lay the finished flower beside the case and position the hanging cord where it will be attached.
Check three things:
- The flower does not cover the camera or buttons.
- The cord does not interfere with normal charging.
- The flower does not hang so low that it catches on nearby objects during ordinary handling.
Temporarily attach the cord before permanently securing it. Lift the phone normally and observe how the flower moves.
If it swings into the screen or catches on your fingers, shorten or reposition the attachment. For matching pairs or small-batch production, measure the finished flower width and hanging drop for your chosen yarn and case, then record those values as your own reference.
3. How to Make Your Charm Look Professionally Finished
<!– gap –>
Professional-looking miniature crochet is defined by consistency rather than complexity. Start with clean, evenly formed stitches. Make sure the center is properly closed and the petals look balanced.
Next, inspect the attachment area. Reinforcement should be secure but not bulky enough to distort the flower. Weave all yarn ends into the back of the motif and trim carefully. Finally, remove loose fibers by hand rather than aggressively brushing the yarn.
If making several charms for a coordinated collection, keep the following consistent:
- Yarn weight.
- Hook size.
- Petal stitch count.
- Center style.
- Cord material.
- Attachment method.
- Overall finishing standard.
Consistency makes a collection feel intentional even when the flower colors differ.
4. Cleaning and Storage
<!– gap –>
A decorative phone charm may pick up dust, lint, or oils from frequent handling. For a cotton flower, gentle spot cleaning is usually preferable to repeatedly soaking the entire accessory. Follow the yarn manufacturer’s care instructions.
If the charm includes metal connectors, avoid prolonged moisture exposure unless those components are known to be suitable for washing. After cleaning, reshape the petals and let the accessory dry completely before returning it to the phone case. Store spare charms flat in a dry place.
Avoid compressing delicate flowers beneath heavy objects, which can distort their shape. Different yarn and connector choices affect appearance, comfort, and durability.
| Option | Best For | Advantages | Limitations | Recommendation |
|---|---|---|---|---|
| Smooth cotton yarn | Defined mini motifs | Clear stitches, soft feel | Can absorb moisture | Strong starting choice |
| Mercerized cotton | Polished finish | Smooth appearance, defined texture | May be less forgiving of uneven tension | Good for refined designs |
| Acrylic yarn | Color experimentation | Wide range of textures and colors | May become fuzzy with friction | Good for practice |
| Cotton-blend yarn | Softer accessories | Combines fiber characteristics | Performance varies by blend | Check label before use |
| Braided hanging cord | Secure decorative connection | Flexible and relatively compact | Quality varies | Use a purpose-made cord |
| Crocheted chain loop | Fully handmade styling | Coordinates with flower | Can stretch or wear | Better for lighter, occasional-use accessories |
| Closed metal connector | Detachable arrangements | Convenient if well made | Can scratch surfaces or add weight | Use with suitable hardware |
For the pattern in this tutorial, smooth cotton yarn and a separate purpose-made hanging cord provide a practical balance between visual detail and ease of construction.
Final Quality Checklist
Before using your crochet phone charm, inspect the entire accessory.
Crochet Construction
- [ ] Five petals are present.
- [ ] Each petal contains the correct six-stitch sequence.
- [ ] The center is tightened and secured.
- [ ] No major gaps remain between the petals.
- [ ] The stitches are reasonably even.
- [ ] The flower keeps its intended shape without excessive stretching.
Finishing
- [ ] The contrast center is attached securely.
- [ ] All yarn tails are woven in.
- [ ] No loose threads protrude from the back.
- [ ] The cord is attached through stable stitches.
- [ ] All connectors are fully closed or securely fastened.
- [ ] Decorative beads, if used, cannot slide free.
Phone Compatibility
- [ ] The phone case has a suitable attachment point.
- [ ] The charm does not interfere with buttons or ports.
- [ ] The cord does not obstruct the camera.
- [ ] The charm hangs comfortably during normal use.
- [ ] The attachment shows no signs of fraying or slipping.
Minor variations in petal shape are normal for handmade work. Loose attachment stitches, damaged cords, or connectors that open under gentle handling are not acceptable. Repair or replace those parts before using the charm.
Frequently asked questions
1. How do you crochet a phone charm for beginners?
Start with a small, flat motif such as a flower. Make an adjustable ring, crochet five repeated groups of six stitches into the center, and close the ring securely. Add an embroidered center, weave in the ends, and attach a strong hanging cord. A flat motif is an approachable first project because it does not require stuffing or complicated shaping.
2. What yarn is best for crochet phone charms?
Smooth cotton yarn is a good choice because individual stitches remain visible and miniature designs can retain their shape. Mercerized cotton is useful when you want a smoother appearance. Acrylic can also work, especially for practice. Choose the yarn according to the intended size and use a hook that creates a reasonably firm fabric without making the stitches difficult to work.
3. Can I make a crochet phone charm without a magic ring?
Yes. You can chain four, join the first chain with a slip stitch to create a small ring, and work the flower stitches into the center opening. This technique is often easier for beginners who struggle with adjustable rings. However, a chain ring cannot tighten in exactly the same way, so it may leave a more visible opening in the center.
4. How do I stop my crochet phone charm from falling apart?
Secure both the magic-ring tail and the finishing tail by weaving them through stable stitches in more than one direction. Reinforce the point where the hanging cord connects to the flower. Choose a suitable phone-case attachment point, check connectors regularly, and replace any cord that becomes damaged. Avoid using the charm to lift or carry the phone.
5. Can I attach beads to a crochet phone charm?
Yes, provided the beads have smooth edges and are secured using suitable cord, thread, or connectors. Keep the arrangement lightweight to avoid pulling the flower out of shape. Inspect the bead attachment regularly for wear. Because small beads can detach and create a choking hazard, keep beaded charms away from infants and young children.
6. Why does my crochet flower look too large?
Flower size depends on yarn thickness, hook size, stitch tension, and the pattern’s stitch structure. If the flower is larger than you prefer, try finer yarn and a compatible smaller hook. Avoid simply pulling the yarn extremely tightly, because excessive tension makes the project uncomfortable to crochet and can distort the petals.
7. How do you clean a handmade crochet phone charm?
Begin with the yarn label’s care instructions. For a lightly soiled cotton charm, gently spot clean using a small amount of mild detergent and water, then remove residue carefully. Avoid harsh scrubbing, twisting, or stretching. Let the flower dry completely on a flat surface. If the charm contains metal fittings or decorative beads, consider whether those components are suitable for moisture.
8. Can I sell handmade crochet phone charms?
Handmade crochet phone charms can be offered as finished craft products, but selling requires attention to construction quality, material descriptions, and applicable consumer-safety requirements. Test your own finished designs for appropriate use and describe them as decorative accessories rather than safety devices. Keep records of materials and production costs so that pricing accounts for both supplies and labor.
Yarn weights and hook sizes in this guide follow the Craft Yarn Council standards.
Keep going: How to Crochet the Moss Stitch (Linen, Granite): A Complete Beginner-to-Pro Tutorial · Cozy Crochet Fingerless Gloves Pattern: Easy Winter Accessories · Crochet Moss Stitch: Easy Step-by-Step Tutorial, Pattern & Blanket Ideas
Final Thoughts: Make Your First Crochet Phone Charm
Start with one simple five-petal flower using a yarn color you enjoy. Complete the petals, secure the center, add the hanging cord, and inspect the final attachment before using it.
Once you understand the construction, make a second flower with a different color combination and compare the results. Experimenting with yarn thickness, center details, and finishing techniques will help you develop a consistent style.
Save this crochet phone charm tutorial for your next small handmade project, and use the stitch-count table whenever you need a quick reminder of the petal sequence. A carefully finished miniature flower is a satisfying way to practice precise crochet stitches while creating a practical decorative accessory.
Pin “Crochet Phone Charm Tutorial: Make a Cute Mini Flower Charm” so you can find it when the yarn arrives.
Get the next free pattern first
One email a week. New patterns, no noise.





